
Table of Contents >> Show >> Hide
- Quick Primer: What You’re Seeing in These Quilling Designs
- Gallery: 35 Pictures Of My Paper Quilling Art
- How I Make a Quilling Piece (Without Losing My Mind)
- Tools and Supplies I Actually Use (And Why)
- Framing and Preserving Paper Quilling Art
- Common Quilling Problems (And What I Do Instead of Panicking)
- 500-Word Personal Add-On: What Making 35 Quilled Pieces Taught Me
- Conclusion
If you’ve never met paper quilling before, let me introduce you to the craft that looks like it requires a tiny
wizard wand and the patience of a saintbut actually starts with paper, glue, and one stubborn belief that
this coil will absolutely behave this time.
Paper quilling (also called paper filigree) is the art of rolling narrow strips of paper into coils,
pinching them into shapes, and gluing them into designs that pop off the page. It’s part drawing, part sculpture,
and part “why is this one piece suddenly sticky everywhere except where I need it?”
This post is a gallery-style tour of 35 pictures of my paper quilling artwith captions that explain what you’re
looking at, how I built each piece, and the little design decisions that turn “random coils” into “wait… that’s actually gorgeous.”
You’ll also find practical notes on quilling tools, quilling techniques, paper choices, and how I like to frame quilled art so it
stays crisp and clean on display.
Quick Primer: What You’re Seeing in These Quilling Designs
Most quilling starts with a few core shapes: tight coils (rolled and glued without letting go),
loose coils (rolled, released, then glued), and pinched forms like teardrops, marquises
(aka “eyes”), and half-moons. From there, it’s basically LEGOexcept your bricks are made of paper and feelings.
My “always” rules (so the art doesn’t look like pasta)
- Consistency matters: I try to keep coil sizes uniform within each section of a piece (unless I’m deliberately creating texture).
- Negative space is a design tool: Leaving breathing room makes the details look more intentional (and less like a paper yarn ball).
- Glue is a seasoning, not a soup: A tiny dot beats a glossy puddle every time.
Gallery: 35 Pictures Of My Paper Quilling Art
Below are 35 “photo slots” you can pair with your real images. Each picture includes SEO-friendly alt text and a caption you can keep,
tweak, or use as inspiration for your own gallery descriptions.

a reminder that yes, my hands still remember what “symmetry” means.

and for turning gifts into “custom” without actually learning calligraphy.

Butterflies are basically nature’s permission slip to use every color you own.

and the occasional whisper of “please don’t stick to my tweezers.”

with tiny, caffeinated confidence.

Fringe looks fancy, but it’s secretly just “cut a lot and hope.”

This is where quilling starts feeling like drawing in 3D.

and because tiny imperfections read as “handmade charm,” not “oops.”

“Hi, I would like attention now.”

indefinitelyunlike certain real succulents who shall remain unnamed.

not like a fish wearing a party streamer.

and for discovering you are either a “measure everything” person or a “close enough” person.

engineered with paper strips and optimism.

mostly because the petals have opinions, and they express them loudly.

it reads as “stylized,” not “I panicked halfway through.”

immediately missed the beach again. Rude.

but it does require a strong belief in drying time.

whimsy is a valid artistic goal.

because nature loves asymmetry.

and makes me say “Carefully. Very carefully.”

Small flowers are detail-heavy, but they make the whole piece feel delicate and intentional.

and also when my ruler mysteriously “disappears.”

the quilling equivalent of doing a hairstyle with extra attitude.

This is also my tribute to cats: elegant shape, chaotic energy.

Dragonflies are basically “line art,” but in paper.

I love landscapes because they’re forgivingno one knows what your mountain “should” look like.

Green palettes are soothinguntil you realize you’ve made twelve “almost identical” greens and can’t tell which is which.

This one feels like quilling trying to singquietly, politely, and with good posture.

This is my go-to “wow” piece because the eye reads it as complex, but the technique is delightfully repetitive.

Succulents in paper are satisfying: all the texture, none of the guilt when you forget to water them.

It’s moody, dramatic, and a great excuse to use deep blues and purples like you’re painting with midnight.

This piece is basically sunshine with pulpand it taught me how important clean spacing is for “crisp” fruit designs.

3D quilling is where you graduate from “rolling paper” to “engineering paper,” and it’s extremely satisfying.

Feathers look delicate, but they require firm decisionsespecially about how thin you’re willing to go before paper snaps.

This is the piece that made me realize quilling isn’t just “shapes”it’s arrangement, balance, and storytelling.
How I Make a Quilling Piece (Without Losing My Mind)
1) Sketch the idea (or steal it from nature)
I start with a simple sketchnothing fancy. For florals, I map big shapes first (petal clusters, leaves, main focal points),
then decide where texture should live. The goal is to avoid “uniform everywhere,” which can make quilled art look flat.
2) Choose strip width and a color plan
Strip width affects the whole vibe. Wider strips read bold and graphic; narrower strips feel delicate and detailed.
If a piece needs crisp edges (like geometric patterns), I keep widths consistent. If it needs movement (like waves or feathers),
I mix widths and sizes on purpose.
3) Build a shape library first
Before I glue anything to the final background, I roll a small pile of matching coils and shapeslike prepping ingredients before cooking.
This keeps the final assembly smooth and helps me spot color issues early (because “oops, that green is neon” is easier to fix
before it’s glued forever).
4) Assemble from anchor points outward
I glue the largest, most important shapes first (centers of flowers, the body of an animal, the main outline).
Then I fill around them with smaller coils and scrolls. This prevents the “I filled everything and now there’s no room for the focal point”
problem, which is a classic quilling plot twist.
Tools and Supplies I Actually Use (And Why)
Paper quilling tools can get fancy, but the basics are refreshingly simple. Here’s what consistently makes my life easier:
- Slotted tool or needle tool: Both work; it’s mostly about what feels comfortable and what center look you prefer.
- Tweezers: For placing tiny pieces precisely, especially in dense designs.
- Circle sizer (or template): Helps keep loose coils consistent in sizehuge for clean, professional-looking quilling designs.
- Precision glue applicator: The difference between “clean” and “why is everything shiny?”
- Work board (cork/foam): Useful for pinning outlines and letting pieces dry without shifting.
My favorite “supply upgrade” is not glamorous: an extra scrap paper strip I use like a tiny spatula to pick up micro-dots of glue.
It’s the craft equivalent of using the right spoon instead of your hands.
Framing and Preserving Paper Quilling Art
Quilling is durable for paper, but it still has enemies: dust, humidity, and direct sunlight. If you want your art to look sharp long-term,
presentation matters almost as much as the quilling itself.
My go-to display options
- Shadow box frame: Great for deeper coils and 3D quilling. It keeps the glass from pressing on the artwork.
- Double mat frame: Creates space and looks polished, especially for flat quilling designs.
- No-glass display (carefully): Works for low-traffic areas, but you’ll want to keep it away from kitchens, bathrooms, and curious pets.
If I’m gifting a piece, I usually choose a frame that provides breathing room and protectionbecause nothing says “I care” like making sure your
present doesn’t become a dust-catching hobby sponge.
Common Quilling Problems (And What I Do Instead of Panicking)
Problem: Coils won’t stay tight
I roll tighter, hold for an extra second, and use a smaller amount of glue at the end. Sometimes the paper is too springy,
so switching strip type or narrowing the strip can help.
Problem: Glue smears or shines
I use less glue, apply it with a fine tip, and keep a “wipe paper” nearby. If the background is showing glue marks, I switch to a sturdier,
cleaner backing surface and assemble pieces with micro-dots only.
Problem: The design looks busy
I remove (yes, remove) a few elements and let negative space do its job. If everything screams, nothing sings.
500-Word Personal Add-On: What Making 35 Quilled Pieces Taught Me
The funny thing about finishing a big set of quilling pieceslike this collection of 35is that the art on the page is only half the story.
The other half lives in the tiny habits you develop without noticing: how you hold your breath during precise placement, how you “test roll”
a strip just to see if it’s going to behave, how you start recognizing your own style the same way you recognize your handwriting.
Early on, I treated paper quilling like a craft you “follow directions” for. I’d copy a shape, glue it down, and hope the result looked like
the tutorial photo. Over time, I realized quilling is more like design than assembly. The moment I stopped asking, “What shape do I make next?”
and started asking, “What should this area feel like?” everything improved. Tight coils became “clean and structured.” Loose coils became “soft
and airy.” Scrolls became motion. Negative space became a deliberate pause instead of “the spot I forgot to fill.”
I also learned that consistency is a quiet superpower. When a piece looks professional, it’s rarely because it’s complicated; it’s because it’s
cohesive. Matching coil sizes in a section, repeating a shape rhythmically, or limiting the palette to a few confident colors can make a simple
design look high-end. In fact, some of my favorite pieces in this set are the ones where I did lessa single monogram, a clean geometric repeat,
or a small blossom branch with lots of breathing room. The restraint makes the detail feel intentional.
Emotionally, quilling became my “reset” hobby. It’s hands-on enough to pull me out of a busy brain, but structured enough to feel safe.
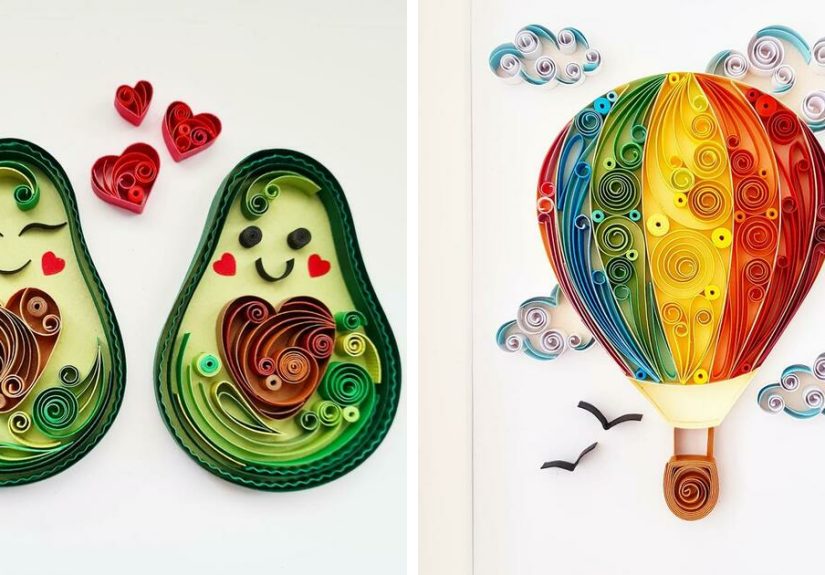
If my day was chaotic, I’d reach for a mandala pattern because repetition is soothing. If I felt stuck, I’d do something playful like a hot air balloon
or a lemon slicebecause bright colors are basically optimism you can hold.
And yes, there were mistakes. Coils popped open. Glue got everywhere. A carefully balanced bouquet turned into a lopsided situation that looked like
the flowers were leaning away from commitment. But the longer I did this, the more mistakes stopped feeling like failure and started feeling like data.
If a feather snapped, the paper was too delicate or my curl was too aggressive. If a wave looked stiff, I needed longer curves and less symmetry.
Quilling quietly trains you to iterate: small change, better result.
So when I look at these 35 pictures of my paper quilling art, I don’t just see pretty coils. I see a timeline of problem-solving, patience, and the
oddly satisfying joy of turning strips of paper into something that makes people lean in and say, “Wait… that’s paper?”


