Table of Contents >> Show >> Hide
- Before You Start: Tie-Dye Paint vs. Traditional Tie-Dye Dye
- Way #1: Make Tie Dye Paint with Soft Fabric Paint + Water (Beginner-Friendly)
- Way #2: Make Tie Dye Paint with Acrylic Paint + Fabric Medium (Most Customizable)
- Way #3: Make Puffy Tie-Dye Paint (Perfect for Paper Crafts & Kids Projects)
- Bonus Technique: How to Get a Tie-Dye Effect with Paint (Without Mixing a Special Formula)
- Common Mistakes When Making Homemade Tie Dye Paint
- Which Tie Dye Paint Method Should You Choose?
- Experience Notes: Testing 3 Ways to Make Tie Dye Paint (Extended Practical Insights)
- Conclusion
Tie-dye is one of those crafts that never really leaves. It just changes outfits. Sometimes it shows up as a classic spiral T-shirt, sometimes as a pastel pillowcase, and sometimes as a gloriously messy kids’ art project that somehow ends up on the dog. If you want the bright, swirly look of tie-dye but don’t want to use traditional powdered dye every single time, tie-dye paint is a fantastic alternative.
In this guide, you’ll learn 3 practical ways to make tie dye paint for different projects: a diluted soft fabric paint for shirts, a custom acrylic-and-fabric-medium version for more control, and a puffy tie-dye paint for paper and craft boards. I’ll also show you when each method works best, what mistakes to avoid, and how to get that bold tie-dye look without turning your workspace into a crime scene.
This article is based on real craft and dye guidance from major U.S. brands and publishers (including Tulip, Rit, Jacquard, Dharma Trading, Crayola, Elmer’s, Liquitex, GOLDEN, Plaid/FolkArt, and others), but rewritten completely in a fresh, practical format for easy use.
Before You Start: Tie-Dye Paint vs. Traditional Tie-Dye Dye
Let’s clear up a common confusion: tie-dye paint is not always the same as tie-dye dye. Traditional tie-dye usually uses fiber-reactive dye (especially on cotton), which chemically bonds with the fabric for long-lasting color. That’s why classic tie-dye shirts can stay bright after many washes.
Tie-dye paint, on the other hand, is usually a paint-based mixture (fabric paint, acrylic paint + fabric medium, or craft paint) that sits on or partially bonds to the surface. It’s easier to mix, less intimidating for beginners, and perfect for small-batch DIY projects. The tradeoff? It may not behave exactly like professional dye, especially on heavily washed clothing.
Translation: if you want a quick weekend craft with squeeze bottles and instant fun, paint is great. If you want pro-level fiber-reactive color chemistry, use true dye. If you want both, welcome to the craft rabbit hole. Snacks recommended.
Way #1: Make Tie Dye Paint with Soft Fabric Paint + Water (Beginner-Friendly)
This is the easiest method for making DIY tie dye paint for shirts when you already have soft fabric paint on hand. It’s especially good for beginners because the paint is already designed for fabric, so you don’t have to guess as much.
Best For
- White cotton T-shirts
- Canvas totes
- Lightweight cotton pillow covers
- Beginner crafters who want a low-stress project
What You Need
- Soft fabric paint (4–5 colors)
- Empty squeeze bottles
- Water
- Rubber bands
- Gloves
- Pre-washed white cotton shirt (or other light fabric)
- Plastic table cover or trash bag for surface protection
How to Make the Paint
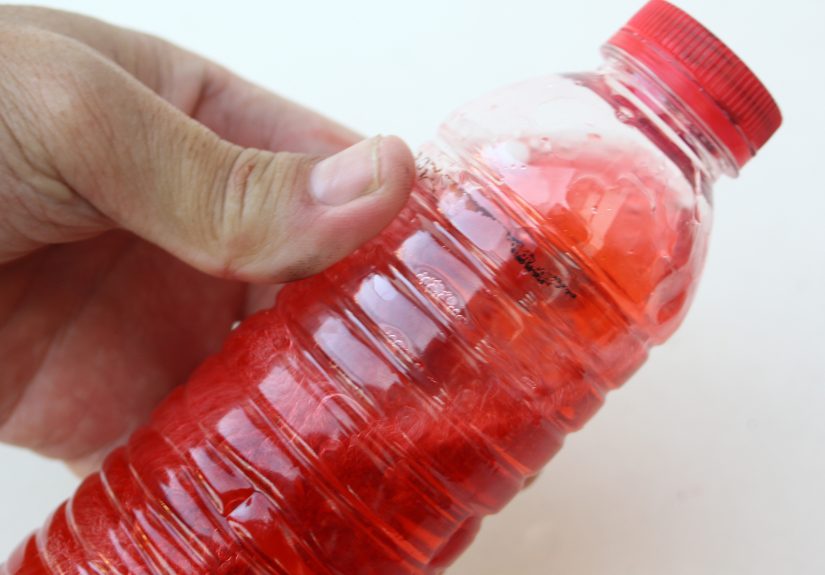
- Add about 1–2 tablespoons of soft fabric paint to an empty squeeze bottle.
- Fill the rest of the bottle with water.
- Close tightly and shake thoroughly until the color is fully mixed.
- Test on scrap fabric before applying to your actual project.
This diluted mixture flows more like traditional tie-dye liquid, which makes it much easier to squeeze into folds and creases. If the paint is too thick, it won’t penetrate. If it’s too watery, the color can look weak. The sweet spot is “smooth enough to squirt, not so thin it looks sad.”
How to Use It for a Tie-Dye Look
- Pre-wash your fabric (importantfinishes and softeners can block color).
- Fold or scrunch your shirt and secure with rubber bands.
- Wet the fabric, then wring it out so it’s damp, not dripping.
- Apply your diluted fabric paint in sections using squeeze bottles.
- Cover the project and let it dry completely.
- Optional: lightly rinse for a softer watercolor effect, or skip rinsing for brighter white contrast and stronger color blocks.
Why This Method Works
Soft fabric paint is formulated to stay more flexible on fabric than standard craft paint. Diluting it helps mimic the flow behavior of tie-dye liquid so you can create spirals, scrunches, stripes, and bursts with less effort. It’s one of the best homemade tie dye paint approaches for casual wearables.
Pro Tips
- Stick with cotton or cotton-rich fabric for the brightest results.
- Use clear squeeze bottles so you can see whether the paint is fully blended.
- Test one hidden area first if you’re painting a mixed-fabric garment.
- Protect your table and wear old clothes. Tie-dye paint is fun; laundry surprises are not.
Way #2: Make Tie Dye Paint with Acrylic Paint + Fabric Medium (Most Customizable)
If you want more control over color, consistency, and finish, this is the power-user option. Mixing acrylic paint with fabric medium creates a custom fabric tie dye paint that can be adjusted for bold or watercolor-style effects.
Fabric medium improves how acrylic paint behaves on textiles by increasing flexibility, improving adhesion, and reducing stiffness. Many art brands also note it helps reduce color bleeding and cracking when used correctly.
Best For
- Custom color mixing (specific shades, muted palettes, earth tones)
- Upcycled clothing and denim
- Canvas shoes or bags
- Crafters who already own acrylic paints
What You Need
- Soft body or fluid acrylic paint
- Fabric medium (brand-specific instructions vary)
- Small mixing cups
- Stir sticks
- Squeeze bottles
- Water (optional, for thinning)
- Fabric item (pre-washed and dried)
- Rubber bands, gloves, surface protection
Basic Mixing Formula
A common starting point is 1:1 (equal parts acrylic paint and fabric medium), especially with soft body or fluid acrylics. Then adjust with a little water if you want a looser, more tie-dye-like flow.
How to Make the Paint
- Mix acrylic paint and fabric medium in a cup (start at 1:1).
- Stir gently to avoid bubbles.
- Add a small splash of water if needed for squeeze-bottle flow.
- Pour into squeeze bottles and label colors.
- Test on scrap fabric to check flow, opacity, and bleeding.
How to Apply for Tie-Dye Patterns
- Pre-wash and dry the garment.
- Fold/scrunch/swirl and secure with rubber bands.
- Lightly dampen if you want softer color transitions, or keep dry for sharper edges.
- Apply paint mixture to all sides (don’t forget the back and inner folds).
- Allow to dry fully.
- Heat-set if your chosen fabric medium requires or recommends it (follow brand directions exactly).
- Wash gently after curing/setting, ideally inside out.
Why This Method Works
Plain acrylic paint can become stiff or crack on fabric when applied too heavily. Fabric medium changes the behavior of the paint so it’s more suitable for textiles. This method gives you the most flexibility if you’re creating a branded color palette, matching room decor, or just refusing to accept that “hot pink and neon green” is your only option today.
When to Choose This Method Instead of Way #1
- You want exact custom colors.
- You already own artist acrylics and don’t want to buy fabric paint.
- You need better control over opacity and finish.
- You’re painting more than T-shirts (like canvas, denim, or mixed surfaces).
Important Caution
Always follow the instructions for your specific fabric medium and paint brand. Ratios, drying times, and heat-setting requirements can vary. Some brands recommend heat-setting after air drying; others note different handling depending on the textile and paint thickness.
Way #3: Make Puffy Tie-Dye Paint (Perfect for Paper Crafts & Kids Projects)
If your goal is colorful texture and funnot washable clothingpuffy tie-dye paint is the move. This method creates a fluffy, dimensional paint that looks amazing on cardstock, poster board, craft paper, and mixed-media projects.
It’s also one of the easiest ways to make tie dye paint for kids because the ingredients are simple and the results are super visual. The only downside: yes, shaving foam is involved, which means someone will try to make a beard. Plan accordingly.
Best For
- Paper crafts and school projects
- Rainbow and tie-dye style posters
- Sensory art activities
- Fast, colorful craft sessions
Recipe Option A: Glue + Shaving Foam + Food Coloring (Classic Puffy Paint)
- 1/2 cup white school glue
- 1/2 cup shaving foam
- Food coloring (or washable liquid color)
How to Make It
- Mix the glue and shaving foam in a bowl.
- Split the mixture into smaller portions (one for each color).
- Add food coloring and stir until the colors are even.
- Use brushes, spoons, or squeeze bottles to apply to paper.
Recipe Option B: Color Glue + Shaving Foam (Faster Setup)
- 1/4 cup color glue
- 1/2 cup foaming shaving cream
This shortcut version is handy when you want bold pre-colored puffy paint without mixing food coloring into every bowl. It’s great for rainbow strips, cloud textures, and tie-dye-inspired blobs and swirls.
How to Create a Tie-Dye Look with Puffy Paint
- Apply multiple colors in spirals, zigzags, or random patches.
- Lightly drag a craft stick or skewer through the colors to create swirls.
- Build up some sections for extra dimension.
- Let the project dry completely (overnight is safest).
Why This Method Works
The glue gives structure, and the shaving foam adds volume. That combo creates a soft, raised texture that feels different from normal paint and makes color transitions look playful. It’s not a “true” fabric tie-dye solution, but for craft projects, it absolutely delivers the vibe.
Bonus Technique: How to Get a Tie-Dye Effect with Paint (Without Mixing a Special Formula)
Want the tie-dye look without changing your paint recipe? Try a plastic-wrap twist technique on a board, canvas, or plaque. Drop acrylic paint on the surface, cover it with plastic wrap, and twist/rub the wrap to blend and create streaky tie-dye textures. Let it dry with the wrap on, then peel it off for a cool marbled pattern.
This is a great option when you want tie dye painting decor rather than wearable fabric art. It’s less about chemistry and more about movement, texture, and happy accidentswhich is basically tie-dye’s whole personality.
Common Mistakes When Making Homemade Tie Dye Paint
1) Skipping the Pre-Wash
Fabric finishes, oils, and softeners can block color. If your shirt looks patchy, this is often the culprit.
2) Making the Paint Too Thick
If the mixture won’t penetrate folds, you’ll get surface color only. That can look cool, but it won’t read as classic tie-dye.
3) Making the Paint Too Thin
Super-watery mixtures can leave weak color or muddy blending. Thin gradually and test as you go.
4) Forgetting the Back Side
Tie-dye is a 360-degree project. If you only apply color to the top, the reveal can look unfinished.
5) Using the Wrong Surface
Puffy paint belongs on paper and craft surfaces, not your “favorite shirt for vacation photos.” Fabric paint or acrylic + fabric medium is the better choice for clothing.
6) Ignoring Brand Instructions
Different paints and mediums have different curing and heat-setting recommendations. Read the label. Future You will be grateful.
Which Tie Dye Paint Method Should You Choose?
Choose Way #1 (Soft Fabric Paint + Water) if:
- You want easy, low-mess tie-dye shirts
- You’re a beginner
- You want a fast weekend project
Choose Way #2 (Acrylic + Fabric Medium) if:
- You want custom colors and better control
- You’re painting different fabric items (not just tees)
- You already have acrylic paint supplies
Choose Way #3 (Puffy Tie-Dye Paint) if:
- You’re doing kids’ crafts or classroom projects
- You want texture and dimension
- You’re painting paper, not washable clothing
Experience Notes: Testing 3 Ways to Make Tie Dye Paint (Extended Practical Insights)
After trying all three methods on different surfaces, the biggest surprise was how much the fabric moisture level changes the result. On the soft fabric paint + water method, a shirt that was just slightly damp gave me the best balance: the colors spread enough to blend softly, but not so much that everything turned into one giant purple argument. On a wetter shirt, the yellow and blue sections became green almost immediately. Not uglyjust very enthusiastic.
The acrylic + fabric medium method felt the most “grown-up” and controllable. I tested it on a cotton tote and a scrap of denim, and it really shined on the tote. I could mix muted tones (dusty coral, olive, slate blue) that are harder to find in ready-made fabric paint sets. The trick was getting the squeeze-bottle flow right. My first batch was too thick and sat on top of the fabric like frosting. My second batch, with a little more medium and a tiny splash of water, behaved much better and soaked into folds more evenly.
One thing I learned quickly: with the acrylic + fabric medium mix, thin layers matter. If you flood the fabric, the paint can feel heavier after drying, especially on thicker cotton. When I used smaller amounts and built color gradually, the finished piece looked more like a dyed effect and less like a painted patch. Also, testing on scrap fabric saved me from ruining an actual shirt, which is the kind of wisdom you only earn after nearly painting a sleeve solid black.
The puffy paint version was the clear winner for instant fun. It’s bright, tactile, and forgiving. I tried both the glue + shaving foam + food coloring method and a color-glue variation. The color-glue version was faster, but the food-coloring version gave me more control because I could adjust intensity. The most successful tie-dye look came from laying down dots of multiple colors in a spiral and dragging a skewer through them in a loose swirl. It looked like a cupcake and a rainbow had a collaboration meeting.
Drying time was the biggest patience test with puffy paint. It can look dry on top while still being soft underneath, so overnight drying is worth it. On cardstock, it held shape nicely. On thin paper, it wrinkled a bit (still fun, but less polished). If I were doing this with kids, I’d absolutely use heavier paper or cardboard-backed sheets to avoid the “why is my rainbow now a taco?” problem.
Overall, if I had to recommend one method for first-timers making a wearable project, I’d go with Way #1. It’s simple, forgiving, and gives that classic tie-dye feel quickly. For crafters who want color precision and already own art supplies, Way #2 is the best long-term solution. And for pure joy, classroom energy, and textured art fun, Way #3 is unbeatable. In other words: all three workyou just need to choose the kind of mess you’re in the mood for.
Conclusion
Making tie-dye paint at home is easier than most people think, and you don’t need a giant dye station to get beautiful results. Whether you choose a diluted soft fabric paint for shirts, a custom acrylic-and-fabric-medium blend for advanced projects, or a puffy paint recipe for playful crafts, each method gives you a different version of the same thing: bold color, creative freedom, and a little bit of controlled chaos.
Start with the project you actually want to make, not the “perfect” method. A great tie-dye craft made today beats a perfect one you keep postponing until next summer.