
Table of Contents >> Show >> Hide
- Quick Glossary (So the Rest Makes Sense)
- Start Here: What Are You Spreading, and Where?
- Types of Fertilizer Spreaders (And Who They’re Best For)
- Key Features That Actually Matter (And a Few That Are Just “Nice”)
- Hopper Capacity: Bigger Isn’t Always Better
- Spread Pattern and Consistency: Even Beats “Fancy”
- Edge Control: Save Your Sidewalk (and Your Wallet)
- Wheels: Pneumatic vs. Solid
- Build Materials: Rust Is the Silent Lawn Tool Killer
- Gearbox Design: Enclosed is Your Friend
- Agitation and Anti-Clog Performance: The “Bridging” Problem
- Rate Control: Simple, Repeatable Settings Beat a Thousand Numbers
- Ergonomics and Storage: Your Back Votes Too
- Matching a Spreader to Lawn Size: Practical Scenarios
- How to Calibrate Your Fertilizer Spreader (So You Don’t Overapply)
- Technique Tips for Better Results (And Less Cleanup)
- Durability and Maintenance: How to Make a Spreader Last
- Common Buying Mistakes (So You Can Avoid Them)
- How to Choose the Best Fertilizer Spreader for You (Decision Checklist)
- Conclusion: Buy for Consistency, Not Hype
- Real-World Experiences & Lessons Learned (So Your First Run Goes Better)
- 1) “Why Are There Stripes?” (The Classic Spreader Moment)
- 2) “My Spreader Clogged… and Then Dumped a Pile”
- 3) The Sidewalk Problem (AKA “I Just Fertilized Concrete”)
- 4) “The Setting on the Bag Didn’t Work for Me” (Totally Normal)
- 5) Bigger Hoppers Feel Great… Until They’re Full
- 6) Maintenance Isn’t FunBut It’s Way Less Fun to Buy Twice
Buying a fertilizer spreader sounds like the kind of “responsible adult” purchase you make right before you start
saying things like, “We should really aerate this year.” But here’s the truth: the right spreader can be the
difference between a lush, even lawn and a yard that looks like it was fed by a confused raccoon tossing snacks at
random.
This guide breaks down the main spreader types, what features actually matter, how to match a spreader to your
yard, and how to calibrate it so you’re not accidentally donating half a bag of fertilizer to your driveway.
Expect practical tips, a little humor, and enough detail to help you buy once and cry never.
Quick Glossary (So the Rest Makes Sense)
- Broadcast/Rotary spreader: Spins material outward in a fan pattern. Fast coverage.
- Drop spreader: Drops material straight down between the wheels. Precision coverage.
- Hopper: The bin that holds fertilizer/seed/ice melt.
- Impeller/Spinner: The spinning plate that throws granules on broadcast models.
- Edge control/deflector: A feature that blocks spread to one side near sidewalks or beds.
- Calibration: Adjusting settings so the correct amount lands on the correct area.
Start Here: What Are You Spreading, and Where?
“Fertilizer spreader” is a category, not a single tool. The best one for you depends on a few simple questions:
- Lawn size: Small suburban lot, medium yard, or something approaching “mini-farm”?
- Material type: Fertilizer, grass seed, lime, compost-based pellets, or even ice melt?
- Layout complexity: Straight rectangles or a maze of beds, paths, and tight turns?
- Terrain: Smooth, flat lawn or bumpy ground and slopes?
If you want one sentence that saves you an hour: Broadcast spreaders win on speed; drop spreaders win on accuracy.
And if you have a big property, tow-behind models can save your arms and your weekend.
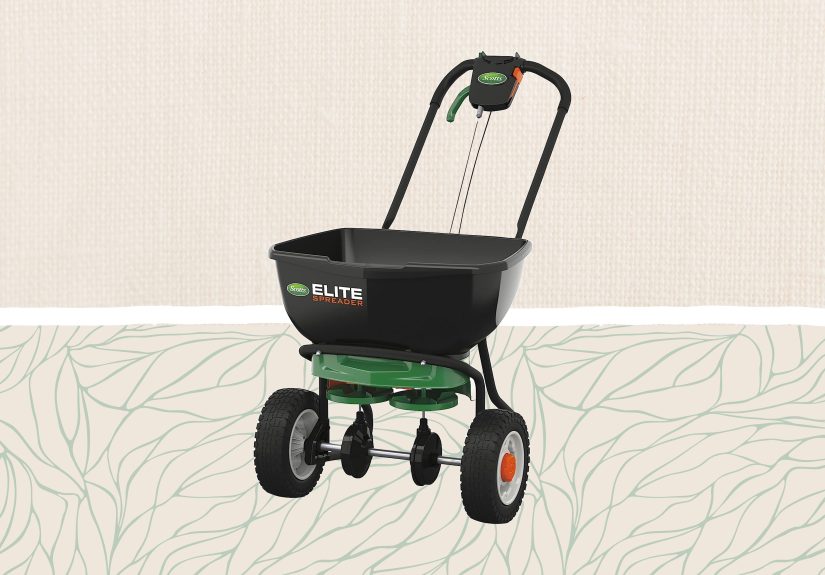
Types of Fertilizer Spreaders (And Who They’re Best For)
1) Broadcast (Rotary) Spreaders: The “Cover Ground Fast” Choice
Broadcast spreaders fling granules outward using a spinning disc. They’re popular because they’re efficient: you
can cover a medium-to-large lawn quickly. They’re also more forgiving because you can overlap passes slightly to
even out coverage.
The downside is precision. If you’re not careful near sidewalks, driveways, or flower beds, you’ll spread product
where it doesn’t belong. That’s why edge control (a deflector) is a big deal on broadcast models.
Best for: Medium-to-large lawns, open spaces, homeowners who want speed and convenience.
2) Drop Spreaders: The “No Fertilizer on the Sidewalk” Option
Drop spreaders release material in a straight line beneath the hopper, typically across the width between the
wheels. That makes them excellent for tight strips, along borders, or anywhere you care about clean edges.
The tradeoff is that drop spreaders demand good technique: if you miss a pass or don’t keep your lanes consistent,
you can end up with stripes. Many people use a broadcast spreader for the main lawn and a drop spreader for
precision zones.
Best for: Narrow lawns, lots of landscaping, precision work near beds and hardscapes.
3) Handheld Spreaders: Small Yards, Touch-Ups, and “I’m Not Storing Another Big Thing”
Handheld spreaders (hand-crank or battery-powered) are great for small areas and spot treatments. They’re compact,
relatively inexpensive, and easy to carry around.
The main limitation is stamina and consistency: it’s harder to keep a perfectly even pattern when your wrist is
doing the work. Still, for small lawns or patch repairs, they’re a practical choice.
Best for: Small yards, touch-ups, spot seeding, and anyone short on storage space.
4) Tow-Behind Spreaders: When Your Lawn Has Zip Codes
Tow-behind spreaders hitch to a riding mower, lawn tractor, ATV, or UTV. They’re designed for covering large areas
efficiently, often with bigger hoppers and wider spread patterns than walk-behind units.
If you’re managing acres, a tow-behind spreader can turn a multi-hour job into a straightforward lap around the
property. Look for features like an enclosed gearbox, durable wheels, and easy-to-use flow controls.
Best for: Large lawns, acreage, food plots, and property maintenance.
Key Features That Actually Matter (And a Few That Are Just “Nice”)
Hopper Capacity: Bigger Isn’t Always Better
A bigger hopper means fewer refills, but it also means more weight. A fully loaded spreader can become awkward on
slopes or uneven ground. As a rule of thumb:
- Small yard: Compact push spreader or handheld.
- Medium yard: 40–60 lb push broadcast spreader is often comfortable.
- Large yard: 80+ lb walk-behind, or tow-behind if you’re covering a lot of square footage.
Spread Pattern and Consistency: Even Beats “Fancy”
For broadcast spreaders, consistency is the whole game. Some designs focus on improving uniform distribution (for
example, dual-rotor concepts or improved impeller geometry). In real life, “even coverage with minimal fuss” is
what you’re buying.
For drop spreaders, the evenness is usually excellentyour job is making straight, consistent passes.
Edge Control: Save Your Sidewalk (and Your Wallet)
If you’ve ever seen fertilizer granules glittering on a driveway like tiny regret crystals, you already understand
edge control. A deflector/edge guard helps keep product on the lawn where it belongs. This is especially important
near garden beds, sidewalks, and waterways.
Wheels: Pneumatic vs. Solid
Wheels matter more than most people expect. Large wheels roll more smoothly across uneven ground, and pneumatic
(air-filled) tires can improve traction and reduce bouncing. Bouncing can affect flow consistencyespecially with
lighter or irregular granules.
Build Materials: Rust Is the Silent Lawn Tool Killer
Many homeowner spreaders use a poly (plastic) hopper because it resists rust. The parts that suffer are usually
metal components: frame, axle, impeller shaft, hardware, and any exposed fasteners. If you plan to spread ice melt
or store the spreader in a damp area, corrosion resistance becomes a premium feature.
When comparing models, pay attention to stainless or corrosion-resistant hardware, and look for sealed or enclosed
gearboxes that keep moisture and grit out.
Gearbox Design: Enclosed is Your Friend
An enclosed gearbox is a durability upgradeless exposure to dust, moisture, and granules that can grind away at
moving parts. This tends to matter most on larger push spreaders and tow-behind models used frequently.
Agitation and Anti-Clog Performance: The “Bridging” Problem
Some fertilizers (especially if they’re damp or oddly sized) can “bridge” inside the hopperforming a little arch
that stops flow. Better hopper geometry and an effective agitator can reduce this. If your lawn-care life includes
humid garages, half-open bags, or “mystery pellets from last year,” anti-bridging design is not optional.
Rate Control: Simple, Repeatable Settings Beat a Thousand Numbers
Most spreaders use a dial or lever that opens the hopper gate. The best systems are easy to adjust, easy to
repeat, and easy to lock so the setting doesn’t drift mid-pass. A readable scale is helpful, but calibration is
still the real key.
Ergonomics and Storage: Your Back Votes Too
Handle height, grip comfort, and fold-down storage can be surprisingly important. If the spreader is annoying to
use, you’ll avoid using it. And then your lawn will make passive-aggressive comments by growing weeds.
Matching a Spreader to Lawn Size: Practical Scenarios
Scenario A: Townhouse or Small Suburban Lawn (Under ~5,000 sq ft)
A handheld spreader or a compact walk-behind broadcast spreader is usually the sweet spot. Look for easy edge
control and quick cleanup. If you have narrow strips, a small drop spreader can be a precision upgradebut it’s
not mandatory.
Scenario B: Mid-Size Lawn (~5,000–15,000 sq ft)
This is prime territory for a quality walk-behind broadcast spreader with solid wheels and dependable rate
control. If you have lots of beds and borders, prioritize edge control.
Scenario C: Big Lawn / Property (15,000+ sq ft or acreage)
Consider a heavy-duty walk-behind spreader with a larger hopper, better wheels, and a more durable drive system.
If you’re covering very large areas, a tow-behind spreader can be a time-saver that pays for itself in a season or
two.
How to Calibrate Your Fertilizer Spreader (So You Don’t Overapply)
Calibration sounds technical, but it’s basically this: you’re matching the spreader setting to the amount of
product you want to apply over a known area. It matters because different fertilizers vary in granule size and
densityeven if the bag looks the same as last time.
A Simple, Homeowner-Friendly Calibration Method
- Read the product label for the recommended application rate (often per 1,000 sq ft).
- Measure a test area (for example, 1,000 sq ft or a smaller measured section you can scale).
- Weigh product before and after your test pass to see how much you actually applied.
- Adjust the setting up or down and repeat until you’re close to the target rate.
- Keep your walking speed consistentspeed changes can affect output on many spreaders.
Pro tip: If you’re not sure, start with a lower setting and make two crossing passes (north-south, then east-west).
It’s easier to add a little more than to un-spread fertilizer after you’ve overdone it.
Pattern Matters Too (Especially for Broadcast Spreaders)
Broadcast spreaders don’t always throw perfectly evenly across the full width. Many work best when you plan for
overlapmeaning your next pass partially covers the previous one. If your lawn has striping issues, pattern and
overlap technique are usually the reason.
Technique Tips for Better Results (And Less Cleanup)
- Don’t open the gate while standing still. Start walking, then engage the flow.
- Close the gate before you stop. Otherwise you’ll create a “fertilizer pancake” at the end.
- Use edge control near sidewalks and beds. Less waste, fewer messes, better results.
- Keep material dry and free-flowing. Moisture is the enemy of consistent spreading.
- Clean after use. Empty leftover granules, brush off residue, and rinse if the manufacturer allows.
Durability and Maintenance: How to Make a Spreader Last
A fertilizer spreader lives a hard life: abrasive granules, moisture, humidity, and sometimes ice melt (which is
basically corrosion with ambition). A few habits make a big difference:
- Store it dry (garage shelf beats “outside behind the shed”).
- Empty the hopper after every useleftover fertilizer attracts moisture and clumps.
- Rinse and dry if you spread corrosive materials (especially ice melt), following the manual.
- Check fasteners and moving parts at the start of each season.
- Use a hopper cover if you often spread in breezy conditions or need to protect material from moisture.
Common Buying Mistakes (So You Can Avoid Them)
Mistake #1: Choosing by Hopper Size Alone
Capacity is useful, but wheel quality, rate control, and corrosion resistance usually matter more over time.
Mistake #2: Ignoring Edge Control
If your lawn borders sidewalks, driveways, gardens, or water features, edge control isn’t a “nice to have.” It’s a
“don’t waste money and risk runoff” feature.
Mistake #3: Skipping Calibration
Bag charts are a starting point, not the final answer. Fertilizer blends vary, and so does walking speed. A quick
calibration check can prevent burned grass and uneven results.
Mistake #4: Buying Too Cheap for Your Terrain
On uneven ground, flimsy wheels and inconsistent flow turn into patchy coverage. If your yard is bumpy, upgrade
the wheels and drive durability first.
How to Choose the Best Fertilizer Spreader for You (Decision Checklist)
- Yard under ~5,000 sq ft? Consider handheld or compact broadcast.
- Lots of borders and tight strips? Drop spreader or strong edge control on broadcast.
- Medium-to-large open lawn? Quality walk-behind broadcast with good wheels and easy settings.
- Very large property? Tow-behind spreader (and a comfortable seat on your mower).
- Plan to spread ice melt too? Prioritize corrosion resistance and thorough cleanup habits.
- Hate maintenance? Choose rust-resistant materials and enclosed drive components.
Conclusion: Buy for Consistency, Not Hype
The best fertilizer spreader isn’t the one with the most dramatic marketing. It’s the one that spreads evenly,
adjusts predictably, rolls smoothly over your terrain, and doesn’t rust into a sad sculpture by next spring.
Choose the type that matches your yard, prioritize edge control and durable components, and calibrate like you
mean it. Your lawn will look better, your fertilizer budget will stretch further, and your driveway can go back to
being a driveway instead of a crunchy glitter runway.
Real-World Experiences & Lessons Learned (So Your First Run Goes Better)
Most people don’t “master” a fertilizer spreader on day onethey collect a few lawn-care stories first. Here are
the most common real-world experiences homeowners and DIY lawn folks report, plus what to do about them (so your
lawn doesn’t become the learning lab).
1) “Why Are There Stripes?” (The Classic Spreader Moment)
Striping usually happens when your passes don’t overlap properly, your walking speed changes, or your spreader
pattern isn’t what you assumed. Broadcast spreaders often throw heavier in the middle of the pattern and lighter
at the edges, which is why overlapping passes can matter. Drop spreaders can stripe when you miss a lane by a few
inches. The fix is boring but effective: pick a landmark, walk straight, keep speed consistent, and overlap
intentionally. If you want a confidence boost, do a light two-pass approach (north-south, then east-west). People
report it’s the fastest way to “erase” unevenness without overthinking the pattern.
2) “My Spreader Clogged… and Then Dumped a Pile”
Another common experience is bridginggranules stop flowing, so you shake or bump the spreader, and suddenly it
releases a mini avalanche. This is often tied to moisture (damp fertilizer), irregular granules, or a spreader
design that struggles with certain materials. The practical lesson people learn quickly: keep product dry, don’t
store open bags in humid places, and don’t leave material sitting in the hopper. If you’re mid-job and flow slows,
stop, close the gate, and inspect rather than “encouraging” it with extra bouncing.
3) The Sidewalk Problem (AKA “I Just Fertilized Concrete”)
Many first-timers over-apply along edges. The spreader feels like it’s aiming at the lawnuntil you notice a neat
trail of granules all the way down the driveway. People who fix this fastest do two things: use edge control (or a
deflector) and change their route. Instead of walking parallel to the sidewalk with the spinner flinging outward,
they adjust so the spread pattern stays on grass. If your spreader doesn’t have edge control, some homeowners
simply leave a small buffer strip, then come back with a handheld spreader for precision.
4) “The Setting on the Bag Didn’t Work for Me” (Totally Normal)
Homeowners often assume the dial number on the fertilizer bag is a perfect match. In reality, spreaders vary,
fertilizer blends vary, and walking speed varies. The most common “aha” moment is doing a quick calibration check
and realizing they were applying too much (or too little). The experienced approach is to treat bag settings as a
starting point, then fine-tune. People who do this once often keep a simple note (product + setting + results) for
next timelike a tiny lawn-care cheat sheet.
5) Bigger Hoppers Feel Great… Until They’re Full
It’s a very real experience: a larger hopper sounds convenient, but a fully loaded spreader can be heavy, especially
on slopes. Some users learn to fill only what they need for a section, then refill, rather than loading the
spreader to maximum capacity. This improves control, reduces tip risk, and helps keep application more even.
Heavy-duty wheels help, but smart loading helps more than you’d think.
6) Maintenance Isn’t FunBut It’s Way Less Fun to Buy Twice
People who spread fertilizer and then roll the spreader back into a damp corner often discover clumped residue,
stiff controls, or rusty hardware later. The “experienced” routine is simple: empty leftover product, brush out
granules, wipe the hopper, and store it dry. Those who spread ice melt in winter learn this lesson fastestsalt
can be tough on metal components if you don’t clean and dry the spreader afterward.
The takeaway from these experiences is reassuring: most spreader problems aren’t permanent flawsthey’re technique
and setup issues. Choose a spreader type that matches your yard, calibrate once, overlap intentionally, keep
material dry, and clean up afterward. Do that and your lawn stops looking like a science experiment and starts
looking like a lawn.


