
Table of Contents >> Show >> Hide
- Why This DIY Project Works So Well
- Before You Cut Anything
- Tools and Materials You’ll Likely Need
- Step-by-Step: Build a DIY Dutch Door With a Barn-Door Look
- 1) Dry-Fit, Inspect, and Mark the Cut Line
- 2) Plan and Install Additional Hinges Before the Cut
- 3) Remove the Door and Cut It in Half
- 4) Reinforce and Finish the Raw Cut Edges
- 5) Rehang the Bottom Half, Then the Top Half
- 6) Install Hardware So It Functions Like a Real Door (Not a Prop)
- 7) Add the Barn-Door Look With Decorative Trim
- 8) Prime, Paint (or Stain), Then Weatherproof
- Common Mistakes (and How to Avoid Them)
- Cost, Time, and When to Call a Pro
- DIY Experiences and Lessons Learned (Extended Section)
- Conclusion
Want the charm of a Dutch door and the rustic style of a barn door without replacing your whole entry setup (or selling a kidney for a custom build)? Good news: you can absolutely convert the right door into a split Dutch door and then dress it up with barn-door-style trim so it looks like it came straight out of a fancy farmhouse magazine.
This project blends two popular looks into one practical upgrade: the top half opens for airflow and conversation, while the bottom half stays closed to help keep kids, pets, and general household chaos where it belongs. The “barn door” part is mostly visual herethink vertical battens, diagonal trim, and rustic hardware stylingnot a sliding track system.
In this guide, you’ll learn how to choose the right door, cut and reinforce it properly, install the extra hardware, and finish it so it looks polished instead of “weekend project gone rogue.” We’ll also cover weatherproofing tips for exterior use, common mistakes, and what real DIYers tend to experience while building one.
Why This DIY Project Works So Well
A Dutch door (also called a split door or stable door) is divided horizontally so the top and bottom halves can operate independently. That means you get ventilation and visibility without fully opening the doorway. It’s a timeless design that still feels practical todayespecially in kitchens, mudrooms, laundry rooms, and back entries.
Adding barn-door-style trim on top of that gives the door more personality. Instead of a plain slab door, you get a textured, farmhouse-inspired look using trim boards, glue, nails, and paint or stain. The result can look custom, even if the starting point was a basic door from the home center.
Before You Cut Anything
Choose the Right Door (This Part Matters More Than People Think)
Not every door is a good Dutch-door candidate. If you remember only one thing from this article, make it this: do not start with a hollow-core door. Once cut, hollow-core doors can become flimsy, wobbly, and frustrating to align.
The best candidates are:
- Solid wood doors (easiest to modify and finish)
- Sturdy solid-core doors with enough structure to remain stable after splitting
- Door designs with solid wood across the cut area (or a rail in the right location)
Also, don’t modify a fire-rated door unless the manufacturer explicitly allows it. Many fire doors are engineered and tested as a complete assembly, and cutting them can invalidate the rating.
Interior vs. Exterior Dutch Door
An interior Dutch door is the friendlier version of this project. You still need accurate cuts and alignment, but you don’t have to obsess over weatherproofing, threshold seals, and security hardware the way you do on an exterior door.
An exterior Dutch door is absolutely doable, but it’s more demanding. You’ll need tight alignment between the two halves, proper sealing, weatherstripping, and secure hardware (including a top-half locking strategy if it’s a primary exterior opening).
Where to Split the Door
A common cut height is around 36 inches from the bottom, but don’t treat that as sacred law. Use it as a starting point. The best final location depends on your door’s panel layout, existing lock position, and how you want the finished top rail/shelf area to look.
Pro tip: if your door has panels, try to cut between panels or along a visually logical line. A perfectly measured cut that slices right through a decorative panel can still look awkward.
Safety Checklist Before Starting
- Wear safety glasses and hearing protection.
- Clamp the door securely before cutting.
- Use a straightedge guide for circular-saw cuts.
- Get help lifting heavy doors (they are awkward even when they look innocent).
- If the door or surrounding trim may have pre-1978 paint, use lead-safe practices before sanding/cutting.
Tools and Materials You’ll Likely Need
Core Build Tools
- Drill/driver
- Circular saw or track saw
- Straightedge and clamps
- Chisel and utility knife (for hinge mortises)
- Sander and sandpaper (medium and fine grit)
- Tape measure, pencil, and level
- Sawhorses or sturdy work surface
Materials and Hardware
- Solid wood or solid-core door (already fitted to the opening if possible)
- Extra hinge(s) so each half is properly supported
- Latch or slide bolt / Dutch door latch to connect halves
- Knob/lever and lockset for bottom half (and deadbolt/top security hardware for exterior use)
- Wood filler
- Wood glue and screws
- Trim boards for barn-door look (thin boards recommended)
- Primer and paint or stain/sealer
- Weatherstripping and possibly a door sweep (for exterior doors)
Step-by-Step: Build a DIY Dutch Door With a Barn-Door Look
1) Dry-Fit, Inspect, and Mark the Cut Line
Start with the door hung in the jamb if possible. This lets you confirm that the door already opens and closes properly before you start surgery. If the door is already rubbing, sagging, or misaligned, fix that firstotherwise you’ll just be building a more stylish problem.
Measure up from the bottom and mark your split line (again, around 36 inches is common). Mark at multiple points across the face, then use a level or straightedge to draw a clean line. Check the line from both sides of the door if you’re preserving a panel layout or design symmetry.
2) Plan and Install Additional Hinges Before the Cut
A Dutch door needs more hinge support than a standard slab. Many setups end up with four hinges total (two for the top half, two for the bottom half), though exact placement depends on door weight and size.
Mark the locations for your added hinges while the door is still in place. Carefully mortise the door and jamb so the hinges sit flush. Score the mortise edges with a utility knife before chiseling to reduce splintering. If you’re replacing old hinges, match thickness and alignment so the door halves sit correctly later.
3) Remove the Door and Cut It in Half
Take the door down and place it on sawhorses. Clamp it securely. Use a straightedge guide with your circular saw (or a track saw) to make a slow, steady cut along the marked line. Let the saw do the workrushing is how you end up with a wandering cut and a new vocabulary of bad words.
After cutting, inspect both raw edges. Expect some roughness, especially on painted or older doors.
4) Reinforce and Finish the Raw Cut Edges
This is where a lot of DIY Dutch doors go from “pretty good” to “actually solid.” You need the two fresh cut edges to be smooth, protected, and structurally sound.
- Patch splinters, dents, or voids with wood filler.
- Sand both cut edges smooth so the halves sit flush without catching.
- Seal the raw wood with primer/paint or stain/sealer to protect against moisture.
If your door construction leaves hollow or weak sections at the cut, add fitted wood blocking/filler pieces and secure them with glue and screws as needed. This step dramatically improves rigidity and gives you better anchoring for hardware or decorative trim later.
5) Rehang the Bottom Half, Then the Top Half
Reinstall the bottom half first and make sure it swings cleanly and latches where it should. Use shims if necessary to dial in the reveal (the gap around the door). Then install the top half and check alignment between the two sections.
Your goal is simple:
- The halves should line up cleanly when closed
- They should move smoothly without binding
- The meeting point should be snug enough to seal (especially for exterior doors)
Minor sanding adjustments are normal. Tiny tweaks now save major frustration later.
6) Install Hardware So It Functions Like a Real Door (Not a Prop)
A Dutch door needs a little more hardware planning than a regular door. At minimum, install a latch/bolt so the two halves can be secured together and operated as one door when needed.
Typical hardware setup:
- Bottom half: main knob/lever and latch
- Top half: coordinating latch or bolt to connect to the bottom half
- Exterior doors: consider a deadbolt or secure locking solution on the top half as well
If you want the rustic look, strap-style hinges and traditional slide bolts can help visually reinforce the barn-door aesthetic. Just make sure every piece is rated for the door’s weight and installed correctly. Stylish hardware is great; stylish sagging is not.
7) Add the Barn-Door Look With Decorative Trim
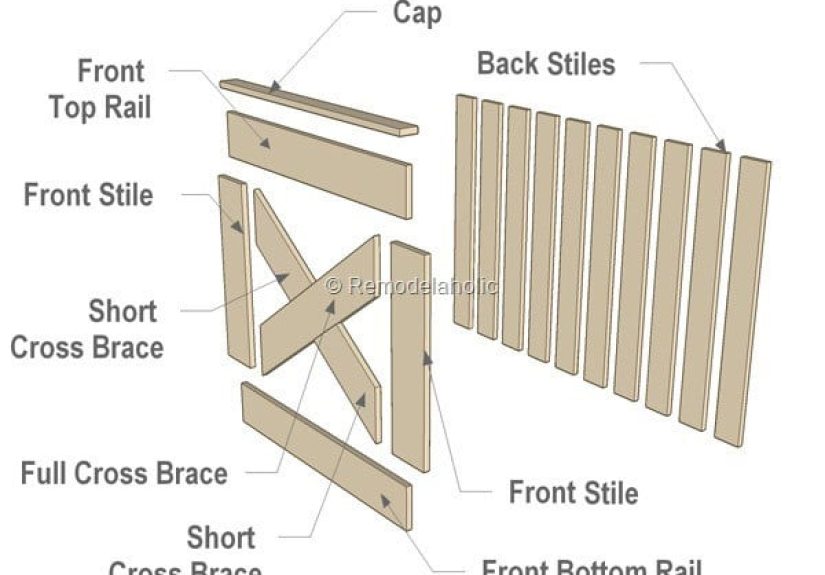
Now for the fun part: the makeover. To make your Dutch door look like a barn door, add decorative trim patterns to the door faces. Popular choices include:
- Vertical battens with a center rail
- Diagonal “Z” brace pattern
- Chevron or herringbone-inspired trim pattern
- Shaker-style perimeter trim with farmhouse accents
A practical approach:
- Lay out your trim pattern on a flat surface before attaching anything.
- Measure and cut carefully (diagonals often need angle cuts).
- Pre-drill where needed to prevent splitting.
- Attach trim with wood glue plus finishing nails/brads.
- Clamp during glue-up for better contact and cleaner results.
Keep trim reasonably lightweight. Decorative boards add charm, but they also add weight. Heavier doors need stronger hinges and can become harder to align over time.
8) Prime, Paint (or Stain), Then Weatherproof
Finish is what makes the project look intentional. Fill nail holes, sand, prime, and apply your topcoat. If you’re painting, label trim pieces beforehand if you pre-finish them off the doorfuture you will be grateful.
For exterior Dutch doors, do not skip weatherproofing:
- Install weatherstripping on the top, latching side, and other contact points
- Check the threshold seal
- Add or replace a door sweep if air is leaking under the bottom
- Test for drafts by hand after installation
If the door alignment isn’t perfect, adjust hinges and strike plates before blaming the weatherstripping. Seals work best when the door is already square and latching properly.
Common Mistakes (and How to Avoid Them)
Using the Wrong Door
Hollow-core doors are the #1 regret machine in this project category. Start with a door that can handle being split.
Skipping the Extra Hinge
Each half needs support. If a half feels floppy, the fix is usually not “hope”it’s hinge placement and alignment.
Rushing the Cut
A crooked cut line affects the appearance, sealing, and operation. Clamp a guide and cut slowly.
Ignoring Raw Edge Sealing
Raw wood edges can absorb moisture, swell, and warp. Seal them thoroughly, especially on an exterior door.
Overloading the Door With Decorative Trim
Barn-door-inspired trim should improve the look, not turn the door into a gym membership. Keep the design balanced and the materials sensible.
Cost, Time, and When to Call a Pro
If you already own the door and tools, a DIY conversion can be relatively affordable. Many homeowners spend mostly on hardware, filler, finish, and trim. If you need to buy tools, the budget climbs fast.
As a rough expectation:
- Interior conversion: usually the most DIY-friendly and budget-friendly route
- Exterior conversion: more time, more hardware, more finishing, more precision
- Custom premade Dutch door: often significantly more expensive, but less DIY risk
Call a pro if:
- The door is a primary exterior entry and security is a concern
- The frame is out of square or already damaged
- You’re not comfortable mortising hinges or adjusting strike plates
- The home may have lead-based paint and you’re unsure how to work safely
DIY Experiences and Lessons Learned (Extended Section)
One of the most interesting things about this project is how often it starts as a “cute farmhouse idea” and quickly becomes a lesson in door geometry. Many DIYers go in thinking the hard part is the cut, but the real challenge is usually the alignment afterward. A door can be cut beautifully and still fight you at the jamb if the hinges are slightly off, the frame is uneven, or the trim adds just enough weight to change how it hangs. The good news is that these problems are usually fixable with patience, shims, and small adjustmentsnot a complete do-over.
Another very common experience is discovering that the original door was never perfect to begin with. People often don’t notice a slightly sagging hinge, a loose strike plate, or a drafty threshold until they convert the door and suddenly every little issue becomes obvious. In a weird way, the project becomes a mini door tune-up. Tightening hinges, adjusting the strike plate, and improving weatherstripping often makes the finished Dutch door work better than the old one ever did.
On the style side, DIYers frequently say the decorative trim is the most satisfying part because it delivers the “barn door look” fast. Even a simple vertical-and-diagonal pattern can completely transform a basic slab door. But it’s also where enthusiasm can outrun practicality. People get creative (which is great), then realize the doorknob, latch path, or split line is now competing with a chunky trim board. The fix is simple: do a full dry layout before attaching anything. Tape the pattern in place, open and close the door halves, and check the hardware locations. Ten extra minutes here can save hours of repairs later.
Paint and finish decisions are another real-world lesson. A lot of homeowners love the idea of a distressed farmhouse finish until they test it in their actual space and realize it reads more “old shed” than “curated rustic.” The best results usually come from cleaner paint lines, quality primer, and a finish color that complements the room instead of shouting over it. If you want character, add it with hardware and trim shape first, not by forcing fake weathering.
For exterior installations, the most repeated lesson is this: weatherproofing is not optional. People often celebrate the successful split, the new hinges, and the cute latchthen notice a draft at night or light peeking through the meeting rail. A Dutch door can absolutely be weather-tight, but only if you take the extra steps to seal edges, install weatherstripping correctly, and check the threshold and door sweep. It’s not glamorous work, but it’s what separates a pretty project from a durable one.
Finally, many DIYers say the project gives them a confidence boost because it looks advanced but is manageable when broken into stages. Measure, hinge, cut, reinforce, hang, trim, finish. It’s a solid reminder that good carpentry is often less about superhero talent and more about slow, accurate steps. And yes, a helper on rehang day still counts as a power tool.
Conclusion
Building a DIY Dutch door that looks like a barn door is one of those rare projects that delivers both charm and function. You get airflow, visibility, and a built-in conversation starterplus a custom-looking farmhouse design without buying a fully custom door.
The keys to success are simple: start with the right door, plan your cut carefully, support both halves with proper hinges, seal the exposed edges, and keep the decorative trim stylish but sensible. Do that, and your finished door won’t just look good in photosit’ll work well in real life.


