
Table of Contents >> Show >> Hide
- Why a Spray Painted File Cart Is Such a Smart Upgrade
- Before You Paint: Know Your File Cart Material
- Safety First (Especially With Spray Paint)
- Supplies for a Spray Painted File Cart
- How to Spray Paint a File Cart So It Doesn’t Chip, Peel, or Look “Dusty”
- Step 1: Disassemble what you can
- Step 2: Clean like you mean it
- Step 3: Scuff sand (this is the “boring” part that makes it last)
- Step 4: Address rust or bare spots
- Step 5: Prime (especially for metal)
- Step 6: Spray paint with light coats (your secret weapon)
- Step 7: Respect dry times, recoat windows, and humidity
- Step 8: Optional clear coatuse it only if it makes sense
- Step 9: Cure time is where the magic happens
- Design Ideas for a Spray Painted File Cart That Looks Custom
- Make It Functional: Organization Upgrades After Painting
- Troubleshooting: Fix Common Spray Painting Problems
- Conclusion: A File Cart That Finally Deserves a Spot in Your Office
- Real-World Experiences With a Spray Painted File Cart (The Part No One Mentions Enough)
A file cart is one of those painfully practical things: it exists to hold paperwork, glide around your home office, and quietly remind you that
“adulting” is just a series of folders wearing different hats. Unfortunately, most file carts come in a finish best described as
Corporate Beige Sadness or Metallic “I Gave Up” Gray.
The good news: a spray painted file cart is a fast, budget-friendly makeover that can turn a utilitarian eyesore into something that looks
intentionally styledlike you meant to have an office corner instead of a paper avalanche held together by vibes.
In this guide, you’ll get a practical, real-world approach to spray painting a file cart (especially metal and wire styles), plus design ideas,
durability tips, and organization upgrades that make the cart work harder than your group chat during finals week. And yesthere’s a whole
experience section at the end because spray painting is never just “spray paint and done.” It’s a journey.
Why a Spray Painted File Cart Is Such a Smart Upgrade
A file cart makeover is more than cosmetic. When you change the look of something you use daily, you’re more likely to keep it in your workflow
(instead of banishing it to the closet of forgotten productivity tools).
What you get from a spray painted file cart
- A cleaner-looking workspace: A coordinated color makes the cart feel like furniture, not office surplus.
- Better organization habits: A “new” cart makes it easier to commit to a filing system you’ll actually use.
- A more durable surface (when done right): Proper prep and the right coating can reduce chips and scratches.
- Style flexibility: Matte, satin, metallic accents, or color-blockingyour cart can match your vibe.
Before You Paint: Know Your File Cart Material
Most file carts are metal, wire, or a mix of metal frame + plastic accessories. The material matters because paint adhesion is all about what
you’re asking the paint to stick toand metal can be either cooperative or wildly petty depending on prep.
Common file cart surfaces (and what they mean for paint)
- Powder-coated metal: Smooth and tough. It can be painted, but you’ll want to scuff it so primer and paint can grip.
- Bare steel / rusty spots: Needs rust removal and a primer meant for metal (often rust-inhibitive).
- Aluminum or stainless parts: Can be trickier. A primer formulated for the specific metal helps prevent peeling.
- Plastic handles or rails: Some spray paints bond better to plastic than othersalways check the label and test first.
Safety First (Especially With Spray Paint)
Spray paint is convenient, but it’s also a cloud of fine particles and solvents you don’t want in your lungs or eyes. Treat this like a real
project, not a “two-minute craft.” Work in a well-ventilated area (outside is best), protect nearby surfaces, and wear appropriate protection.
If you’re a teen, do this with a parent/guardian or a responsible adult supervisingespecially for setup and ventilation.
Basic safety checklist
- Ventilation: Outdoors is ideal; otherwise use strong ventilation and keep others away from the area.
- Respiratory protection: Use a properly fitted respirator appropriate for paint aerosols and organic vapors.
- Eye/skin protection: Safety glasses and gloves help prevent irritation and accidental contact.
- Fire safety: Aerosols can be flammablekeep away from flames, sparks, and heat sources.
Supplies for a Spray Painted File Cart
You don’t need a garage full of equipment, but you do need the right basics. A good paint job is mostly prep and patiencespraying is
just the part that looks cool on camera.
What to gather
- Drop cloth or cardboard (to protect the ground)
- Degreaser or mild soap + water (for cleaning)
- Microfiber cloths or lint-free rags
- Sandpaper (medium grit for scuffing; finer grit for smoothing)
- Tack cloth (optional but helpful for dust)
- Painter’s tape (for masking wheels, rails, or areas you don’t want painted)
- Metal primer (especially for bare metal or rust-prone areas)
- Spray paint (choose a finish: matte/satin/semigloss)
- Clear coat (optional, for added protectionmust be compatible with your paint)
How to Spray Paint a File Cart So It Doesn’t Chip, Peel, or Look “Dusty”
Let’s be honest: the internet is full of paint jobs that look great for exactly 48 hoursuntil the first bump, scratch, or impatient recoat.
The goal here is a finish that holds up to real life: rolling, loading files, and occasional “why is this folder so heavy?” moments.
Step 1: Disassemble what you can
Remove hanging file rails, handles, labels, and any detachable trays. If the cart has wheels, you can either remove them or mask them carefully.
Disassembling reduces awkward angles and helps you spray evenly without building up paint in corners.
Step 2: Clean like you mean it
File carts collect dust, oils from hands, and mystery grime (especially around handles and rails). Wash with mild soap and water or a degreaser.
Rinse and let it dry fully. Paint hates greasy surfaces, and it will absolutely punish you for skipping this.
Step 3: Scuff sand (this is the “boring” part that makes it last)
If the cart is glossy or powder-coated, scuff it with medium-grit sandpaper to create a tooth for primer and paint to grip. You’re not trying
to remove the finish completelyjust dull it. Wipe away dust afterward (a tack cloth helps).
Step 4: Address rust or bare spots
If you see rust, remove loose rust with a wire brush and sand until the area feels solid. Rust left under paint is like putting a cute rug over
a leaking pipelooks fine until it very much does not.
Step 5: Prime (especially for metal)
Primer is not a scam invented by paint companies to sell extra cans. Primer improves adhesion and can help prevent corrosion and peeling on metal.
Use a primer formulated for metal; choose one appropriate for clean metal vs. rusty metal depending on your cart’s condition.
Step 6: Spray paint with light coats (your secret weapon)
The fastest way to ruin your spray painted file cart is to “save time” with one heavy coat. Instead, do multiple light coats. Hold the can at
the recommended distance (often around 8–12 inches, but follow your can), move in smooth, overlapping passes, and start/stop spraying slightly
off the object so you don’t create paint “blobs” at the edges.
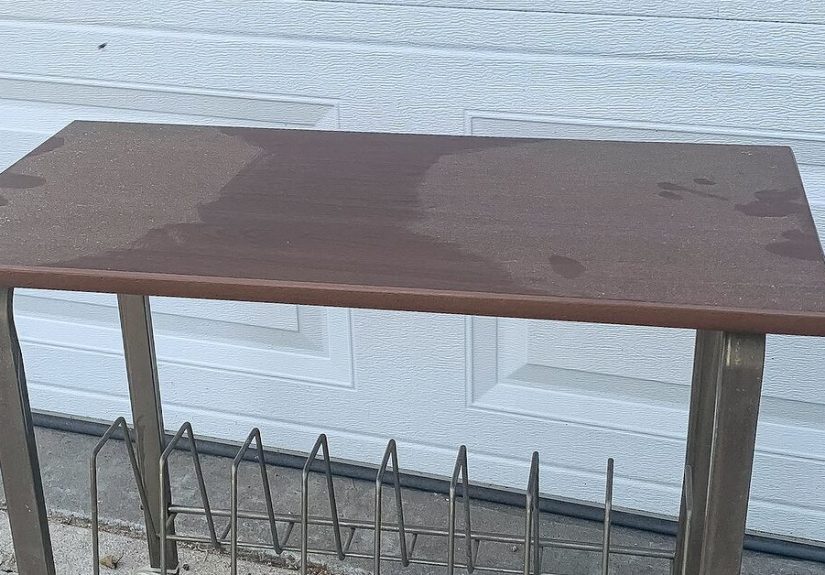
Step 7: Respect dry times, recoat windows, and humidity
Spray paint behaves differently depending on temperature and humidity. In damp conditions, paint can dry slowly and feel tacky longer. Many
spray systems also have specific recoat windows (for example, recoat within a short window or wait longer for full curing) to avoid wrinkling or
lifting. This is the part where reading the label actually saves your sanity.
Step 8: Optional clear coatuse it only if it makes sense
A clear coat can add scratch resistance, but only if it’s compatible with your paint system and applied at the right time. If your cart is going
to be heavily used (lots of rolling and file swapping), a compatible clear coat in a similar sheen can help. If you love a super-matte look,
know that matte finishes can show scuffs more easilyand some clear coats can change the sheen.
Step 9: Cure time is where the magic happens
“Dry to the touch” isn’t the same as “ready for heavy use.” Let your cart cure in a clean, ventilated space before loading it with files.
If you rush this, you’ll get fingerprints, dents, and stickingbasically a highlight reel of regrets.
Design Ideas for a Spray Painted File Cart That Looks Custom
1) Modern minimal
Choose a matte or satin neutral (soft black, warm white, mushroom gray). Pair with simple label tabs and matching file folders for a clean,
high-end “home office catalog” look.
2) Color-blocked cart
Paint the frame one color and the rails/handle another. Think navy + brass-toned metallic, or white + a bright accent. Mask carefully, and let
each color cure before taping over it.
3) “Quiet luxury” metallic accents
Keep the cart base neutral, then add a subtle metallic to handles or the top tray. Metallic sprays can look amazing, but they show dripsso light
coats are non-negotiable.
4) The playful, dopamine office
If you want the cart to feel fun, go bold: sage green, dusty blue, sunflower yellow, or even a retro pastel. A pop color can make filing feel
less like paperwork and more like a tiny design win.
Make It Functional: Organization Upgrades After Painting
A spray painted file cart looks greatbut it’s even better when it actually solves problems. Here are upgrades that take it from “pretty” to
“why didn’t I do this sooner?”
Set up a simple filing system (that you’ll maintain)
- Daily/Weekly: inbox folder + action folder
- Monthly: bills, receipts, school/work documents
- Reference: manuals, warranties, medical, taxes (as needed)
- Archive: anything you rarely touch but can’t toss
Label smarter, not harder
Use clear, short labels that match how you think. If you keep renaming categories, your system becomes a hobby instead of a solution. Keep it
boring on purposeboring systems are the ones you actually keep.
Add liners where metal meets metal
If your cart has a tray or shelf, a thin liner (felt, cork, or shelf liner) reduces scratching and rattling. It also makes the cart feel more
“finished” and less like it belongs in a storage room.
Upgrade wheels if your floors are suffering
Some carts come with tiny plastic casters that fight rugs and complain on hardwood. If your cart is constantly catching or wobbling, consider
replacing casters with smoother rolling ones (and choose a style safe for your flooring).
Troubleshooting: Fix Common Spray Painting Problems
“My paint is dripping.”
You sprayed too close or too heavy. Let it dry, sand the drip smooth, wipe dust, and recoat lightly. Multiple thin coats beat one thick coat
every time.
“It feels gritty or dusty.”
That can happen from spraying too far away (paint dries midair), windy conditions, or dust in the environment. Lightly sand with fine grit,
wipe clean, and spray again in calmer conditions.
“It’s tacky forever.”
Common causes: heavy coats, high humidity, low temperature, or recoating at the wrong time. Improve ventilation, give it more time, and avoid
loading the cart until it’s truly cured.
“The paint is peeling or scratching off.”
Usually a prep issue: the surface wasn’t cleaned or scuffed enough, or primer wasn’t right for the metal. Strip/sand failing areas, prime
properly, and repaint with light coats.
Conclusion: A File Cart That Finally Deserves a Spot in Your Office
A spray painted file cart is one of the highest-reward, lowest-drama upgrades you can do for an office or study spaceas long as you
respect prep, light coats, and cure time. Once it’s painted, you can tailor the function to your life: bills and receipts, school papers,
creative projects, or that growing collection of documents you swear you’ll “deal with later.”
The real win is this: when your organizing tools look good and work well, you’re more likely to keep using them. And that’s how you go from
“paper chaos” to “I know where everything is,” which is basically a superpower.
Real-World Experiences With a Spray Painted File Cart (The Part No One Mentions Enough)
Here’s what people commonly discover when they actually live with a spray painted file cartbeyond the glossy before-and-after photos.
You’ll think you’re done… and then you’ll notice the “angles”
File carts are full of little corners: wire intersections, rail brackets, undersides of handles, and the back side you “won’t see.”
Except you will see itbecause file carts roll. The first time you push it to a different corner and sunlight hits the side you ignored,
you’ll understand why light coats from multiple angles matter. A good approach is to do a quick pass, rotate the cart, do another pass, then
come back after a short dry period for a second round. The goal isn’t to drown the cart in paintit’s to build coverage evenly.
Dry-to-touch confidence is a trap
This is the classic storyline: the cart feels dry, you get excited, you put the rails back in, and suddenly your fresh finish has tiny marks
where metal scraped metal. That’s not failure; that’s chemistry. Many finishes are “dry” fast but still soft underneath until they cure. The
experience lesson here is patience: if you can, wait longer than you think you need. If you can’t wait, handle parts with clean gloves and
reassemble gently, avoiding pressure points. People who let their cart cure properly usually end up with a harder, more chip-resistant finish
that doesn’t record every touch like a detective.
The first scratch will annoy you… then it will teach you what matters
Your cart will get used. That means it will eventually get a tiny scuffoften near the top edge where you slide folders in and out, or around
the rails where weight shifts. Most people learn two things fast: (1) satin and semi-gloss finishes tend to be easier to wipe clean than dead
matte; (2) keeping a little leftover paint for touch-ups is strangely calming. A quick, careful touch-up can erase most “first week” scuffs.
Also, adding a thin liner in the tray or on contact surfaces reduces that scratch risk dramatically, and it makes the cart feel quieter and
sturdier.
Your organization system will evolvebuild it so it can
A spray painted file cart often becomes a turning point: you start using it for one thing (like bills), then it grows into a whole system
(bills, warranties, school stuff, projects, receipts). People who enjoy the cart long-term usually keep their categories flexible. Instead of
labeling every single niche category from day one, they start with a few broad folders and adjust after a week or two. It’s normal to realize
that “Important” is not a categoryit’s a feeling. Replace it with something actionable like “To Pay,” “To File,” and “To Keep.”
The unexpected joy: it makes your space feel intentional
The biggest experience takeaway is emotional, not technical: when the cart matches your space, it stops feeling like clutter and starts feeling
like a tool you chose. That shift matters. A file cart that looks good is more likely to stay out where you’ll use it, which means fewer paper
piles and fewer frantic searches for the one document you need right now. It’s a small DIY project, but it can create a surprisingly big sense
of controllike you upgraded your whole office without buying new furniture.


