Table of Contents >> Show >> Hide
- What “SMD Challenge Extreme Edition” Really Means
- Flux: The Main Character You Keep Treating Like a Sidekick
- The Toolkit: Make Tiny Parts Feel Less Like Pranks
- Heat Strategy: The Difference Between “Reflow” and “Roast”
- Extreme Edition Boss Fights (and How to Beat Them)
- Cleaning and Residues: “No-Clean” Isn’t a Magical Force Field
- Inspection: What “Good” Looks Like Under Magnification
- How to Run the SMD Challenge Extreme Edition (Without Crying)
- Conclusion: Let the Flux Flow (but with intention)
- Extra: of “Extreme Edition” Bench Wisdom
Somewhere between “I can totally solder that” and “why is my resistor now living in another ZIP code,”
there’s a magical moment when molten metal does what it’s supposed to do: flow. That’s the whole vibe
of the SMD Challenge Extreme Editiona deliberately ridiculous, surprisingly educational gauntlet
where tiny components, tighter pitches, and stubborn oxides team up to test your patience… and your flux.
If you’ve ever stared at a 0402 part and thought, “Is that an electronic component or a seasoning?” you’re in the
right place. We’re going deep on surface-mount soldering: how to pick the right approach (iron, hot air, reflow),
why flux is basically liquid courage for solder joints, and how to survive the classic failuresbridges, tombstones,
lifted pads, and that one IC pin that refuses to admit it’s not connected.
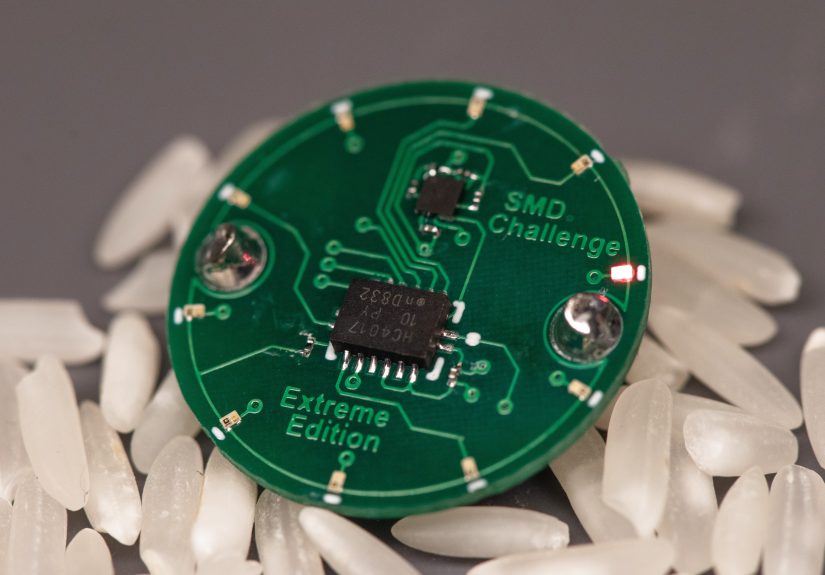
What “SMD Challenge Extreme Edition” Really Means
“Extreme Edition” isn’t about owning the most expensive rework station (although sure, that helps your ego). It’s
about leveling up from “I can tack down an 0805” to “I can place, solder, inspect, and rework fine-pitch parts
without turning the PCB into modern art.”
The unofficial stages of the challenge
- Stage 1: 0603 and SOT-23 parts. Comfortable. Friendly. Slightly smug.
- Stage 2: 0402 and smaller passives. You start respecting tweezers like they’re surgical instruments.
- Stage 3: Fine-pitch QFP/TQFP. Drag soldering enters the chat.
- Stage 4: QFN/DFN/leadless packages. The joints are hiding underneath, like they owe you money.
- Stage 5: Rework and rescue: bridges, tombstoning, and “why did that pad lift?”
You can do the challenge as a personal skill upgrade, a team activity, or a friendly competition where the prize is
bragging rights and the penalty is cleaning flux out of your keyboard because you were soldering too close to your laptop.
Flux: The Main Character You Keep Treating Like a Sidekick
Solder doesn’t “stick” because it’s in a good mood. It bonds because oxides are removed, surfaces get properly wetted,
and molten solder can actually touch metal instead of an invisible crust of “this pad has been exposed to oxygen since
the dawn of time.” That’s flux’s job: it cleans (chemically), protects (by reducing re-oxidation during heating),
and helps solder flow where it should.
Common flux families (and when they’re not your friend)
-
No-clean flux: Designed to leave benign residue behind in many cases. Great for speed, prototypes,
and sane people who don’t want to wash every board. Downside: “no-clean” doesn’t mean “always looks pretty,” and
residues can still matter for high-impedance circuits, coatings, or certain reliability needs. -
Water-soluble flux: Often more active, very effective at soldering… and very committed to being cleaned
thoroughly afterward. If you don’t clean it, it can bite you later. -
Rosin/resin-style options: The old-school classicsstill used widely, especially where strong wetting
is needed. They can leave residue that many folks prefer to remove for inspection, coating, or aesthetics.
Practical rule: the “best flux” is the one that fits your process, your reliability expectations, and your willingness to
clean. If you’re building a one-off gadget for your desk, you have flexibility. If you’re building something that must behave
perfectly in harsh conditions, you’ll treat flux selectionand cleaninglike part of the design, not an afterthought.
The Toolkit: Make Tiny Parts Feel Less Like Pranks
The SMD Challenge Extreme Edition isn’t won by raw bravery. It’s won by visibility, control, and heat management.
If your setup feels like you’re soldering through interpretive dance, upgrade the fundamentals.
1) Magnification that doesn’t insult your eyesight
A microscope or a strong inspection lens turns “I hope that pin is soldered” into “oh, that pin is definitely not soldered.”
Even a decent camera-based inspection rig can change your success rate overnight.
2) Tweezers with good tips (and better manners)
Cheap tweezers love launching 0402 parts into low Earth orbit. Fine-point, ESD-safe tweezers with aligned tips help you place
parts without becoming a human catapult.
3) Temperature control (iron + hot air) you can trust
A stable soldering iron with appropriate tips matters. Add a hot air rework tool and suddenly QFNs and rework jobs become
possible instead of mythical.
4) Consumables that save your sanity
- Solder wick (desoldering braid) for bridges and excess solder
- Solder paste (especially for reflow and fine-pitch work)
- Flux pen and/or tacky flux for controlled application
- Kapton tape and aluminum foil for heat shielding during rework
Heat Strategy: The Difference Between “Reflow” and “Roast”
SMD soldering is mostly a heat-management game. Too little heat and solder won’t wet properly (hello, dull joints and intermittent
connections). Too much heat and you risk lifted pads, damaged components, and solder that flows into places it absolutely should not.
Hand soldering: fast, precise, and surprisingly scalable
For many parts (0603, 0805, SOT-23, SOIC), hand soldering is efficient:
tack one pad, place the part, reflow the tack, then solder the rest. Add flux, and the solder behaves like it got a promotion.
Drag soldering: when fine-pitch legs stop being scary
Fine-pitch ICs look intimidating until you realize the trick is letting surface tension do the sorting. Load a bit of solder,
flood with flux, and gently drag along the pins. If you bridge a few pins (you will), wick plus flux usually cleans it up neatly.
Hot air rework: controlled chaos (in a good way)
Hot air is perfect for reflowing solder paste, removing parts, and rescuing joints under stubborn packages. The key is balance:
enough heat to reflow without blasting components off the board or overheating nearby plastics. Lower airflow is often safer than you think.
Reflow options: stencil-toaster-oven energy, but make it legit
If you’re assembling more than a couple boardsor placing lots of SMD partsreflow becomes your productivity multiplier.
Common approaches include:
- Hot plate/skillet: Great visibility: you can literally watch paste go shiny when it reflows.
- Toaster-oven reflow: Popular for hobby-to-prototype workflows. Better repeatability with a controller or disciplined profiling.
- Purpose-built reflow ovens: The “I’m done guessing” option for consistent results.
Whatever you use, consistency matters. Uneven heating can create cold joints on bigger copper areas or overcook tiny components.
The Extreme Edition mindset: treat heat like a process variable, not a vibe.
Extreme Edition Boss Fights (and How to Beat Them)
Boss #1: Tombstoning (a.k.a. “My resistor is standing up now”)
Tombstoning happens when one end of a small passive reflows before the other, and surface tension pulls it upright.
It’s common on tiny parts, uneven pad geometry, or uneven heating.
- Use a proper paste amount (too much can worsen it).
- Preheat evenly; avoid focusing hot air on one pad only.
- Check pad design and thermal balance (copper pours can create uneven heat draw).
Boss #2: Bridging on fine pitch
Bridges happen when solder connects adjacent pins. It’s not a moral failure; it’s physics plus too much solder.
- Add flux first. Always. The solder will separate more cleanly.
- Use solder wick with a gentle touchdon’t scrub pads off the board.
- Consider paste + reflow for consistent volume on very fine pitch.
Boss #3: QFN/DFN joints you can’t see
QFNs are peak “trust the process.” The pads are underneath, so you can’t visually confirm each joint the same way you can with gull-wing pins.
Success depends on paste volume, alignment, and reflow profile.
- Stencil paste is your friend; consistent deposits reduce surprises.
- Use flux and hot air for rework, but don’t overdo airflow.
- Inspect the perimeter fillets (when present) and validate electrically (continuity + functional tests).
Boss #4: Lifted pads (the “PCB says no” moment)
Pads lift when the adhesive bond between copper and substrate loses the argumentoften due to overheating, repeated rework, or mechanical stress.
- Minimize time at high temperature; preheat instead of blasting one spot.
- Let the joint cool before you nudge componentsmolten solder is not structural.
- Use the right tip size and avoid prying; wick excess solder rather than pushing harder.
Cleaning and Residues: “No-Clean” Isn’t a Magical Force Field
In many builds, leaving no-clean residue is acceptable. In others, residue can interfere with inspection, conformal coating adhesion,
high-impedance leakage performance, or simply your desire to not show off a board that looks like it survived a syrup spill.
When cleaning is worth it
- High impedance / analog front ends: residue can contribute to leakage or noise in sensitive nodes.
- Conformal coating: residues can affect adhesion and long-term reliability depending on materials and conditions.
- Professional presentation: yes, aesthetics matterespecially for client demos and documentation photos.
If you do clean, do it properly. Half-cleaning can be worse than not cleaning, because you can spread residues into places you didn’t intend.
Choose a cleaner compatible with your flux chemistry, and use appropriate brushing and drying methods.
Inspection: What “Good” Looks Like Under Magnification
The Extreme Edition doesn’t end when the solder cools. It ends when you inspect and validate.
A solid joint generally looks smooth with a tidy fillet, good wetting to pad and lead, and no obvious cracks, voidy lumps, or dull “cold” texture.
Quick inspection checklist
- Any bridges between pins or pads?
- Any pins that look dry (not wetted) or lifted (no contact)?
- Any passives skewed or tombstoned?
- Any suspicious residue in high-impedance areas?
- Continuity test the critical nets before power-up (future you will be grateful).
How to Run the SMD Challenge Extreme Edition (Without Crying)
Here’s a fun, practical format that works for solo practice or a team workshop:
Round 1: Speed + basics (15–20 minutes)
- Place and solder 10 passives (0603 or 0402) cleanly.
- Zero tombstones allowed. (Okay, one. We’re not monsters.)
Round 2: Fine pitch control (20–30 minutes)
- Solder a fine-pitch IC using drag soldering.
- Fix bridges with wick + flux, then re-inspect under magnification.
Round 3: The boss level (30–45 minutes)
- Reflow a QFN/DFN (paste + hot air or reflow method of choice).
- Validate with continuity and a functional power-up test.
Score yourself on: joint quality, rework efficiency, cleanliness (if required), and whether you kept your cool.
Extra points for not chasing a 0402 across the room.
Conclusion: Let the Flux Flow (but with intention)
The SMD Challenge Extreme Edition is a love letter to modern electronics: tiny packages, dense layouts,
and surprisingly forgiving physicsif you respect heat and use flux like you mean it. Master the basics (placement,
magnification, temperature control), then build confidence through repeatable processes (paste volume, reflow strategy,
and inspection).
When the solder finally snaps into a perfect fillet and a fine-pitch IC looks like it was assembled by a calm robot instead of a caffeinated human,
you’ll feel it: that satisfying moment when your technique clicks… and your flux is doing exactly what it was born to do.
Extra: of “Extreme Edition” Bench Wisdom
Every soldering journey has that turning point where you stop blaming the parts and start blaming the processand that’s progress.
One of the most common stories goes like this: someone tries hot air for the first time, cranks the airflow like they’re drying a car after a wash,
and watches a row of 0402 capacitors perform a synchronized escape maneuver. The fix isn’t shame; it’s dialing airflow down, preheating the area,
and letting heat soak do the heavy lifting. Hot air is a scalpel, not a leaf blower.
Another classic: the “I used solder wire on a QFN and now I’m confused” moment. Leadless packages punish randomness. What usually works better is a
controlled paste deposit (stencil if you can, syringe if you must), then gentle, even heating. If you’re doing rework, a small amount of tacky flux
around the perimeter can help the solder wet correctly when the paste reflows. The win condition isn’t “add more solder”; it’s “add the right amount,
in the right place, and let surface tension finish the job.”
Flux habits separate casual dabblers from Extreme Edition survivors. People either underuse flux (“it’s probably fine”) or overuse it (“my PCB is now
a slip ’n slide”). A practical middle path: apply flux where you’re about to heat, not everywhere you’ve ever loved. For fine-pitch drag soldering,
you want enough flux that the solder moves smoothly and bridges release easilybut not so much that you can’t see anything or you’re boiling a swamp.
And if you do clean: commit to cleaning properly. Half-cleaning can smear residues under components where they’re harder to remove and easier to regret.
Inspection is where confidence is earned. Under magnification, you’ll notice tiny clues: a pin that looks slightly “dry,” a passive that’s minutely
skewed, a solder fillet that seems a bit too convex because you fed it extra wire out of sympathy. In Extreme Edition land, sympathy is how you get
solder bridges. When in doubt, wick it, flux it, and redo it cleanly. Rework is not failureit’s part of the craft.
Finally, the most underrated trick: set up your workspace so you’re not fighting your environment. Good lighting. A stable board holder. Tweezers that
don’t flex. A tip you can actually control. A small dish for passives so they don’t vanish. With the basics handled, your brain can focus on what matters:
placement, heat timing, and letting molten solder do what it naturally wants to doflow to clean metal. That’s the whole point. Extreme Edition isn’t about
being fearless. It’s about being repeatable.