
Table of Contents >> Show >> Hide
- Before You Start: Make Sure Your Wheels Are Actually Polishable
- Tools & Supplies Checklist
- How to Polish Aluminum Wheels in 13 Steps
- Step 1: Work on cool wheelsshade is your best friend
- Step 2: Decide whether to remove the wheel (optional, but easier)
- Step 3: Rinse thoroughly to remove loose grit
- Step 4: Clean with a wheel-safe cleanerspray, agitate, rinse
- Step 5: Decontaminate (optional, but huge for brake dust)
- Step 6: Dry completely and inspect under good light
- Step 7: Start with the least aggressive method (always)
- Step 8: Sand oxidation and scratches using a smart grit progression
- Step 9: Rewash to remove sanding slurry and residue
- Step 10: Compound buff (optional, but speeds up the mirror finish)
- Step 11: Apply metal polish correctly (small amount, steady work)
- Step 12: Final buff, detail the tight spots, and check your work
- Step 13: Protect the finish with a sealant (this is how you keep your weekends)
- Special Situations (So You Don’t Accidentally Fight the Wrong Boss)
- Common Mistakes That Kill Shine (and Morale)
- Maintenance: Keep Them Bright With Less Work
- FAQ
- Real-World “Been There” Notes (Extra of Experience)
- Conclusion
Aluminum wheels can go from “meh” to mirror-finish shinywithout selling a kidney or hiring a wizard. The trick is knowing what finish you actually have, cleaning like you mean it, and using abrasives in a smart, gradual way (not the “attack it with whatever’s in the garage” method).
This guide walks you through a proven, detailer-style processplus what to do if your wheels are clear-coated, anodized, oxidized, or just emotionally damaged by curb rash.
Before You Start: Make Sure Your Wheels Are Actually Polishable
Not all “aluminum-looking” wheels are bare aluminum. Many OEM wheels are painted and/or clear-coated. Polishing products that work beautifully on raw aluminum can do basically nothing on a coated surfaceexcept waste your Saturday and turn your towel into a science experiment.
Quick spot test (2 minutes)
- Choose a hidden spot (inside barrel or behind a spoke).
- Rub a dab of metal polish with a clean cloth.
- If the cloth turns dark gray/black: you’re likely working with bare/polished aluminum (good news).
- If nothing dark shows up: you probably have a coating (clear coat/paint/anodizing). In that case, skip aggressive polishing and focus on cleaning + protecting instead.
Also note: many metal polishes are not recommended for anodized, painted, or clear-coated aluminum. Translation: don’t assumetest first.
Tools & Supplies Checklist
Cleaning & prep
- pH-balanced wheel cleaner (or a dedicated wheel cleaner safe for your finish)
- Bucket, car-wash soap, and water
- Soft wheel brush + small detailing brush (lug nuts/spokes)
- Microfiber towels (severalpolishing eats towels for breakfast)
- Masking tape (to protect nearby painted surfaces if the wheel stays on the car)
Correction (for oxidation, scratches, curb rash)
- Wet/dry sandpaper: 400, 600, 800, 1000, 1500, 2000 grit (add 2500/3000 if you’re chasing a show finish)
- Sanding block or foam pad (helps keep pressure even)
- Spray bottle of water (a tiny drop of soap in the water helps the paper glide)
Polishing & protection
- Aluminum/metal polish
- Optional power assist: drill + polishing cone/ball or a small buffer
- Buffing compounds (optional but helpful for faster “mirror” results)
- Wheel sealant/wax/ceramic coating (to protect your hard work)
Safety gear (don’t skip)
- Nitrile gloves (polish turns your hands into a crime scene)
- Eye protection
- Dust mask/respirator if sanding (aluminum dust is not a snack)
How to Polish Aluminum Wheels in 13 Steps
-
Step 1: Work on cool wheelsshade is your best friend
Hot wheels make cleaners evaporate too fast and can cause spotting or streaking. Park in the shade, let the wheels cool, and do one wheel at a time. Your future self will thank you.
-
Step 2: Decide whether to remove the wheel (optional, but easier)
You can polish wheels on the car, but removing them makes it easier to reach the inner barrel and avoid getting polish on paint, brakes, and trim. If you keep them on, use masking tape around painted areas and be careful near brake components.
-
Step 3: Rinse thoroughly to remove loose grit
Rinsing is not “the boring part.” It’s the “prevent sanding a tiny rock into your wheel” part. Blast away loose dirt and brake dust before you touch the wheel with anything that scrubs.
-
Step 4: Clean with a wheel-safe cleanerspray, agitate, rinse
Spray your wheel cleaner generously, let it dwell briefly (don’t let it dry), then agitate with a soft brush. Hit lug nut pockets, around the valve stem, and the inner barrel. Rinse completely.
If the wheel is heavily contaminated, repeat. Polishing over embedded grime is like waxing over peanut butter: technically possible, spiritually incorrect.
-
Step 5: Decontaminate (optional, but huge for brake dust)
If you feel roughness after washing, you’re probably dealing with bonded contamination (metal particles, stubborn brake dust). Use a wheel-safe decontamination product as directed, then rinse well. This step improves your finish and reduces the chance of scratches during polishing.
-
Step 6: Dry completely and inspect under good light
Dry with a microfiber towel. Then inspect: oxidation looks like dull chalkiness; deeper damage shows as pits, etching, or curb rash. This inspection decides whether you can go straight to polish or need sanding first.
-
Step 7: Start with the least aggressive method (always)
If the wheel is only slightly dull, try metal polish first. If you’re dealing with heavy oxidation, scratches, or peeling/corroded areas, plan to sand. The goal is to remove defects with minimal material removalbecause the wheel is not an infinite resource.
-
Step 8: Sand oxidation and scratches using a smart grit progression
For most aluminum wheels with oxidation, a common starting point is 400 grit, then stepping up: 600 → 800 → 1000 → 1500 → 2000. For deeper scratches or curb rash, you may need to start lower (like 220–320), but only in the damaged area and only as long as needed.
- Wet-sand whenever possible to control dust and improve consistency.
- Use light-to-moderate pressure; let the abrasive do the work.
- Sand in one direction for a grit, then change direction slightly with the next grit so you can see your progress.
- Rinse the wheel (and your paper) between gritsold grit residue can re-scratch the surface.
Don’t rush this step. Polishing can’t “hide” sanding scratches. It only makes them shiny.
-
Step 9: Rewash to remove sanding slurry and residue
After sanding, wash and rinse again. Leftover sanding residue will clog polishing pads and cause hazing. Dry the wheel completely before moving on.
-
Step 10: Compound buff (optional, but speeds up the mirror finish)
If you’re chasing a true reflective finish, a cutting compound designed for metal can save a ton of time. Use a drill-mounted polishing cone/ball or a dedicated buffer at a controlled speed. Keep the tool moving and avoid lingering on edges and spoke corners (they heat up fast).
Work in small sections and wipe residue frequently. You’re looking for the surface to transition from “gray and cloudy” to “smooth and reflective.”
-
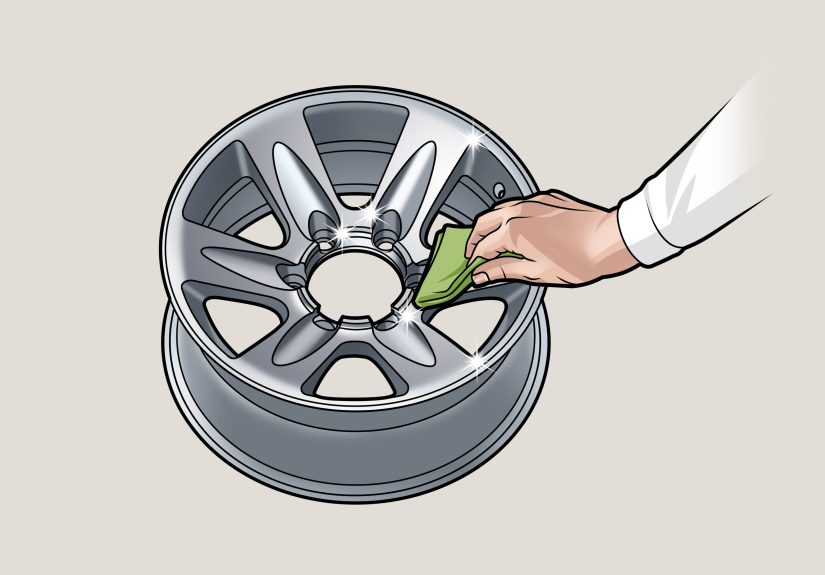
Step 11: Apply metal polish correctly (small amount, steady work)
Use a clean microfiber or cotton terry cloth. Apply a small amount of polish and work it across the metal. Many polishes will create a dark residue as oxidation liftsthis is normal on bare aluminum.
- Work a small section at a time.
- Keep rubbing until residue diminishes and shine increases.
- Don’t let polish dry hard on the surfacewipe and buff while manageable.
If you’re using power tools, use light pressure and short burstsyour goal is shine, not a wheel-shaped heat sink.
-
Step 12: Final buff, detail the tight spots, and check your work
Switch to a fresh towel and buff to a clean, crisp shine. Use a small detailing cloth or a soft tool for lug recesses and spoke edges. Inspect from multiple angles. If you see haze, you likely need either a finer polish step or more thorough buffing with a clean towel.
-
Step 13: Protect the finish with a sealant (this is how you keep your weekends)
Bare polished aluminum will oxidize againbecause oxygen is rude like that. A wheel sealant, wax, or ceramic coating helps keep brake dust from sticking and makes future cleaning much easier. Apply thin, let it set per the product instructions, then buff gently.
The result: less scrubbing, fewer harsh chemicals, and a lot more “Wow, those wheels look new.”
Special Situations (So You Don’t Accidentally Fight the Wrong Boss)
If your wheels are clear-coated
Clear-coated wheels should be treated more like painted surfaces: clean gently and protect with a sealant. If the clear coat is failing (peeling, cloudy corrosion underneath), polishing won’t permanently fix it. That’s usually a refinish job: stripping, correcting, and re-coating.
If your wheels are anodized
Anodizing is a hardened protective layer. Many metal polishes aren’t recommended for anodized aluminum, and trying to “polish through” it can look patchy fast. If your goal is a mirror finish, removing anodizing typically requires aggressive methods and can be risky and messyoften not worth it for daily drivers. Consider professional refinishing if you want a different finish.
If you have pitting or heavy corrosion
Polishing improves appearance, but deep pits may remain visible unless you remove significant material (which may not be wise). If the wheel has structural damage, cracks, or severe corrosion, safety comes firstget it inspected by a professional.
Common Mistakes That Kill Shine (and Morale)
- Skipping the spot test and polishing a coated wheel until you lose your will to live.
- Using one towel for everything (cleaning + polishing + final buff = guaranteed haze).
- Jumping grits (400 to 2000 sounds efficient… until you still see 400-grit scratches at the end).
- Letting product dry on the wheel, creating stubborn residue.
- Overheating edges with a drill/buffer and making the finish uneven.
- Not sealing afterward, then acting shocked when oxidation returns like a sequel you didn’t ask for.
Maintenance: Keep Them Bright With Less Work
- Rinse wheels during regular washes to remove brake dust early.
- Use a wheel-safe cleaner and soft brushesavoid abrasive pads on polished metal.
- Top up sealant periodically (especially if you drive in rain, snow, or salty conditions).
- Do light polishing as needed instead of waiting for full “gray wheel” mode.
FAQ
How long does polishing aluminum wheels take?
For lightly dull wheels, plan on 30–60 minutes per wheel. If you’re sanding heavy oxidation and chasing a mirror finish, it can take 1–3+ hours per wheel depending on condition, wheel design, and whether you use power tools.
Can I polish aluminum wheels by hand only?
Yes. Hand polishing works great for maintenance and mild oxidation. For severely oxidized wheels or a true mirror look, sanding and machine polishing save time and usually improve consistency.
Why does my towel turn black when polishing?
That dark residue is oxidation and microscopic metal being liftedcommon on bare aluminum. If you get no dark residue at all, your wheel may be coated (or you’re polishing something that’s not actually aluminum).
How do I avoid swirl marks?
Keep towels clean, switch to fresh towels often, work in small sections, and finish with a finer polish step. If you used power tools, reduce pressure and speed for finishing, and don’t buff dry.
Real-World “Been There” Notes (Extra of Experience)
People who polish aluminum wheels for the first time almost always have the same three moments: the optimism phase (“This will take 20 minutes!”), the mystery phase (“Why is everything turning black?”), and the victory phase (“I can see my reflection and also my poor life choicesbeautiful!”). That black residue is the big surprise. It looks alarming, but on bare aluminum it’s usually a sign the polish is doing its job by pulling oxidation and grime away from the surface. The trick is not to panic and not to keep using the same dirty section of cloth. Fold your towel, rotate to clean sides, and you’ll notice the finish sharpens up quickly.
Another common “first-timer” lesson: polish won’t fix texture. If the wheel feels rough, has water-spot etching, or looks cloudy from oxidation, metal polish alone can only do so much. That’s where sanding earns its keep. And yeswet sanding sounds terrifying the first time, like you’re about to ruin a perfectly good wheel with office supplies. But when you start with the right grit and move up gradually, the surface actually gets more uniform and more reflective. The key is patience: each grit should remove the scratches from the previous grit. If you skip that, you don’t get a mirroryou get a shiny version of the same scratches, which is basically the wheel equivalent of putting glitter on a problem.
Wheel design also changes the game. A simple open five-spoke wheel is like polishing a countertop. A complicated multi-spoke wheel with tight corners is like trying to detail a chandelier while wearing mittens. In those tight spots, small microfiber strips, soft polishing cones, and a calm attitude do more than brute force. Many DIYers discover that “good enough” on the inner barrel is a perfectly healthy life choiceespecially if the wheel is going right back behind a brake caliper that loves generating dust like it’s paid per particle.
And finally: protection is the difference between a weekend project and a lifestyle. If you polish bare aluminum and don’t seal it, oxidation will come backsometimes faster than expected, depending on climate and how often the car is driven. A sealant or coating makes the next wash dramatically easier because brake dust and road film don’t bond as aggressively. People who seal their wheels usually report the same happy outcome: quicker cleanups, less scrubbing, and fewer moments of staring at their wheels thinking, “Did I imagine that shine?”
The best “experienced” advice is simple: do one wheel start-to-finish before you commit to all four. That first wheel teaches you your ideal grit starting point, how fast your polish flashes, how many towels you burn through, and whether you want to involve power tools. Once you’ve got a rhythm, the other wheels go fasterand the final result looks more consistent. Plus, you get to end the day with wheels that look like they’re trying out for a car commercial. Not bad for a Saturday.
Conclusion
Polishing aluminum wheels is mostly a game of smart preparation: identify the finish, clean thoroughly, correct defects with a careful grit progression, then polish and protect. Do it right and you get a durable, mirror-like shine that’s easier to maintainnot a temporary glow-up that disappears after two rainy drives.


