
Table of Contents >> Show >> Hide
- Why Paint a Dining Table Instead of Replacing It?
- Before You Start: Decide If Your Table Is Worth Painting
- Supplies for a DIY Dining Table Makeover
- How to Paint a Dining Table: 9-Step Makeover Plan
- Step 1: Clear, disassemble, and protect your work area
- Step 2: Clean like you mean it
- Step 3: Repair damage before you paint
- Step 4: Sand the finish for better adhesion
- Step 5: Prime for durability
- Step 6: Choose the right paint for the look and wear level you want
- Step 7: Apply thin, even coats
- Step 8: Protect the tabletop if needed
- Step 9: Let the finish cure before real life attacks it
- Best Color Ideas for a Painted Dining Table Makeover
- Common Mistakes That Ruin a Dining Table Paint Job
- How to Keep Your Painted Dining Table Looking Good
- What the DIY Experience Really Feels Like
- Final Thoughts
- SEO Tags
A sad dining table has a special talent: it can make your whole dining room look like it gave up on itself sometime around 2014. The good news is that a painted dining table makeover is one of the most satisfying DIY projects you can tackle without needing a contractor, a workshop the size of a small airport, or a television crew yelling, “We only have one hour left!”
With the right prep, the right paint, and just enough patience to avoid touching the finish every six minutes, you can turn a scratched, orange-toned, glossy, outdated table into a clean, stylish centerpiece. Whether you want a modern black dining table, a soft white farmhouse look, a moody charcoal finish, or a two-tone painted wood design, this guide walks you through the process from start to finish.
This DIY dining table makeover article covers how to prep the surface, what paint works best, how to avoid brush marks, when to use primer, how to paint chairs and legs, and how to protect the tabletop so it stands up to family dinners, homework sessions, and that one friend who always puts down a sweating glass with zero coaster awareness.
Why Paint a Dining Table Instead of Replacing It?
Because furniture is expensive, solid wood is worth saving, and many older tables are sturdier than newer flat-pack options. Painting is also a smart way to update your space without changing everything else in the room. A fresh finish can make a heavy traditional table feel modern, make mismatched chairs look intentional, and help an old hand-me-down fit your style instead of haunting it.
A painted table makeover also gives you design flexibility. You can go crisp and classic with white, dramatic with black, calm with greige, or trendy with muted olive, navy, or mushroom. And if you are not ready to cover up the whole piece, you can paint the base and refinish only the top for a beautiful mixed-finish look.
Before You Start: Decide If Your Table Is Worth Painting
Not every table needs the exact same approach. Take five minutes to inspect what you are working with before opening a paint can like an overexcited raccoon.
Questions to ask first
- Is it solid wood, veneer, laminate, MDF, or a mix of materials?
- Is the current finish glossy, waxy, chipped, or peeling?
- Are there deep dents, scratches, water rings, or loose joints?
- Will the table get heavy daily use from kids, meals, crafts, or work-from-home life?
- Do you want a smooth modern finish, a farmhouse distress look, or a more vintage chalk-painted style?
If the table is structurally sound, painting is usually a great option. Tighten loose screws, glue wobbly joints, and fill dents before you paint. If the piece is extremely valuable or antique, consider whether painting will reduce its value. For everyday dining tables, though, a makeover is often the better choice than living with “meh” furniture for another five years.
Supplies for a DIY Dining Table Makeover
- Drop cloth
- Screwdriver for removing hardware or leaves
- Mild cleaner or degreaser
- Microfiber cloths or tack cloth
- Wood filler or paintable filler
- Putty knife
- Sandpaper in medium and fine grits
- Sanding sponge or orbital sander
- Bonding primer or stain-blocking primer
- Furniture paint, cabinet paint, enamel paint, or chalk-style paint
- High-quality angled brush
- Foam roller or microfiber mini roller
- Optional clear topcoat for extra tabletop protection
- Painter’s tape if needed
- Respirator or mask, especially for sanding
How to Paint a Dining Table: 9-Step Makeover Plan
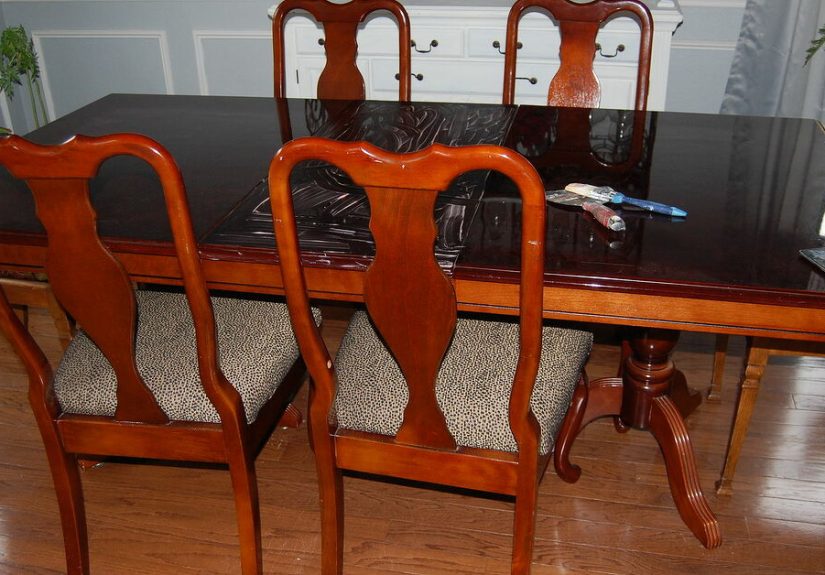
Step 1: Clear, disassemble, and protect your work area
Move the table to a well-ventilated space where you can work comfortably. Remove table leaves, unscrew detachable parts if possible, and take off any hardware. Put down a drop cloth and label any screws or pieces you remove. This step seems boring, but it saves you from painting yourself into a corner both literally and emotionally.
Step 2: Clean like you mean it
Paint does not stick well to grease, furniture polish, crumbs, body oils, or mystery stickiness. Clean the entire table thoroughly using a mild cleaner or degreaser. Pay extra attention to the tabletop edges, apron, and legs, where grime loves to hide. Then let everything dry completely.
This step matters more than people think. Many paint failures that get blamed on “bad paint” are really just “paint applied over ten years of spaghetti night.”
Step 3: Repair damage before you paint
Fill dents, chips, nail holes, and scratches with paintable wood filler. Once dry, sand those repairs smooth so they blend into the surrounding surface. If the table wobbles, fix that now. Paint will not distract from a tabletop that rocks like it is at a concert.
Step 4: Sand the finish for better adhesion
You usually do not need to strip the table completely to bare wood. In most cases, you only need to dull the existing finish so the primer and paint can grip. Sand the whole piece evenly, focusing on glossy areas. For curved legs or carved details, use a sanding sponge.
If your table is laminate, veneer, or very slick, be gentle. The goal is to scuff the finish, not chew through it. After sanding, remove all dust with a damp cloth or tack cloth and let the surface dry.
Important safety note: if you are working on a table or in a home with paint that may date to before 1978, do not casually sand away. Old coatings can create hazardous lead dust. In that case, use lead-safe practices and get expert guidance before disturbing the finish.
Step 5: Prime for durability
If you want a painted dining table makeover that actually lasts, primer is your friend. A good bonding primer helps paint stick to slick or previously finished surfaces and can block stains from bleeding through. Use a brush for corners and details, and a small roller for broad flat areas like the top.
Let the primer dry fully. If the surface feels rough after priming, sand lightly with a fine grit sanding sponge and wipe away the dust. This is the secret to that smoother, more professional finish that says, “I totally knew what I was doing,” even if halfway through you had primer on your elbow.
Step 6: Choose the right paint for the look and wear level you want
For most indoor dining tables, durable furniture paint, cabinet paint, or enamel paint is the best choice. These products are designed to level out nicely and hold up better to frequent contact. Satin and semigloss finishes are popular because they are easier to wipe clean and tend to be more forgiving than flat finishes.
Chalk-style paint can work too if you love a matte, vintage look, but it usually benefits from a protective finish and may not be the best choice for a heavily used tabletop unless sealed properly. If you want a sleek modern look, an enamel-style finish is often the better bet.
Step 7: Apply thin, even coats
Now for the fun part. Stir the paint well and start with a thin coat. Use a brush to cut in around edges, carvings, and joints, then roll large flat surfaces with a foam or microfiber roller. Work in manageable sections and keep a wet edge when possible so you do not create lap marks.
Do not try to get full coverage in one thick coat. Thick coats are the fast lane to drips, texture, tackiness, and regret. Two to three thin coats will almost always look better and last longer than one heavy one.
Allow the first coat to dry according to the paint label. Then sand lightly if needed, wipe off dust, and apply the next coat. Repeat until coverage looks rich, even, and smooth.
Step 8: Protect the tabletop if needed
The tabletop takes the hardest beating, so this is where durability really matters. Some furniture and cabinet paints are tough enough on their own once fully cured. Others benefit from a compatible clear protective topcoat, especially if your table sees daily meals, school projects, or regular wipe-downs.
If you choose a topcoat, make sure it works with your paint system. A clear polyurethane or polycrylic-style finish is often used for furniture protection, but always follow the product directions and test first if you are mixing brands. Apply thin coats and let them dry completely between applications.
Step 9: Let the finish cure before real life attacks it
This is the step people love to ignore and then blame on the universe. Dry is not the same as cured. A table may feel dry to the touch fairly quickly, but the finish often needs much longer to reach full hardness. During the cure period, use the table gently. Avoid dragging dishes, stacking heavy decor, or setting down hot or wet items directly on the surface.
If you can give the table a few days of light use and a couple of weeks of common sense, the finish will thank you by not peeling when someone slides a cereal bowl across it like a hockey puck.
Best Color Ideas for a Painted Dining Table Makeover
Classic white
White brightens the room and works beautifully in cottage, coastal, or farmhouse spaces. It also shows less dust than black but more spaghetti sauce than anyone would prefer.
Soft black or charcoal
A black dining table feels current, grounded, and a little dramatic in the best way. It pairs especially well with wood floors, brass lighting, and neutral walls.
Greige or warm taupe
If you want the table to feel elevated without shouting for attention, this is the sweet spot. It works with traditional and modern homes alike.
Two-tone makeover
Paint the base and preserve or restain the top. This is a great option if you love contrast and want a custom look. A black base with a medium wood top is especially timeless.
Muted color
Navy, sage, dusty blue, and olive all work well if you want personality without turning the dining room into a cartoon set. Keep the rest of the room simpler so the table gets its moment.
Common Mistakes That Ruin a Dining Table Paint Job
- Skipping the cleaning step
- Painting over wax, polish, or grease
- Not sanding glossy surfaces
- Using the wrong primer on slick finishes
- Applying paint too thickly
- Rushing dry time between coats
- Using the table too soon
- Ignoring dents, chips, or loose joints before painting
- Choosing a delicate finish for a high-traffic family table
If your goal is a smooth painted furniture finish, patience is doing at least half the work. The rest is surface prep and resisting the temptation to say, “Looks dry enough to me.” Those are famous last words in DIY.
How to Keep Your Painted Dining Table Looking Good
Once your DIY table makeover is finished, treat it kindly. Use placemats, coasters, and trivets. Clean spills promptly with a soft damp cloth. Avoid harsh abrasives, strong solvents, or aggressive scrubbing pads. If you need to decorate the table, lift objects rather than dragging them. Tiny habits make a huge difference in how long the finish stays beautiful.
Also, remember that every painted table develops a little life story. A tiny scuff here or there is not always failure. Sometimes it is character. Sometimes it is your nephew with a toy truck. Either way, minor wear is easier to touch up on a well-prepped painted table than on one that was rushed from start to finish.
What the DIY Experience Really Feels Like
Let’s talk about the real experience of painting a dining table, because the internet often makes it seem like you will wave a brush twice, laugh in perfect lighting, and suddenly own a magazine-worthy room. In reality, a dining table makeover is part skill, part patience, and part emotional growth. Mostly the patience part.
The first surprise for many DIYers is how much prep affects the outcome. Painting itself is actually the easy stage. The cleaning, sanding, wiping, priming, and waiting are what separate a pretty result from a table that starts chipping after the first enthusiastic taco night. Most people who have a good experience with a painted table say the same thing in different words: the prep felt like a lot, but it made everything else easier.
The second surprise is how quickly an ugly table can start looking promising. There is a magical point right after primer when the mismatched finish, water rings, scratches, and orange wood tones all disappear into one clean, unified surface. That moment feels like the furniture equivalent of a fresh haircut. You start thinking, “Wait, is this actually going to look good?” Yes. Yes, it is.
Then comes the awkward middle stage. The first coat of paint rarely looks amazing. It can be streaky. It can look thin. It can make you question your life choices and your color selection. This is normal. The second coat is usually where confidence returns. The third, if needed, is where the table starts looking deliberate, polished, and expensive enough that you begin mentally accepting compliments from guests who have not even seen it yet.
Another common experience is learning that table tops are drama queens. Legs and aprons often paint beautifully and quietly mind their business. Tabletops, meanwhile, reveal every brush mark, every dust nib, and every moment of impatience. That is why thin coats, a quality roller, and light sanding between coats matter so much. It is also why many DIYers say the tabletop alone taught them more than the rest of the project combined.
There is also the emotional challenge of cure time. You finish the table, it looks great, and suddenly you are expected to not use it like a normal table. This is rude, but necessary. During those first several days, you become weirdly protective. You place items down as if the table is made of spun sugar. You hover when other people come near it. You become the kind of person who says, “Please use a coaster,” with the intensity of a museum guard. This phase passes, and the finish gets tougher.
What makes the project worth it is not just the money saved. It is the shift in how the room feels afterward. A freshly painted dining table can make the entire space look cleaner, brighter, newer, and more intentional. It can help old chairs make sense. It can connect the room to your wall color, your rug, or your cabinets. And perhaps most satisfying of all, it turns a piece you were tired of into something you are proud to say you transformed yourself.
So if you are on the fence, here is the honest version: yes, it takes effort. Yes, there will be sanding dust in places that seem scientifically impossible. Yes, you may stare at drying paint like it is a reality show finale. But if you go step by step, use the right products, and let the finish cure properly, a DIY dining table makeover is one of the best weekend projects for changing the look of your home without replacing the furniture you already own.
Final Thoughts
If you have been wondering how to paint a dining table for a DIY makeover, the answer is simple but not sloppy: clean thoroughly, repair damage, sand for grip, prime smartly, paint in thin coats, and let the finish cure. That combination gives you the best shot at a dining table that looks custom instead of crafty.
The beauty of this project is that it works for almost any style. Farmhouse, modern, vintage, classic, minimalist, moody, cheerful, elegant, or somewhere in the very real category of “whatever looks better than this scratched-up brown finish” all become possible once you pick up a brush. A dining table is the heart of a lot of homes. Giving it a fresh look is not just cosmetic. It changes how the whole room feels and how the space gets used.
In other words, your old table may not be done yet. It might just be waiting for primer.


