
Table of Contents >> Show >> Hide
- Why Jeans Get Tight at the Waist in the First Place
- Before You Alter Anything: The 5-Minute Fit Audit
- No-Sew Methods to Make the Waist Bigger
- Permanent Alterations That Actually Last
- How Much Bigger Can You Make the Waist?
- Video Walkthrough: “How to Make the Waist Bigger on Jeans”
- Common Mistakes to Avoid
- Aftercare So the Waist Stays Comfortable
- FAQ
- Experience Section (500+ Words): Real-World Waist-Fix Stories, Lessons, and What Actually Worked
- Conclusion
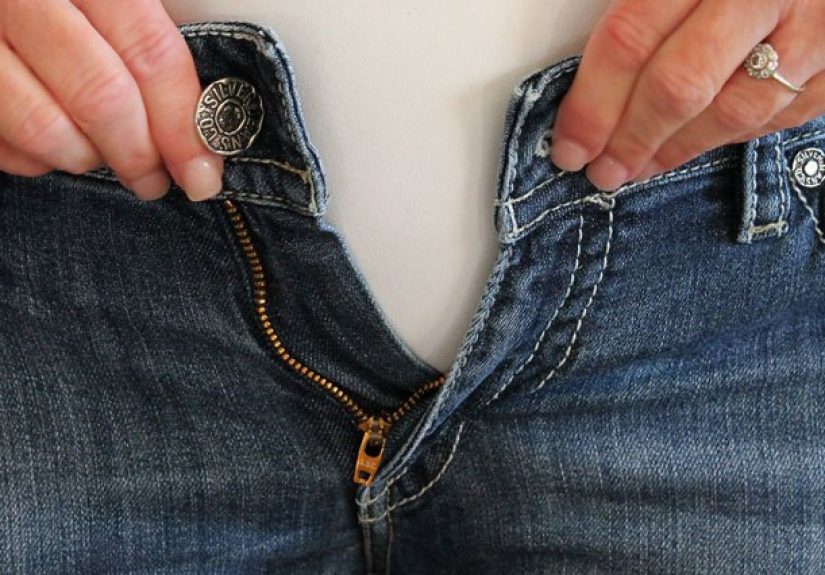
You know that moment when your jeans fit perfectly everywhere…except the waist, where they feel like a firm handshake from a robot?
Good news: you do not need to retire great denim just because the waistband got too snug. Whether your jeans shrank in the wash,
your body changed (totally normal), or the fit was “aspirational” when you bought them, there are practical ways to make the waist bigger.
In this guide, you’ll get both quick no-sew fixes and cleaner permanent alterations, plus a full video script you can film or follow step-by-step.
We’ll cover what works, what backfires, and how to avoid turning your favorite pair into a denim science experiment.
If you only remember one line from this whole article, make it this: stretch first, sew second, and heat last.
That order saves fabric, time, and your sanity.
Why Jeans Get Tight at the Waist in the First Place
Waistband problems usually happen for one (or more) of these reasons:
- Heat shrinkage: Hot washes and high-heat dryers can tighten cotton fibers.
- Elastane fatigue: Stretch denim can lose recovery over time, then fit unpredictably after washing.
- Fit mismatch: Hips and thighs may fit while the waistband runs small for your body shape.
- Construction limits: Some jeans have very little seam allowance, so let-out potential is limited.
- Timing: Denim often feels tight right out of the wash and relaxes with wear.
Translation: your jeans are not “bad,” and you’re not doing anything wrong. Denim is a structured fabric with opinions.
Before You Alter Anything: The 5-Minute Fit Audit
Step 1: Measure your current waist fit
Put the jeans on, button them if possible, and note how much extra room you need to breathe, sit, and bend comfortably.
Most people need between 0.5 and 2 inches of additional waist ease.
Step 2: Check fiber content
Look at the care label. A 100% cotton jean behaves differently from a cotton/poly/elastane blend.
Higher stretch content usually responds well to gentle damp stretching but can dislike aggressive heat.
Step 3: Inspect seam allowance
Turn the jeans inside out and inspect the center-back seam and side seams near the waistband.
If there’s extra seam allowance, you may be able to let them out cleanly. If there isn’t, use a gusset method instead.
Step 4: Decide your goal
- Need +0.5 to +1 inch: try no-sew methods first.
- Need +1 to +2 inches: center-back let-out or side-gusset alteration.
- Need +2 inches or more: gussets, partial waistband rebuild, or tailor intervention.
No-Sew Methods to Make the Waist Bigger
These are your “I need this pair tonight” solutions. They’re quick, reversible, and surprisingly effective.
Method 1: Button Extender (Fastest Fix)
A button extender loops onto your existing button and gives instant waistband relief without cutting or stitching.
It’s ideal for short-term comfort, travel days, or in-between sizing.
- Attach extender loop to jean button.
- Hook extender button through the buttonhole.
- Zip up and test sitting/standing comfort.
Expected gain: about 0.5 to 1.5 inches depending on extender style.
Method 2: Warm-Damp Stretch + Wear Dry
Mist the waistband (inside and outside) with lukewarm water until dampnot soakedthen gently pull and wear until nearly dry.
The fabric relaxes as it dries on your body shape.
- Lay jeans flat and spray waistband front/back.
- Use both hands to stretch evenly in small sections.
- Put jeans on and move (squat, sit, walk) for 10–20 minutes.
- Air dry fully before storing.
Expected gain: 0.5 to 1 inch on many denim blends.
Method 3: Waistband Stretcher Tool
If you alter jeans often, this tool is worth it. It expands the waist under controlled tension and gives more consistent results than hand-pulling.
- Dampen waistband with warm water.
- Insert stretcher and expand gradually.
- Leave overnight to set.
Expected gain: often 1 inch, sometimes a bit more depending on fabric and construction.
Method 4: The Elastic Hair-Tie Emergency Hack
If your jeans close but feel tight at the top, loop a sturdy hair tie through the buttonhole, hook it around the button, then zip partially or layer with a longer top.
Is it glamorous? Not particularly. Is it useful during a long dinner? Absolutely.
Expected gain: 0.5 to 1 inch temporary relief.
Permanent Alterations That Actually Last
If you want repeatable comfort after every wash, this is the move.
Option A: Let Out the Center-Back Waist (Best for Small Adjustments)
This is the cleanest alteration for +1 to +2 inches if you have enough seam allowance.
- Remove the center-back belt loop.
- Open waistband stitching near center back.
- Release center-back seam to desired width.
- Re-stitch seam with smooth transition to original line.
- Close waistband and reinstall belt loop.
- Press thoroughly for a factory-like finish.
Pro tip: Mark your new seam with tailor’s chalk before sewing. “Eyeballing it” is how jeans become abstract art.
Option B: Add Side Waist Gussets (Best for Bigger Increases)
If you need more room than seam allowance allows, insert triangular or curved gussets at one or both sides of the waistband.
- Open side waistband sections and side seams.
- Cut matching denim inserts (or contrasting fabric for style).
- Sew inserts into side openings.
- Topstitch to blend with existing construction.
Expected gain: 1.5 to 4 inches depending on gusset size.
Option C: Convert to a Comfort-Back Waistband
This is a hybrid method: keep the front classic and add hidden elastic to the back waistband.
Great for fluctuating body size, long sitting days, and jeans you wear constantly.
- Open interior back waistband channel.
- Insert non-roll elastic cut to comfort length.
- Anchor both ends securely with bartacks.
- Close seam and steam-press.
Expected gain: variable comfort expansion with minimal visible change.
How Much Bigger Can You Make the Waist?
| Method | Typical Waist Increase | Skill Level | Permanent? |
|---|---|---|---|
| Button extender | 0.5″–1.5″ | Beginner | No |
| Warm-damp stretch | 0.5″–1″ | Beginner | Semi |
| Waistband stretcher tool | Up to ~1″+ | Beginner | Semi |
| Center-back let-out | 1″–2″ | Intermediate | Yes |
| Side gussets | 1.5″–4″ | Intermediate/Advanced | Yes |
| Comfort-back elastic | Flexible fit range | Intermediate | Yes |
Video Walkthrough: “How to Make the Waist Bigger on Jeans”
Estimated runtime: 5 minutes
Shot List + Voiceover Script
-
Hook (0:00–0:15): Show jeans that almost button.
Voiceover: “If your jeans fit everywhere except the waist, don’t panichere are fast and permanent ways to fix that.” -
Tools (0:15–0:40): Spray bottle, extender, seam ripper, chalk, denim needle, matching thread.
Voiceover: “Pick your method based on how much room you need: half an inch, one inch, or a full resize.” -
No-Sew Fix #1 (0:40–1:20): Demonstrate button extender.
Voiceover: “For instant comfort, use a button extender. It’s the fastest option and fully reversible.” -
No-Sew Fix #2 (1:20–2:00): Mist and stretch waistband.
Voiceover: “Dampen, stretch evenly, and wear until almost dry. This helps the waistband relax to your shape.” -
Permanent Fix (2:00–3:40): Center-back seam let-out.
Voiceover: “Remove the back loop, open the waistband, release seam allowance, re-stitch, press, and reattach.” -
Big Resize (3:40–4:30): Side-gusset insertion preview.
Voiceover: “If seam allowance is limited, add side gussets for serious extra room.” -
Aftercare (4:30–5:00): Air dry and low-heat care tips.
Voiceover: “Keep the new fit by washing cold and skipping high heat.”
Bonus filming tip: use close-up shots for seam lines and stitch pathsviewers stay longer when they can actually see what your needle is doing.
Common Mistakes to Avoid
- Using high heat to “help stretch”: heat often shrinks denim instead.
- Pulling only one point: causes distortion and odd puckers.
- Skipping pre-wash before permanent alteration: fit can change after first laundry cycle.
- Wrong needle choice: standard needles may skip stitches on thick denim seams.
- Over-stretching belt loop area: can warp the back rise.
Aftercare So the Waist Stays Comfortable
- Wash in cool/cold water on gentle settings.
- Turn jeans inside out before washing.
- Avoid high-heat drying; line dry when possible.
- Follow the garment’s care label instructions.
- Re-stretch lightly while damp if needed after laundering.
Think of it like training a great pair of jeans: gentle cycles, low drama, excellent long-term results.
FAQ
Can I make jeans bigger without sewing?
Yes. Start with a button extender, damp-stretch method, or waistband stretcher. These are the easiest beginner options.
How much can jeans stretch at the waist naturally?
It depends on fabric content and construction, but many pairs can relax around 0.5 to 1 inch with controlled methods.
Will hot water make jeans bigger?
Usually the opposite. Hot water and high heat commonly increase shrinkage risk, especially in cotton-rich denim.
Can a tailor make the waist bigger on jeans?
Yes. Tailors can let out center-back seams or add gussets, depending on seam allowance and design.
Is it worth altering cheap jeans?
If the fit and wash are perfect otherwise, yes. But compare alteration cost with replacement cost first.
Do stretch jeans alter differently than rigid denim?
Absolutely. Stretch blends respond faster to damp stretching, while rigid denim may need more structural alteration.
Experience Section (500+ Words): Real-World Waist-Fix Stories, Lessons, and What Actually Worked
The most useful denim advice rarely comes from theoryit comes from real people trying to sit through dinner in jeans that suddenly became “decorative only.”
Over time, I’ve collected recurring patterns from home sewists, everyday wearers, and alteration pros. The details change, but the outcomes are surprisingly consistent.
Experience 1: The “I Need This by Tonight” Dinner Save
One wearer had a favorite dark-wash pair that fit fine through the legs but pinched at the waist after a laundry cycle. She had no sewing machine, no tailor appointment, and exactly 45 minutes before leaving.
The solution was a simple two-step combo: a button extender for immediate room, then a warm-damp stretch while wearing the jeans at home. The extender solved the pressure point instantly; the damp stretch softened the waistband so the jeans felt less rigid.
She paired it with a tucked-in blouse and said no one noticed anything unusual. The key takeaway: temporary solutions aren’t “cheating”they’re practical engineering. Not every jeans problem needs a seam ripper at 6:30 p.m.
Experience 2: The Gym Return + Waist Mismatch Problem
Another person returned to strength training and found that old jeans fit great at the thighs but not at the waist. Rebuying an entire denim wardrobe felt expensive and wasteful.
They tested no-sew methods for two weeks and got modest improvement, but comfort still disappeared after washes. A center-back let-out alteration finally solved it: the waistband gained just over an inch, and the fit looked original after pressing and topstitching.
What stood out was emotional, not technical: this was less about “fixing jeans” and more about keeping clothes aligned with a changing body without turning getting dressed into a daily argument.
Experience 3: The Gusset Upgrade That Became a Style Feature
One advanced DIY sewist needed close to 3 inches of extra room and knew center-back let-out alone wouldn’t do it. Instead of hiding the fix, she used matching-but-visible side gussets with subtle contrast topstitching.
The result looked intentional, like a custom detail rather than a repair. She also added a tiny bit of ease in the side seam transition so sitting was comfortable without tugging at the zipper.
Her biggest lesson: if you need substantial expansion, stop fighting physics. Gussets are not a last resortthey’re often the cleanest route to both comfort and longevity.
Experience 4: The “I Ruined Them Once” Recovery Story
A beginner tried to “stretch” jeans using very hot water and aggressive dryer heat, which made the waist tighter. On attempt two, they switched strategies: cold wash maintenance, damp waistband stretch, and low-heat drying only when necessary.
They also learned to pre-wash before making permanent alterations, so sizing stayed stable. Eventually they performed a conservative center-back adjustment and practiced on thrifted denim first.
The confidence shift was huge: once you understand that denim responds to moisture, tension, and heat in predictable ways, you stop guessing and start getting repeatable results.
Experience 5: The Office Chair Test
A remote worker had a specific requirement: jeans must pass the “four-hour desk sit” test. Standing fit was okay, seated fit was not. They adopted a comfort-back waistband conversion with hidden elastic in the rear section only.
From the front, the jeans still looked classic. From a comfort perspective, they were transformedno digging, no unbutton-at-lunch routine, no waistband marks.
This case is a reminder that fit is activity-dependent. If your day includes commuting, sitting, bending, and real life, your jeans should be built for movement, not just mirror photos.
Across all these experiences, the same three rules keep showing up: first, match method to how much extra room you need; second, protect your results with low-heat care; third, treat denim alterations like small design decisions, not emergency fixes.
When you do that, your jeans stop being “almost right” and start feeling like they were made for you.
Conclusion
Making the waist bigger on jeans is one of the highest-value clothing fixes you can learn. Quick no-sew methods buy you comfort today, while thoughtful alterations deliver a long-term custom fit.
If you need just a little breathing room, start simple. If you need serious extra space, go with structured sewing methods and don’t be afraid of gussets or comfort-back solutions.
Your favorite jeans are probably much more salvageable than you think.


