
Table of Contents >> Show >> Hide
- Table of Contents
- Know Your Tank: Parts That Make It Look Legit
- Supplies (and Why They Matter)
- Clean Folds 101: The Secret Sauce
- Method 1: No-Glue Fold-and-Tuck Paper Tank (Beginner Friendly)
- Method 2: Rolled-Paper Tank with Tough Tracks (Sturdy + Customizable)
- Method 3: Printable 3D Paper Tank Template (Sharpest Details)
- Make It “Army”: Camouflage, Markings, and Details
- Troubleshooting (When It Looks Like a Sad Burrito)
- Quick Fun Fact: Why It’s Called a “Tank”
- Wrap-Up: Pick Your Build, Then Start a Paper Motor Pool
- Craft Table Field Notes (500+ Words of Real-Life Vibes)
- SEO Tags (JSON)
Want a tiny “armored vehicle” you can build on your kitchen table, deploy across your desk, and proudly
refuse to pick up when someone says, “Are you done crafting?” Meet the paper army tank: part origami,
part papercraft, and 100% proof that a single sheet of paper can become a surprisingly convincing little
menace (the adorable kind).
In this guide, you’ll learn three solid ways to make a paper tank:
a no-glue fold-and-tuck build, a rolled-paper build with sturdy tracks, and a printable cut-and-fold build
for crisp details. Pick the style that matches your patience level, your available tools, and whether you
consider “precision” a lifestyle or a rumor.
Know Your Tank: Parts That Make It Look Legit
A paper tank doesn’t need to be historically accurate to look convincing. It just needs the visual “signals”
our brains associate with tanks. Aim for these:
- Hull (body): the main boxy shape that everything sits on.
- Tracks: strips or folded edges along both sides that suggest movement and weight.
- Turret: a smaller top piece that reads as “rotates to aim” (even if it doesn’t).
- Cannon: a rolled tube or folded flap that says “tank” instantly.
- Details: hatches, panels, stars/stripes, numbers, or simple camo lines.
Supplies (and Why They Matter)
Paper options
- Printer paper (8.5×11): easiest to find, good for folding and rolling.
- Construction paper: great for color/camo, but can be softer and harder to keep crisp.
- Light cardstock: best for the printable template methodstrong, sharp edges.
- Two-tone paper: adds instant “tracks vs. hull” contrast if you fold it strategically.
Tools
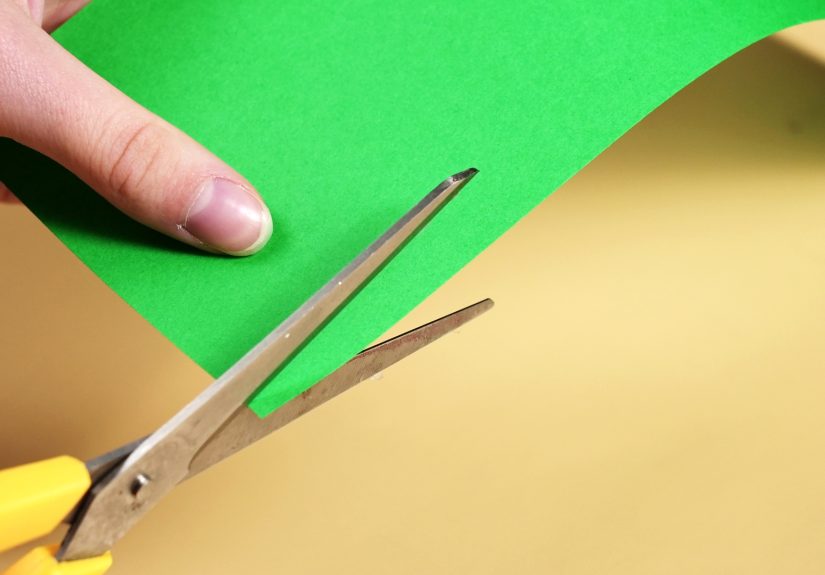
- Scissors (or safety scissors for kids): for cutting strips and templates.
- Ruler: for straight edges, measuring, and helping folds stay honest.
- Bone folder (optional but magical): for crisp folds without tearing.
- Pencil + eraser: light guidelines, panel lines, and placement marks.
- Markers/colored pencils: for camouflage, markings, and “weathering.”
Adhesives
- Glue stick: quick, clean, great for templates and large surfaces.
- White liquid glue: stronger bond, better for tubes/tracksuse sparingly.
- Tape: fast and forgiving, especially inside the model where it won’t show.
Clean Folds 101: The Secret Sauce
A paper tank lives or dies by its creases. The difference between “wow, nice” and “is that… a crumpled taco?”
is usually fold quality.
Use light scoring for crisp edges
If you’re folding thicker paper (like cardstock), lightly score the fold line first using a ruler and a dull tool
(or a bone folder) before you fold. Scoring helps the fold land exactly where you want it and look sharp.
If you don’t have a bone folder, the back of a spoon can do decent work in a pinch.
Crease like you mean it (but don’t shred the paper)
Align edges carefully, then press the fold from the center outward. A crisp fold technique (measuring and
lining up the fold path first) can make even cheap paper look professional.
Origami vocabulary, in plain English
- Valley fold: fold toward you so the paper makes a “V” shape.
- Mountain fold: fold away from you so the paper peaks like a mountain.
- Squash fold: open a pocket and flatten it into a new shape (common in tank-like models).
Kid-friendly safety note
If kids are helping, use safety scissors designed to cut paper safely, and keep sharp craft blades for adults only.
(Also: paper cuts are tiny but dramatic. Respect the paper.)
Method 1: No-Glue Fold-and-Tuck Paper Tank (Beginner Friendly)
This method is a “folded illusion” tank: you create a sturdy hull and folded track edges, then add a turret and
cannon using tucks. It’s not strict museum origamiit’s a practical desk tank that looks great and survives
being pushed across a table like it’s auditioning for an action movie.
What you’ll need
- 1 sheet of printer paper
- Optional: 1 small square (sticky note) for the turret
- Markers for details
Step-by-step
-
Make a long rectangle: Fold your sheet in half lengthwise (“hot dog style”) and crease well,
then unfold. -
Create a center guideline: Fold each long edge in toward the center crease you just made,
then unfold. You now have reference lines for clean symmetry. -
Form the hull base: Fold the paper in half widthwise (“hamburger style”) and crease.
Open it back upthis midpoint is your hull center. -
Build the front slope: Take the two top corners and fold them inward to meet at the center line,
creating a triangle “nose.” -
Lock the slope: Fold the top triangle point down slightly to create a small flap. This flap will
help hold the shape later. -
Create track edges: Fold each long side inward along your earlier guidelines to create raised
“track” bands. Keep both sides the same width. -
Box the hull: Fold the bottom portion upward to form a thicker body. You’re aiming for a low,
rectangular profile with visible track strips on both sides. -
Tuck and tighten: Use any small flaps you created to tuck into pockets so the hull holds without
glue. Press creases again to stiffen the shape. -
Turret (easy version): Fold a sticky note into a small rectangle, then fold the corners slightly
to soften it into a “rounded” turret look. Set it on top. -
Turret (tucked version): If your hull has a pocket at the top, slide the turret flap into it so
it stays put. -
Cannon: Roll a thin strip (torn or cut from scrap) into a tight tube. Tuck it under the turret
fold or tape it on the inside where it won’t show. -
Detail pass: Draw track segments (short rectangles), a hatch circle on the turret, and a number
on the hull side. Instant upgrade.
Pro tip: If the hull feels floppy, gently compress it from the top and sides while reinforcing creases.
Paper gets stronger when folds “stack” into layers.
Method 2: Rolled-Paper Tank with Tough Tracks (Sturdy + Customizable)
If you want a tank that feels more like a tiny model (and less like a clever fold), this is your build.
You’ll make a boxy hull, looped tracks, and a turret that can rotate if you add a simple paper “pin.”
What you’ll need
- 1–2 sheets of printer paper (or cardstock for extra durability)
- Glue stick or white glue
- Scissors, ruler
- Marker or colored paper for camo
Step-by-step
-
Build the hull box: Cut a rectangle about 7″ x 4″. Fold it into a long box shape:
score four panels (top, side, bottom, side) plus a glue tab. Glue the tab inside to form a rectangular tube. -
Close the ends: Cut two rectangles to cap the hull ends. Glue them on. If you want a sloped front,
trim the front cap into a trapezoid and angle it. -
Make track “rails”: Cut two long strips (about 9″ x 1″). Fold each strip lengthwise into a shallow
channel shape (like a squared-off “U”). Glue one along each side of the hull. -
Make the tracks: Cut two more strips (about 11″ x 1″). Wrap each strip around a finger to pre-curve,
then form a loop. Glue the ends together to make a track belt. -
Mount the tracks: Slide each loop over the hull so it sits around the side rails. If it’s loose,
add a tiny paper spacer inside the loop to tighten it. -
Add road wheels (optional, but cool): Punch or cut small circles and glue them along the track sides.
Even 4–6 circles per side sells the look. - Make a turret: Fold a small box (about 2″ x 2″ x 1″) or roll a short wide tube. Glue it.
-
Make the cannon: Roll a tight tube from a thin strip. Glue the seam lightly. Attach it to the turret
front with glue or tape from the inside. -
Optional rotating turret: Poke a small hole through the turret bottom and hull top. Use a paper fastener,
or a rolled-paper “pin” (a tiny tight tube) to connect them loosely so it can turn. - Reinforce key spots: Add a dab of glue inside corners. Let it dry fully before “driving” it.
Why this method rocks: You can scale it up, add more layers for armor plating, or redesign the turret
without rebuilding the entire tank.
Method 3: Printable 3D Paper Tank Template (Sharpest Details)
If you want the cleanest silhouette and that “model kit” vibe, use a printable template. Many templates use
tabs that fold inward and get glued to neighboring facesthis is how lots of paper models hold their shape.
You print, cut, fold, glue, and suddenly you feel like you should be paid in tiny medals.
What you’ll need
- Printable tank template (best on light cardstock)
- Scissors (or craft knife for adults)
- Glue stick or white glue
- Ruler + bone folder (optional) for crisp folds
Step-by-step
-
Print smart: Use “actual size” (not “fit to page”) if the template is designed for a specific scale.
Cardstock makes the model sturdier and less wrinkly. -
Pre-score fold lines: Before cutting everything out, lightly score along fold lines with a ruler and
dull tool. This prevents tearing and helps folds land exactly where intended. -
Cut cleanly: Cut on the outer lines. Go slow on corners; sharp corners make the finished model look
way more professional. -
Fold all tabs first: Fold tabs inward and crease them. This is boring, but it’s the boring that
makes the final build not look like a paper accident. -
Dry-fit the main hull: Without glue, fold the hull into shape and check alignment. If something
overlaps strangely, re-crease before committing. -
Glue in stages: Glue one face at a time. Hold for a few seconds, then move to the next. For liquid glue,
use tiny amountspaper warps when it gets too wet. - Assemble turret last: Turrets are smaller and easier once the hull is solid. Add the cannon tube at the end.
- Final press: Once dry, press edges gently with a bone folder or spoon to sharpen corners.
Time estimate: 20–40 minutes, depending on complexity and whether you stop to admire your work every 90 seconds
(which is scientifically unavoidable).
Make It “Army”: Camouflage, Markings, and Details
This is where your paper tank goes from “craft” to “mini masterpiece.” Try these upgrades:
Easy camouflage that doesn’t look messy
- Two-tone panels: Glue darker paper rectangles onto the hull sides like armor plates.
- Marker camo: Use 2–3 shades. Draw blob shapes, then outline lightly so it looks intentional.
- Dry-brush effect: Lightly drag a colored pencil sideways along edges to fake wear.
Markings that instantly sell the look
- Unit numbers: “01,” “07,” “23,” or your birthday (no judgment).
- Stars/stripes (or simple geometric symbols) on the turret sides.
- Panel lines: Thin ruler-straight lines suggest hatches and maintenance panels.
Make tracks look mechanical
On the track strips, draw repeating rectangles or chevrons. Consistency matters more than artistry here.
Even simple repeating marks read as “track segments.”
Troubleshooting (When It Looks Like a Sad Burrito)
-
Problem: Folds won’t stay crisp.
Fix: Score first (especially on thicker paper), and crease from center outward. Reinforce with a bone folder. -
Problem: Paper is warping from glue.
Fix: Use less liquid glue, switch to a glue stick for wide surfaces, and press flat while drying. -
Problem: Tracks look uneven.
Fix: Measure strip widths with a ruler. Pre-curve strips around a marker before forming loops. -
Problem: Turret keeps sliding off.
Fix: Add a small paper “ring” (a thin glued strip) on the hull top as a turret seat, or use a hidden tape loop. -
Problem: Cannon droops like it’s tired.
Fix: Roll tighter, glue the seam, and insert a short inner tube as a sleeve for stiffness.
Quick Fun Fact: Why It’s Called a “Tank”
The word “tank” didn’t start as a cool armored-vehicle name. Early on, “tank” was used as a secrecy-friendly label
essentially a code namebefore it stuck as the everyday term. It’s the rare case where a boring word accidentally becomes iconic.
Wrap-Up: Pick Your Build, Then Start a Paper Motor Pool
If you want fast and satisfying, go with Method 1 (fold-and-tuck). If you want sturdy and customizable,
go with Method 2 (rolled-paper build). If you want sharp lines and “model kit energy,” go with
Method 3 (printable template).
And remember: the real victory isn’t perfection. It’s getting to the end, placing your finished paper army tank on the table,
and declaring, “Behold. My tiny fleet.”
Craft Table Field Notes (500+ Words of Real-Life Vibes)
Let’s talk about the part no one mentions in neat little “Step 1, Step 2” craft lists: the emotional journey of making a paper tank.
Not the dramatic kind with violinsmore like the kind where you whisper, “Why are you like this?” to a piece of stationery.
First, there’s the confidence phase. You start with a flat sheet of paper and a belief that your hands are basically 3D printers.
You make the first fold and think, “Wow. I’m a natural.” Then fold number three happens, and suddenly you’re holding something that
looks less like a tank and more like a modern art sculpture titled “Regret in Beige.” Totally normal.
The second phase is the “crease enlightenment.” At some point you realize your tank isn’t failing because you lack talent;
it’s failing because your folds are a little off. When folds drift by even a few millimeters, paper models amplify that error
like it’s trying to teach you a life lesson. This is usually when people discover the power of slowing down, aligning edges,
and pressing creases intentionally. It’s boring for ten seconds, and then suddenly the whole build feels easier.
Then comes the track drama. Tracks are the fashion accessories of tanks: if they’re lopsided, everyone notices.
The most common “aha” moment is realizing that tracks don’t need to be complicatedjust consistent. A simple repeating pattern
(little rectangles, short slanted lines, tiny chevrons) creates the illusion of mechanical detail. It’s the crafting equivalent of
wearing clean sneakers: not fancy, just instantly more put-together.
Turrets are where personalities show up. Some people go minimalist: a clean little box on top and a tiny cannon. Others go full
creative director: extra armor plates, a hatch, a periscope, maybe a paper flag because the tank is now attending a parade.
This is the fun part, because details are forgiving. If your hull is slightly imperfect, good detailing distracts the eye and makes the
whole tank feel “designed,” not “accidental.”
One of the best experiences people report is building a second tank immediately after the firstbecause the second one is always better.
The first tank teaches your hands what your brain can’t fully explain. By the time you start tank #2, you fold with more confidence,
you anticipate where the paper wants to curve, and you stop over-gluing because you’ve learned that paper + too much glue =
“wet cardboard sadness.”
And finally: the desk test. You set the tank down and gently push it forward. If it slides smoothly, you feel like an engineer.
If it catches on a glue blob underneath, you feel like a mechanic. Either way, you learned somethingand you now own a tiny paper tank
that sparks the same reaction from almost everyone: they pick it up, turn it around, and say, “Wait… you made this out of paper?”
That moment is basically the whole point.


