
Table of Contents >> Show >> Hide
- What Makes the Costume Instantly Recognizable
- Materials You’ll Need
- Method 1: Make a No-Sew Disney’s Pocahontas Costume
- Method 2: Sew a More Polished Version
- How to Make the Accessories
- How to Keep the Costume Respectful
- Budget-Friendly Ways to Pull It Off
- Common Mistakes to Avoid
- What the Experience Is Really Like
- Final Thoughts
Note: This guide is for a Disney-movie-inspired costume, not a generic “Native costume.” Keep it respectful: skip skin darkening, faux “tribal” face paint, and sacred-looking headdresses. Your goal is recognizable Disney style, not a stereotype.
Some costumes require a fog machine, a glue gun, three emotional support spreadsheets, and a miracle. A Disney’s Pocahontas costume is not one of them. The look is simple, recognizable, and surprisingly friendly to beginners. At its core, you need a warm tan dress or tunic, soft fringe, a turquoise-style necklace, flat sandals or boots, and hair that looks like it has been blessed by dramatic wind and a movie soundtrack.
The best part is that you can make this costume on almost any budget. You can thrift the base, go fully no-sew, or break out your sewing machine and get a cleaner, more polished finish. You can also style it in a way that looks clearly inspired by Disney animation instead of drifting into costume-shop chaos. That matters. A good costume should be fun for you and not disrespectful to anyone else.
In this guide, you’ll learn exactly how to build the outfit from scratch, how to create a no-sew version in an afternoon, how to sew a more durable version if you have basic skills, and how to finish the look with accessories that say “Disney heroine” instead of “Halloween aisle went rogue.”
What Makes the Costume Instantly Recognizable
Before you cut fabric, it helps to know what visual details actually sell the character. The Disney-inspired look usually includes a one-shoulder tan dress, angled hemline, fringe trim, a blue-green necklace, long dark hair, and simple shoes. That means you do not need twenty accessories, a plastic bow, or enough feathers to start your own craft-store weather event.
If you nail these five elements, people will get it fast:
- A tan or light brown dress or oversized tunic
- Fringe along the neckline, hem, or both
- An asymmetrical, one-shoulder silhouette
- A turquoise-style statement necklace
- Long, straight, loose hair
Think of the costume as “minimal pieces, strong silhouette.” That is what keeps it looking intentional and photo-ready.
Materials You’ll Need
You can keep the supply list simple. If you are going the no-sew route, focus on fabric glue, trim, and a thrifted base piece. If you’re sewing, add matching thread, pins or clips, and an iron.
Basic Materials
- Tan or camel-colored dress, long T-shirt, tunic, or large piece of faux suede/felt/jersey knit
- Fringe trim in tan or brown
- Scissors or fabric shears
- Measuring tape
- Fabric glue or hot glue for no-sew construction
- Needle and thread or sewing machine for a sewn version
- Turquoise-style necklace or blue-green beads
- Flat sandals, ankle boots, or moccasin-style flats
- Optional: belt, faux leather cord, wig, leggings, safety shorts
Best Fabric Choices
Faux suede is the obvious winner because it gives that soft, matte, costume-friendly finish without looking flimsy. But jersey knit, microsuede, felt, and even a thrifted knit dress can work beautifully. If comfort matters most, choose a stretchy knit. If structure and movie-inspired texture matter most, choose faux suede or microsuede.
One practical tip: if you’re making this for a party, school event, or convention, do a quick movement test. Sit down, walk fast, lift your arms, and make sure the one-shoulder design stays where it belongs. A costume should create magic, not a wardrobe emergency.
Method 1: Make a No-Sew Disney’s Pocahontas Costume
If you need this fast, this is your path. The no-sew version is ideal for beginners, last-minute costume makers, or anyone who believes ironing is already a bold enough lifestyle choice.
Step 1: Find Your Base Piece
Start with a tan dress, oversized shirt dress, long tunic, or even an extra-large men’s T-shirt in brown or camel. Thrift stores are excellent for this. Look for something soft and slightly loose rather than bodycon. The Disney-inspired look should drape, not cling like it’s trying to win a fitness challenge.
Step 2: Create the One-Shoulder Shape
Put the dress on inside out and mark where you want the neckline to slant. Usually, one shoulder stays covered while the other side dips below the shoulder. Cut conservatively at first. You can always trim more, but you cannot have a meaningful reconciliation with fabric you already chopped off.
If the fabric stretches, cut a little less than you think you need. Stretchy fabric relaxes once worn. If the neckline looks messy, glue or fold the raw edge under for a neater finish.
Step 3: Angle the Hem
The hem should look slightly uneven and organic, not perfectly straight. Cut one side a bit longer than the other to echo the animated silhouette. If you want extra polish, fold the raw edge under and glue it down. If the fabric doesn’t fray much, you can leave it raw for a softer, handmade look.
Step 4: Add Fringe
Fringe is what turns “brown dress” into “oh, I see what you did there.” Glue fringe trim along the neckline, the lower hem, or both. If you can’t find matching trim, cut strips into a spare piece of faux suede or felt and glue that homemade fringe into place. Keep the fringe soft and subtle. You’re aiming for movement, not full-on lampshade energy.
Step 5: Add Shape at the Waist
If the outfit looks boxy, wrap a thin belt, faux suede tie, or leather-look cord around the waist. This gives the costume structure and makes it more flattering in photos. You can knot it simply and let the ends hang for a casual finish.
Method 2: Sew a More Polished Version
If you know how to sew a straight stitch and can stay calm around a measuring tape, you can make a cleaner, reusable version that holds up better over time.
Step 1: Cut a Simple Tunic Shape
Fold your fabric in half and use a loose dress or tunic as a guide. Trace around it, adding seam allowance. Extend the length to where you want the costume to hit, usually around the knee. Cut a one-shoulder neckline into the folded top edge. Keep the body simple. This is not the time to audition for advanced tailoring.
Step 2: Sew Side Seams
Place right sides together and sew the side seams, leaving enough room at the arm openings. Try it on before finishing edges. If it feels too loose, take it in slightly. If it feels too tight, respect your need for oxygen and loosen the seams.
Step 3: Finish the Neckline and Hem
Fold raw edges under and press them before sewing. Pressing sounds boring because it is boring, but it makes homemade costumes look dramatically better. A neat neckline and hem are often the difference between “custom costume” and “I fought a curtain and lost.”
Step 4: Sew on Fringe
Topstitch fringe trim to the neckline and hemline. Sew slowly so the fringe strands don’t get caught under the presser foot. If your machine starts acting suspicious, stop and reposition the trim. This part adds movement and texture, so it is worth taking your time.
Step 5: Check the Fit and Layering
Because one-shoulder costumes can shift, consider wearing a strapless camisole, bandeau, or fitted tank underneath in a matching color. For extra comfort, add bike shorts or leggings underneath, especially if the hemline is shorter on one side.
How to Make the Accessories
The Necklace
A blue-green statement necklace is one of the fastest ways to make the costume read as Pocahontas-inspired. You can buy one, thrift one, or make a simple version with chunky beads on cord. Choose a single bold necklace rather than stacking five random pieces like a pirate who got lost at a craft fair.
The Shoes
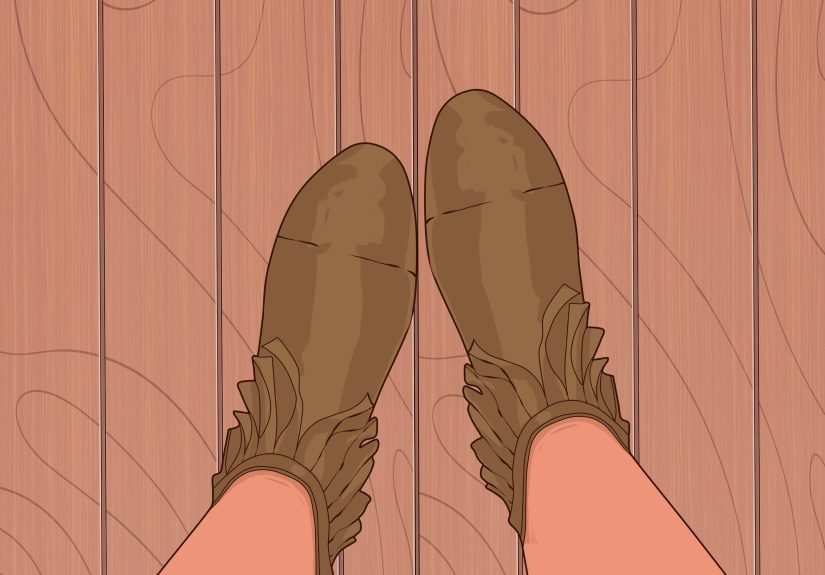
Flat sandals, simple ankle boots, or moccasin-style flats work best. Keep them neutral. Brown, tan, or soft gold tones look cohesive. Comfort matters here. If you’ll be walking a lot, choose shoes you can survive in. Heroic suffering is optional.
The Hair
Long, straight, dark hair is the classic Disney-inspired finish. If that’s your natural hair, great. If not, a budget-friendly wig can do the job. Keep it loose and smooth rather than heavily curled. The character’s hair should look like a breeze is about to enter the room and dramatically improve your entire silhouette.
The Makeup
Keep makeup soft and simple. A little bronzer, subtle eyeliner, groomed brows, and a neutral lip are more than enough. Do not darken your skin tone, and skip makeup that imitates ethnic or “tribal” designs. The costume should be inspired by an animated character’s outfit, not by caricatures of real people and living cultures.
How to Keep the Costume Respectful
This is the part many costume guides skip, but it matters. Pocahontas is a Disney character inspired by a real historical figure and Native cultures, so there is a difference between making a movie-inspired outfit and turning Native identity into a costume. The respectful approach is to focus on the recognizable Disney design details: the tan dress, fringe, necklace, and hair.
Avoid anything that pushes the costume into stereotype territory. That includes darkening your skin, wearing faux war paint, adding a headdress, or mixing in generic “tribal” props that were never part of the Disney character’s core look anyway. In plain English: costume the character, not the culture.
That approach also makes the outfit cleaner and more stylish. Respect and better aesthetics? Rarely does Halloween hand out such a generous two-for-one deal.
Budget-Friendly Ways to Pull It Off
You do not need to spend a fortune. In fact, this costume gets better when it looks a little handmade.
- Under $20: Thrifted brown dress, DIY cut neckline, homemade fringe from felt, existing sandals, borrowed necklace
- $20 to $40: Better base garment, store-bought fringe trim, simple wig or statement necklace
- $40 and up: Faux suede fabric, sewn construction, polished accessories, upgraded wig, and sturdier shoes
If your budget is tight, put the money into the base garment and necklace first. Those two things do the most visual work. Fringe and styling can do the rest.
Common Mistakes to Avoid
- Making the neckline too low or too loose so it constantly slips
- Using stiff fabric that stands away from the body like cardboard with ambition
- Over-accessorizing with unrelated “Native-inspired” items
- Cutting the hem too short and then spending the night tugging at it
- Ignoring comfort, especially in shoes and underlayers
- Waiting until the last minute to test the full look
Try everything on before the event. Walk around. Sit down. Turn sideways. Raise your arms. Take a few photos in regular lighting. Costumes have a way of looking amazing in the mirror and mildly lawless in a phone camera, so test early.
What the Experience Is Really Like
Making a Disney’s Pocahontas costume is one of those projects that starts out feeling wonderfully simple and then turns into a tiny creative adventure. At first, you think, “It’s just a brown dress with fringe. I’ve got this.” Then you spend twenty minutes comparing tan fabrics like you’ve suddenly become a fashion historian. One is too orange. One is too gray. One looks perfect until you hold it under actual light, and then it resembles a sad cardboard box. This is normal. This is part of the journey.
Once you find the right base piece, the project gets fun fast. The transformation is dramatic. A plain thrifted dress can look completely ordinary one minute and then, after one angled cut and a line of fringe trim, suddenly become costume-worthy. That is the kind of crafting magic that makes people dangerously confident in the fabric aisle.
The most satisfying part is usually the styling. When you add the necklace, smooth the hair, and put on the shoes, the outfit starts making sense all at once. It stops looking like “brown clothing with decisions” and starts reading clearly as a Disney-inspired character look. That reveal moment is especially fun if you’re making the costume with a friend, sibling, or parent, because someone always says, “Wait, okay, now it really works.”
Wearing the costume can also be surprisingly comfortable compared with bulkier outfits. There are no giant wings, no plastic armor, no face paint that cracks when you smile, and no accessories that keep smacking strangers in line for snacks. You can actually move, sit, dance, and exist like a person. That alone deserves applause.
There is also a nice confidence boost that comes from telling people you made it yourself. Even if you only modified a thrifted dress and glued on trim, it still counts. You solved the design problem, shaped the silhouette, and created the final look. Homemade costumes have personality. They rarely look identical to store-bought versions, and that is exactly why they stand out.
Another real experience? You learn very quickly that less is more. Many people start by thinking they need loads of accessories, but the strongest version of this costume is usually the simplest one. A clean one-shoulder dress, tasteful fringe, one necklace, and good hair do more than a mountain of props ever could. The final effect is elegant, easy to wear, and instantly recognizable without being overdone.
Most important, approaching the costume thoughtfully makes the whole experience better. When you focus on the Disney character design and avoid stereotypes, you can enjoy the creativity without the awkward feeling that the costume may cross a line. That gives the whole project a smarter, more modern feel. In the end, the experience is part crafting win, part styling experiment, and part proof that a little imagination can beat a plastic costume bag every single time.
Final Thoughts
If you want a costume that is recognizable, affordable, beginner-friendly, and easy to personalize, a Disney’s Pocahontas costume is a strong choice. The key is to keep it simple and intentional. Start with the silhouette, add movement through fringe, finish with a blue-green necklace, and style the hair so the whole thing feels cinematic. Whether you sew it from scratch or build it from thrifted pieces, the result can look polished without feeling fussy.
And that is the real costume sweet spot: easy enough to make, comfortable enough to wear, and memorable enough that nobody asks, “So… what are you supposed to be?”


