
Table of Contents >> Show >> Hide
- Why Install iTunes Without the Microsoft Store?
- Before You Start
- How to Install iTunes Without the Microsoft Store
- What Happens If Apple Pushes You Toward the Microsoft Store?
- Standalone iTunes vs. Apple’s Newer Windows Apps
- Common Problems and How to Fix Them
- How to Update iTunes After Installing It This Way
- Best Practices After Installation
- Quick FAQ
- Final Thoughts
- Experiences With Installing iTunes Without the Microsoft Store
- SEO Tags
If the Microsoft Store is acting like a moody vending machine, you are not alone. Plenty of Windows users still want a straightforward way to install iTunes without signing into the Store, fixing Store errors, or wrestling with mysterious download failures. The good news is that there is still a practical route: you can install iTunes directly from Apple’s download pages and use the classic desktop version like a normal human being.
This guide walks you through exactly how to install iTunes without the Microsoft Store, when this method makes sense, what to do if the installer refuses to cooperate, and how to avoid common mistakes. We will also cover the difference between iTunes and Apple’s newer Windows apps, because Apple has been gradually moving some features into Apple Music, Apple TV, and Apple Devices. In other words, this is not just a “click here and hope” tutorial. It is the complete, sane-person version.
Why Install iTunes Without the Microsoft Store?
There are several perfectly reasonable reasons to skip the Microsoft Store and use the direct installer instead. First, the Store does fail sometimes. It can hang on downloading, throw cache errors, demand a Microsoft account, or simply refuse to install anything on a work or school PC. Second, many people just prefer the traditional desktop installer because it feels more predictable. You download a file, run it, and move on with your life. Revolutionary, I know.
Using the standalone installer can also be useful if you are troubleshooting an older Windows setup, trying to manage an iPhone through a non-Store environment, or dealing with device sync issues that are easier to control in the classic iTunes desktop app. For users who want iTunes for podcasts, audiobooks, local media libraries, backups, or device syncing, the non-Store path is often the cleanest option.
Before You Start
Before you install iTunes without the Microsoft Store, take two minutes to make sure you are not setting yourself up for avoidable drama.
1. Check whether you need 64-bit or 32-bit iTunes
Most modern Windows PCs use 64-bit Windows, and that is the version most people should download. Apple also still provides a 32-bit version for older systems. If you download the wrong one, the installer may fail or you may end up doing this whole dance twice.
2. Make sure Windows is up to date
Even when you are avoiding the Microsoft Store, Windows updates still matter. Missing system components, outdated drivers, or old security files can interfere with the installer. If your PC has not been updated in ages, that could be the real villain of the story.
3. Sign in with an administrator account
Installing iTunes changes system files, adds Apple services, and may install device support components. A standard account can sometimes hit permission errors halfway through the setup process, which is a great way to waste ten minutes and learn nothing.
4. Decide what you actually need iTunes for
This matters more than it used to. On newer Windows systems, Apple now pushes separate apps for music, TV, and device management. But if your goal is a classic all-in-one desktop experience, or if you cannot use the Store at all, the direct iTunes installer is still a useful solution.
How to Install iTunes Without the Microsoft Store
Now for the part you came here for. Here is the easiest way to install iTunes without the Microsoft Store.
Step 1: Go to Apple’s official iTunes download page
Open your browser and visit Apple’s official iTunes page or Apple Support’s iTunes for Windows download section. Do not grab the installer from a random download site with twelve blinking buttons and a suspicious promise to “speed up your PC.” You want the official Apple installer, not a side quest.
On Apple’s iTunes page, look for the direct Windows download option. Apple typically offers a 64-bit download and a separate 32-bit link. Apple’s support downloads page may also list older compatible installers, including a special version for certain older video card setups.
Step 2: Download the correct installer
Select the version that matches your system:
- 64-bit iTunes for most Windows PCs
- 32-bit iTunes for older 32-bit Windows systems
- Special older hardware build only if Apple specifically notes that your system needs it
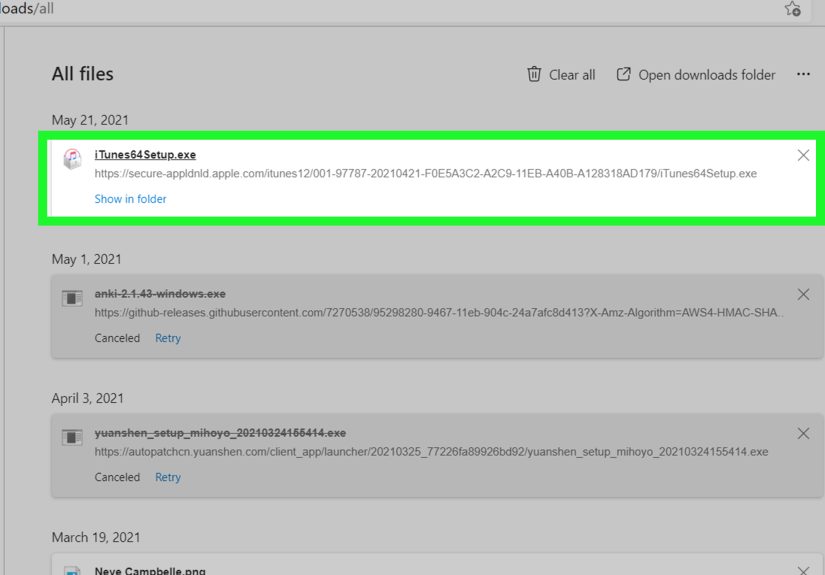
Save the installer to your desktop or Downloads folder so you can find it easily. The file is usually named something similar to iTunes64Setup.exe or iTunesSetup.exe.
Step 3: Close background apps
Before running the installer, close open apps that like to get in the way. That includes old Apple software, device managers, antivirus pop-ups, and anything currently talking to your iPhone or iPad. If your computer is the type that opens fifty background programs at startup for no obvious reason, this is your moment to regain control.
Step 4: Run the installer
Double-click the installer file. If Windows asks whether you want to allow the app to make changes to your device, click Yes. Follow the on-screen prompts. You may be asked where to install iTunes, whether to add a desktop shortcut, and whether iTunes should be the default player for audio files.
For most users, the default settings are fine. If you like controlling every tiny setup option, this is your time to shine. If not, clicking Next with confidence is also acceptable.
Step 5: Finish installation and restart if needed
Once the setup finishes, launch iTunes. Some systems may ask for a restart before all Apple services work properly. If that happens, restart your PC. It is annoying, but usually worth it. Many installation issues disappear after the classic Windows fix known as “turn it off and on again.”
Step 6: Sign in and test iTunes
Open iTunes and sign in with your Apple Account if you plan to access purchases, sync content, or use your library across devices. Then test the basics:
- Open the app normally
- Check that your library loads
- Connect your iPhone or iPad if needed
- Confirm that iTunes recognizes the device
- Try playing a song, opening a podcast, or viewing your library
What Happens If Apple Pushes You Toward the Microsoft Store?
This is where some users get confused. Apple’s newer Windows guidance often highlights the Microsoft Store version of iTunes or points users toward the newer Apple Music, Apple TV, and Apple Devices apps. That does not always mean the standalone installer has disappeared. In practice, Apple still provides direct Windows installer links on its iTunes site and in its support download pages.
So if the main page nudges you toward the Store, look carefully for the standard Windows download link or the 32-bit link. If that still feels too hidden, Apple Support’s “iTunes for Windows” downloads page is often the clearer path because it lists available builds more directly.
Standalone iTunes vs. Apple’s Newer Windows Apps
Let’s clear up one of the biggest points of confusion. Apple has been separating parts of the old iTunes experience into individual apps on Windows:
- Apple Music for music and library management
- Apple TV for movies and shows
- Apple Devices for backups, restore, sync, and device management
Those apps are useful, but they usually rely on the Microsoft Store. If your whole reason for reading this guide is “the Store is broken and I never want to see it again,” the standalone iTunes installer is still the more practical choice. It keeps a familiar desktop workflow alive, especially for users who want one place to manage podcasts, audiobooks, and a local media library.
Common Problems and How to Fix Them
The installer will not open
Right-click the installer and choose Run as administrator. If that does not help, re-download the installer from Apple’s official site in case the file was corrupted.
iTunes installs, but your iPhone is not detected
This often points to the Apple Mobile Device Service. Restart your computer first. If the issue continues, restart the Apple Mobile Device Service in Windows and reconnect the device. Also try a different cable or USB port, because sometimes the problem is not deep or dramatic. Sometimes the cable is just having a bad day.
The installer fails halfway through
Install the latest Windows updates, temporarily disable conflicting security software, and try again. If you had a previous broken iTunes installation, uninstall old Apple components first, restart, and then reinstall cleanly.
You only wanted iTunes because the Microsoft Store was broken
That is fair. If you ever decide to fix the Store later, Windows has a built-in reset command called wsreset.exe. It can clear Store cache issues. But the beauty of this guide is that you may not need to care anymore.
How to Update iTunes After Installing It This Way
This is an important detail. If you install iTunes from Apple’s download page instead of the Microsoft Store, updates are handled differently.
Inside iTunes, go to Help > Check for Updates. You can also enable automatic update checks in Preferences so iTunes looks for new versions regularly. This is one of the main benefits of the desktop installer: it is not tied to Microsoft Store update behavior.
Some systems also include Apple Software Update, which can help manage updates for Apple programs installed outside the Store. If you see it in Windows search, that can be a handy shortcut.
Best Practices After Installation
Keep a backup of your library
If you use iTunes for a large local media library, keep a backup of your iTunes folder. Music collections have a magical ability to become important the moment they disappear.
Use a good USB cable
When syncing or backing up an iPhone, a flaky cable can mimic software failure. Before blaming Windows, Apple, or the moon, test another cable.
Do not mix too many Apple app setups at once
If you are using classic iTunes, be careful about also installing every newer Apple Windows app unless you have a clear reason. Mixed setups can create confusion about where music, devices, or media are supposed to be managed.
Quick FAQ
Can I still download iTunes directly from Apple?
Yes. Apple still provides direct Windows downloads through its iTunes site and support download pages, even though newer guidance often highlights Microsoft Store options.
Is it safe to install iTunes without the Microsoft Store?
Yes, as long as you download it from Apple’s official pages. Avoid third-party download sites.
Do I need a Microsoft account?
Not for the direct Apple installer. That is one reason many people prefer it.
Can I use iTunes on Windows 11?
Many users still do, especially when they want a classic desktop setup. Just make sure you download the correct build and keep Windows updated.
What if I only want to back up my iPhone?
Classic iTunes can still work for that, though Apple’s newer Apple Devices app is designed for device management on newer Windows setups. The catch is that the newer app usually comes through the Microsoft Store.
Final Thoughts
Installing iTunes without the Microsoft Store is absolutely doable, and for many users it is still the easiest route. If the Store is blocked, broken, or simply not invited to the party, Apple’s direct iTunes download gives you a traditional desktop installer that is familiar, practical, and still useful for media libraries, podcasts, audiobooks, syncing, and device management.
The main thing to remember is this: download from Apple, choose the correct installer, run it as an administrator, and keep Windows reasonably updated. That simple checklist solves most of the friction. And if Apple’s newer Windows app ecosystem leaves you wondering which app does what, the standalone iTunes installer remains a refreshingly old-school answer. Sometimes the best technology experience is the one that asks the fewest philosophical questions.
Experiences With Installing iTunes Without the Microsoft Store
Real-world experience with this process tends to fall into a few familiar categories. The first is the frustrated Windows user who opens the Microsoft Store, clicks install, waits forever, and then gets nothing but a spinning progress icon and a rising blood pressure reading. For that person, the direct Apple installer feels almost suspiciously easy. You download a file, double-click it, and suddenly the problem that felt like a system-wide crisis turns out to be mostly a Store problem, not an iTunes problem.
Another common experience comes from people using work, school, or managed PCs where Microsoft Store access is limited by policy. They are not doing anything shady. They just want to back up an iPhone, move music, or access an old library without filing a support ticket and waiting three business days for someone named Chad from internal IT to bless the process. In those cases, the standalone installer can feel like a practical workaround, especially when local installation rights are allowed but Store access is locked down.
Then there are longtime iTunes users who simply prefer the classic layout. They already know where the menus are, they trust the desktop workflow, and they do not want their music in one app, device backups in another, and video somewhere else. For them, installing iTunes without the Microsoft Store is not just a workaround. It is a lifestyle choice. A slightly stubborn one, maybe, but a valid one.
People with older PCs also often report better luck with the direct installer because it gives them more control. They can choose the correct build, rerun setup as an administrator, and troubleshoot step by step instead of guessing what the Store is doing in the background. That matters on systems where every install feels like negotiating with a toaster.
Of course, not every experience is instantly perfect. Some users install iTunes successfully and then discover their iPhone is not detected. In many of those cases, the problem turns out to be a cable, a USB port, or the Apple Mobile Device Service rather than iTunes itself. Once that is sorted out, the setup works fine. That is a useful reminder that installation is only one part of the puzzle. Device communication has its own little personality.
A lot of users also say the biggest benefit of the non-Store method is psychological. The process feels more transparent. You know where the installer came from, you know when it runs, and you know where to go for updates. There is less mystery, less waiting, and fewer moments where Windows seems to be silently thinking about your request rather than actually doing it.
In short, the experience of installing iTunes without the Microsoft Store is usually best described as practical, slightly old-school, and oddly satisfying. It is the software equivalent of finding a regular light switch after struggling with a motion-sensor lamp. Not glamorous, but wildly effective.


