
Table of Contents >> Show >> Hide
- Table of Contents
- Kale Prep That Makes Every Method Better
- The “Maximum Flavor” Formula for Kale
- Way #1: Sautéed Kale (Fast, Garlicky, Weeknight-Friendly)
- Way #2: Roasted Kale (Crispy Edges or Kale Chips)
- Way #3: Braised Kale (Tender, Cozy, Deeply Savory)
- Way #4: Blanched Kale (Milder, Brighter, Perfect for Pesto & Prep)
- Common Kale Mistakes (and How to Fix Them)
- Storage, Meal Prep, and Leftover Ideas
- of Real-Life Kale Experiences (So You Don’t Repeat Our Mistakes)
- 1) The “Why is it still chewy?” moment
- 2) The “My kale chips burned in five minutes” panic
- 3) The “This tastes too bitter” complaint
- 4) The “I wanted a side dish, but this became a meal” surprise
- 5) The “I swear I washed it, but it’s crunchy… and not in a good way” problem
- 6) The “Now what do I do with the rest of this bunch?” question
- Sources Consulted (No Links)
Kale has a reputation. It’s either “superfood royalty” or “that leafy green that tastes like you licked a pine tree.”
The truth is way less dramatic: kale is simply a sturdy, slightly bitter green that needs the right technique.
Give it heat, fat, salt, and a bright finish, and it turns into something you’ll actually cravecrispy-edged, silky,
garlicky, lemony, and (dare we say) kind of addictive.
This guide breaks down how to cook kale four different wayssauté, roast,
braise, and blanchwith practical steps, flavor upgrades, and specific examples so you can
pick the method that matches your mood (and your hunger level).
Kale Prep That Makes Every Method Better
Before we cook, we do one small-but-mighty thing: prep kale like it deserves respect. Most “kale is gross”
complaints come down to texturetough ribs, gritty leaves, and big pieces that fight back like they’re training for a
jawline competition.
Pick your kale wisely
- Curly kale: Peppery, sturdy, great for chips and braises (holds its shape).
- Lacinato (Tuscan/dinosaur) kale: More tender, slightly sweeter, excellent for sautéing and roasting.
- Baby kale: Mild and delicatebest for quick wilts, soups, or gentle sautéing.
Wash it like you mean it
Kale can hide grit like it’s smuggling sand. Swish the leaves in a big bowl of water, lift them out, and repeat if needed.
Then dry thoroughlyespecially for roasting. Wet kale + oven = steamed sadness instead of crisp magic.
Remove the tough rib (yes, it matters)
Hold the stem with one hand and strip the leaves down with the other, or slice the rib out with a knife.
Those thick ribs are fibrous and can stay chewy even when the leaves are perfect.
Cut size = texture control
- Big pieces: Better for roasting (more crisp edges), braising (less mush), and hearty bowls.
- Thin ribbons: Better for quick sautéing and blanching (tender faster, easier to eat).
- Chopped small: Great for mixing into soups, scrambled eggs, and pasta.
The “Maximum Flavor” Formula for Kale
Kale’s flavor gets amazing when you build it like a good song: bass (fat), drums (salt), a catchy chorus (acid), and a
surprising bridge (umami). Here’s the simple formula that works across all four methods:
- Fat: olive oil, butter, avocado oil, bacon fathelps carry flavor and soften bitterness.
- Salt: adds pop and tames the “green” taste (season in layers, not only at the end).
- Heat: creates browning (the “why is this suddenly delicious?” moment).
- Acid at the finish: lemon, vinegar, pickled pepper brinewakes everything up.
- Umami booster (optional but powerful): Parmesan, soy sauce, miso, anchovy, mushrooms, tomato paste.
Keep that lineup in your back pocket and kale becomes less “health assignment” and more “I might make this again tomorrow.”
Way #1: Sautéed Kale (Fast, Garlicky, Weeknight-Friendly)
If you want kale on your plate in under 10 minutes, sautéing is your move. The key is
hot pan + enough oil + quick cooking + bright finish. You’re aiming for tender leaves with a few crispy
spots, not swampy greens.
Basic Sautéed Kale (Garlic + Lemon)
- Heat: Warm 1–2 tablespoons olive oil in a large skillet over medium-high heat.
- Aromatics: Add sliced or minced garlic (and a pinch of red pepper flakes if you like heat). Stir 30–60 seconds.
- Add kale: Toss in kale (start with a big pilekale shrinks dramatically). Add a pinch of salt.
- Wilt + steam briefly: Toss for 2–3 minutes. If the kale is still tough, splash in 1–2 tablespoons water and cover for 1 minute.
- Finish: Off heat, add lemon juice or a splash of vinegar. Taste and adjust salt.
Flavor upgrades (choose one “theme”)
- Italian-ish: Olive oil + garlic + chili flakes + lemon + Parmesan.
- Umami bomb: Add 1 teaspoon soy sauce or a tiny spoon of miso whisked into a splash of water before you cover.
- Smoky: Cook a strip of chopped bacon first; sauté kale in the rendered fat; finish with apple cider vinegar.
- Nutty crunch: Add toasted almonds, walnuts, or pepitas at the end.
Specific example: “Grown-up side dish” sautéed kale
Sauté kale with garlic and chili flakes, then finish with lemon and a shower of Parmesan. Serve next to roasted chicken,
salmon, or even scrambled eggs. If you want it to taste restaurant-level, add one more thing: a drizzle of good olive oil
right before serving.
Way #2: Roasted Kale (Crispy Edges or Kale Chips)
Roasting turns kale into two great personalities: tender leaves with crispy browned edges (sheet-pan kale)
or full-on kale chips (snack mode). The difference is mostly temperature, dryness, and spacing.
Option A: High-Heat Roasted Kale (tender + crispy edges)
- Preheat: 425°F (hot oven = fast browning).
- Dry kale well: Water is the enemy of crispness.
- Season: Toss kale with olive oil, salt, and pepper. Keep it lightly coated, not drenched.
- Spread: Single layer on a sheet pan (crowding = steaming).
- Roast: 8–12 minutes, tossing once, until edges brown and leaves are tender.
- Finish: Lemon juice, tahini drizzle, or grated cheese.
Option B: Kale Chips (light, crispy, dangerously snackable)
- Preheat: 300–350°F (lower temp helps avoid bitter burning).
- De-stem + tear: Bite-size pieces, similar size for even cooking.
- Oil lightly: Toss with a small amount of oiltoo much makes chips greasy and limp.
- Season: Salt is essential; add garlic powder, smoked paprika, or nutritional yeast.
- Bake: 10–20 minutes, turning once. Pull them when crisp (they go from perfect to burnt fast).
Specific example: “Salt + heat + cheese” kale chips
Bake kale at 350°F until crisp, then sprinkle with Parmesan and return to the oven for a few minutes.
It’s like popcorn got a glow-up and started paying rent.
Pro tip: Add your acid after roasting
Lemon juice before roasting can mute browning. Add acidity at the end for maximum punch and better texture.
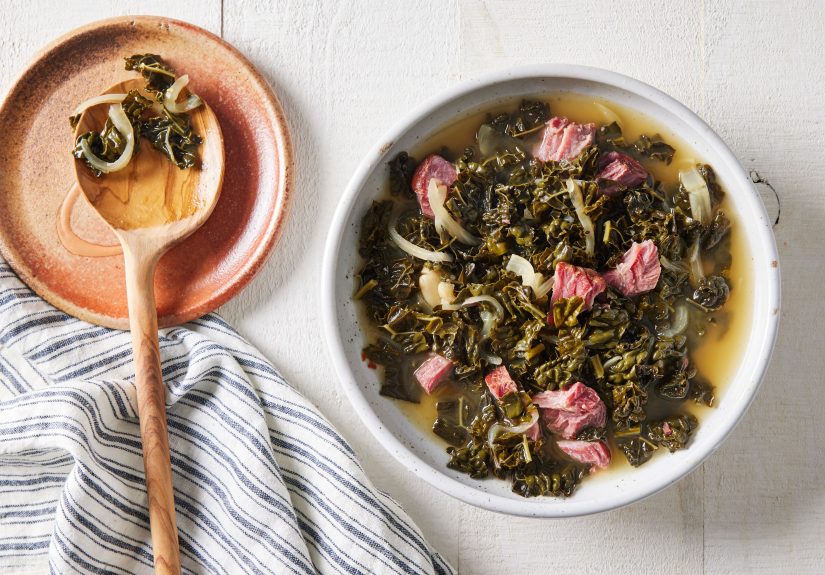
Way #3: Braised Kale (Tender, Cozy, Deeply Savory)
Braising is how you make kale taste like comfort food. It’s slower than sautéing, but the payoff is huge:
silky leaves, mellowed bitterness, and broth you’ll want to soak up with bread.
Basic Braised Kale (with garlic, onion, and broth)
- Start with aromatics: Sauté chopped onion in olive oil over medium heat until soft (5–8 minutes).
- Add garlic + spice: Stir in garlic and red pepper flakes for 30 seconds.
- Add kale (stems first if you saved tender ones): Toss for 1–2 minutes to coat in oil.
- Add liquid: Pour in broth (vegetable or chicken) until the bottom of the pan is generously covered.
- Simmer: Cover and cook 15–25 minutes, stirring occasionally, until tender.
- Finish with brightness: Vinegar, lemon, or a spoon of tomato sauce. Salt to taste.
Make it a meal: Add beans, sausage, or mushrooms
- Kale + white beans: Stir in canned cannellini beans near the end and warm through.
- Smoky version: Brown sliced sausage first, then braise kale in the flavorful bits.
- Vegetarian umami: Add sautéed mushrooms or a teaspoon of tomato paste with the garlic.
Specific example: Braised kale and white beans bowl
Braise kale with garlic, onion, and broth. Stir in white beans and finish with lemon and black pepper. Serve with toasted
bread, rice, or polenta. Add shaved Parmesan if you’re feeling fancy (or if your fridge is feeling generous).
Way #4: Blanched Kale (Milder, Brighter, Perfect for Pesto & Prep)
Blanching is the “reset button” for kale. A quick dunk in salted boiling water softens tough fibers, reduces bitterness,
and turns kale a brighter green. Then you shock it in ice water so it doesn’t overcook.
This method is gold for pesto, meal prep, freezing, and kale that needs to behave in salads or sauces.
How to blanch kale (the simple method)
- Boil: Bring a large pot of salted water to a boil.
- Prep: De-stem kale, then tear or chop.
- Blanch: Add kale and cook 1–2 minutes (just until it turns bright green and slightly tender).
- Shock: Transfer immediately to a bowl of ice water to stop cooking.
- Squeeze dry: Drain well, then squeeze out water with your hands or a clean towel.
What to do with blanched kale
- Kale pesto: Blend blanched kale with garlic, nuts (walnuts or pine nuts), olive oil, cheese, and lemon.
- Silky soups: Add blanched kale to blended soups for color and nutrients without rough texture.
- Quick skillet finish: After blanching, sauté for 1 minute with garlic and oilsuper tender, zero bitterness.
- Freezer stash: Freeze squeezed-dry portions for smoothies, soups, and sauces later.
Specific example: Bright kale pesto pasta
Blanch and shock kale, squeeze dry, then blend with olive oil, garlic, toasted walnuts, Parmesan, and lemon.
Toss with hot pasta and a splash of pasta water for a glossy, restaurant-style sauce.
Common Kale Mistakes (and How to Fix Them)
Mistake #1: You didn’t remove the tough rib
Fix: De-stem before cooking. If you already cooked it, chop smaller and braise longer in broth.
Mistake #2: You under-seasoned
Fix: Add salt in layers and finish with acid. Kale can take seasoningdon’t whisper at it.
Mistake #3: You cooked it wet (especially for roasting)
Fix: Dry thoroughly. Use a salad spinner or towels. Wet kale steams; dry kale roasts.
Mistake #4: You overcooked it into army-green mush
Fix: For sautéing and roasting, cook just until tender with some texture left. For braising, go long enough to become silky.
The goal is “intentionally tender,” not “accidentally defeated.”
Mistake #5: You forgot the “finishing move”
Fix: Lemon juice, vinegar, grated cheese, toasted nuts, chili oilone finishing touch turns kale from fine to fantastic.
Storage, Meal Prep, and Leftover Ideas
How to store cooked kale
- Fridge: Keep cooked kale in an airtight container for 3–4 days.
- Reheat: Warm in a skillet with a splash of water or broth (microwave works, but skillet tastes better).
- Kale chips: Store loosely covered at room temp. If they soften, re-crisp in a low oven for a few minutes.
Leftover ideas that don’t feel like leftovers
- Fold sautéed kale into scrambled eggs or an omelet.
- Add braised kale to pasta with garlic and olive oil.
- Layer roasted kale into a grain bowl with beans, feta, and lemon.
- Stir blanched kale into soups, stews, and sauces for an easy nutrient boost.
of Real-Life Kale Experiences (So You Don’t Repeat Our Mistakes)
If you’ve ever bought a gorgeous bunch of kale and then watched it wilt in the fridge like a forgotten houseplant,
congratulationsyou’ve lived the classic kale experience. Here are a few very normal, very human kale moments (and how to
turn them into wins) so your next “How to cook kale” attempt feels less like a science project and more like dinner.
1) The “Why is it still chewy?” moment
You sautéed it, it’s hot, it smells garlicky… and somehow it’s still chewing back. This usually happens when the leaves
are big and the ribs are still in play. Next time, cut kale into thinner ribbons and de-stem first. If you want
guaranteed tenderness fast, do the sneaky move: splash in a tablespoon or two of water and cover for one minute.
That tiny steam burst softens the fibers without turning the whole pan into mush.
2) The “My kale chips burned in five minutes” panic
Kale chips are dramatic. They’re fine, then suddenly they’re not. The fix is simple: keep pieces similar in size, don’t
drown them in oil, and start checking early. Also, don’t crowd the pan. Overlapping pieces trap moisture and cook unevenly,
so you get a mix of limp and scorched. If you want chips that actually stay crispy, low-to-moderate oven temps give you
more control than a volcanic blast of heat.
3) The “This tastes too bitter” complaint
Kale bitterness is real, but it’s also negotiable. Two tricks help instantly: (1) add fat (olive oil, butter, avocado),
because it rounds sharp edges, and (2) finish with acid (lemon or vinegar), which brightens the flavor and makes bitterness
taste more like “pleasant bite” than “punishment.” If you’re extremely bitterness-sensitive, blanch kale for a minute,
shock it, squeeze dry, then sauté quickly with garlic. That combo tends to convert even skeptical eaters.
4) The “I wanted a side dish, but this became a meal” surprise
Braised kale has a funny habit of turning into a full dinner when you add one pantry ingredient. White beans, lentils,
sausage, mushroomsanything savory that can hang out in broth. Suddenly it’s not “greens on the side,” it’s a bowl you
want to eat with bread. If you’re cooking for someone who claims they “don’t like kale,” braising is your best strategy
because the texture becomes silky and the flavor picks up everything in the pot.
5) The “I swear I washed it, but it’s crunchy… and not in a good way” problem
That’s grit, not texture. Kale can hide dirt in folds like it’s storing secrets. Swish it in a bowl of water, lift it out,
dump the gritty water, and repeat. The key is lifting, not pouringbecause pouring just redistributes grit like glitter at
a craft table.
6) The “Now what do I do with the rest of this bunch?” question
Blanching is your meal-prep superpower. Blanch, shock, squeeze dry, and freeze portions. Future-you can toss it into soups,
blend it into pesto, or reheat it with garlic in about two minutes. It’s the difference between kale being a one-time plan
and kale becoming a flexible ingredient you actually use.
The big takeaway: kale isn’t hardit’s just honest. Treat it with enough heat, seasoning, and a bright finish, and it will
stop tasting like “health food” and start tasting like something you’d order again on purpose.
Sources Consulted (No Links)
This article was synthesized from widely referenced U.S.-based culinary and health publishers and recipe editors, including:
The Kitchn, Serious Eats, Bon Appétit, Epicurious, Food Network, EatingWell, Allrecipes, Food52, Martha Stewart,
The Washington Post, Simply Recipes, and Cleveland Clinic.


