
Table of Contents >> Show >> Hide
- What “Pallet Arbor” Actually Means
- Before You Start: Pallet Safety (The 3-Minute Check That Matters)
- Plan Your Arbor: Size, Location, and a Simple Design
- Materials and Tools
- Step-by-Step: Build a Walk-Through Pallet Arbor
- Step 1: Prep the pallet panels
- Step 2: Build (or reinforce) a frame around each pallet
- Step 3: Mark your opening and set the post positions
- Step 4: Anchor the posts (two solid options)
- Step 5: Attach the pallet panels to the posts
- Step 6: Tie the sides together with top beams
- Step 7 (Optional but awesome): Add a simple arch or “cap” details
- Step 8: Add bracing so it stays square for years
- Finishing: Make Pallet Wood Look Intentional (Not “Accidental”)
- Train Plants on Your New Arbor (Without Starting a Vine War)
- Common Problems (and How to Fix Them Fast)
- Conclusion: A Pallet Arbor That’s Actually Worth Building
- Experience Notes from Real-World Builds (Extra )
If your garden entrance feels a little… “meh,” an arbor is basically a welcome sign that doubles as plant scaffolding. And if you build it from a pallet, you get bonus points for thriftiness, charm, and rescuing wood that was otherwise destined for a dramatic retirement behind a warehouse dumpster.
This guide shows you how to turn one solid pallet (or two, if you want extra height) into a sturdy, vine-ready arbor. You’ll get practical measurements, anchoring options, safety checks (yes, pallet stamps matter), and finishing tips so your arbor survives real weathernot just “influencer weather.”
What “Pallet Arbor” Actually Means
A pallet alone isn’t a full arbor the way a kit is. Think of the pallet as your ready-made trellis panela grid of slats perfect for training climbing plants. To become an arbor, that panel needs:
- Structure: posts or a frame that won’t wobble like a shopping cart with one rebellious wheel
- A top connection: beams or an arch that ties the sides together
- Anchoring: ground contact protection so it doesn’t sink, twist, or become a sail in a storm
Before You Start: Pallet Safety (The 3-Minute Check That Matters)
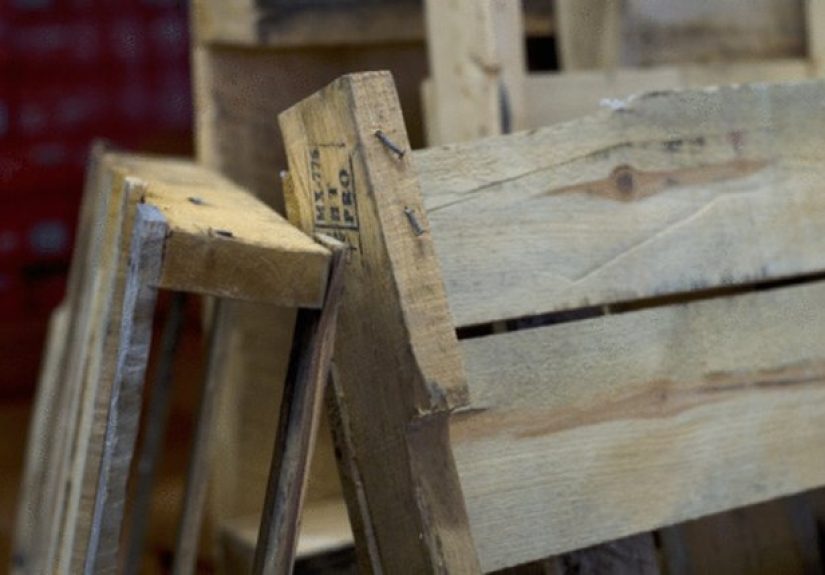
Not all pallets are DIY-friendly. Some are heat-treated, some are fumigated, and some have lived a mysterious life involving who-knows-what spills. Your goal: a pallet that’s safe, clean-ish, and structurally sound.
Look for a stamp
- Choose “HT” (Heat Treated): generally considered the safer choice for DIY because it’s treated with heat rather than chemical fumigation.
- Avoid “MB” (Methyl Bromide): a fumigant you do not want to sand, cut, or breathe near.
- KD often means kiln-dried; that’s helpful because drier wood moves less once it’s built.
Trust your senses (seriously)
- Skip pallets that smell like chemicals, fuel, or “industrial mystery.”
- Avoid stained, oily, or sticky boards.
- Pick pallets with intact stringers (the thick runners) and minimal rot or cracking.
Plan Your Arbor: Size, Location, and a Simple Design
The sweet spot for most garden paths is a clear walking width of 36–48 inches. Height depends on your vibe: 7–8 feet feels welcoming without turning into a medieval gatehouse.
Two easy layouts
- Classic walk-through arbor: two pallet panels + top beams + optional arch. Best for paths and garden entrances.
- Wall/bed-mounted arbor: one pallet panel as a trellis with a mini “roof” frame. Best when you want vertical support without a walk-through opening.
Pick a spot that helps you
- Sun: flowering vines usually want 6+ hours; some climbers tolerate part shade.
- Soil & drainage: standing water = wood’s villain origin story.
- Wind: an arbor can catch gusts; anchoring matters more in open yards.
Materials and Tools
Materials (for one walk-through arbor)
- 1–2 heat-treated pallets (one per side panel; choose matching size if possible)
- 4 posts (ideal: 4×4 posts, 8 ft long; if you want “mostly pallet,” see the alternative below)
- Top beams: 2×4 or 2×6 lumber (two pieces 4–6 ft long depending on your opening)
- Exterior screws (deck screws, 2 1/2 in. and 1 5/8 in.)
- Structural screws or carriage bolts for post connections (recommended for stability)
- Galvanized brackets/angles (optional but helpful)
- Concrete mix (if setting posts in ground) or post bases/anchors (if attaching to a patio/deck)
- Exterior wood sealer/stain + brush
Tools
- Drill/driver + bits
- Measuring tape, level, pencil
- Circular saw or handsaw (for trimming pallets and beams)
- Hammer/pry bar (if you’re removing slats)
- Post hole digger or auger (if setting posts)
- Safety gear: gloves, eye protection, dust mask
“Mostly pallet” alternative (if you truly don’t want to buy posts)
You can laminate pallet stringers into thick uprights, but it’s more work and often less durable outdoors. For a long-lasting arbor, posts are the smartest place to spend a little moneybecause gravity has zero respect for your budget.
Step-by-Step: Build a Walk-Through Pallet Arbor
Step 1: Prep the pallet panels
- Clean: scrub with soapy water; let it dry fully.
- Trim: cut off broken ends and remove any protruding nails or staples.
- Sand smart: knock down splinters and rough edges (don’t turn it into a dust festival).
- Square it up: if your pallet is warped, decide now which face will be “front.” Minor warps are OK if the frame is strong.
Step 2: Build (or reinforce) a frame around each pallet
Pallets are strong in shipping-world terms, but an arbor needs upright rigidity. The easiest upgrade is framing the pallet like a picture.
- Cut 2x4s to match the pallet’s height and width.
- Screw the 2×4 frame to the pallet’s outer edges, pre-drilling to avoid splitting.
- Add a diagonal brace inside the frame if the panel racks when you push it (a small “X” brace works wonders).
Step 3: Mark your opening and set the post positions
Decide your clear opening width (again: 36–48 inches is comfortable). You’ll set two posts per side: one at the front and one at the back. A “box” footprint gives the arbor real strength.
- Mark the front-left and front-right post points.
- Measure back 12–18 inches and mark the rear post points (same width apart).
- Check for square: measure diagonally corner-to-corner; adjust until both diagonals match.
Step 4: Anchor the posts (two solid options)
Option A: Set posts in the ground (most stable)
- Dig holes roughly 10–12 inches wide and at least 24 inches deep (deeper in loose soil or cold climates).
- Add a few inches of gravel for drainage.
- Place posts, level them, and brace temporarily with scrap boards.
- Pour concrete, set posts plumb, and let cure.
Option B: Use post bases/anchors (for patios, decks, or hardscape)
- Attach post bases to a concrete pad or deck framing per manufacturer instructions.
- Mount posts in the bases and keep everything level/plumb.
- This option keeps wood out of direct soil contact, which helps longevity.
Step 5: Attach the pallet panels to the posts
Now you’re building the “walls” of your arbor. A helper is nice here, unless you enjoy balancing large wooden objects while whispering motivational speeches to your drill.
- Hold the first pallet panel between the front and rear posts on one side.
- Lift the panel so the bottom edge sits 1–2 inches above soil (or higher if splashback is an issue).
- Fasten with structural screws or carriage bolts into the posts.
- Repeat for the other side panel, checking that the opening stays consistent.
Step 6: Tie the sides together with top beams
This is where your arbor stops being two lonely trellises and becomes a single, confident structure.
- Cut two beams (2×4 or 2×6) to span the opening plus post thickness.
- Clamp or hold beams in place at the top and check level.
- Fasten beams to posts with structural screws or bolts.
- Add short blocking pieces between beams for extra stiffness and a place to attach decor (or lights).
Step 7 (Optional but awesome): Add a simple arch or “cap” details
Want that storybook garden moment? You can create a gentle arch using pallet slats as a template, or keep it clean with straight caps. Either way, make sure decorative pieces are not doing the heavy lifting.
- Easy arch method: cut two matching curved pieces from exterior plywood or laminated slats, then screw them to the beams.
- Simple cap method: add small pallet-wood caps to post tops to protect end grain and look finished.
Step 8: Add bracing so it stays square for years
If you do only one “extra” step, do this one. Bracing prevents wobble and keeps your arbor from slowly turning into modern art.
- Add diagonal braces from posts to beams (short 2×4 triangles work great).
- Re-check square by measuring diagonals; adjust before everything is fully locked in.
- Tighten all fasteners after the first week outdoors (wood shifts as it dries).
Finishing: Make Pallet Wood Look Intentional (Not “Accidental”)
Pallet wood can look rustic-chic or “forgotten behind a shed.” The difference is prep and finish.
Seal it like you mean it
- Use an exterior stain/sealer to slow water absorption.
- Pay attention to end grain: the cut ends soak up moisture fastest.
- If you want paint, prime first and use exterior-grade paint.
Hardware matters outdoors
- Use galvanized or exterior-rated fasteners to avoid rust streaks and loosening.
- Avoid mixing metals if possible (it can speed corrosion).
Train Plants on Your New Arbor (Without Starting a Vine War)
The pallet’s slats are practically begging for climbers. The trick is choosing plants that match your patience level and your willingness to prune.
Good choices for a pallet arbor
- Annuals: morning glory, black-eyed Susan vine, climbing nasturtium (fast payoff)
- Edibles: pole beans, cucumbers, small-fruited squash trained carefully
- Perennials: clematis (variety-dependent), climbing roses (needs support + pruning), grapes (needs serious structure and yearly pruning)
Quick training tips
- Start with soft ties (garden tape or jute) so stems don’t get strangled.
- Guide new growth early; later it becomes a tangled negotiation.
- Plan access: you’ll still want to walk through without wearing your plants like a feather boa.
Common Problems (and How to Fix Them Fast)
“It wobbles.”
Add diagonal braces at the top corners, tighten hardware, and confirm the posts are plumb. If posts are shallow, reinforce with ground anchors or reset deeper.
“My pallet is warped.”
Frame it with 2x4s and pull it into alignment as you fasten. Minor warps disappear visually once vines grow in.
“The bottom is rotting.”
Keep wood off soil, improve drainage, and reseal annually. If you’re rebuilding, use post bases or a gravel strip to reduce splashback.
“It looks… too pallet-y.”
Add trim boards, paint the frame one color, and keep the pallet slats natural. That contrast reads “designed,” not “found.”
Conclusion: A Pallet Arbor That’s Actually Worth Building
A pallet arbor works best when you let the pallet do what it’s great atbeing a trellisand you let posts and beams do what they do beststaying upright. Choose a safe pallet, anchor well, brace for stability, and seal for weather. Do that, and your garden entrance goes from “this is a path” to “welcome to the part of the yard I brag about.”
Experience Notes from Real-World Builds (Extra )
People love the idea of a pallet arbor because it feels like a life hack: free wood + a weekend + instant cottage garden energy. And honestly, it can be exactly thatif you treat it like an outdoor structure and not a craft project that accidentally wandered outside.
One of the most common “first-time pallet” experiences is discovering that pallets are rarely perfectly square. In a warehouse, that’s not a crisis. In a build where you want straight lines, it can feel like the pallet is gaslighting you: you measure, you cut, you step back… and the panel still looks slightly off. The fix most DIYers land on is framing the pallet with 2x4s. That frame doesn’t just make things look cleanerit gives you control. Once the pallet is boxed in, you can clamp and pull small warps into alignment and lock them down.
Another shared experience: underestimating wind. An arbor isn’t a solid wall, but it still catches gustsespecially once vines fill in. More than a few backyard builders learn this the hard way when a “good enough” stake system starts leaning after a storm. The lesson that sticks is simple: anchoring is not the fun part, but it’s the part you’ll respect later. Setting posts deeper, using concrete in soft soils, and adding diagonal bracing can feel like overkill on day oneuntil you realize your arbor is still square on day 300.
There’s also a very real “pallet personality” issue: some pallets are cooperative, others are basically a bag of splinters held together by spite. Builders often report that prying slats off can split boards, strip nails, and turn the project into a surprise anger-management workshop. Many end up switching strategies midstreamkeeping the pallet intact as a trellis panel and cutting only what’s necessary. This is why using the pallet as a panel (instead of fully dismantling it) is so appealing: it saves time, preserves strength, and reduces the number of moments where you stare at a rusty nail and question your life choices.
Finishing is another area where real-world experience changes minds. Lots of folks start with “I love rustic wood!” and end with “Okay, but I’d also love fewer splinters.” A light sand on touch points (where hands might grab), plus a solid exterior sealer, usually becomes the sweet compromise. Those who skip sealing often notice the arbor grays quickly, and the lower sections begin to roughen from splashback and weather. The annual habit that experienced builders recommend is a quick spring inspection: tighten screws, touch up sealer, and trim any vines that are trying to swallow hardware or pry boards apart.
Finally, the most fun shared experience is the “month three glow-up.” Pallet arbors can look a little plain right after build daylike a strong, practical frame waiting for its costume. Then the plants kick in. Once tendrils grab the slats and you guide new growth across the top beams, the structure visually softens, the entrance feels intentional, and the whole thing reads like it’s been there longer than it has. That transformation is why people keep making these: the payoff isn’t just a structureit’s the moment your garden starts telling a story.


