
Table of Contents >> Show >> Hide
- What Causes Fiberglass to Crack?
- Before You Start: Inspect the Damage
- Tools and Materials You May Need
- Easy Method 1: Repair a Hairline Fiberglass Crack
- Easy Method 2: Patch a Deeper Crack with Fiberglass Cloth
- Easy Method 3: Finish with Gelcoat, Paint, or Polish
- Epoxy vs. Polyester Resin: Which One Should You Use?
- Common Mistakes to Avoid
- When to Call a Professional
- Extra Experience: Real-World Lessons from Repairing Cracked Fiberglass
- Conclusion
Fiberglass is tough, lightweight, and wonderfully usefulright up until it cracks and starts looking like it lost an argument with a garage door, a dropped wrench, or gravity itself. The good news? Many small fiberglass cracks can be repaired at home with the right tools, careful prep, and a little patience. The bad news? Skipping the prep work is how you create a repair that looks like frosting on a canoe.
This guide explains easy ways to repair cracked fiberglass on common surfaces such as boats, tubs, shower stalls, RV panels, hoods, kayaks, and small composite parts. You will learn how to tell the difference between cosmetic cracks and structural damage, how to choose between epoxy, polyester resin, filler paste, fiberglass cloth, and gelcoat, and how to finish the repair so it blends in instead of waving hello from across the driveway.
Important safety note: Fiberglass dust, uncured resin, catalysts, and solvents can irritate your skin, eyes, and lungs. Work in a well-ventilated area, wear gloves, eye protection, long sleeves, and a properly rated respirator or dust mask for sanding. Keep resin and solvents away from flames, sparks, kids, and pets. If the crack affects a fuel tank, boat hull below the waterline, load-bearing structure, or anything that must hold weight or keep water out, get a qualified repair professional involved.
What Causes Fiberglass to Crack?
Fiberglass usually cracks for one of four reasons: impact, flexing, age, or poor support. A dropped object can chip a fiberglass tub. A boat deck can develop stress cracks from years of walking, twisting, and vibration. A shower pan can crack because the floor underneath is not supported well enough. A vehicle panel can split after a bump that looked harmless at first but was apparently full of drama.
The first rule of fiberglass crack repair is simple: do not just cover the crack. Find out why it happened. If the crack is only in the gelcoat or surface finish, a cosmetic repair may be enough. If the laminate underneath is broken, soft, wet, delaminated, or flexing, the repair needs reinforcement. Paint and filler cannot fix a weak structure; they can only make it look guilty in a smoother way.
Before You Start: Inspect the Damage
Take a few minutes to inspect the cracked fiberglass carefully. Clean the area with mild soap and water, dry it, and look closely under good light. Press gently around the crack. If the area feels soft, springy, or makes a dull sound when tapped, the laminate may be damaged underneath. If the crack leaks water, grows when pressure is applied, or appears on both sides of the panel, treat it as more than a surface blemish.
Cosmetic cracks
Cosmetic cracks are usually thin lines in gelcoat or paint. They may look like spiderwebs, hairline scratches, or shallow crazing. These are common on boats, tubs, and older fiberglass panels. They are often repairable with sanding, cleaning, filler, gelcoat paste, or a small epoxy-based repair kit.
Structural cracks
Structural cracks are deeper. They may open when the surface flexes, leak, expose fibers, or run through the actual fiberglass laminate. These repairs usually require grinding a bevel, adding resin, and reinforcing the area with fiberglass cloth or mat. If the damaged piece supports weight, keeps water out, or protects someone from injury, do not guess. Guessing is fine for soup seasoning, not structural fiberglass.
Tools and Materials You May Need
You do not need a professional boatyard to repair a small fiberglass crack, but you do need the right supplies. For a simple repair, gather gloves, safety glasses, a respirator or dust mask, painter’s tape, sandpaper in several grits, a sanding block, clean rags, mixing cups, mixing sticks, a utility knife or rotary tool, and a shop vacuum.
Depending on the crack, you may also need epoxy resin, polyester resin, fiberglass cloth or mat, filler powder, gelcoat repair paste, acetone or a manufacturer-approved cleaner, plastic spreaders, masking film, rubbing compound, and polish. Many small cracks can be handled with a fiberglass repair kit, especially for tubs, showers, kayaks, and small boat repairs. Read the product instructions before mixing anything. Resin has a working time, and once it starts curing, it will not politely wait while you look for the scissors.
Easy Method 1: Repair a Hairline Fiberglass Crack
This method is best for shallow cracks in gelcoat, tubs, shower stalls, RV panels, and other non-structural surfaces. The goal is to open the crack slightly, give the repair material something to grip, fill it, sand it smooth, and polish or paint the surface.
Step 1: Clean and dry the area
Wash the surface with mild detergent and water to remove wax, soap scum, oil, dirt, and mystery garage residue. Dry the area completely. Fiberglass repairs do not bond well to moisture, grease, or old wax. If the product instructions recommend a specific solvent wipe, follow them carefully and use plenty of ventilation.
Step 2: Open the crack slightly
Use a utility knife, scraper, small file, or rotary tool to create a shallow V-shaped groove along the crack. This may feel wrong at firstyes, you are making the crack a little widerbut the reason is practical. A narrow crack does not give filler much surface area to grab. A small V groove allows the repair paste or resin to lock in properly.
Step 3: Sand the repair zone
Sand a small area around the crack with 80- to 220-grit sandpaper, depending on the repair product. The surface should look dull, not glossy. Glossy surfaces are great for admiring your reflection, terrible for bonding. Vacuum the dust and wipe the area as directed by the repair product.
Step 4: Fill the crack
Mix the repair paste, epoxy filler, or gelcoat paste exactly as directed. Apply it with a plastic spreader and slightly overfill the crack, because the material may shrink a little or need sanding later. Do not whip the mixture like cake batter; air bubbles are not delicious here.
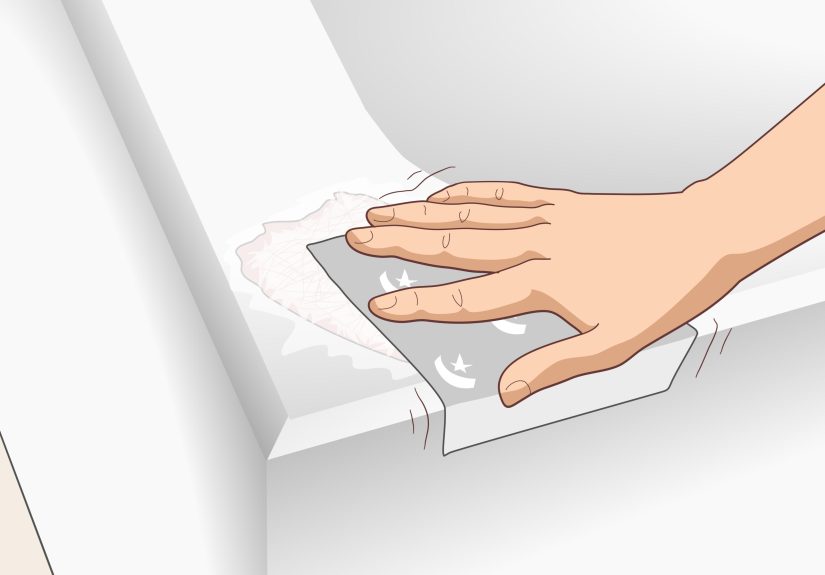
Step 5: Sand and finish
After the filler cures, sand it flush with the surrounding surface. Start with a medium grit and move gradually to finer wet/dry paper. For a glossy finish, polish with rubbing compound and then a finishing polish. If the surface is painted, apply primer and paint compatible with the cured repair material.
Easy Method 2: Patch a Deeper Crack with Fiberglass Cloth
Use this method when the crack extends into the laminate, exposes fiberglass fibers, leaks, or needs added strength. This is common on boats, kayaks, RV panels, and some shower or tub bases where the surface has flexed enough to split.
Step 1: Remove loose material
Grind or sand away cracked, loose, soft, or contaminated material until you reach solid fiberglass. Feather the edges around the crack. A common repair principle is to create a wide bonding area rather than a steep cliff. A shallow bevel spreads stress across the patch and helps the repair sit flush.
Step 2: Cut fiberglass cloth pieces
Cut several pieces of fiberglass cloth before mixing resin. Make the first piece slightly larger than the deepest part of the repair and each next piece wider than the last. This layered approach helps rebuild thickness smoothly. Dry-fit the pieces so you are not wrestling sticky cloth later like it is a caffeinated spiderweb.
Step 3: Wet out the repair area
Mix the resin according to the manufacturer’s ratio. Brush a thin layer onto the sanded area. Place the smallest cloth patch first and wet it out with resin until it turns transparent. Add the next layer, wet it out, and continue until the repair is slightly proud of the surface.
Step 4: Remove bubbles
Use a plastic spreader, brush, or fiberglass roller to press out trapped air. Air bubbles weaken the patch and can show up later as tiny craters. Work gently but firmly. You want the cloth saturated, not drowning in a lake of resin.
Step 5: Let it cure fully
Allow the patch to cure for the full recommended time. Temperature matters: cold conditions slow curing, while hot conditions can shorten working time. Do not rush sanding before the resin is hard. Half-cured resin clogs sandpaper and tests your emotional maturity.
Easy Method 3: Finish with Gelcoat, Paint, or Polish
Once the fiberglass repair is strong, the cosmetic work begins. For boats and many molded fiberglass surfaces, gelcoat is the traditional outer finish. For RV panels, automotive parts, and some utility items, primer and paint may be more practical. For tubs and showers, use a repair system designed for bathroom fixtures, because color matching and water exposure matter.
Using gelcoat
Gelcoat repair works well for small chips, scratches, and surface cracks. The challenge is color matching. White is not just white; it is snow white, warm white, old-shower white, boat-that-has-seen-things white, and “why does this not match?” white. For the best result, test the color first in a small area. Apply gelcoat slightly high, let it cure, then wet sand and polish.
Using paint
If the surface is already painted, or if the repair area is large, paint may be easier than gelcoat. Use a primer compatible with fiberglass and the resin underneath. Sand between coats as recommended. Thin, even coats usually look better than one heroic coat that runs like it has somewhere to be.
Polishing the repair
Wet sanding with progressively finer grits helps blend the repair into the surrounding surface. After sanding, use rubbing compound, then polishing compound, and finally wax if appropriate. On boats, wait until coatings are fully cured before waxing. On tubs or showers, avoid slippery waxes that could turn your bathroom into a low-budget skating rink.
Epoxy vs. Polyester Resin: Which One Should You Use?
Epoxy resin is known for strong adhesion, water resistance, and versatility. It is often a smart choice for repairs where bonding strength matters, especially when patching existing cured fiberglass. Polyester resin is common in original fiberglass construction and is often used with gelcoat systems. It can be less expensive and works well for certain cosmetic and marine repairs, but it does not always bond as strongly to old cured laminate as epoxy does.
For small DIY repairs, epoxy is often forgiving and durable. For a gelcoat finish, however, check compatibility carefully. Some gelcoats do not cure properly over certain epoxies unless the surface is fully cured, washed, sanded, and prepared according to the product instructions. The safest answer is not “always epoxy” or “always polyester.” The safest answer is: match the resin to the surface, the repair type, the finish, and the manufacturer’s directions.
Common Mistakes to Avoid
Repairing over dirt, wax, or moisture
Bonding to contamination is like putting tape on a dusty wall and acting surprised when it falls off. Clean, dry, sanded fiberglass gives resin and filler the best chance to hold.
Using too much resin
More resin does not automatically mean more strength. Fiberglass cloth provides reinforcement; resin binds it. A resin-rich patch can become brittle and heavy. Saturate the fabric, remove bubbles, and avoid puddles.
Skipping reinforcement on deep cracks
Filler alone is not a structural repair. If the laminate is cracked, add fiberglass cloth or mat as needed. Otherwise, the crack may return in the same spot, because apparently it missed you.
Sanding without protection
Fiberglass dust can irritate skin, eyes, and lungs. Wear protection and control dust with a vacuum. Long sleeves may not look glamorous, but neither does scratching your arms all evening.
Ignoring the cause of flexing
If a tub floor or boat deck keeps flexing, the crack may return after repair. Add support from below when possible, reinforce the back side, or consult a professional for structural problems.
When to Call a Professional
DIY fiberglass crack repair is great for small cosmetic cracks, chips, scrapes, and simple patches. Call a professional if the crack is large, spreading, leaking badly, located below a boat’s waterline, near a transom, around hardware that carries load, or part of a tub or shower floor that feels unsupported. Also get help if you find wet core material, rotten backing, delamination, or damage caused by impact.
A professional repair may cost more upfront, but it can prevent repeat damage, leaks, mold, or safety problems. There is no shame in hiring help. The true shame is pretending a structural crack is “just cosmetic” and later discovering it has a sequel.
Extra Experience: Real-World Lessons from Repairing Cracked Fiberglass
The first thing most people learn about fiberglass repair is that the actual filling or patching is not the hard part. The hard part is preparation. In real projects, 70 percent of the job is cleaning, grinding, sanding, masking, vacuuming, dry-fitting, and waiting. The resin stage is short. The prep stage is where the repair is won or lost.
One practical lesson is to make the repair area larger than the visible crack. Cracks rarely stop exactly where your eyes stop seeing them. Lightly sanding beyond the visible damage often reveals tiny extensions, old stress marks, or weak edges. If you only fill the center line, the crack can reappear beside the repair. It is better to make one careful repair than three tiny apologies.
Another lesson: color matching is harder than strength. A fiberglass patch can be structurally sound and still look like a bandage. On boats, tubs, and white panels, aging changes the surrounding color. A brand-new white repair may look too bright next to older fiberglass. When appearance matters, test the gelcoat or tint first, work in small batches, and accept that perfect color matching may require professional materials or spraying equipment.
Patience during curing also matters. Many DIYers sand too early because the repair feels “mostly hard.” That is how sandpaper gets clogged, edges tear, and the surface becomes lumpy. Let the resin or filler cure fully according to the label. If the weather is cool or humid, give it extra time. Fiberglass repair rewards the person who can walk away and resist poking it every ten minutes.
Masking is another underrated trick. Tape around the repair before sanding and filling, especially on tubs, shower stalls, RV panels, and glossy boat surfaces. Masking keeps resin smears contained and reduces cleanup. Remove tape before the repair becomes rock-hard if the product allows it, so you do not chip the edges while peeling.
For cracks in a fiberglass tub or shower pan, support is often the secret issue. If the bottom flexes when someone stands on it, filling the crack from the top may not last. Accessing the underside and adding support can make a huge difference. Sometimes that means adding a reinforced backing plate or bedding material beneath the weak area. Without support, the crack may return like a bad sitcom character.
For boat and kayak repairs, water exposure changes everything. The damaged area must be dry before repair. If moisture is trapped inside laminate or core material, sealing it in can create future problems. Let the area dry thoroughly, inspect for soft spots, and avoid rushing repairs on surfaces that have been submerged or leaking.
Finally, do not underestimate cleanup. Prepare disposable gloves, trash bags, stir sticks, and covered work surfaces before opening resin. Once resin is mixed, the clock starts. Having everything ready makes the job calmer, cleaner, and far less likely to involve frantic one-handed searching while wearing a glove that has become part of your soul.
Conclusion
Repairing cracked fiberglass is not magic. It is a careful sequence: inspect the damage, clean the area, sand or bevel the crack, choose the right filler or reinforcement, let the repair cure, and finish it with sanding, gelcoat, paint, or polish. Small hairline cracks can often be fixed with a simple filler or gelcoat repair. Deeper cracks need fiberglass cloth and resin to restore strength.
The easiest fiberglass repair is the one you do patiently. Respect the materials, protect yourself from dust and fumes, and do not skip the boring steps. Boring steps are the quiet heroes of DIY. They do not get applause, but they keep the crack from coming back next month with a tiny suitcase.
Note: This article is written for general educational DIY guidance. Always follow the instructions and safety warnings on the specific fiberglass repair products you use. For structural, marine, load-bearing, or large leak repairs, consult a qualified professional.


