Table of Contents >> Show >> Hide
- Before You Start: Are Railroad Ties Right for Your Yard?
- Planning Your DIY Retaining Wall Project
- Step-by-Step: How to Build a Railroad Tie–Style Retaining Wall
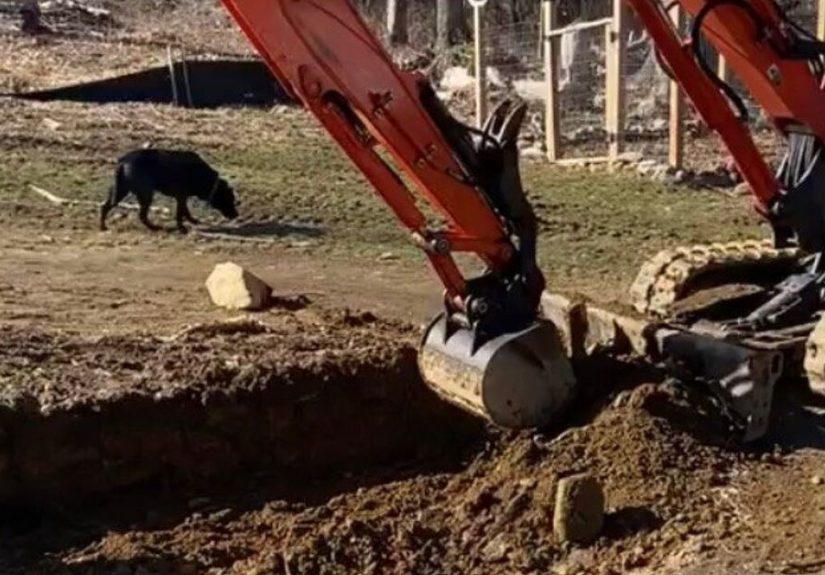
- Step 1: Mark and Excavate the Wall Footprint
- Step 2: Add and Compact the Gravel Base
- Step 3: Set the First Course of “Ties” Perfectly Level
- Step 4: Install Drainage and Backfill Behind the First Course
- Step 5: Stagger and Stack Additional Courses
- Step 6: Pin the Timbers Together
- Step 7: Backfill and Finish the Top
- Drainage, Longevity, and Maintenance
- Safer Alternatives That Mimic the Railroad Tie Look
- Cost Snapshot: What You Can Expect to Spend
- Wrap-Up: Is a Railroad Tie Retaining Wall Worth It?
- Real-Life DIY Experience: Lessons from a “Railroad Tie” Retaining Wall
Got a sloping yard that keeps washing your mulch into the neighbor’s driveway?
A DIY retaining wall can turn that chaotic slope into usable, good-looking
landscaping. If you’ve scrolled Hometalk or Pinterest, you’ve probably seen
plenty of rustic walls built with “railroad ties” and thought, “Hey, I could
do that!”
You absolutely can build a DIY retaining wall yourself, but there are two big
things you need to know up front:
- Real, reclaimed railroad ties are heavy, messy, and often not safe for residential use.
- Retaining walls are all about structure and drainage, not just stacking wood and hoping for the best.
In this guide, we’ll walk through how to build a “railroad tie–style”
retaining wall, explain the pros and cons of using actual ties, show you safer
alternatives, and share real-life lessons from a DIY project that could have
been a disaster but turned into a backyard win.
Before You Start: Are Railroad Ties Right for Your Yard?
Traditional railroad ties are chunky wood beams soaked in creosote so they
can survive decades under train tracks. That’s great for trains. For your
backyard? It’s complicated.
What Exactly Are Railroad Ties?
Railroad ties are typically:
- Large, dense timbers, often around 7″ x 9″ x 8′ long.
- Treated with creosote, a coal tar–based preservative that helps resist rot and insects.
- Heavy enough that you’ll be on a first-name basis with your chiropractor after moving a few.
Many people love the rugged, rustic look of these beams in retaining walls,
steps, and garden borders. But there’s a catch: creosote isn’t just stinky
black gooit’s a chemical preservative with health and environmental
concerns, especially in residential settings.
Important Safety & Legal Considerations
Before you head to the salvage yard, keep these key points in mind:
-
Creosote-treated ties are not approved for residential landscaping.
U.S. regulators do not register creosote for typical home uses like
garden borders or play areas. Old ties can leach chemicals into soil and
can be a concern where kids, pets, or edible plants are involved. -
Never use railroad ties around vegetable beds or edible plants.
Extension services and garden organizations specifically warn against using
creosote-treated ties near anything you plan to eat. -
Local codes may limit or prohibit their use.
Some areas treat reclaimed railroad ties as industrial material, not
residential landscape lumber. Always check with your local building
department before building a retaining wall of any kind.
For most homeowners, the best approach is to build a “railroad tie–style”
retaining wall using:
- Pressure-treated 6×6 or 8×8 timbers rated for ground contact.
- Engineered wood or composite landscaping timbers.
- Concrete block or stone if you want long-term, low-maintenance performance.
In this article, we’ll use the term “railroad ties” loosely to describe
that chunky, timber-style lookbut we strongly recommend using modern,
residential-grade timbers rather than old creosote ties, especially if
you have kids, pets, or gardens nearby.
Planning Your DIY Retaining Wall Project
A retaining wall is more than a wooden fence lying down. It’s a structural
system that holds back soil, manages water, and keeps your yard from slowly
sliding toward your house.
1. Check Local Codes and Call Before You Dig
-
Height rules: Many areas limit DIY retaining walls to
about 3–4 feet high before you need an engineer or permit. -
Material rules: Ask specifically about treated ties or
reclaimed materials, and what’s allowed in your area. -
Call 811 (in the U.S.). Before digging, have underground
utilities marked. Nothing ruins a Saturday project like hitting a gas line.
2. Measure the Site and Sketch a Simple Plan
Grab a tape measure and note:
- Length of wall you need to build.
- Height of the slope you’re holding back.
- Any curves, corners, or steps you want to incorporate.
From this, you can estimate how many timbers (“ties”) you’ll need. For
example, a 20-foot-long wall that’s 3 feet high using 8-foot timbers will
likely require several staggered courses and some cuts. Add at least 10–15%
extra for waste and mistakesbecause there will be mistakes.
3. Gather Tools and Materials
For a typical DIY railroad tie–style retaining wall, you’ll need:
- Pressure-treated landscape timbers or “tie-style” beams.
- Crushed stone or gravel (for base and backfill).
- Perforated drain pipe and fittings.
- Landscape fabric or geotextile (for weed and soil separation).
- Rebar or landscape spikes (for pinning the timbers together).
- Exterior-rated construction screws or lag bolts (optional reinforcement).
- Shovels, digging bar, and a wheelbarrow.
- Hand tamper or plate compactor (renting one is worth it).
- Drill with long auger bit (for drilling pin holes).
- Circular saw or chainsaw (for cutting timbers to length).
- 4-foot level, string line, and stakes.
- Gloves, safety glasses, andif working with older tiesa proper respirator.
If you’re using actual reclaimed ties, expect more mess and more safety
precautions. If you can choose new, ground-contact-rated timbers instead,
your lungs, skin, and sanity will thank you.
Step-by-Step: How to Build a Railroad Tie–Style Retaining Wall
Every yard is a little different, but most timber retaining walls follow a
similar build sequence. Think: dig, base, first course, drainage, stack,
pin, backfill, repeat.
Step 1: Mark and Excavate the Wall Footprint
-
Use stakes and string to mark the front edge of your wall. Keep the line
straight, or follow a smooth curve if that’s your plan. -
Dig a trench along this line that’s:
- Wide enough for your timber plus 4–6 inches of gravel on each side.
- Deep enough to bury at least 1/3 to 1/2 of the first timber height.
-
Slope the soil behind the trench slightly back toward the hill so the wall
can lean very slightly into the slope, which helps resist pressure.
Step 2: Add and Compact the Gravel Base
- Lay 4–6 inches of crushed stone or gravel in the bottom of the trench.
-
Use a hand tamper or plate compactor to compact the gravel thoroughly.
This base is what keeps your wall from settling and tilting later. - Check for level along the length of the trench. Adjust the gravel as needed.
Step 3: Set the First Course of “Ties” Perfectly Level
The first course is the boss. If it’s crooked, every course above it will
be worse.
- Lay your first row of timbers into the trench on top of the compacted gravel.
- Check each timber for level front-to-back and end-to-end.
-
Use additional gravel to shim and support low spots. Don’t use soil for
thisit compresses too much.
Take your time here. Spending an extra 30 minutes on the base row can save
you hours of frustration later.
Step 4: Install Drainage and Backfill Behind the First Course
Water is the #1 enemy of retaining walls. Without proper drainage, pressure
builds up behind the wall and can cause bulging or failure.
-
Lay a strip of landscape fabric behind the first course, folding it up the
hill. This helps keep soil from packing into your gravel. -
Place a perforated drain pipe behind the first course of timbers, sloped
slightly so water has somewhere to go (daylight or a drain outlet). - Backfill around the pipe with more gravel, tamping as you go.
Step 5: Stagger and Stack Additional Courses
-
Place the second course of timbers on top of the first, staggering the
joints like bricks so no vertical seams align. - For corners or curves, cut timbers to fit snugly. Dry-fit first, then cut.
- Check level and alignment with each course. Adjust as needed before pinning.
Step 6: Pin the Timbers Together
To keep the wall from shifting over time, you’ll pin the courses together
with rebar or long landscape spikes.
-
Pre-drill vertical holes through the top timber into the one below using a
long auger bit. -
Drive rebar or spikes through the holes into the lower course using a
sledgehammer or heavy mallet. - Space pins every 3–4 feet along the wall and at all corners or joints.
Repeat this processstacking, leveling, pinning, and backfilling with
graveluntil your wall reaches the desired height.
Step 7: Backfill and Finish the Top
-
Continue to backfill with gravel directly behind the wall and compact
in thin layers. Top with soil further back where you want to plant. -
Fold the landscape fabric over the top of the gravel before adding soil
or mulch. This helps keep fine particles out of your drainage layer. -
Slightly slope the soil on top so water runs away from the wall, not
straight down behind it.
You can finish the top course with a “cap” row of timbers, a bench, or even
a planter box built into the wall for extra style and function.
Drainage, Longevity, and Maintenance
A retaining wall that looks great on day one but starts leaning like a
tired old fence by year three is… not ideal. To keep your wall functional
and attractive:
-
Keep drains clear. Make sure outlet points for your
perforated pipe stay open and free of debris. -
Watch for bulges. If a section begins to lean or bow,
address drainage issues early rather than waiting for a full collapse. -
Protect the wood. For non-creosote timbers, you may be
able to extend life by keeping soil and mulch slightly below the top of
the beam so water sheds away instead of pooling.
Wood or “railroad tie–style” walls typically aren’t as long-lived as concrete
block or stone, but with good drainage and preventive care, you can get
many years of service from them.
Safer Alternatives That Mimic the Railroad Tie Look
Love the chunky, rustic look but not excited about creosote-soaked sleepers?
You have options.
-
Pressure-treated landscape timbers: Sized similarly
to railroad ties but designed for residential use. Choose ones rated
for ground contact. -
Engineered composite “timbers”: Made from recycled
plastics or composite materials. More expensive up front, but durable
and low-maintenance. -
Concrete block retaining walls: Not wood, but modular
blocks can give a clean, modern look and often last longer with less
maintenance. -
Natural stone: Ideal if you want a timeless, high-end
look and are willing to invest more labor or hire a pro.
A lot of modern “railroad tie” projects you see online are actually built
with these safer, residential-grade materials that simply mimic the old
railroad aesthetic.
Cost Snapshot: What You Can Expect to Spend
Costs can vary by region, lumber prices, and how much equipment you rent,
but here’s a rough idea:
-
Timbers: Often in the range of $20–$40 per piece for
pressure-treated 6x6s, depending on length and treatment. -
Gravel and drainage: Several yards of crushed stone,
plus perforated pipe and fabricoften a few hundred dollars combined
for a medium-sized wall. -
Equipment rentals: A plate compactor, power auger, or
small loader can speed up the job and may cost $50–$150 per day.
Even with materials and rentals, a DIY retaining wall typically costs
significantly less than hiring a contractorjust trade money for sweat
equity and some sore muscles.
Wrap-Up: Is a Railroad Tie Retaining Wall Worth It?
A DIY retaining wall can transform a tricky slope into a usable, beautiful
space, and timber-style walls are approachable for many handy homeowners.
The key is to:
- Respect the structural side: base, drainage, and proper pinning.
- Respect the safety side: choose materials approved for residential use.
- Respect your back: don’t be afraid to recruit a friend or rent equipment.
If you love the look of a railroad tie retaining wall, you can absolutely
get that style using modern, safer landscape timbersand still enjoy that
classic Hometalk-worthy “before and after.”
Real-Life DIY Experience: Lessons from a “Railroad Tie” Retaining Wall
Let’s talk about what this project really feels like in the real
world, beyond the perfect, dust-free photos.
Picture this: your backyard has a sloped corner where the lawn mower goes to
die. Water runs straight down the hill, taking your mulch, topsoil, and
occasionally your patience. You decide it’s time to build that retaining
wall you’ve saved a dozen Hometalk posts about.
Step one? Optimism. You measure the space, calculate you’ll need “maybe 10
timbers,” and feel pretty confident. The lumber yard quickly informs you
that your math was “adorable” and you actually need closer to 16–18 pieces
once you account for cuts, staggering joints, and the reality that no wall
is perfectly straight.
The first real moment of truth comes when you unload the timbers. They’re
heavy. As in, “I should have stretched first” heavy. This is where a wheelbarrow,
a friend, or a rental mini skid-steer suddenly feels like the best decision
you’ve ever made.
Excavation day is another humbling experience. Digging out the trench takes
longer than you think, especially if you hit roots, rocks, or the remains
of previous landscaping experiments. By the time you tamp the gravel base
and finally get that first course of timbers level, you’ll understand why
every pro screams “The base row is everything!”
As you build up courses, you’ll start to appreciate the rhythm:
place timber, check level, drill pin holes, drive rebar, backfill with
gravel, compact, repeat. It’s physical work, but there’s something oddly
satisfying about watching those courses stack neatly and that once-useless
slope turn into a clean, terraced edge.
You’ll also make at least one classic DIY mistake:
-
Forgetting to slope the drain pipe enough, then realizing water doesn’t
magically flow uphill. -
Underestimating how much gravel you need and making a last-minute run
back to the landscape yard. -
Cutting a timber 1 inch too short and learning the painful definition
of “measure twice.”
The good news? Most of these mistakes are fixable if you catch them early.
And they all teach the same lesson: the wall’s long-term success depends
more on drainage and base prep than anything else.
A year or two later, you’ll really see how you did. A well-built timber
retaining wall still looks straight, drains well after storms, and hasn’t
developed weird bulges or gaps. You might notice some natural weathering
on the wood, but the structure still feels solid when you walk along the top.
If you rushed the job, skipped gravel, or treated drainage like an optional
extra, you’ll notice subtle signs of trouble: leaning sections, soil pushing
through cracks, or water pooling where it shouldn’t. At that point, you
either correct the issues (often by adding drainage or rebuilding a section)
or make a mental note for your “next wall” to do things differently.
The biggest takeaway from real-world experience? A DIY retaining wall isn’t
just another weekend projectit’s somewhere between landscaping and light
engineering. But if you respect the process, choose safe materials, and
follow solid building principles, you end up with more than just a wall:
you gain usable yard space and a daily reminder that, yes, you really did
build that.
That’s the kind of project that absolutely earns its spot on Hometalk,
complete with dramatic before-and-after photos and a comment section full
of people saying, “Okay, now I want to do this too.”