
Table of Contents >> Show >> Hide
- Why DIY Chalkboard Coasters Are Worth Making
- Best Materials for Chalkboard Coasters
- Supplies List
- How to Make DIY Chalkboard Coasters
- Creative Design Ideas for DIY Chalkboard Coasters
- Tips for the Best Results
- Common Mistakes to Avoid
- How to Use DIY Chalkboard Coasters Around the House
- Are DIY Chalkboard Coasters Good for Gifts?
- Long-Form Experience: What Making DIY Chalkboard Coasters Actually Feels Like
- Conclusion
Some projects are born from pure inspiration. Others are born because your coffee table has seen things. If your furniture has survived mystery mugs, sweating iced coffee, and that one guest who swears, “Oh, I never need a coaster,” this project is your stylish little revenge. DIY chalkboard coasters are practical, customizable, affordable, and just plain fun to make. They protect surfaces, double as decor, and give you a tiny canvas for doodles, names, quotes, holiday messages, or the occasional dramatic “This is definitely tea.”
What makes these coasters especially charming is that they sit right at the sweet spot between useful and adorable. They are easy enough for a beginner, cute enough for gifts, and clever enough to earn compliments at parties. You can make them from ceramic tiles, small wood circles, cork, or even plain saucers, then transform the top into a writable chalkboard surface. The result feels polished without being fussy. In other words, it is the kind of craft that looks far more impressive than the amount of chaos required to create it.
In this guide, you will learn how to make DIY chalkboard coasters step by step, which materials work best, how to avoid the most common mistakes, and how to style them for everyday use, entertaining, or gifting. There is also a longer experience section at the end for readers who enjoy the real-life side of crafting, including what the process feels like, what usually goes wrong, and why this project keeps winning people over.
Why DIY Chalkboard Coasters Are Worth Making
There are plenty of coaster ideas out there, but chalkboard coasters have a few extra tricks up their sleeve. First, they are customizable. You can label drinks at a dinner party, write guests’ names for place settings, add tiny seasonal drawings, or leave funny notes for family members. Second, they are budget-friendly. A small set can often be made with basic supplies from a hardware, craft, or discount store. Third, they are useful. Good coasters help protect tables from moisture rings, scratches, and the slow emotional decline caused by watching condensation roll toward expensive furniture.
They also make excellent handmade gifts. A tied stack of chalkboard coasters paired with chalk or a chalk marker feels thoughtful without looking overly precious. Teachers, neighbors, hosts, coffee lovers, newlyweds, and holiday party attendees can all appreciate a gift that says, “I care about you and also your end tables.”
Best Materials for Chalkboard Coasters
1. Ceramic tiles
Ceramic tiles are the classic choice for DIY coasters. They are affordable, easy to find, sturdy, and give you a flat surface that paints well. Square tiles create a clean, modern look, but you can also use round tile pieces if you want something softer.
2. Cork bases
Cork is lightweight and naturally coaster-friendly. It is a good option if you want something softer, quieter, and easy to cut into shapes. Cork is also great for homes with lots of glass and delicate tabletop finishes.
3. Wood slices or wood blanks
Wood gives the project warmth and a handmade look. If you use wood, make sure it is sanded smooth and ready for paint. This version leans rustic and works beautifully in farmhouse, cabin, or cozy kitchen spaces.
4. Felt or cork backing
Do not skip the backing. This is the part that keeps your coaster from scratching furniture or sliding around like it is auditioning for an action movie. Adhesive felt pads, cork sheets, or pre-cut backing all work well.
5. Chalkboard paint or spray paint
This is the star of the show. You can use brush-on chalkboard paint for control or spray chalkboard paint for a smoother finish. If you want a more even surface and faster coverage, spray paint is often the easiest route. If you want less overspray and more precision, brush-on paint is your friend.
6. Chalk or chalk markers
Regular chalk gives a classic dusty look. Chalk markers can create brighter, sharper lettering, though they feel a little more polished and less old-school café menu. Either works, depending on your style.
Supplies List
- 4 ceramic tiles, cork circles, or wood blanks
- Chalkboard paint or chalkboard spray paint
- Fine-grit sandpaper
- Rubbing alcohol or mild cleaner
- Foam brush or paintbrush if using brush-on paint
- Painter’s tape if you want crisp edges or designs
- Adhesive felt pads or cork backing
- Scissors or craft knife
- Regular chalk or chalk marker
- Optional: ribbon, gift tags, stencils, metallic paint, or vinyl decals
How to Make DIY Chalkboard Coasters
Step 1: Clean and prep the surface
Start by cleaning your coaster bases thoroughly. Dust, oil, and residue can mess with paint adhesion, and nobody wants their hard work peeling off because the tile was still wearing a thin layer of warehouse mystery. If you are using tile or wood, wipe it down and let it dry completely. Lightly sanding glossy surfaces can also help the paint grip better.
Step 2: Apply the chalkboard paint
Use thin, even coats rather than one thick, impatient blob of ambition. If you are brushing the paint on, move in smooth strokes and allow each coat to dry before adding the next. If you are spraying, work in a well-ventilated area and keep the coats light to avoid drips. Two to three coats usually create the best finish and coverage.
If you want a clean border or a dipped design, apply painter’s tape before painting. This can create a modern, color-blocked look and make the coasters feel more designer and less “I attacked some tile with craft supplies at 10 p.m.”
Step 3: Let the paint cure fully
This is the part where patience becomes a character-building exercise. Dry is not the same as cured. A surface may feel dry to the touch long before it is ready for real use. Let the paint cure according to the product directions so the finish becomes durable and writes cleanly. Skipping this step is how people end up smudging, scratching, and quietly blaming the project when it was actually their own inability to wait.
Step 4: Season the chalkboard surface
Before using the coaster, rub the side of a piece of chalk over the entire painted area and then wipe it clean. This conditions the surface and helps prevent ghosting, which is the faint permanent memory of the first thing you wrote. That may sound poetic, but it is less charming when the first thing written was “Bob’s soda” and now Bob lives on your coaster forever.
Step 5: Add backing to the bottom
Flip the coaster over and apply felt pads or a cork layer. This protects tables and gives the coaster a more finished feel. Full-sheet backing looks sleek, while corner felt pads are quick and easy. Either way, this step turns your craft into something that feels complete instead of almost complete, which is a category where too many DIY projects sadly live.
Step 6: Personalize and style
Now for the fun part. Write names, initials, seasonal icons, favorite drink labels, mini menus, or short quotes. You can also decorate the edges with metallic paint, stencil patterns around the border, or create a gift set tied with ribbon. Personalized coaster sets work especially well for weddings, host gifts, holidays, and housewarming presents.
Creative Design Ideas for DIY Chalkboard Coasters
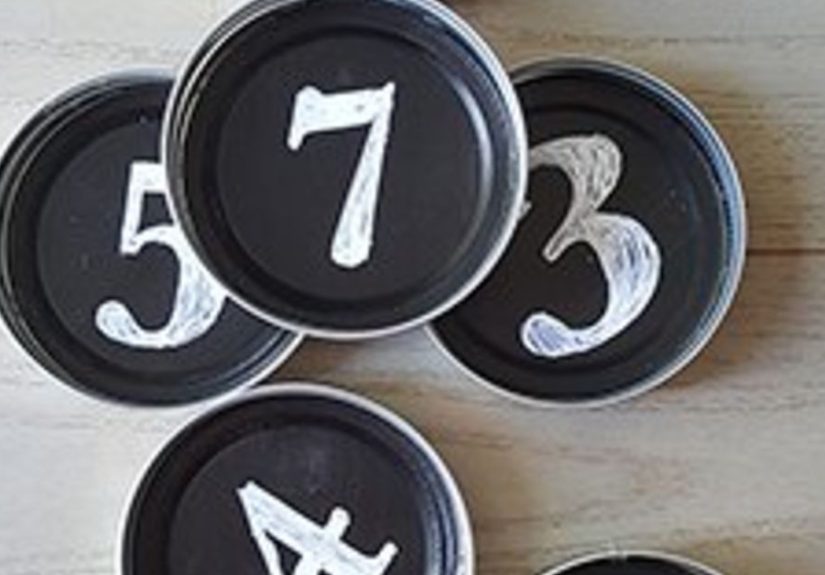
Minimalist black-and-white set
Keep the coaster fully black on top with crisp white lettering. This look works in modern homes and makes even your water glass feel like it came from an expensive café.
Farmhouse kitchen style
Use wood rounds or distressed tile edges, then write simple words like “sip,” “brew,” “tea,” or “cheers.” This design feels cozy, casual, and right at home beside a basket of lemons and a suspiciously photogenic sourdough loaf.
Holiday coaster sets
Create themed sets for Halloween, Thanksgiving, Christmas, New Year’s, or summer parties. Tiny pumpkins, snowflakes, stars, or citrus doodles can turn basic coasters into seasonal decor.
Party place cards
Use the coasters to label each guest’s seat at a dinner party or bridal shower. It is a smart little detail that feels custom without requiring a degree in event planning.
Gift-ready bundles
Stack four coasters, wrap them with twine or ribbon, and tuck in a piece of chalk or a marker. Suddenly, your easy weekend craft becomes a gift with main-character energy.
Tips for the Best Results
- Use several light coats instead of one heavy coat.
- Let each coat dry properly before adding the next one.
- Follow full cure time for the paint before writing on the surface.
- Condition the chalkboard before first use to reduce ghosting.
- Add felt or cork backing so the coaster protects your furniture both on top and underneath.
- Test chalk markers on one coaster first if you want a cleaner, brighter look.
- Make an extra coaster or two, because one will somehow become your favorite and vanish into another room.
Common Mistakes to Avoid
Rushing the curing process
This is the most common mistake. If the coaster is used too early, the finish may scratch or smear. It is tempting to speed through the wait, but this is one of those rare moments in life where doing nothing is technically doing the project correctly.
Skipping the backing
A coaster without felt or cork on the bottom may still protect from moisture, but it can scratch the table or slide around too easily. Protecting furniture should not involve attacking it from below.
Using thick coats
Heavy paint coats can drip, crack, or dry unevenly. Thin layers are more reliable and create a smoother writing surface.
Forgetting to condition the surface
If you skip this, your first message may leave a permanent shadow. That is not ideal unless the message is “You look amazing today,” and even then it is a gamble.
How to Use DIY Chalkboard Coasters Around the House
These coasters can do more than sit under drinks. Use them in a home office to label cups during meetings. Set them out during brunch and write drink names like coffee, tea, mimosa, or “just surviving.” Put them in a kids’ craft area for doodling breaks. Use them as mini signs on a hot cocoa bar, dessert table, or snack station. They also work nicely in guest rooms, where a coaster and a handwritten note can make the space feel thoughtful and welcoming.
If you entertain often, keeping a set of chalkboard coasters nearby makes hosting easier. Guests can identify their drinks, and you can make the table feel more personal with very little effort. It is the kind of detail people remember, partly because it is cute and partly because nobody likes accidentally drinking from the wrong glass.
Are DIY Chalkboard Coasters Good for Gifts?
Absolutely. They are one of those rare handmade gifts that manage to be useful, attractive, and personal all at once. They can be customized for nearly anyone, from a coffee-obsessed friend to a teacher who deserves better than another candle. A set made in neutral colors feels elegant, while bright painted edges or playful lettering can make the gift more casual and fun.
For holiday gifting, pair the coasters with mugs, tea sachets, hot cocoa mix, or a bag of coffee beans. For a housewarming gift, wrap them with a dish towel or a bottle of wine. For weddings or bridal showers, use initials or a shared last name. For teachers, add messages like “Best. Teacher. Ever.” and hope they laugh instead of grading your handwriting.
Long-Form Experience: What Making DIY Chalkboard Coasters Actually Feels Like
There is something deeply satisfying about a project that starts with humble materials and ends with something you genuinely want to use. DIY chalkboard coasters are exactly that kind of project. At first glance, they seem almost too simple. You gather a few tiles or cork rounds, some chalkboard paint, and backing for the bottom, and it hardly feels like enough supplies to create anything memorable. But then the process starts, and the magic sneaks up on you.
The first experience most people have with this craft is surprise. Surprise that the materials are affordable. Surprise that the steps are manageable. Surprise that a plain tile can go from hardware-store boring to coffee-table cute with just a few coats of paint. There is also the very real emotional arc of this project, which deserves honesty. In the beginning, you feel optimistic. During drying time, you feel impatient. During curing time, you begin bargaining with the laws of chemistry. And when the finished coaster finally works exactly as hoped, you suddenly become the kind of person who says things like, “I should make a whole matching set.”
One of the best parts of making chalkboard coasters is how customizable the experience is. Some people enjoy the neat, measured version: equal coats, crisp edges, minimalist lettering, perfect stacks. Others prefer the more playful route: doodles, hand-lettered names, seasonal shapes, and a little bit of wonky charm. Both approaches work. In fact, that flexibility is part of why this project remains so appealing. It does not demand perfection. It rewards personality.
There is also a quiet confidence that comes from making something functional. Decorative crafts are lovely, but practical crafts hit differently. When you make a coaster and someone actually uses it, you get that tiny spark of victory. It is no longer just a craft. It is now part of daily life. It sits beside the couch during movie night, lands on the breakfast table with a mug of coffee, and quietly protects furniture while looking much more stylish than its modest origin story suggests.
Another real experience with this project is learning patience. Chalkboard paint teaches that lesson whether you asked for it or not. Many crafters discover the hard way that dry does not mean ready. If you rush to write on the surface too soon, the finish can smudge or scratch, and suddenly your cute coaster looks like it lost a fight with a pencil case. But once you slow down and let the product do its thing, the project becomes much more rewarding. In a strange way, chalkboard coasters are a tiny workshop in delayed gratification, except the reward is not wisdom. It is a charming place to set your iced latte.
People also tend to remember the personal moments around this craft. Maybe you made a set for a holiday gathering and wrote everyone’s names on them. Maybe your kids doodled on each one and declared the mess “art.” Maybe you made a set as a last-minute gift and ended up keeping one because it was too cute to part with. These are the kinds of projects that pick up stories along the way. The coaster becomes more than an object. It becomes a little memory with felt on the bottom.
And that is really the appeal of DIY chalkboard coasters. They are easy enough to make on a weekend, useful enough to keep out year-round, and charming enough to make people ask where you got them. Getting to answer, “I made them,” is half the fun.
Conclusion
DIY chalkboard coasters are proof that small projects can still make a big impression. They protect surfaces, add personality to your space, and give you a creative little outlet without requiring a giant budget or a full craft-room meltdown. Whether you make them for yourself, for a party, or as gifts, they strike that lovely balance between cute and useful. And honestly, any project that helps your furniture survive while making your table look more put together deserves a little respect.
If you want a beginner-friendly craft with practical payoff, this one is hard to beat. A handful of supplies, a bit of patience, and a few coats of chalkboard paint can turn basic materials into something fun, functional, and surprisingly giftable. Not bad for a project that starts with a tile and a dream.


