Table of Contents >> Show >> Hide
- Can You Really Turn Putty Into Slime?
- What You Will Need
- How to Turn Putty Into Slime: 11 Steps
- Step 1: Identify the Putty Type
- Step 2: Work With a Small Test Piece First
- Step 3: Warm and Knead the Putty
- Step 4: Make a Fresh Slime Base
- Step 5: Stir in Baking Soda
- Step 6: Add the Putty in Tiny Pieces
- Step 7: Add Activator Slowly
- Step 8: Knead Until the Texture Changes
- Step 9: Adjust for Your Ideal Finish
- Step 10: Let It Rest for 5 to 10 Minutes
- Step 11: Store It the Right Way
- Troubleshooting Common Putty-to-Slime Problems
- Why This Method Works
- Best Add-Ins for Putty Slime
- Safety Tips You Should Not Skip
- Experiences People Commonly Have When Turning Putty Into Slime
- Final Thoughts
If you have a blob of putty that feels more like a stubborn lump than a fun sensory toy, you are not alone. A lot of homemade putty starts out charming and ends up acting like a tiny rubber gym sock. The good news is that you can often turn putty into slime, or at least into a softer, stretchier putty-slime hybrid, with the right method. The trick is knowing what kind of putty you are working with and not trying to bully it into becoming something it was never meant to be.
This guide walks you through 11 easy steps to make that transformation happen. You will also get texture fixes, storage tips, and a realistic explanation of why some putties convert beautifully while others just sit there judging you.
Can You Really Turn Putty Into Slime?
Yes, but not every putty behaves the same way. Homemade cornstarch putty, dish-soap putty, and glue-based putty are the easiest to loosen into slime. They already contain ingredients that can be softened, thinned, or rebalanced.
Traditional silicone putty, including some store-bought thinking putties, is a different beast. It is designed to stay putty-like, not become classic stretchy slime. In that case, your best result usually comes from blending a small amount into a fresh glue-based slime base rather than trying to melt the whole thing into goo. Translation: not all putty wants to live the slime life.
What You Will Need
- About 1/2 cup white school glue or clear PVA glue
- 1/4 to 1/2 teaspoon baking soda
- 1 to 2 teaspoons contact lens solution or slime activator
- Your putty, torn into small pieces
- 1 to 2 teaspoons warm water, hand lotion, or a drop of dish soap for softening
- Optional: 1 to 2 tablespoons cornstarch for a thicker putty-slime texture
- Food coloring, glitter, or foam beads if you want to get fancy
- A mixing bowl, spoon, and clean work surface
- An airtight container or zip-top bag for storage
If your putty is very old, dry, or crumbly, start with a smaller test batch first. That way, if your experiment goes sideways, you lose a tablespoon of putty instead of your entire afternoon.
How to Turn Putty Into Slime: 11 Steps
Step 1: Identify the Putty Type
Before you add anything, figure out what kind of putty you have. If it was made from cornstarch and dish soap, it will usually soften fast. If it was homemade with glue and borax or another activator, it can often be reworked into slime with a little moisture and fresh glue. If it is store-bought silicone putty, expect a slower, less dramatic change.
This step matters because different putties respond to different fixes. A soap-based putty may love lotion. A glue-based putty may need more glue and activator balance. A silicone putty may act like a cat being offered a bath.
Step 2: Work With a Small Test Piece First
Do not toss the whole blob into a bowl and hope for a miracle. Tear off a small piece, roughly the size of a grape, and test your method on that first. This gives you a chance to see whether the putty softens, clumps, melts, or flat-out refuses to cooperate.
Small-batch testing is the least glamorous part of slime making, but it saves supplies and frustration. Think of it as quality control for people who enjoy squishing things.
Step 3: Warm and Knead the Putty
Use the heat of your hands to knead the putty for a few minutes. If it feels stiff, add a few drops of warm water, a tiny dab of lotion, or a drop of dish soap and keep working it. The goal is to make it more pliable before it ever meets your slime base.
Do not drown it. A little moisture goes a long way. Too much liquid can make the putty separate into a gross mess that feels like wet flour paste with abandonment issues.
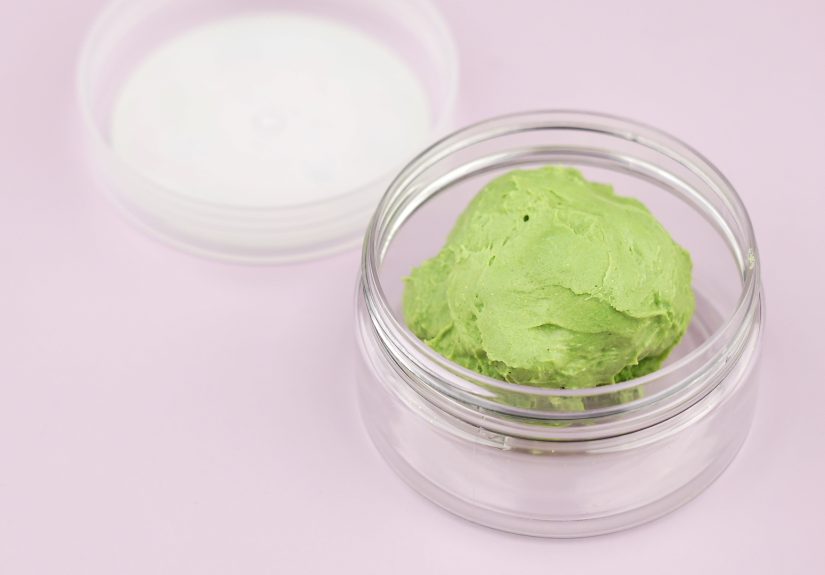
Step 4: Make a Fresh Slime Base
In a bowl, pour in about 1/2 cup of white school glue or clear PVA glue. This is your rescue base. If your putty refuses to stretch on its own, the glue gives it a fresh polymer backbone to cling to.
If your goal is a classic glossy slime, use clear or white glue and skip the cornstarch for now. If you want a thicker putty slime feel, you can add cornstarch later.
Step 5: Stir in Baking Soda
Add 1/4 to 1/2 teaspoon baking soda and mix thoroughly. This helps the base firm up and prepares it for activation. If you are using a commercial slime activator instead of contact lens solution, you may not need as much baking soda, so add it conservatively.
At this point the mixture still looks like glue pretending to be productive. That is normal.
Step 6: Add the Putty in Tiny Pieces
Tear your softened putty into the smallest pieces you can manage and mix them into the glue base. Do not toss in one giant chunk unless you enjoy chasing stubborn lumps around a bowl for fifteen minutes.
Small pieces distribute more evenly and give you a smoother final texture. If the putty starts dissolving into the glue, good. If it stays chunky, keep stirring. If it just smears like gum on a hot sidewalk, reduce the amount and keep going with a smaller test batch.
Step 7: Add Activator Slowly
Now add contact lens solution or slime activator a little at a time. Start with about 1 teaspoon. Stir well after each addition. You are looking for the mixture to thicken, pull away from the bowl, and stop acting like sweetened school glue soup.
This is where patience wins. Too much activator too quickly can make the batch rubbery and tough. Too little leaves it sticky. Slow additions help you hit the sweet spot between stretchy and tragic.
Step 8: Knead Until the Texture Changes
Once the mixture starts clumping, take it out and knead it with clean hands. This step is where slime actually becomes slime. The texture usually improves after a few minutes of folding, pressing, and stretching.
If it sticks to your hands, add a few more drops of activator. If it feels too firm, add a tiny bit more glue or one drop of warm water and keep kneading. The best batches are not born perfect. They are negotiated into existence.
Step 9: Adjust for Your Ideal Finish
Now decide what you want the final texture to be.
- For stretchier slime: add a little more glue and knead.
- For thicker putty slime: knead in 1 tablespoon cornstarch.
- For softer texture: add a tiny dab of lotion.
- For less stickiness: add a few drops more activator.
This is the point where your batch becomes personal. Some people want glossy, slow-stretch slime. Others want a doughier texture that holds shape. Neither is wrong. This is arts and crafts, not the Supreme Court.
Step 10: Let It Rest for 5 to 10 Minutes
Set the slime aside for a short rest. Freshly mixed slime can feel sticky, stringy, or weirdly warm. After a few minutes, the ingredients settle and the texture usually improves.
Then come back and test it again. Stretch it slowly. Roll it into a ball. Let it ooze through your fingers. If it still needs help, make one more small adjustment rather than dumping in random ingredients like you are starring in a chaotic slime challenge video.
Step 11: Store It the Right Way
Put the finished slime in an airtight container or sealed bag. That keeps it from drying out, getting grimy, or absorbing mystery crumbs from your kitchen table. Wash your hands before and after play, and keep slime away from fabric, carpet, and anyone who still puts things in their mouth.
If the slime starts to smell bad, separate, grow spots, or turn watery beyond repair, throw it out and start fresh. Slime is fun. Science experiments growing their own ecosystem are less fun.
Troubleshooting Common Putty-to-Slime Problems
If It Is Too Sticky
Add activator a few drops at a time and knead well after each addition. Sticky slime often just needs more kneading, not a chemical overreaction.
If It Is Too Stiff
Add a little glue, a drop of warm water, or a tiny bit of lotion. Knead slowly until the stretch comes back. Overactivated slime can often be rescued if you stop panicking and start adding moisture in microscopic amounts.
If the Putty Will Not Blend In
Your putty may be silicone-based or too dry to integrate smoothly. Use less of it and increase the fresh slime base. In some cases, the best result is not true conversion but a mixed texture that feels part slime, part putty.
If It Gets Stringy or Rippy
That usually means the batch needs more kneading or a little more glue. Stretch it slowly instead of yanking it like you are starting a lawn mower.
Why This Method Works
Most homemade slime depends on PVA glue plus an activator that links the polymer chains together. That creates the stretchy, moldable texture people love. Putty, meanwhile, is usually thicker, drier, or more tightly structured. To turn putty into slime, you are basically changing the moisture level, softening the texture, and rebalancing the polymer network so it behaves more like slime and less like modeling compound.
That is why fresh glue helps so much. It gives old putty something flexible to join. It is also why activator must be added gradually. Too much creates a batch that feels firm and snappy, while too little leaves it sticky and impossible to handle.
Best Add-Ins for Putty Slime
- Glitter: makes everything look intentional, even when it was not.
- Foam beads: create crunch and structure.
- Food coloring: best added before activation for even color.
- Cornstarch: thickens the slime for a smoother putty-slime hybrid.
- Shaving cream: creates a fluffier, lighter result if you want volume.
Just do not add everything at once. A slime recipe is not a junk drawer.
Safety Tips You Should Not Skip
Always supervise children when making slime, especially if you are using contact lens solution or commercial activators. Wash hands before and after play. Do not eat the ingredients. Avoid eyes, mouth, and broken skin. Cover your workspace, and store slime properly after use.
If someone develops irritation while handling slime, rinse skin thoroughly and stop using the batch. When in doubt, keep the activity simple and controlled. Sensory fun is great. Emergency room paperwork is not.
Experiences People Commonly Have When Turning Putty Into Slime
The experience of turning putty into slime is usually a mix of science, luck, and a little dramatic self-reflection. The first thing most people notice is that the batch rarely looks promising in the beginning. It often starts as a weird clumpy mess that seems personally offended by your efforts. You stir, it resists. You knead, it sticks. You add one drop too much of something, and suddenly you are in a staring contest with a bowl of glossy nonsense. Then, almost out of nowhere, the texture changes.
That moment is the reason people keep making slime. The mixture stops fighting you and starts cooperating. It stretches instead of snapping. It folds instead of crumbling. It makes that slow, satisfying pull that feels oddly relaxing after a long day of emails, chores, or whatever modern life has chosen to throw at you.
People using homemade dish-soap or cornstarch putty often describe the process as surprisingly forgiving. Those putties tend to soften quickly, and even when they overshoot the slime stage, they can usually be corrected with extra cornstarch or a little more glue. The texture often ends up silky, doughy, and easier to control than standard slime. It is less drippy, less messy, and better for anyone who likes sensory play but does not want their creation making a break for the edge of the table.
Glue-based putty usually gives the most recognizable slime result. Once it is mixed into a fresh glue base and activated properly, it can become glossy, stretchy, and strong enough for slow pulls and bubble pops. This is the batch that makes people feel like kitchen chemists. It is also the batch most likely to inspire overconfidence. Nothing says “I have lost perspective” like deciding your slime now needs glitter, beads, color shifting pigment, fake snow, and a scent called Unicorn Thunderstorm.
Store-bought silicone putty creates the most mixed reactions. Some people manage to soften it enough for a cool hybrid texture, but many find that it resists full conversion. Instead of becoming classic slime, it stays dense and springy. That does not mean the experiment failed. It just means the result is different. Some actually prefer that outcome because it feels less sticky and lasts longer in play.
Another common experience is learning that slow changes beat dramatic ones. A teaspoon of activator may fix everything. A tablespoon may ruin the batch. A tiny dab of lotion can make stiff slime smooth again. Too much turns it into a slippery puddle with trust issues. The best slime makers are not the ones who move fastest. They are the ones who make tiny adjustments and keep testing.
There is also the sensory side. Many people find the process calming because it combines repetitive hand motion, visual change, and immediate feedback. Kids often love the stretch and squish. Adults, meanwhile, may pretend they are “just helping” while secretly being the most invested person in the room. Completely normal behavior. Absolutely not suspicious.
In the end, the experience of turning putty into slime is less about perfection and more about getting the texture you enjoy. Sometimes you make glossy slime. Sometimes you make a thick putty-slime mashup. Sometimes you make an unholy blob that teaches you what not to do next time. That still counts as success, just with more cleanup.
Final Thoughts
If you want the easiest way to turn putty into slime, the smartest method is to soften the putty, blend it into a fresh glue base, and activate slowly. That gives you far more control than trying to force a dry lump to magically become stretchy. Homemade and glue-based putties usually convert best, while silicone putties are better treated as a texture add-in than a full replacement for slime ingredients.
Start small, make adjustments gradually, and do not panic if the first batch looks weird. Slime has a dramatic phase. Most of us do.