
Table of Contents >> Show >> Hide
- Why curing potatoes matters before winter storage
- Step 1: Harvest at the right time and handle potatoes gently
- Step 2: Cure potatoes in a cool, dark, humid place
- Step 3: Move cured potatoes into long-term winter storage
- Common mistakes that ruin stored potatoes
- How long do cured homegrown potatoes last?
- Extra practical tips for better winter potato storage
- Experiences from home gardeners: what curing potatoes really teaches you
- Conclusion
If your garden blessed you with a glorious pile of homegrown potatoes, congratulations: you have officially entered the part of gardening where your harvest starts judging your storage skills. Fresh-dug potatoes are wonderful, but if you want them to last through winter without turning shriveled, sprouted, soft, or suspiciously science-project-like, curing is the step you cannot skip.
The good news? Learning how to cure homegrown potatoes is not complicated. It is more about creating the right conditions than doing anything fancy. In simple terms, curing gives potatoes time to toughen their skins and heal tiny nicks from harvest. That means less moisture loss, less rot, and a much better chance your crop will still be in good shape when cold weather really settles in.
Below, you will learn exactly how to cure potatoes in 3 easy steps, plus how to store potatoes all winter, avoid the most common mistakes, and get the longest possible shelf life from your harvest. If you have ever tossed half your crop by January and muttered, “Well, that escalated quickly,” this guide is for you.
Why curing potatoes matters before winter storage
Curing is the short period right after harvest when potatoes sit in a dark, well-ventilated place with moderate temperatures and high humidity. During that time, small cuts and bruises begin to heal, and the skin becomes firmer. Think of it as the potato version of putting on a winter coat before stepping outside.
Without curing, freshly dug potatoes are far more likely to lose moisture, wrinkle, and rot in storage. Potatoes may look sturdy, but they bruise more easily than gardeners like to admit. A shovel nick here, a rough basket there, and suddenly your winter food stash has become a breeding ground for disappointment.
Properly cured potatoes also store better because mature, thick-skinned tubers are naturally more resilient. If you want potatoes for long-term storage, curing is not optional housekeeping. It is the main event.
Step 1: Harvest at the right time and handle potatoes gently
The first step in curing homegrown potatoes starts before you ever move them into storage. Timing matters. If you dig them too early, the skins will be thin and rub off easily. Those delicate skins do not store well and invite rot. For the best winter storage potatoes, wait until the vines die back and the skins are set.
How to tell potatoes are ready for storage
- The vines have died back or been allowed to die down naturally.
- The skins feel firm and do not rub off easily when you test one with your thumb.
- The soil is reasonably dry, not muddy and not soaking wet.
If you want to be extra careful, stop watering before harvest so the skins can toughen up. Then dig on a dry day if possible. Use a garden fork or shovel well away from the base of the plant and lift gently. You are harvesting potatoes, not auditioning for a treasure-hunting movie.
What to do right after harvest
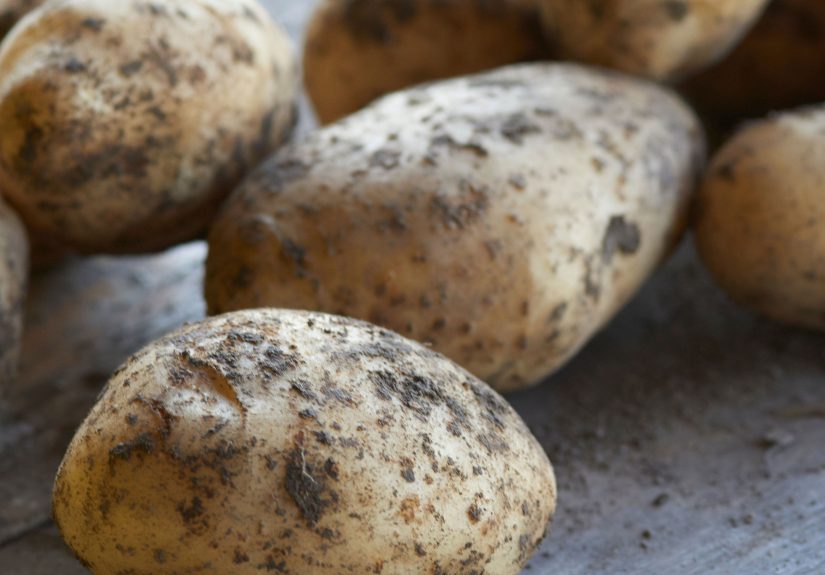
Brush off loose soil, but do not scrub like you are preparing them for a glamorous produce photo shoot. In most cases, do not wash potatoes before curing or storage. Extra moisture raises the risk of rot. If your soil is sticky clay and a rinse is truly necessary, make sure the potatoes dry completely before curing.
As you harvest, sort the tubers into two groups:
- Good keepers: firm, mature, undamaged potatoes with intact skins.
- Use soon: cut, skinned, bruised, oddly soft, or insect-damaged potatoes.
Damaged potatoes are not great candidates for long-term storage. Eat them first, roast them soon, or turn them into mashed potatoes before they turn the storage box into a tiny potato tragedy.
Step 2: Cure potatoes in a cool, dark, humid place
Now for the actual curing part. Once harvested, potatoes need about 10 to 14 days in the right environment. Some gardeners go a full two weeks, which works especially well for storage varieties. The goal is to encourage wound healing and skin set without overheating the tubers or drying them out.
Ideal potato curing conditions
- Temperature: about 50°F to 60°F
- Humidity: high, around 85% to 95%
- Light: dark
- Airflow: good ventilation, but not a harsh draft
A basement, garage, shed, mudroom, or spare corner of a cool room can work if conditions are right. Spread potatoes in a single layer in shallow boxes, crates, or ventilated bins. Paper sacks, slatted crates, or perforated containers work well. Do not pile them into a deep mound right away. That makes it harder to monitor problems and easier for moisture and heat to build up in the wrong places.
If your air is dry, add humidity carefully. Some gardeners use perforated plastic bags or loosely cover boxes with burlap or newspaper to help reduce moisture loss while still allowing airflow. The goal is damp air, not wet potatoes. You want them cured, not steamed.
Keep the potatoes out of direct light during curing. Light causes greening, and green potatoes are bad news. That green color often signals the development of bitter glycoalkaloids, which you do not want on the dinner menu.
During the curing period, check for trouble
Every few days, inspect your potatoes. Remove any that feel soft, smell off, or show signs of rot. One bad tuber really can spoil the bunch, which is annoying in fruit bowls and downright rude in potato crates.
At the end of curing, the skins should feel firmer, and minor surface damage should look dry and healed over. At that point, your potatoes are ready for winter storage.
Step 3: Move cured potatoes into long-term winter storage
After curing, shift your potatoes into colder storage. This is where they spend the rest of fall and winter, ideally staying firm, dark, and quiet. A properly stored potato should not be trying to reinvent itself as a houseplant by February.
Best storage conditions for potatoes
- Temperature: about 38°F to 45°F
- Humidity: roughly 90% to 95%
- Light: complete darkness
- Container: ventilated boxes, bins, crates, or paper sacks
A root cellar is ideal, but plenty of home gardeners use a cool basement, unheated pantry, insulated mudroom, or cold closet. The key is consistency. Wild temperature swings encourage sprouting and shorten storage life.
If potatoes are kept too warm, they sprout faster. If they are kept too cold, they can develop a sweeter taste because some starch converts to sugar. That may not ruin them for every use, but it can affect flavor and browning, especially if you fry them.
What not to store near potatoes
Keep potatoes away from light, apples, tomatoes, and other ethylene-producing produce. Ethylene can speed sprouting. It is also wise not to crowd potatoes next to onions in mixed storage if you can help it. Separate storage helps each crop last longer and keeps your pantry from turning into a chemistry experiment.
Check potatoes through the winter
Once a month, look through your storage potatoes and remove any that are soft, shriveled, sprouting heavily, or rotting. This quick inspection takes just a few minutes and can save the rest of the crop. Winter storage is not “set it and forget it.” It is more like “set it and occasionally make sure your potatoes are still behaving.”
Common mistakes that ruin stored potatoes
Even a good harvest can go downhill fast if storage conditions are off. Here are the mistakes gardeners make most often:
- Harvesting too early: thin skins do not store well.
- Rough handling: bruises and cuts invite rot.
- Washing before storage: excess moisture shortens shelf life.
- Skipping curing: potatoes miss the chance to heal and toughen up.
- Too much light: causes greening.
- Storage that is too warm: leads to sprouting and shriveling.
- Storage that is too dry: causes moisture loss and wrinkling.
- Not sorting regularly: one rotten potato can spread trouble fast.
There is a pattern here: potatoes like dark, cool, humid, stable conditions and gentle handling. They are simple creatures with very firm opinions.
How long do cured homegrown potatoes last?
If you choose a good storage variety, harvest it at full maturity, cure it properly, and keep it in the right conditions, your potatoes may last for several months and often through much of the winter. Late-season varieties generally store better than early types, and thick-skinned potatoes usually outlast thin-skinned ones.
That means if you are serious about winter storage, variety choice matters almost as much as technique. New potatoes are delicious, but they are not built for the long haul. Storage potatoes are the marathon runners of the garden.
Extra practical tips for better winter potato storage
- Label varieties if you grew more than one kind. Some store better than others.
- Use shallow containers so you can inspect potatoes easily.
- Do not store potatoes in sealed plastic bags with no airflow.
- Keep the storage area clean before bringing in the harvest.
- Use the most delicate or smallest potatoes first during winter.
- Save only your healthiest tubers for the longest storage period.
These small habits make a big difference. Potato storage is one of those garden tasks where the boring details are secretly the superheroes.
Experiences from home gardeners: what curing potatoes really teaches you
One of the most common experiences gardeners share about curing potatoes is how dramatically the results improve once they stop rushing the process. A first-time grower often digs up a gorgeous harvest, tosses the potatoes into a bucket, washes them because they look dirty, and stores them in the kitchen or a warm garage. A month later, the crop starts sprouting, softening, or developing rot. It feels unfair, especially after all the hilling, watering, and pest-watching. But once that same gardener learns to slow down, let the skins set, and cure the tubers before storage, the difference can be remarkable.
Another real-world lesson is that gentle handling matters more than people expect. Homegrown potatoes may look rugged because they came out of the ground, but they bruise easily. Many gardeners say their best storage year happened when they dug on a dry day, handled each tuber by hand, and sorted damaged ones right away for quick meals. The worst year? Usually the one where harvest happened in a hurry, in wet soil, with a shovel that nicked half the crop.
Gardeners also learn that the “perfect storage space” does not always have to be a fancy root cellar. Some use a cool basement corner with good air circulation. Others use stacked crates in a mudroom, a shelf in an unheated pantry, or a garage that stays cool but never freezes. The common thread is not luxury. It is consistency. Potatoes prefer a stable, dark place with decent humidity and not much drama. In other words, they are the opposite of social media.
Many people who grow several potato varieties notice another important pattern: not all potatoes store equally well. Thin-skinned or early potatoes tend to be eaten first because they are more delicate. The late-season, thicker-skinned types are the dependable ones that keep showing up for dinner deep into winter. Gardeners who pay attention to this often become more intentional the next season, planting some potatoes for early eating and some specifically for storage.
There is also a surprisingly emotional side to opening a box of cured potatoes in January and finding them still firm and healthy. It feels satisfying in a very old-fashioned, practical way. You are not just eating vegetables; you are eating the success of your planning. A well-cured potato in midwinter is proof that a summer garden can keep feeding you long after the growing season ends.
Of course, every gardener has at least one storage mishap story. Potatoes stored near apples that sprouted too fast. A forgotten box exposed to light that turned green. A batch tucked into a spot that was too dry, leaving them shriveled by New Year’s. These mistakes are common, and honestly, they are part of learning. The good news is that curing potatoes is a skill that improves quickly. Once you get one season right, the next becomes much easier.
In the end, the experience most gardeners come back to is this: curing feels like a small step when you are tired after harvest, but it pays off in a big way. It turns a short-lived harvest into a winter food supply. And that is a pretty good return on ten days of patience.
Conclusion
If you want to cure homegrown potatoes in 3 easy steps so they keep all winter, remember this simple formula: harvest mature potatoes carefully, cure them in a dark and humid place for about two weeks, then move them into cool, dark long-term storage. That is it. No wizardry, no expensive equipment, and no potato pep talks required.
When you follow these basics, your potatoes are far more likely to stay firm, flavorful, and useful for months. That means better soups, better roasts, better hash browns, and far fewer sad, sprouted surprises in the corner of the basement. For a crop that starts underground, potatoes are surprisingly good at rewarding thoughtful storage above it.


