
Table of Contents >> Show >> Hide
- Before You Start: Know What You Are Removing
- Method 1: Scrape and Sand the Enamel Paint Off
- Method 2: Use a Chemical Paint Stripper
- Method 3: Soften the Paint With a Heat Gun
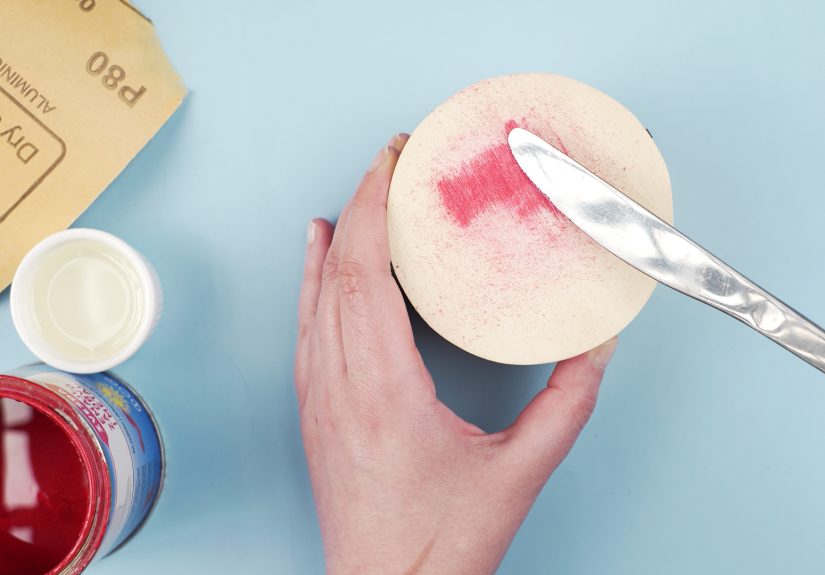
- Method 4: Use a Spot Remover or Solvent for Small Drips and Isolated Areas
- Common Mistakes to Avoid When Removing Enamel Paint
- What to Do After the Enamel Paint Is Gone
- Real-World Experiences With Removing Enamel Paint
- Conclusion
Enamel paint is the overachiever of the paint world. It dries into a tough, durable finish, shrugs off casual abuse, and clings to surfaces like it pays rent there. That is fantastic when you want a cabinet, metal chair, door, or trim piece to stay pretty. It is less fantastic when the time comes to remove it. Suddenly, that hardworking finish turns into the houseguest who refuses to leave.
The good news is that removing enamel paint is absolutely doable when you match the method to the surface, the age of the paint, and the size of the mess. The bad news is that there is no magical one-swipe solution unless you count “calling a pro while making dramatic eye contact with the wall” as a method. For everyone else, there are four practical approaches that actually work: scraping and sanding, chemical stripping, heat softening, and spot-removal with the right solvent or remover.
This guide walks through all four ways to remove enamel paint safely and effectively, with real-world examples, surface-specific tips, and the kind of advice that saves both your project and your patience. Whether you are stripping old enamel off wood trim, cleaning drips from metal, or rescuing a piece of furniture from a glossy paint job that seemed like a great idea in 1998, this article will help you choose the right path.
Before You Start: Know What You Are Removing
Before you attack enamel paint with enthusiasm and a scraper, pause long enough to answer three questions: What surface is underneath? How old is the paint? How much paint needs to go?
If the painted surface is wood, you need a gentler touch, especially on furniture, trim, and molding with details you want to preserve. If it is metal, you can usually be a little more aggressive, though rust, dents, and scratches still matter. If it is masonry, concrete, or another porous material, the paint may have settled into the surface like it owns the place, which changes the cleanup strategy.
Age matters too. In the United States, homes built before 1978 may contain lead-based paint. If that is a possibility, treat the project with extra caution. Dry scraping, aggressive sanding, and careless cleanup can create hazardous dust. When in doubt, test for lead or use lead-safe work practices.
Also, remember that some older paint removers relied on especially harsh chemicals. Stronger is not always smarter. Good ventilation, gloves, eye protection, and label-reading are not optional. They are the difference between a productive DIY afternoon and a story that begins with, “So I opened every window and still made a terrible choice.”
Method 1: Scrape and Sand the Enamel Paint Off
Best for peeling paint, flat areas, and prep before repainting
If the enamel paint is already cracked, chipping, bubbling, or flaking, start here. Scraping and sanding is often the simplest and cheapest way to remove enamel paint, especially when you do not need to get every molecule of paint off the surface. For many repainting projects, you only need to remove loose material and smooth the edges.
Start with a scraper or putty knife. On wood, a plastic scraper is often safer because it is less likely to gouge the surface. On tougher areas, a metal scraper may work better, but keep the blade at an angle and let patience do the heavy lifting. If you charge in like you are trying to excavate treasure, you may find it, but it will be the treasure of accidental damage.
Once the loose paint is gone, move to sandpaper. Medium grit works well to knock down ridges and feather the remaining paint into the bare surface. After that, fine grit smooths everything for primer or stain. On metal, sanding also helps scuff glossy areas and remove rust or oxidation. On wood, it helps blend old edges so the repaired area does not scream, “I was patched on a Tuesday.”
This method is especially useful on doors, window trim, railings, and furniture with broad flat sections. It is less ideal for deep grooves, ornate molding, or multiple thick layers of old enamel paint. In those cases, scraping and sanding can take forever, and your arm may start sending complaint letters.
Example: If you are repainting an old wooden bench with peeling enamel, scrape away every loose section, sand the edges smooth, wipe away the dust, and then decide whether the remaining sound paint can stay under a new finish. Full removal is not always necessary if the old coating is stable and compatible with the new one.
Method 2: Use a Chemical Paint Stripper
Best for thick enamel layers, carved details, and stubborn finishes
When enamel paint is still firmly attached and laughs in the face of your sandpaper, a chemical paint stripper is often the right answer. This method softens the coating so you can scrape it off rather than grinding it away. It is particularly helpful on furniture, trim, decorative woodwork, and other surfaces where sanding alone would be slow or too destructive.
Apply the stripper according to the product label, using a brush or applicator if needed. Many formulas work best when laid on generously and allowed to stay wet long enough to soften the finish. In some cases, covering the stripper helps it remain active longer. Once the paint wrinkles, bubbles, or loosens, scrape it away carefully.
Use the right tool for the surface. A plastic scraper is often best for wood because it reduces the chance of gouging. A stiffer scraper or steel wool may help in corners or on metal, but be careful not to scar the underlying material. Some projects require a second application, especially when enamel has been layered over primer, older paint, or mystery coatings applied by someone whose design philosophy was clearly “more coats, more better.”
Cleanup matters just as much as stripping. Residue left behind can interfere with adhesion when you repaint or refinish. Depending on the product, that may mean wiping with water, using an after-wash, or following the manufacturer’s cleanup directions exactly. Skipping this step is how people end up blaming the new paint for problems the old remover caused.
Chemical stripping shines on detailed furniture legs, cabinet doors, spindles, and trim profiles. It can also work on metal and masonry, but always test a small spot first. Not every remover plays nicely with every substrate.
Example: Say you inherited a wooden side table coated in glossy enamel that buried all the grain. Chemical stripping can lift the finish out of corners and curves that a sander would struggle to reach, making it far easier to restore the piece without flattening all of its character.
Method 3: Soften the Paint With a Heat Gun
Best for large areas and multiple old layers
A heat gun softens enamel paint so it can be scraped off in pliable sheets or ribbons. It is a popular method for doors, wide trim boards, and other bigger surfaces where thick paint buildup would make chemical stripping messy or expensive. When it works well, it feels oddly satisfying, like peeling a sunburn if that sunburn had been decorating your house for two decades.
Turn on the heat gun, hold it a few inches from the surface, and move it steadily. The goal is to warm the paint until it softens, not to scorch the wood, cook the metal, or produce a smell that suggests poor life choices. As the enamel bubbles or loosens, scrape it away and keep moving across the surface in small sections.
This method is effective, but it comes with important warnings. Heated paint can release fumes, even when lead is not involved. Good ventilation and respiratory protection matter. And if the paint could contain lead, extra caution is essential because heat can create a more hazardous situation. This is one of those projects where “I’ll just crack a window” is not a serious safety plan.
Heat guns also require attention and discipline. Do not hold the tool in one place too long. Do not work near flammable materials. Do not let the satisfying peeling action distract you into overheating the surface. Wood can scorch, and hidden adhesives or caulks can react badly to excess heat.
Example: On a painted solid-wood door with years of enamel buildup, a heat gun can remove thick layers faster than hand sanding alone. Once the bulk of the finish is off, a light sanding pass usually handles the remaining residue and prepares the surface for primer or stain.
Method 4: Use a Spot Remover or Solvent for Small Drips and Isolated Areas
Best for paint splatters, hardware, metal, glass, and touch-up cleanup
Sometimes the problem is not an entire painted surface. Sometimes it is a few enamel drips on hinges, dried splatters on metal furniture, or accidental smears where enamel absolutely did not belong. In those cases, targeted removers, carefully selected solvents, or specialized paint-removal products can be the smartest option.
This method works best on small areas and nonporous surfaces. The idea is simple: soften or dissolve the unwanted paint without damaging the material underneath. Always test a hidden area first, because finishes vary and some solvents are much less charming once they meet plastic, laminate, or delicate coatings.
Apply the remover with a cloth, pad, or cotton swab, allow it to work as directed, and then wipe or gently scrape the paint away. For tight spots around hardware, corners, or textured metal, repeated light applications usually beat one aggressive attack. Think surgeon, not demolition crew.
This is a great approach for enamel paint drips on doorknobs, metal legs, tools, window glass, or isolated spots on hard surfaces. It is not the best strategy for large walls, old trim, or heavily coated furniture. At that point, you are better off switching to one of the bigger three methods above.
Example: If you find dried enamel specks on metal patio furniture after a weekend paint project, a small amount of the right remover used carefully can lift those spots without forcing you to strip and refinish the entire piece.
Common Mistakes to Avoid When Removing Enamel Paint
The first mistake is choosing a method based on impatience rather than the surface. A heat gun on delicate veneer, a harsh stripper on the wrong material, or an aggressive metal scraper on soft wood can turn a fixable project into a repair project. Congratulations, now you have two problems.
The second mistake is skipping the test patch. A five-minute test can tell you whether a remover works, whether the substrate reacts badly, and whether the whole plan is smart. That is a pretty good return on investment for five minutes.
The third mistake is rushing cleanup. After the paint is gone, dust, softened residue, and remover leftovers need to go too. Otherwise, the new coating may fail, and you will spend your next weekend asking why the fresh finish is bubbling like a tiny paint volcano.
The fourth mistake is ignoring safety. Ventilation, gloves, eye protection, and lead awareness are not dramatic extras. They are part of the job, especially when working indoors, in older homes, or with stronger removers.
What to Do After the Enamel Paint Is Gone
Once you have removed the enamel paint, inspect the surface honestly. Is it smooth? Clean? Dry? Ready for primer, stain, or a new topcoat? If not, now is the time to fix that. Wipe away dust, remove any remaining residue, and let the surface dry thoroughly before recoating.
Wood may need final sanding to even out the grain. Metal may need rust treatment, light sanding, or a degreasing wipe before primer. Masonry may need extra drying time and a little patience. Surface prep after paint removal is where good-looking finishes are born. Not in the paint can, not in the brush, and definitely not in wishful thinking.
If you plan to repaint, choose a primer that matches the substrate and topcoat. If you are exposing natural wood, make sure all stripper residue is gone before staining or sealing. The prettier the final finish, the more obvious sloppy prep becomes.
Real-World Experiences With Removing Enamel Paint
Anyone who has removed enamel paint more than once learns the same lesson: the paint itself is only half the project. The other half is reading the surface, adjusting expectations, and knowing when to switch strategies. In real life, enamel paint rarely sits on a perfect sample board under perfect conditions. It is usually on an old chair, a sticky windowsill, a metal railing, or a cabinet that has survived multiple decorating eras and at least one well-meaning amateur.
One common experience is discovering that what looked like “a quick sanding job” is actually three layers deep. The top layer starts to come off easily, which gives you false confidence. Then you hit the older enamel underneath and realize it has no intention of cooperating. This is often the moment people learn that sanding is great for surface prep but not always efficient for full removal. A chemical stripper or heat gun suddenly starts looking a lot more attractive.
Another real-world pattern is that trim and furniture details consume far more time than flat areas. Broad boards are manageable. Decorative edges, grooves, spindles, and corners are where a project begins to test your personality. Many DIYers find that a combination method works best: scrape the loose sections, use a stripper in the detailed parts, then finish with light sanding. In other words, the winning approach is often less “one perfect method” and more “a calm little team effort.”
People also underestimate cleanup. The dramatic moment is the paint coming off, but the difference between a decent result and a professional-looking one is what happens after that. Dust left on wood, stripper residue trapped in corners, or greasy fingerprints on metal can ruin the next step. Plenty of failed repaints are not really paint failures at all. They are cleanup failures wearing a fake mustache.
There is also the emotional experience of the project, which deserves honesty. Removing enamel paint can be oddly satisfying for about twenty minutes. After that, it becomes a test of patience, posture, and whether you packed enough snacks. The work is repetitive, and progress can feel slow, especially on old pieces with multiple coats. But small wins matter. The first clean strip of wood grain, the first smooth patch of metal, or the first section of trim that finally looks crisp again can keep the momentum going.
Experienced DIYers usually get better at stopping before they overdo it. They learn not to keep scraping once the loose paint is gone. They learn not to overheat one spot with a heat gun. They learn not to flood the entire project with remover when only part of it needs help. Most of all, they learn that enamel paint removal is less about brute force and more about control. The best results come from steady hands, good prep, and knowing that sometimes the smartest move is to slow down instead of pushing harder.
That is the real secret behind successful enamel paint removal. It is not luck. It is not a miracle product. It is choosing the right method, respecting the material underneath, and letting the process work at the pace it needs. Which is not glamorous advice, but it does beat sanding in frustration while muttering at a cabinet door.
Conclusion
If you need to remove enamel paint, the right approach depends on the surface and the scale of the job. Scraping and sanding works well for peeling areas and repaint prep. Chemical strippers are excellent for thick, stubborn enamel and detailed surfaces. Heat guns help with heavy buildup on larger sections. Spot removers and targeted solvents make sense for drips, splatters, and small isolated messes.
The smartest strategy is to start with the least aggressive method that fits the project, test first, work safely, and clean thoroughly before refinishing. Enamel paint may be durable, but it is not immortal. With the right process, it will absolutely come off. It just prefers that you earn it.


