
Table of Contents >> Show >> Hide
- Why White + Walnut Works (Even If Your House Isn’t “Modern Farmhouse”)
- Before You Start: Decide Your Staircase Game Plan
- Tools & Materials Checklist
- Step-by-Step: Make an Oak Handrail Look Like Walnut
- Step-by-Step: Paint Spindles, Balusters, and Stair Trim White
- How to Avoid the “Painted Oak Looks Like Painted Oak” Problem
- Common Mistakes (So You Can Avoid Staircase Heartbreak)
- Cost, Time, and Mess: A Reality Check
- Style Upgrades That Pair Perfectly With White + Walnut
- Maintenance Tips So It Stays Beautiful
- Real-World Experiences From a White-and-Walnut Stair Makeover (The “Wish I Knew This First” Section)
- Conclusion
If your staircase is rocking that classic “honey oak + glossy finish” combo, you’re not alone. Whole decades of American homes
came pre-installed with warm, orangey oak railings that were considered chef’s kiss at the time… and now feel like they’re
quietly yelling “1997 called!” every time you walk upstairs.
The good news: you don’t have to replace your entire stair system (or sell a kidney to pay a carpenter) to make it feel modern.
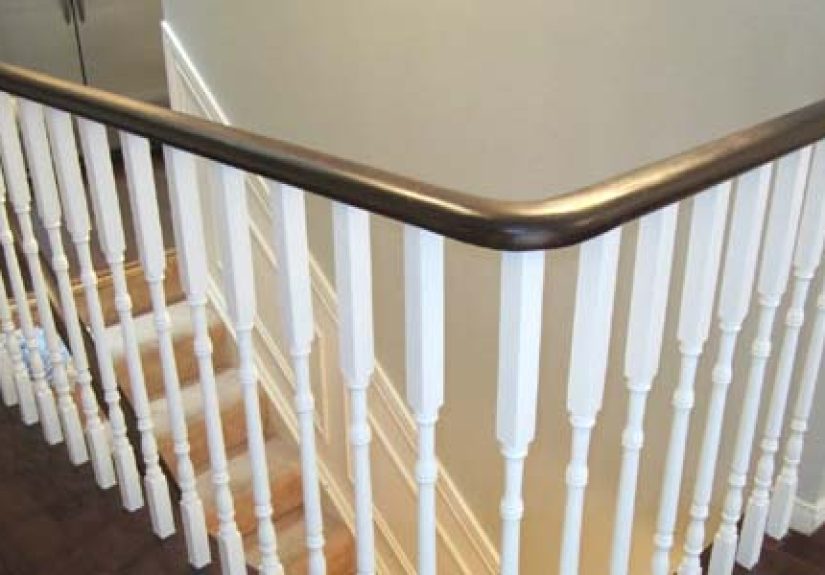
One of the most timeless, high-impact updates is the white-and-walnut staircase makeover: crisp white spindles/trim
paired with a rich walnut-toned handrail (and often a matching newel post). It’s classic, it’s high-contrast, and it makes even a
basic builder staircase look intentionally designedlike it belongs in a “before-and-after” montage with dramatic music.
Why White + Walnut Works (Even If Your House Isn’t “Modern Farmhouse”)
White paint cleans up visual clutter. A staircase has lots of skinny partsbalusters/spindles, trim boards, stringers, skirt boards
and when all of it is stained oak, your eye reads the whole thing as one big wooden ladder. Painting the vertical pieces white
creates negative space and makes the architecture look lighter and more finished.
Walnut stain (or a walnut-look gel stain) adds depth without going full “dark cave.” You get the warmth of wood and the grounded,
furniture-like look of a darker railwithout losing that clean, bright vibe that white brings.
Before You Start: Decide Your Staircase Game Plan
What are you updating?
- Handrail + newel posts (stain to walnut)
- Spindles/balusters (paint white)
- Base rail/shoe rail (often painted white to match spindles)
- Risers + stringers/skirt boards (optional, but painting white can make the whole run look custom)
- Treads (many people keep them wood, refinish them, or add a runnerpainting treads is possible, but it’s the “hard mode” of stair DIY)
Stain first or paint first?
A practical rule: do the messiest step first. If you’re sanding/stripping a rail, do that before you paint spindles.
If you’re using gel stain (which can be a lower-sanding method), you still want to stain before final white coats so you don’t
accidentally smudge dark pigment onto fresh white paint.
Safety note (not the fun part, but the important part)
Stair rails are safety features. Don’t remove handrails or loosen structural parts without a plan to keep the stair safe for your
household. If you have kids, pets, or a household where someone will absolutely forget there’s wet paint, consider blocking off the
area and working in sections.
Tools & Materials Checklist
- Painter’s tape + masking paper/plastic
- Drop cloths (stairs are basically paint magnets)
- Degreaser/cleaner (TSP substitute or similar) + microfiber cloths
- Sandpaper (typical range: 120–220 grit) + sanding block or sponge
- De-glosser (optional, but helpful on slick, glossy polyurethane)
- Bonding primer for slick surfaces (especially rails/spindles with existing clear coat)
- Stain or gel stain in a walnut tone + clean rags/foam brushes
- Durable trim enamel (satin or semi-gloss is common for spindles/trim)
- Clear topcoat for the handrail (polyurethane or a comparable durable clear finish)
- Putty/wood filler + caulk (for dings, nail holes, and gaps)
- Quality angled brush + small foam roller
- Gloves (your hands will thank you) and good ventilation
Step-by-Step: Make an Oak Handrail Look Like Walnut
1) Clean like you mean it
Handrails collect oils, lotions, and general “human life” residueexactly the stuff that makes finishes fail. Clean thoroughly,
rinse if needed, and let everything dry fully.
2) Choose your walnut method: traditional stain vs. gel stain
Traditional stain usually means sanding to raw wood (or close to it), staining, then topcoating. It can look amazing,
but it’s more labor and dust.
Gel stain is popular for stair rails because it can behave more like a tinted coating: it sits on the surface longer,
can give deeper color, and is often used when people want big color change (like orange oak to walnut) without fully sanding every
curve and turned spindle detail. The tradeoff: surface prep and topcoat compatibility still matter. You’re not skipping prepyou’re
choosing a different kind of prep.
3) Scuff-sand for adhesion (even if you’re using gel stain)
If your rail has a glossy polyurethane finish, scuff-sanding creates a mechanical bond so the next layer grips better. Focus on
knocking down shine rather than removing every molecule of finish. Wipe away dust thoroughly.
4) Apply your walnut color in thin, controlled coats
Work in small sections. Use a rag or foam brush to apply, then wipe to even out. If you’re going for that deeper “walnut” vibe,
build color gradually rather than trying to dunk the rail in stain like a churro in chocolate.
5) Protect the rail with a durable clear coat
A handrail gets constant skin contact and friction, so a clear topcoat isn’t optional. Follow label instructions for dry time and
recoat windows. Light sanding between coats (when recommended) can help the finish feel smoother and last longer.
Step-by-Step: Paint Spindles, Balusters, and Stair Trim White
1) Mask like a patient person (future-you will be grateful)
Tape off edges where white meets walnut, floors, walls, and any carpet. Stairs are narrow, vertical, and high-contrastmeaning every
wobbly line will be visible. Take the extra time.
2) Scuff-sand glossy surfaces
Painted spindles fail when primer can’t grip the existing clear coat. A light sanding to dull the shine is often the difference
between “beautiful for years” and “why is it peeling when I look at it?”
3) Prime for bonding and stain blocking
Oak can be dramatic. Its grain and tannins can telegraph through paint, and glossy finishes can fight adhesion. A bonding primer is a
common approach for handrails, spindles, and risers that still have an existing polyurethane/varnish layer.
If you’re worried about tannin bleed (those yellow-brown stains that creep through white paint like a spooky movie fog), use a primer
designed for stain blocking. Let primer cure as recommendeddry-to-touch is not the same as “ready for your staircase to be grabbed
80 times a day.”
4) Use a durable trim enamel, not wall paint
Stair parts are touched constantly, so choose a trim/cabinet style enamel that cures hard. A satin or semi-gloss sheen is common
because it’s easier to clean than flat paint and tends to wear better on high-contact surfaces.
Apply two thin coats rather than one thick coat. Thick coats drip, look lumpy, and take forever to curebasically the DIY trifecta
of regret.
5) Respect cure time (the hardest step emotionally)
Many enamels take days to fully cure. They may feel dry quickly but remain soft underneath for a while. During cure, be gentle:
avoid heavy cleaning, tape removal at aggressive angles, and dragging objects along painted surfaces.
How to Avoid the “Painted Oak Looks Like Painted Oak” Problem
If you paint oak without addressing grain, you may still see texture lines through the white. Some people don’t mindit reads
“painted wood” and can be charming. If you want a smoother, more modern look:
- Fill deep grain on very prominent areas (like large newel posts) before priming.
- Sand between coats (lightly) for a smoother finish.
- Use a self-leveling trim enamel that lays down smoother than standard wall paint.
Common Mistakes (So You Can Avoid Staircase Heartbreak)
- Skipping cleaning: oils on rails cause adhesion failure. Clean first, always.
- Painting over glossy poly without prep: primer needs a surface to grip.
- Rushing dry times: stairs are high-traffic; impatience causes dents, fingerprints, and smudges.
- Not testing stain color: oak undertones vary; test in an inconspicuous spot or scrap.
- Going too dark too fast: build walnut tone gradually for a richer, less blotchy finish.
- Not topcoating the rail: “stain-only” rails wear fast and look tired quickly.
Cost, Time, and Mess: A Reality Check
This makeover is often cheaper than replacement, but it’s still a real project. Material costs vary by brand and staircase size,
but a DIYer commonly spends on primer, enamel, stain/gel stain, tape, sandpaper, and topcoatplus brushes and rollers if you want a
smoother finish. The bigger cost is time: prep + dry time + cure time can stretch a weekend project into a “several evenings plus
a cautious week of living like you’re in a museum” situation.
The mess is manageable with good masking, but stairs have more angles than a geometry textbook. Plan for extra tape and extra
patience. (Also: you will find a paint drip later that you swear wasn’t there yesterday. This is a universal law.)
Style Upgrades That Pair Perfectly With White + Walnut
- Runner: Adds traction, softens noise, and hides tread wear. Plus it looks designer-y.
- Updated light fixture: Stairs are a focal pointlighting makes it feel intentional.
- Hardware coordination: If your home has black, brass, or nickel accents, match the stair vibe to your metal finishes.
- New balusters: If you ever replace spindles, simple profiles (or iron balusters) look striking with walnut rails.
Maintenance Tips So It Stays Beautiful
- Clean gently: mild soap and water beats harsh cleaners that can dull paint or topcoat.
- Touch up chips quickly: small dings are easy to fix early and annoying later.
- Protect the handrail finish: when it starts looking dull, a light refresh coat may beat a full refinish.
Real-World Experiences From a White-and-Walnut Stair Makeover (The “Wish I Knew This First” Section)
Here’s what the tutorials don’t always capture: stairs are a “public” surface inside your own house. You can ignore an imperfect
closet shelf for years. A staircase? It’s in your face twice a day, every day, foreverlike a polite roommate who never moves out.
That’s why the prep matters more here than almost anywhere else.
The first surprise for many DIYers is how much hand oils affect results. Even if the wood looks clean, rails can
hold invisible residue that causes primer to fisheye or paint to scratch off too easily. A real-deal cleaning stepfollowed by
drying timeoften makes the difference between “this looks professional” and “why does my thumbnail do damage?”
The second surprise is emotional: the project feels ugly in the middle. Your rail might look blotchy after the first
gel stain coat. Your white primer might look streaky or too bright. Your tape lines might look terrifying. This is normal. Stain
frequently deepens and evens out with additional thin coats, and trim enamel almost always looks better after the second coat (and
dramatically better after it cures). Mid-project panic is basically a required ingredientlike salt in a recipe.
Another real-life lesson: choose your stopping points. If you try to stain the rail, paint all spindles, paint all
risers, fix every ding, and touch up the walls in one go, you’ll end up exhausted, surrounded by tape, and emotionally negotiating
with the staircase like it’s a hostage situation. A calmer approach is to break it into phases: stain + topcoat the rail first,
then paint the spindles and trim, then circle back for final touch-ups. That pacing also helps because cure times are real, and
stairs don’t pause lifeyou still need to go upstairs to find that one charger that’s always missing.
Practical detail that matters: your “walnut” is a vibe, not one exact color. Some people want a warm chocolate
walnut; others want a cooler espresso; others want a medium brown that looks like real walnut furniture. The same product can look
different depending on your oak’s undertone, your lighting, and how much you wipe back. If you’re nervous, test on the underside of
a rail or behind a newel where no one will ever inspect it with a flashlight.
And finally: your staircase will get better with tiny refinements. After the paint cures, you’ll notice small stuff:
a dot of stain you can scrape off, a tape line you can sharpen with a tiny brush, a caulk gap you can fix in two minutes. That’s the
difference between “DIY” and “DIY that looks custom.” Don’t aim for perfection in one passaim for a solid, durable finish first, then
let your touch-ups be the final polish.
When you’re done, the payoff is immediate. White spindles make the whole area feel brighter. Walnut rail tones down the orange oak and
ties in beautifully with darker furniture, flooring accents, or black hardware. And the best part? You’ll walk past your staircase
and think, “Wait… did I just make my house look more expensive?” Yes. Yes, you did.
Conclusion
Updating an oak stair or handrail to white and walnut is one of those rare DIYs that hits the sweet spot:
high impact, classic style, and a result that looks like you hired someone with a clipboard and a van full of trim samples.
With the right prep, a bonding/stain-blocking primer strategy, and a durable topcoat on the rail, you can turn dated honey oak into a
clean, timeless focal pointwithout replacing the entire staircase.


