
Table of Contents >> Show >> Hide
- What Is a Self-Cleaning Oven?
- Before You Start: Read the Manual First
- When Should You Use the Self-Cleaning Cycle?
- How to Use a Self-Cleaning Oven the Right Way
- Step 1: Remove Everything From the Oven
- Step 2: Wipe Out Loose Crumbs and Heavy Spills
- Step 3: Clean the Door Edge by Hand
- Step 4: Ventilate the Kitchen
- Step 5: Keep Kids and Pets Away
- Step 6: Select the Right Cleaning Time
- Step 7: Start the Cycle and Let the Door Lock
- Step 8: Wait for the Oven to Cool Completely
- Step 9: Wipe Away the Ash
- What Not to Do With a Self-Cleaning Oven
- Self-Clean vs. Steam Clean: Which Should You Choose?
- How to Clean Oven Racks Separately
- How Often Should You Clean Your Oven?
- Common Self-Cleaning Oven Problems
- Real-Life Experience: What Using a Self-Cleaning Oven Actually Feels Like
- Conclusion: The Smart Way to Let Your Oven Do the Dirty Work
- SEO Tags
A self-cleaning oven sounds like a tiny miracle hiding in your kitchen: press a button, walk away, and let the appliance defeat last month’s lasagna eruption. But like many “easy” household features, the self-cleaning cycle works best when you do a little prep first. Think of it less like a robot maid and more like a very hot assistant who needs clear instructions, good ventilation, and absolutely no loose foil lying around.
The right way to use a self-cleaning oven is simple: remove everything, wipe up heavy spills, protect the door gasket, ventilate the kitchen, choose the correct cleaning level, let the oven cool completely, and wipe away the ash. The wrong way? Starting the cycle after Thanksgiving dinner while the racks, foil liner, roasting pan, and mystery cheese puddle are still inside. That is not cleaning. That is kitchen theater with smoke effects.
This guide explains how self-cleaning ovens work, when to use the feature, what to remove, what to avoid, and how to make the process safer and more effective. Whether you have a GE, Whirlpool, Maytag, Frigidaire, Samsung, LG, KitchenAid, or another major oven brand, the core rules are surprisingly similar. Your owner’s manual always wins, but the best practices below apply to most modern self-cleaning ranges and wall ovens.
What Is a Self-Cleaning Oven?
A self-cleaning oven is designed to clean its interior using a special cycle that heats the oven far beyond normal baking temperatures. In a traditional high-heat self-clean cycle, the oven uses intense heat to turn baked-on food, grease, and residue into a light ash that can be wiped away after the oven cools. This process is often called pyrolytic cleaning, which sounds fancy because it is. It basically means “burning the mess until it gives up.”
Many newer ovens also include a steam-clean option. Steam cleaning uses water and lower heat to soften light spills, while a high-heat self-clean cycle is meant for heavier baked-on grime. These features are not the same. Steam clean is the polite weekday tidy-up. High-heat self-clean is the deep-cleaning event you schedule when the oven looks like it has been through a cheese-based natural disaster.
Before You Start: Read the Manual First
Every self-cleaning oven has its own control panel, cycle length, rack rules, and safety warnings. Before using the self-clean function, check the owner’s manual for your exact model. Some ovens allow certain dark porcelain-coated racks to stay inside, while others require all racks to be removed. Some models have light, medium, and heavy soil settings. Others simply offer a timed cycle.
If you no longer have the printed manual, search the model number online through the manufacturer’s support page. The model number is usually located around the oven frame, inside the door area, or behind the storage drawer. This small step can prevent big problems, especially if your oven has special coatings, removable rack supports, a steam reservoir, or unusual cleaning instructions.
When Should You Use the Self-Cleaning Cycle?
You do not need to run the self-cleaning cycle every time a crumb looks at you funny. In fact, using it too often can be unnecessary. For most households, a self-clean cycle once or twice a year is enough, depending on how often the oven is used and how messy the cooking gets.
Use the self-clean feature when the oven has visible baked-on grease, old food residue, smoky odors during preheating, or sticky spills that normal wiping cannot handle. Skip it for small messes. A damp cloth, mild dish soap, or a quick steam-clean cycle may be enough for light soil.
Good Times to Run Self-Clean
The best time to run a self-cleaning oven is when you can stay home, open windows, run the range hood, and keep children and pets away from the kitchen. Choose a day when you do not need the oven for several hours. The cycle itself may take two to five hours, and the oven will remain locked until it cools to a safer temperature.
Bad Times to Run Self-Clean
Avoid running the cycle right before hosting guests, during a heat wave, overnight, or immediately after a major spill without wiping it first. Also avoid using it if the oven is already malfunctioning, the door does not close properly, the control panel is acting strangely, or you smell gas from a gas range. In those cases, cleaning can wait. Safety gets the front burner.
How to Use a Self-Cleaning Oven the Right Way
Using a self-cleaning oven correctly is mostly about preparation. The oven does the heavy lifting, but you need to set the stage. Follow these steps for a safer, cleaner result.
Step 1: Remove Everything From the Oven
Before starting the cycle, remove oven racks, cookware, broiler pans, baking stones, temperature probes, aluminum foil, silicone mats, oven liners, and any loose utensils. The oven cavity should be empty. Not “mostly empty.” Empty-empty.
Racks are a common trouble spot. High heat can discolor metal racks and damage the finish that helps them glide smoothly. If the manufacturer says your specific racks are self-clean safe, you may be able to leave them in. Otherwise, take them out and wash them separately in warm, soapy water.
Step 2: Wipe Out Loose Crumbs and Heavy Spills
The self-clean cycle is powerful, but it is not a garbage disposal with a door. Use a damp cloth or sponge to remove loose crumbs, puddles, grease pools, and large food pieces. This helps reduce smoke, odor, and the chance of flare-ups.
Pay special attention to sugary spills, cheese, meat drippings, and grease. These can smoke aggressively when heated to self-cleaning temperatures. A quick pre-wipe may not feel glamorous, but it makes the whole process much smoother. Your smoke alarm will appreciate the courtesy.
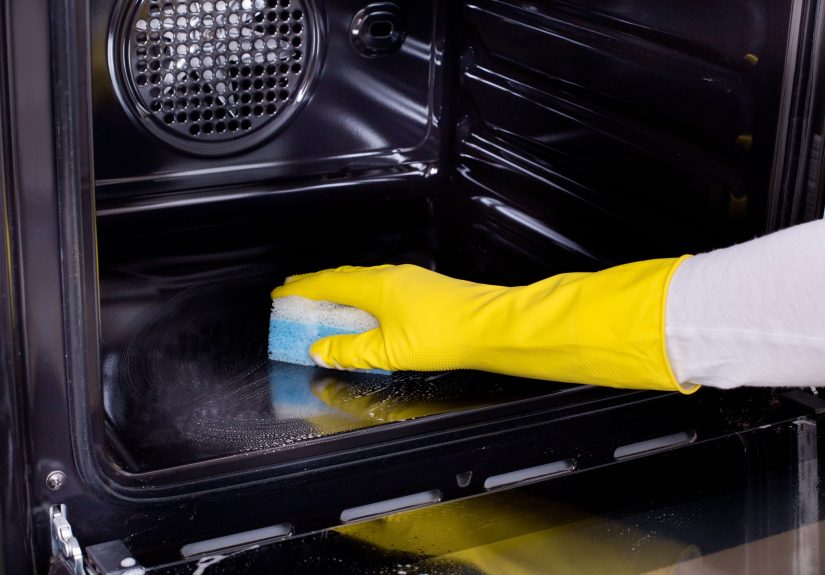
Step 3: Clean the Door Edge by Hand
Many ovens do not heat the area around the door frame enough to burn off soil completely. Use a damp cloth to wipe the inside edge of the door and the front frame of the oven cavity. This helps remove grime from the areas the self-clean cycle may not fully reach.
Be gentle near the gasket, which is the soft seal around the oven door. Do not scrub, pull, bend, soak, or move it. The gasket helps the door seal properly during baking and cleaning. Damaging it can affect oven performance and may require repair.
Step 4: Ventilate the Kitchen
Ventilation is not optional. Self-cleaning ovens can produce smoke, odors, and fumes, especially if there is grease or food residue inside. Turn on the range hood, open windows if weather allows, and keep the kitchen air moving.
If anyone in the home has asthma, respiratory sensitivity, or strong reactions to smoke and odors, consider leaving the area while the cycle runs. Pet owners should be extra cautious. Birds are especially sensitive to airborne fumes and smoke, so they should be moved far away from the kitchen before using the self-clean function.
Step 5: Keep Kids and Pets Away
During self-cleaning, the oven door locks and the appliance becomes very hot. Exterior surfaces can become warmer than usual, especially around the door and control panel. Keep children, pets, and curious adults who like touching things “just to check” away from the oven.
Do not place towels, paper products, oven mitts, food packaging, or plastic containers near the range while the cycle runs. The self-clean setting is already dramatic enough. It does not need props.
Step 6: Select the Right Cleaning Time
Most self-cleaning ovens offer different settings based on soil level. Choose a shorter or light cycle for mild buildup, a medium cycle for average grime, and a longer or heavy cycle for stubborn baked-on residue. If your oven lets you choose a time, follow the manual’s recommendation.
Longer is not always better. A lightly soiled oven does not need a marathon cycle. Using the shortest effective setting helps reduce heat exposure, smoke, odors, and energy use.
Step 7: Start the Cycle and Let the Door Lock
Close the oven door fully and start the self-clean cycle. The oven should lock automatically before the high-heat portion begins. Do not try to force the door open once it locks. The lock is there for safety, not because your oven suddenly wants privacy.
Stay nearby while the cycle runs. You do not have to stare at it like a suspense movie, but you should remain home and alert. If you see heavy smoke, smell something unusual beyond normal burnt-food odor, or notice flames inside the oven, follow the manufacturer’s instructions. In general, keep the door closed, turn the oven off if needed, and call emergency services if a fire does not go out or the situation feels unsafe.
Step 8: Wait for the Oven to Cool Completely
After the cycle ends, the door may remain locked until the oven cools. This can take a while. Do not force it open. Once the lock releases, open the door carefully and stand back to avoid hot air or steam.
The inside of the oven may look dusty or gray. That is normal. The baked-on residue has been reduced to ash, which is much easier to remove than the original mess.
Step 9: Wipe Away the Ash
When the oven is fully cool, use a damp cloth or sponge to wipe out the ash. Rinse the cloth frequently so you are not just moving gray dust from one corner to another. Dry the interior with a clean towel if needed.
If stubborn spots remain, do not panic. Self-cleaning cycles reduce a lot of buildup, but they do not always make the oven look factory-new. Use a mild cleaner approved by your oven manufacturer, or repeat cleaning later only if the manual says it is safe.
What Not to Do With a Self-Cleaning Oven
Self-cleaning ovens are convenient, but they have rules. Breaking those rules can lead to smoke, damage, or disappointing results.
Do Not Use Commercial Oven Cleaner Before Self-Cleaning
Never spray chemical oven cleaner inside a self-cleaning oven before running the cycle unless your manual specifically allows it. Many manufacturers warn against using commercial oven cleaners on self-cleaning oven interiors because they can damage the special coating or create harsh fumes when heated.
Do Not Leave Foil or Oven Liners Inside
Aluminum foil and oven liners can melt, stick, discolor the oven floor, block airflow, or damage the oven surface. Remove them before cleaning. For future cooking, use a rimmed baking sheet under messy dishes instead of lining the oven floor with foil.
Do Not Scrub the Gasket
The door gasket may look like it needs a spa day, but resist the urge to scrub it. A damaged gasket can prevent the door from sealing correctly. Lightly remove loose debris only if your manual allows it.
Do Not Run the Cycle With a Huge Grease Mess
If a pie overflowed, a roast dripped heavily, or a casserole staged a rebellion, wipe the mess first. Large greasy spills can smoke heavily and may create a fire risk. Self-cleaning works best after loose and excessive residue has been removed.
Self-Clean vs. Steam Clean: Which Should You Choose?
Choose steam clean for light soil, fresh spills, and routine maintenance. Steam cleaning usually takes less time and uses lower heat, making it useful for quick cleanup. Choose high-heat self-clean for older, baked-on grime that will not wipe away easily.
A good maintenance strategy is to spot-clean regularly, steam-clean when the oven is lightly dirty, and reserve the self-clean cycle for occasional deep cleaning. This keeps the oven fresher without putting it through high-heat cleaning more often than necessary.
How to Clean Oven Racks Separately
Since most oven racks should be removed before self-cleaning, wash them by hand. Place them in a sink or bathtub lined with an old towel to prevent scratches. Soak the racks in warm water with dish soap, then scrub with a non-scratch pad or brush. Rinse well and dry completely before putting them back.
If racks feel sticky after accidentally going through a self-clean cycle, check the manual. Some manufacturers suggest applying a tiny amount of vegetable oil to the rack edges after cleaning and cooling to help them slide again. Use very little. You want smooth racks, not salad dressing.
How Often Should You Clean Your Oven?
How often you clean your oven depends on how often you cook and what you cook. Frequent bakers, roast lovers, and casserole champions may need more regular attention than someone who mainly reheats pizza. As a general rule, wipe fresh spills as soon as the oven cools, clean light messes monthly, and deep-clean every few months or as needed.
The best way to avoid dramatic self-cleaning sessions is prevention. Use covered dishes when possible, place a rimmed baking sheet under bubbling pies or cheesy casseroles, and clean spills before they turn into blackened kitchen fossils.
Common Self-Cleaning Oven Problems
The Oven Smokes During Self-Cleaning
Some smoke or odor can happen, especially if residue remains inside. If smoke is light, improve ventilation and let the cycle continue if it feels safe. If smoke is heavy, turn off the oven, keep the door closed, and wait for it to cool before inspecting the mess. Next time, wipe up more residue before starting.
The Door Will Not Unlock
The door usually stays locked until the oven cools. Give it time. If it remains locked long after cooling, check the manual for reset instructions. You may need to turn off power briefly or contact service if the lock mechanism is stuck.
The Oven Still Looks Dirty After Cleaning
Self-cleaning turns a lot of food residue into ash, but it may not remove every stain. Door glass, corners, and the frame may need hand-cleaning afterward. Use gentle methods approved for your model.
Real-Life Experience: What Using a Self-Cleaning Oven Actually Feels Like
The first time many people use a self-cleaning oven, they expect magic. They imagine opening the door afterward to find a sparkling appliance glowing like it just came from a showroom. The reality is a little less dramatic but still helpful. The oven gets very hot, the kitchen may smell like burnt toast’s angrier cousin, and afterward there is ash to wipe away. It is not zero effort, but it is much easier than attacking baked-on grease with a scraper while questioning your life choices.
One practical lesson is that preparation makes or breaks the experience. If you run the cycle with crumbs, grease, or old cheese still sitting on the oven floor, the smell can be intense. A five-minute wipe-down before starting can save you hours of airing out the kitchen. It is the cleaning equivalent of brushing your hair before taking a passport photo: technically optional, but highly recommended.
Another experience-based tip is to choose your timing wisely. Do not run the self-clean cycle thirty minutes before dinner, right before guests arrive, or while you are trying to keep the house cool. The oven may be unavailable for several hours, and the kitchen can get warm. A mild morning or afternoon when you can open windows is ideal.
It is also wise to warn the household. The oven door will lock, the appliance will heat up, and there may be odors. Tell everyone not to touch the oven or try to open it. This is especially important in homes with children, pets, or anyone who sees a locked appliance and immediately thinks, “Challenge accepted.”
After the cycle finishes, patience is your friend. The oven may remain locked for quite a while. Let it cool fully before wiping the inside. The ash is usually easy to remove with a damp cloth, but rushing the job can lead to burns or smeared residue. Once the interior is clean, wash the racks separately and slide them back in only when everything is dry.
The biggest takeaway is that a self-cleaning oven is useful, but it is not a substitute for regular maintenance. Wiping spills when they happen, using baking sheets to catch drips, and cleaning the door glass occasionally will make self-cleaning less smoky and more effective. Treat the feature like a deep-cleaning tool, not a weekly reset button. Used correctly, it can save time, reduce scrubbing, and keep your oven from smelling like every dinner you have cooked since 2021.
Conclusion: The Smart Way to Let Your Oven Do the Dirty Work
The right way to use a self-cleaning oven is to prepare carefully, follow the manual, ventilate well, and clean up afterward. Remove racks and loose items, wipe away heavy spills, avoid the gasket, keep children and pets away, and let the oven cool before wiping out the ash. Simple steps, big difference.
A self-cleaning oven can be a wonderful kitchen helper when used occasionally and correctly. It will not replace everyday cleaning habits, but it can make deep cleaning less miserable. And honestly, any appliance willing to turn burnt casserole remains into wipeable ash deserves a little respect.


