Table of Contents >> Show >> Hide
- Why an Organized Pantry Changes Everything
- The Organized Pantry Transformation Plan
- Step 0: Set a goal that matches your life (not a fantasy)
- Step 1: Empty everything (yes, everything) and clean the space
- Step 2: Do a fast but ruthless edit
- Step 3: Create pantry zones (the secret to staying organized)
- Step 4: Choose the right pantry storage containers (without overbuying)
- Step 5: Label like you live with other humans
- Step 6: Restock using “First In, First Out”
- Pantry Organization Ideas for Every Space
- How to Keep Your Pantry Organized (Without Making It Your Personality)
- Common Pantry Organization Mistakes (So You Can Skip Them)
- Conclusion
- Experience Notes: What Pantry Transformations Feel Like in Real Homes (Extra )
If your pantry has ever coughed up three open bags of pasta and a mystery spice labeled “maybe cinnamon?”welcome.
An organized pantry transformation isn’t about making your shelves look like a magazine spread where nobody actually eats.
It’s about building a pantry that works on a Tuesday night when you’re hungry, tired, and one minor inconvenience away from ordering tacos again.
In this guide, you’ll learn how to organize your pantry with a practical zone system, smart storage, and a maintenance routine that won’t
collapse the moment real life shows up. We’ll keep it efficient, realistic, and yesgood-looking enough that you’ll open the door just to admire your own competence.
Why an Organized Pantry Changes Everything
It saves money (because you stop buying duplicates)
The biggest “hidden cost” of a messy pantry is accidental double-shopping. You already have ricesomewhereso you buy more.
Then you find the original rice behind the cereal, quietly aging like a fine wine you never asked for.
With pantry bins, clear categories, and labels, you can see what you have at a glance and shop smarter.
It reduces food waste (and pantry guilt)
When items disappear into the back of a shelf, they tend to reappear only when you’re moving houses.
A pantry setup built around visibilityzones, risers, turntables, and “first in, first out” restockinghelps you actually use what you own.
It makes cooking faster (and less annoying)
An organized pantry is basically mise en place for your entire week. When pasta, sauce, and canned tomatoes live together,
dinner becomes “grab three things” instead of “dig for 12 minutes and question your life choices.”
The Organized Pantry Transformation Plan
Step 0: Set a goal that matches your life (not a fantasy)
Before you buy a single container, decide what “organized” means for you. Do you meal prep daily? Cook mostly on weekends?
Have kids who treat snacks like a professional sport? Your pantry organization should match your habits, not fight them.
Quick rule: function first, aesthetics second. You can absolutely have bothbut function has to win when they disagree.
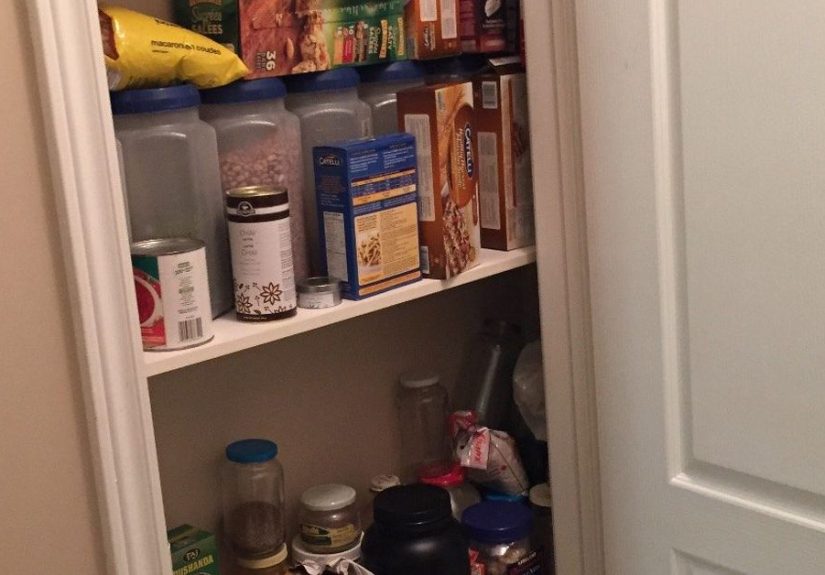
Step 1: Empty everything (yes, everything) and clean the space
This is the only moment you’ll truly understand what you own. Pull items out shelf by shelf and group them on a counter or table.
Wipe down shelves, corners, and any sticky spots where a syrup bottle once lived its best life.
While you’re here, measure your shelves (width, depth, height between shelves). This takes two minutes and prevents the classic mistake:
buying storage that fits beautifully in your cart and tragically nowhere in your pantry.
Step 2: Do a fast but ruthless edit
Toss anything that’s clearly expired, stale, or suspicious. For “best by” dates, use common sense: some shelf-stable foods last longer than you’d think,
but anything that smells off, looks off, or has been open forever should go. When in doubt, choose safety over optimism.
Also remove “pantry squatters”: random party supplies, single chopsticks, coupons from 2019, and that appliance manual you keep “just in case.”
Your pantry is for food and cooking essentialsunless you’re eating instruction booklets for fiber.
Step 3: Create pantry zones (the secret to staying organized)
Zones are the backbone of pantry decluttering and long-term maintenance. Pick categories that make sense for your household.
Here’s a proven zone map you can copy and customize:
- Breakfast: cereal, oatmeal, pancake mix, spreads
- Snacks: grab-and-go items, lunchbox staples
- Baking: flour, sugar, chocolate chips, extracts, sprinkles (yes, sprinkles count)
- Grains & pasta: rice, quinoa, noodles, boxed grains
- Canned goods: beans, tomatoes, broths, tuna
- Condiments & oils: oils, vinegars, sauces, marinades
- Backstock: bulk extras, overflow, paper goods if needed
Place daily-use zones at eye level. Put heavier items lower. Store rarely used items higher up (or deeper back) so the stuff you need most is easiest to reach.
Step 4: Choose the right pantry storage containers (without overbuying)
Let’s talk containersbecause it’s easy to spend $150 to store $12 worth of pretzels. The goal isn’t “everything decanted.”
The goal is “the right things decanted.” Use containers where they create real benefits:
- Decant messy staples: flour, sugar, rice, oats, cereal, baking chips
- Contain small chaos: seasoning packets, pudding cups, snack bars, tea bags
- Prevent spills: powdered drink mixes, breadcrumbs, nuts
Mix and match your tools based on shelf type:
- Clear bins: great for categories like snacks, baking add-ins, packets
- Airtight canisters: ideal for dry goods you use often
- Tiered shelf risers: help canned goods stop playing hide-and-seek
- Lazy Susans: perfect for oils, sauces, nut butters, and anything you want to spin into view
- Door storage: slim baskets or racks for wraps, packets, and small bottles
Pro tip: if you’re torn between “pretty” and “practical,” choose practical. Pretty is what happens naturally when your pantry actually works.
Step 5: Label like you live with other humans
Labels aren’t just aestheticthey’re communication. If multiple people unload groceries, pack lunches, or cook, labels protect your system.
You have two solid labeling options:
- Quick and flexible: painter’s tape + marker (easy to change)
- Long-term: printed labels for bins and canisters (clean look, easy upkeep)
Label bins by category (“Snacks,” “Baking,” “Pasta”), and label containers by item (“Flour,” “Brown Sugar”).
Include dates for things like opened nuts, specialty flours, or bulk items if your household tends to forget.
Step 6: Restock using “First In, First Out”
The easiest way to keep your pantry organized is to restock intentionally:
put newer items behind older items so the older ones get used first. This is the same principle grocery stores use,
and it works beautifully in home pantriesespecially for snacks and canned goods.
Pantry Organization Ideas for Every Space
Small pantry organization (when you’re working with inches, not dreams)
If your pantry is more of a “tall cabinet with ambition,” focus on vertical strategy:
stackable bins, shelf risers, and door storage do the heavy lifting. Keep one “current week” bin at eye level for the items you’re reaching for daily.
You’ll feel like you gained square footage without paying rent for it.
Deep shelves and hard-to-reach corners
Deep shelves are where good intentions go to retire. Fix it with pull-out bins (or sturdy handled bins) so you can slide an entire category forward.
For corners, a lazy Susan is the MVPespecially for short bottles and jars that love disappearing into the back.
A family-friendly snack zone that doesn’t self-destruct
Put kid snacks in a low, labeled bin: “School Snacks” or “Grab & Go.” Adults get an upper shelf for items you’d prefer not to watch vanish in 48 hours.
Add a small “refill” bin so you can restock the snack zone quickly once a week instead of daily scavenger hunts.
How to Keep Your Pantry Organized (Without Making It Your Personality)
The 10-minute weekly reset
- Return strays to their zones (yes, even the rogue marshmallows).
- Wipe one shelf or sticky spot.
- Check your “backstock” and move any near-term items forward.
- Add 3–5 items to a running grocery list (paper, notes app, whatever you’ll actually use).
The monthly “mini-audit”
Once a month, do a quick scan for expired items, open packages, and duplicates. This is also when you decide if your zones still fit your routine.
If “Baking” has turned into “Random Candy,” adjust your systemyour pantry should evolve with you.
Common Pantry Organization Mistakes (So You Can Skip Them)
- Buying containers before sorting: measure first, shop second.
- Over-decanting: not everything needs a matching jar. Save effort for messy staples.
- Making zones too complicated: if it takes a manual, it won’t last.
- Storing heavy items up high: gravity is undefeated.
- Ignoring visibility: if you can’t see it, you won’t use it.
Conclusion
An organized pantry transformation isn’t about perfectionit’s about building a system you can maintain on your busiest week.
Start by emptying and editing, then create zones that match how you cook, add only the storage tools you truly need,
label for real-life humans, and restock with intention. Your future self will thank youprobably while finding the paprika on the first try.
Experience Notes: What Pantry Transformations Feel Like in Real Homes (Extra )
The internet loves an “after” photo, but the real magic of pantry organization shows up in the small, oddly satisfying moments.
People often report the first win is emotional: opening the pantry door stops feeling like starting an argument with your own shelves.
When categories exist and items have homes, your brain doesn’t have to run a scavenger-hunt algorithm every time you need olive oil.
One common experience is the “duplicate discovery era.” During the first full empty-out, households frequently find multiples of the same item:
three half-used bags of lentils, two open boxes of the same crackers, and enough cinnamon to supply a small bakery.
It’s not a moral failingit’s a visibility problem. Once you set up clear bins or zones, duplicates drop fast because you can see inventory instantly.
Another pattern: the snack zone is where systems either thrive or fall apart. In many families, snacks are the most frequently touched category,
which means it’s the first to unravel. The fix is surprisingly simple: make snacks the easiest zone to use.
Put them low, label the bin clearly, and choose containers that don’t require adult-level patience to open.
If kids can access snacks without removing six other items, the pantry stays tidy longer. If snacks are stored like rare museum artifacts,
the pantry will be “reorganized” by tiny hands daily.
People with small pantries often have the best long-term results, because limited space forces decisions.
They’re more likely to use shelf risers, door storage, and a tight “current week” bin. The experience there is a big shift in shopping habits:
instead of buying for the pantry they wish they had, they buy for the pantry they actually own. That’s when a pantry stops being crowded and starts being curated.
Bulk shoppers have a different journey. Their big breakthrough usually comes from separating “working stock” from “backstock.”
When only one container of rice lives in the main zone and the extras live elsewhere (or at least in a dedicated overflow area),
cooking becomes easier and the pantry stops looking like a warehouse aisle. The bonus experience: fewer spills.
Bulk bags are clumsy. Decanting into a sturdy, airtight container turns “rice explosion” into “rice, contained, like it agreed to a lease.”
Finally, nearly everyone experiences a quiet confidence boost after a pantry reset. It’s not just about finding items faster.
It’s the feeling of having a system that supports your day. The best pantry organization isn’t fragileit’s forgiving.
It assumes you’ll be busy, tired, and occasionally chaotic. And then it still works anyway. That’s not just organization. That’s victory.