Table of Contents >> Show >> Hide
- Start with the Camera You Already Have
- 22 Tips for Taking Professional Photos with Your iPhone
- 1. Clean the lens first
- 2. Learn what each lens actually does
- 3. Turn on the grid and use it
- 4. Tap to focus, then lock focus and exposure
- 5. Adjust exposure manually instead of trusting auto mode
- 6. Choose the right file quality for the job
- 7. Use natural light whenever possible
- 8. Shoot during golden hour
- 9. Avoid ugly mixed lighting
- 10. Simplify the background
- 11. Move your feet before you pinch to zoom
- 12. Change your angle
- 13. Use leading lines, framing, and negative space
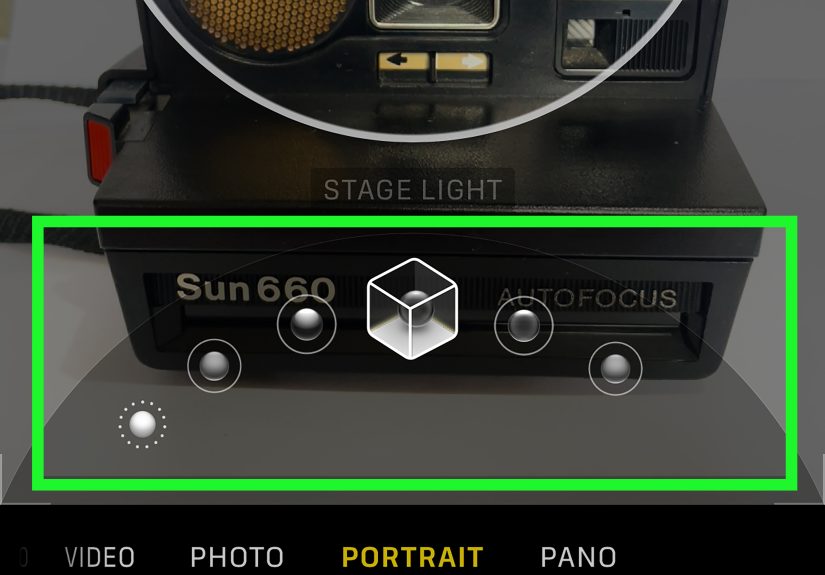
- 14. Use Portrait mode, but do not force it
- 15. Treat Night mode like a tool, not a miracle
- 16. Use Burst mode for action
- 17. Keep Live Photos on when timing is tricky
- 18. Explore macro mode for tiny details
- 19. Use a timer, tripod, or stable surface
- 20. Use the built-in editing tools after you shoot
- 21. Crop with purpose, not panic
- 22. Tell a visual story instead of taking random singles
- Common iPhone Photo Mistakes to Avoid
- Conclusion
- Experience: What It Feels Like When These Tips Start Working
- SEO Tags
Your iPhone is the camera you actually carry, which already gives it a huge advantage over the fancy gear gathering dust in a closet like a retired rock star. But convenience alone does not make a photo look professional. What does? Control, composition, light, timing, and editing with a little restraint. The good news is that your iPhone can do all of that surprisingly well.
If you have ever looked at someone else’s iPhone shot and thought, “Why does theirs look cinematic while mine looks like evidence from a parking lot?” this guide is for you. Below, you will find 22 practical tips that can help your iPhone photos look cleaner, sharper, more intentional, and a whole lot more polished.
Note: Some tools such as ProRAW, 48 MP capture, manual HDR control, Macro Control, and certain Portrait features are only available on supported iPhone models.
Start with the Camera You Already Have
Professional-looking iPhone photography is less about magic settings and more about making smart decisions before you tap the shutter. Think of your iPhone as a tiny camera system with several lenses, helpful computational tricks, and an editing suite built right into Photos. Once you learn how those pieces work together, your pictures stop looking accidental and start looking intentional.
22 Tips for Taking Professional Photos with Your iPhone
1. Clean the lens first
This sounds painfully obvious, which is exactly why people forget it. A smudged lens softens detail, creates strange flares, and makes contrast look muddy. Before you shoot, wipe the lens with a soft cloth or at least the cleanest corner of your shirt. Yes, that tiny fingerprint really can turn “moody atmosphere” into “why does everything look like soup?”
2. Learn what each lens actually does
Most newer iPhones offer a main camera, an ultra-wide option, and sometimes a telephoto lens. The main camera is usually your best all-purpose choice. Ultra-wide is useful for landscapes, architecture, and tight spaces. Telephoto helps with portraits and distant subjects because it preserves perspective better than simply cropping. Knowing which lens fits the scene is one of the fastest ways to improve your photos.
3. Turn on the grid and use it
Enable the camera grid in Settings and start composing with intention. The grid helps you apply the rule of thirds, keep horizons straight, and avoid awkward framing. Put your subject slightly off-center when it improves balance, or align key elements along the grid lines. Tiny compositional choices make a big difference in whether a photo feels casual or carefully made.
4. Tap to focus, then lock focus and exposure
The iPhone camera is smart, but it is also eager. It will happily shift focus and brightness at the worst possible moment if you let it. Tap your subject to focus, then press and hold until you see AE/AF Lock. This locks focus and exposure so the camera stops making last-second decisions on your behalf. For portraits, food, products, and low-light scenes, this is a game changer.
5. Adjust exposure manually instead of trusting auto mode
After tapping to focus, drag the exposure slider up or down to brighten or darken the image. This is one of the easiest ways to make your iPhone photos look more professional. Slightly lowering exposure can save highlights in a bright sky. Slightly raising it can reveal detail in shadows. Auto exposure is fine, but “fine” rarely wins awards or gets bookmarked.
6. Choose the right file quality for the job
For everyday photos, standard high-efficiency capture is usually perfect. If you plan to edit heavily, print large, or need extra flexibility, use higher-resolution settings or Apple ProRAW on supported models. Just remember that bigger files eat storage for breakfast. Use the heavy-duty formats when the shot matters, not for random pictures of your coffee cup pretending to be art.
7. Use natural light whenever possible
Good light makes even simple iPhone photos look expensive. Window light, open shade, and soft outdoor light are your best friends. Harsh overhead light often creates deep shadows and blown highlights, especially on faces. If a scene looks ugly to your eyes, your camera probably agrees. Move closer to a window, step into shade, or change position until the light looks softer and more flattering.
8. Shoot during golden hour
The first hour after sunrise and the last hour before sunset offer softer, warmer light that flatters people, buildings, and landscapes. Golden hour adds dimension without the brutal contrast of midday sun. Skin looks better, shadows look gentler, and colors often feel richer. If you want a quick shortcut to more professional-looking iPhone photos, timing matters almost as much as technique.
9. Avoid ugly mixed lighting
One of the fastest ways to make a photo look off is mixing warm indoor bulbs with cool daylight or neon accents. The result can be weird skin tones and color casts that are annoying to fix later. If possible, turn off one light source, move your subject, or commit to one dominant type of light. A cleaner light source usually means a cleaner-looking image.
10. Simplify the background
Professional photos tend to look intentional because they remove distractions. Before you shoot, scan the edges of the frame. Is there a trash can behind your subject? A random elbow? A lamp sticking out of someone’s head like a budget halo? Clean up the background, move your subject, or change your angle. Less clutter gives your main subject room to breathe.
11. Move your feet before you pinch to zoom
Digital zoom often reduces image quality because it crops the picture rather than truly magnifying it. When possible, walk closer to your subject. If your iPhone has a telephoto lens, use that instead of heavy digital zoom. The result is usually sharper, more natural, and better balanced. Your legs are free, fast, and still more reliable than bad zoom decisions.
12. Change your angle
Most people shoot everything from standing height, which is convenient but usually boring. Get lower for pets, children, flowers, and street scenes. Shoot from the side for shape and depth. Try a high angle for flat lays and food. A more interesting angle can turn an ordinary subject into a stronger image without changing anything except your willingness to squat in public.
13. Use leading lines, framing, and negative space
Roads, railings, windows, fences, doorways, and shadows can guide a viewer’s eye through a photo. That is what gives images structure. Use leading lines to pull attention toward the subject. Use natural frames like arches or branches to add depth. Use negative space when you want a minimal, elegant look. Composition is not about making things fancy; it is about making them clear.
14. Use Portrait mode, but do not force it
Portrait mode can create beautiful background blur and separation, especially for people, pets, and close-up objects. It can also make ears disappear or turn hair into abstract modern art when the scene is too complex. Use it when your subject is clearly separated from the background and the lighting is decent. Then adjust blur and lighting later if your iPhone supports it.
15. Treat Night mode like a tool, not a miracle
Night mode can brighten dark scenes and pull out surprising detail, but it still rewards steadiness. Brace your elbows, lean against a wall, or use a tripod for the sharpest result. Watch for moving people or cars, because motion can create softness or ghosting. Low light is where patience pays off. The camera can help, but it cannot negotiate with a moving subject.
16. Use Burst mode for action
When your subject is moving, one perfectly timed tap is often a gamble. Burst mode gives you a rapid sequence so you can choose the strongest frame later. It is ideal for kids, pets, sports, dancing, splashing water, or anyone who blinks like it is their part-time job. On supported setups, you can enable Volume Up for Burst to make this even easier.
17. Keep Live Photos on when timing is tricky
Live Photos capture moments just before and after you press the shutter. That means you can often pick a better frame later if the original shot missed the expression, hand position, or peak moment. This is especially helpful for candid photos, group shots, and moving subjects. It is like giving yourself a tiny second chance without having to pretend the first shot never happened.
18. Explore macro mode for tiny details
On supported iPhones, macro mode lets you capture close-up textures, flowers, jewelry, food details, and little objects with surprising drama. The trick is not just getting close, but keeping the phone steady and composing carefully. Macro can look amazing, but only if the subject is clear and the frame is intentional. Random close-ups are not macro art. They are just close mistakes.
19. Use a timer, tripod, or stable surface
Professional-looking images are often just the result of keeping the camera still. A timer prevents shake from tapping the shutter. A tripod helps in low light, self-portraits, flat lays, and product shots. If you do not have one, prop your phone on a shelf, mug, or stack of books. Great photography has always involved improvisation. Sometimes the hero is a cereal box.
20. Use the built-in editing tools after you shoot
The Photos app is more powerful than many people realize. You can adjust exposure, brilliance, highlights, shadows, contrast, warmth, and more. Start small. Fix the crop, straighten the image, recover highlights, and add just enough contrast to give shape. Good editing should make a photo feel finished, not obviously edited. If everyone can tell you edited it, you may have overcooked it.
21. Crop with purpose, not panic
Crop to improve composition, remove distractions, or emphasize your subject, but do not use cropping as an excuse to shoot carelessly. A thoughtful crop can strengthen a weak frame, but too much cropping reduces quality. Straighten horizons while you are at it. A crooked ocean horizon makes viewers feel mildly haunted, and not in a good artistic way.
22. Tell a visual story instead of taking random singles
Professional photographers often think in sequences, not just one-off images. If you are photographing a meal, a market, a walk through the city, or a family moment, capture a variety of shots: wide, medium, close-up, detail, and candid. Your photography instantly feels more polished when your images work together. One great photo is nice. A mini story feels deliberate and memorable.
Common iPhone Photo Mistakes to Avoid
The biggest mistake is relying too much on the camera to do the creative work. Your iPhone is powerful, but it cannot choose the best light, simplify a messy scene, or decide what story you want the image to tell. That part is still gloriously human.
Another mistake is overediting. Too much sharpening, saturation, contrast, or fake blur can make a photo look processed instead of polished. Aim for clean, balanced, believable results. Professional does not always mean dramatic. Sometimes it just means the picture looks calm, clear, and well made.
Finally, do not ignore practice. The best iPhone photographers are not using secret wizard settings every day. They are noticing light, trying angles, testing framing, and learning from the shots that did not work. Photography is part skill, part observation, and part taking three near-identical photos because one of them might actually be excellent.
Conclusion
If you want to take professional photos with your iPhone, focus less on gimmicks and more on fundamentals. Clean the lens. Use the right lens. Control focus and exposure. Watch the light. Simplify your composition. Use Portrait mode, Night mode, Burst, Live Photos, and editing tools when they genuinely help the shot. Most importantly, slow down just enough to make choices on purpose.
Your iPhone may fit in your pocket, but it is capable of producing striking, polished images when you stop treating it like a quick snapshot machine and start using it like a real camera. That does not mean every photo needs to be serious. It just means even spontaneous photos can look thoughtful. And that is usually where “professional” begins.
Experience: What It Feels Like When These Tips Start Working
At first, improving your iPhone photography does not feel dramatic. It feels tiny. You wipe the lens. You stop standing in the same spot for every shot. You tap to focus instead of hoping the phone reads your mind. You lower the exposure a touch so the sky does not turn into a glowing white surrender flag. None of that sounds glamorous, but the results start stacking up fast.
The first real change is that your photos begin to look more intentional. Friends may not know exactly what changed, but they notice. Your portraits look cleaner. Your food photos stop looking like hostage documentation. Vacation shots have depth instead of visual chaos. You start catching moments more accurately because Burst and Live Photos save you when timing is slightly off. Suddenly, the camera roll feels less like a dumping ground and more like an edited collection.
Then you begin to see light differently. Window light becomes exciting. Open shade feels like a secret. Golden hour turns into a reliable cheat code. You notice when overhead light is too harsh, when mixed lighting makes skin look strange, and when the background is fighting with the subject. The weird part is that this awareness spills into daily life. You walk into a coffee shop and immediately think, “That corner table near the window would make a great portrait spot.” That is when you know the photography bug has bitten.
There is also a confidence shift. Instead of randomly tapping the shutter and hoping for mercy, you start making decisions. Which lens should I use? Do I want the whole scene or just the detail? Is Portrait mode helpful here, or will it butcher the edges? Should I move closer? Should I wait for a better expression? Those decisions make you faster, not slower, because you waste less time taking weak photos that were never going to work.
Best of all, your iPhone becomes more than a convenience. It becomes a creative tool you trust. You realize you do not need a backpack full of gear to make strong images on a walk, at dinner, during travel, or while your dog performs another completely unnecessary but photogenic zoom across the living room. The phone is already with you. The skill is what changes everything.
And yes, not every shot will be amazing. Some will still be blurry. Some will still be crooked. Some will feature a wonderful expression and a truly unfortunate background. But that is part of the process. The more you practice these tips, the more often you will capture photos that feel polished, personal, and surprisingly professional. Once that starts happening consistently, your iPhone stops feeling like a compromise and starts feeling like a camera you actually know how to use.