
Table of Contents >> Show >> Hide
- Table of Contents
- Before You Start: Identify Your Shower Handle Type
- Tools and Materials Checklist
- Step 1: Shut Off Water and Prep the Work Area
- Step 2: Remove the Old Shower Knob
- Step 3: Install the New Shower Knob
- Step 4: Test for Fit, Function, and Leaks
- Troubleshooting: Stuck Handles, Stripped Screws, and Other Plot Twists
- When to Call a Plumber
- FAQ
- Real-World Experiences & Lessons Learned (Extra )
- Conclusion
- SEO Tags (JSON)
Shower knobs are like tiny bathroom bosses: they don’t do much until the day they decide to ruin your morning.
Maybe yours is cracked, loose, spinning like a roulette wheel, or just so dated it belongs in a museum exhibit titled
“Early 2000s Chrome: A Love Story.” The good news: replacing shower knobs (a.k.a. shower handles) is usually a
straightforward DIY jobno wall demolition, no plumbing doctorate, and no dramatic “Why is there water everywhere?!” moment
(as long as you shut off the water first… which we will).
This guide walks you through replacing shower knobs step by step, including the most common handle styles (single-handle,
two-handle, and three-handle setups), how to identify what you have, what tools you’ll need, and what to do when things get
stubborn. You’ll also learn when a “knob problem” is actually a “cartridge problem” in disguise.
Table of Contents
- Before You Start: Identify Your Shower Handle Type
- Tools and Materials Checklist
- Step 1: Shut Off Water and Prep the Work Area
- Step 2: Remove the Old Shower Knob
- Step 3: Install the New Shower Knob
- Step 4: Test for Fit, Function, and Leaks
- Troubleshooting: Stuck Handles, Stripped Screws, and Other Plot Twists
- When to Call a Plumber
- FAQ
- Real-World Experiences & Lessons Learned (Extra )
- SEO Tags (JSON)
Before You Start: Identify Your Shower Handle Type
“Shower knob” can mean a few different things. The replacement steps are similar, but the way the handle comes off depends on
how it’s attached. Spend two minutes here and you’ll save twenty minutes of muttering later.
Common shower handle setups
- Single-handle shower (one knob/lever): One handle controls both temperature and water flow.
- Two-handle shower: Separate hot and cold handles.
- Three-handle tub/shower: Hot, cold, and a diverter handle (to switch tub spout to shower head).
How the handle is usually fastened
- Center screw under a cap: A decorative “index cap” pops off to reveal a screw.
- Set screw (Allen/hex): A small screw on the underside or side of the handle tightens onto the stem.
- Screwless / threaded base: The handle base or “bonnet” unscrews, often with a strap wrench.
Pro tip: Take a photo of the handle (front, side, and underneath), plus a close-up of any logos. If you’re buying a direct-fit
replacement, brand and series matter. If you’re going universal, stem shape matters.
Tools and Materials Checklist
Most shower handle replacement jobs are “basic tool drawer” territory. Here’s what typically helps:
Tools
- Flathead screwdriver (small, for prying caps)
- Phillips screwdriver
- Allen (hex) key set (common for set screws)
- Adjustable wrench (optional)
- Strap wrench (helpful for screwless/threaded bases)
- Handle puller (optional, for stuck handles)
- Flashlight or phone light
Materials
- Replacement shower knob/handle (direct-fit or universal)
- Soft rag or towel (to protect finishes and cover the drain)
- White vinegar (for mineral buildup) and/or penetrating oil (for corrosion)
- Silicone-based plumber’s grease (optional but useful)
- Small container for screws and caps (a.k.a. “don’t lose the tiny stuff” bowl)
Step 1: Shut Off Water and Prep the Work Area
Replacing a shower knob is easier when your shower isn’t actively trying to become a fountain. Shut off the water first.
Some homes have shutoff stops for the shower (often accessible via an adjacent panel), but many don’tso you may need to
shut off the main water supply.
- Turn off the water supply to the shower (or the home’s main shutoff if needed).
- Relieve pressure by turning the shower on briefly, then off. (Yes, this is the one time “turn it on” is part of turning it off.)
- Cover the drain with a rag or towel so screws don’t disappear into the plumbing void.
- Protect the tub or shower floor with a towel if you’re working over a hard surfacedropped tools and porcelain do not make good friends.
Step 2: Remove the Old Shower Knob
Your mission is to remove the handle without damaging the valve stem (or the wall/trim). Go slow, use the right tool, and
avoid aggressive prying against tile or fiberglass.
Option A: Handle with a center screw under a cap
-
Find the index cap (often marked hot/cold or just a decorative button).
Use a small flathead screwdriver to gently pry it off. Work carefully to avoid scratching the finish. - Remove the screw underneath (usually Phillips). Turn counterclockwise, then set it aside.
-
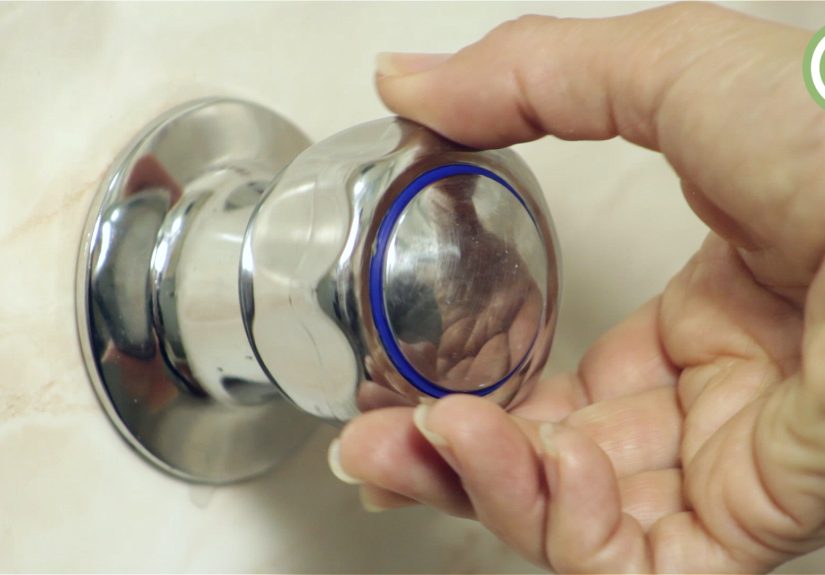
Pull the handle straight off. If it resists, wiggle gently while pulling.
Avoid yanking sidewaysthis can damage internal parts.
Option B: Handle secured with a set screw (Allen/hex)
- Locate the set screwcommonly on the underside of the handle near the wall, or sometimes on the side.
- Insert the correct hex key and loosen the set screw. You usually don’t need to remove it completely.
- Slide the handle off the stem. If it’s stuck, see the troubleshooting section below before going full caveman.
Option C: “Screwless” handles with a threaded base or bonnet
Some handles come off by unscrewing the handle base (or a collar/bonnet behind it). If you don’t see a cap or set screw,
this is a likely suspect.
- Try turning the base counterclockwise by hand while holding the handle steady.
- Use a strap wrench if needed (it grips without chewing up the finish like metal jaws can).
- Once loosened, remove the base and any exposed screws that secure the handle.
If the escutcheon (trim plate) needs to come off
For a simple knob swap, you usually don’t need to remove the trim plate. But if you’re installing a matching trim kit,
inspecting the valve, or replacing a cartridge, you may need to remove the plate by taking out the screws and gently pulling it away.
If there’s caulk along the top/sides, score it with a utility knife first to avoid tearing.
Step 3: Install the New Shower Knob
Installing the new handle is mostly the reverse of removalexcept now you’re aiming for a snug fit, correct alignment, and
smooth operation. The key is matching the handle to your valve stem.
Check the stem and handle compatibility
- Direct-fit handle: Designed for a specific brand/series and stem style. Easiest option.
- Universal handle: Includes adapters for common stem shapes (splined, D-shaped, etc.). Great when the original is discontinued.
Before installing, clean the exposed stem with a rag. If mineral buildup is heavy, a vinegar-dampened cloth can help.
If the handle was stuck due to corrosion, clean gently so the new handle seats properly.
Install steps (most common approach)
- Dry-fit the handle first (no screw yet). Confirm it slides on fully and sits flat without wobbling.
- Use the correct adapter if it’s a universal handle. If the handle includes multiple inserts, choose the one that matches the stem.
-
Apply a tiny amount of silicone plumber’s grease to the stem splines (optional). This can make future removal easier and reduce squeaks.
Don’t overdo itthis is a shower handle, not a slip-and-slide. -
Secure the handle:
- If it uses a center screw, tighten it until snugfirm, not Hulk-level.
- If it uses a set screw, align the handle and tighten the set screw snugly with the correct hex key.
- If it uses a threaded base, reassemble and tighten by hand or strap wrench (protecting the finish).
- Reinstall the index cap or decorative button if your handle has one.
Alignment tips (so it doesn’t look… haunted)
- For lever handles, align so “off” points straight down or in the manufacturer’s intended position.
- For hot/cold handles, confirm the labels end up readable and consistent.
- If the handle stops in a weird spot, you may need to reposition an adapter or verify the handle is fully seated.
Step 4: Test for Fit, Function, and Leaks
- Turn the water supply back on slowly.
- Test the handle movement: It should turn smoothly without grinding, binding, or wobbling.
- Run the shower: Check that hot/cold directions behave as expected and that water flow responds normally.
- Check for leaks around the trim plate and handle area.
Important reality check: replacing the knob fixes cosmetic damage and looseness. If you still have dripping when the shower is off,
the issue is often the cartridge, valve stem, seats/springs, or another internal valve componentnot the handle itself.
Troubleshooting: Stuck Handles, Stripped Screws, and Other Plot Twists
The handle won’t come off (it’s stuck like it pays rent)
- Confirm you removed the fastener: Cap screw fully removed? Set screw actually loosened?
- Use vinegar for mineral buildup: Wrap a vinegar-damp cloth around the area for 20–30 minutes.
- Try penetrating oil (sparingly): Let it soak, then wiggle and pull.
- Use a handle puller: This tool applies even pressure and reduces the chance of cracking trim or hurting the valve stem.
- Gentle heat: A hair dryer can help expand the handle slightly if corrosion is the issue (avoid overheating plastic parts).
The screw is stripped
- Use a slightly larger screwdriver bit and press firmly.
- Try a rubber band between the bit and the screw head for extra grip.
- If it’s truly mangled, a screw extractor may be needed. At that point, patience beats brute force.
The handle is loose even after tightening
- Make sure the handle is fully seated on the stem.
- Check that the adapter insert (if universal) matches the stem shape.
- Inspect the stem splinesif they’re worn or rounded, the handle may not grip properly and the internal part may need replacement.
The handle turns, but water doesn’t behave correctly
- A mismatched handle/adapter can cause poor engagement.
- Some valves use temperature limit stops or rotational stopsreinstall them correctly if you removed trim pieces.
- If the valve is old or failing, the handle swap won’t fix internal control issues.
When to Call a Plumber
DIY is greatuntil it becomes “DIY: Destroy It Yourself.” Consider calling a pro if:
- You can’t locate any shutoff valves and the main shutoff is unreliable.
- The handle removal requires drilling/extraction and you’re not comfortable with it.
- You discover active leaking behind the trim plate or signs of water damage.
- You suspect the valve body needs replacement (this can involve opening the wall and soldering or special fittings).
- Your home has very old plumbing and parts are seized beyond reasonable persuasion.
FAQ
How long does it take to replace shower knobs?
If the handle comes off easily, many homeowners finish in under an hour. If it’s stuck or you’re also replacing trim components,
plan for extra timeespecially if you’re making a run to the store mid-project (the unofficial “Step 6” of most DIY jobs).
Do I need to replace the cartridge when replacing the handle?
Not necessarily. Replace the cartridge (or valve stem) if the shower drips when off, temperature control is inconsistent, or the valve feels rough.
Handles fix grip and appearance; cartridges fix water control.
Can I use a universal shower handle?
Often, yes. Universal handles typically come with adapters for common stem types. The key is choosing the correct insert and securing it properly so it
doesn’t wobble or slip.
Why is my shower knob hard to turn?
A stiff knob can be caused by mineral buildup, an aging cartridge/stem, or internal seals that are wearing out. A new handle might feel better,
but stiffness usually points to an internal valve component that needs service.
Real-World Experiences & Lessons Learned (Extra )
Replacing shower knobs sounds like the kind of DIY project you do between coffee refills. And sometimes it is.
But real bathroomsunlike the internetcontain hard water, mystery caulk, and hardware that has been quietly oxidizing since
the era when flip phones were considered cutting-edge. Here are the most common “this is what actually happens” experiences,
plus the lessons that keep the job quick and frustration-free.
1) The handle is never as loose as you thinkit’s usually stuck. Many people start the job expecting a gentle pull,
then discover the handle has basically fused to the stem. This is especially common in humid bathrooms or regions with hard water.
The best move isn’t prying against tile (which risks cracks); it’s patience: loosen the fastener fully, soak mineral buildup with vinegar,
and use a handle puller when wiggling doesn’t work. The puller feels like an “extra tool,” but it can prevent the classic
DIY tragedy: “I broke the handle, scratched the wall, and I’m still not done.”
2) Tiny parts try to escape. Index caps, set screws, and handle screws are small, shiny, and apparently trained by
professional magicians. Covering the drain isn’t just a suggestionit’s a lifestyle. Also, keeping a small cup or magnetic tray nearby
can save you from crawling around the bathroom floor like you’re searching for a contact lens.
3) Universal handles are great… if you treat them like a kit, not a single part. People sometimes install the new handle
without the adapter insert (or choose the wrong one), then wonder why it wobbles. Universal kits can work beautifully, but only when the handle is fully seated,
the correct adapter matches the stem, and the fastener is snug. A quick dry-fit before final tightening is the difference between
“solid upgrade” and “why is this handle doing the cha-cha?”
4) A shiny new knob won’t stop a drip. Homeowners often replace the handle because the shower is leaking,
only to discover the leak continues. That’s not failureit’s a diagnosis. If water drips when the shower is off, the problem is typically internal:
cartridge, valve stem, seals, seats/springs, or worn components. The handle is the steering wheel; the cartridge is the engine.
Upgrading the steering wheel is nice, but it won’t fix an engine issue.
5) The “one quick project” sometimes becomes a “while I’m here” moment. Once the handle is off, people notice the trim plate is grimy,
the caulk line is rough, or the finish doesn’t match. If you’re already there, it can be satisfying to clean the area thoroughly,
replace worn screws, and re-caulk neatly (especially along the top and sides of the trim plate, leaving the bottom unsealed when appropriate
so moisture can escape). Just be honest with yourself: if you only have 20 minutes, don’t start a full bathroom makeover at 10:30 p.m.
The bottom line: Most shower knob replacements are totally doable and surprisingly rewardingyour shower instantly feels newer.
The real “expert move” isn’t fancy technique; it’s being prepared for the two most common obstacles: stuck parts and mismatched fittings.
Plan for those, and the rest is just tightening screws and enjoying the fact that your shower handle no longer looks like it survived a minor earthquake.
Conclusion
Replacing shower knobs is one of those rare home projects that can be both practical and instantly satisfying. With the water off,
the drain covered, and the right handle (plus the correct screw or adapter), you can usually swap a cracked or dated handle in under an hour.
If your shower still drips afterward, consider it a helpful clue: the handle was the messenger, not the culprit, and the cartridge or valve internals
may be the next thing to address.


