
Table of Contents >> Show >> Hide
- Before You Start: Two Rules That Save Mattresses
- What You’ll Need (Quick Checklist)
- Step-by-Step for New (Fresh) Urine Stains
- Step-by-Step for Old (Set-In) Urine Stains
- How to Remove the Urine Smell (Even When You Can’t See a Stain)
- Mattress Type Tips: Foam vs. Spring
- Troubleshooting: When the Stain Won’t Quit
- Safety Notes (Because Chemistry Is Not a Party Trick)
- Prevention: Stop Future Accidents from Becoming a Mattress Saga
- Real-World Experiences: What People Learn After the First “Mattress Pee Emergency” (Extra Insights)
- Conclusion
Urine on a mattress is one of life’s least glamorous surprises. It’s right up there with stepping on a LEGO in the darkexcept this one comes with a smell that can haunt your bedroom like a tiny, ammonia-scented ghost.
The good news: you can usually remove urine stains (fresh and set-in) and the odor without turning your mattress into a science fair volcano. The better news: you don’t need a cabinet full of harsh chemicals. You mainly need speed, the right cleaner for the job, and a strong commitment to letting things dry completely.
Before You Start: Two Rules That Save Mattresses
Rule #1: Don’t drown the bed
Mattresses are basically giant sponges with feelings. Too much liquid sinks deep, dries slowly, and can lead to lingering odor (or worse, mildew). Use a spray bottle or lightly dampened clothnever pour cleaners directly onto the mattress.
Rule #2: Don’t “rage scrub”
Scrubbing hard can push urine deeper and spread the stain. Think: blot, press, and gently work from the outside edges toward the center.
What You’ll Need (Quick Checklist)
- Paper towels or clean white cloths (white helps you see what’s lifting out)
- Rubber gloves (urine cleanup is not a bare-hands hobby)
- Spray bottle
- Baking soda
- Distilled white vinegar
- Mild dish soap (optional)
- 3% hydrogen peroxide (for set-in stains; patch test first)
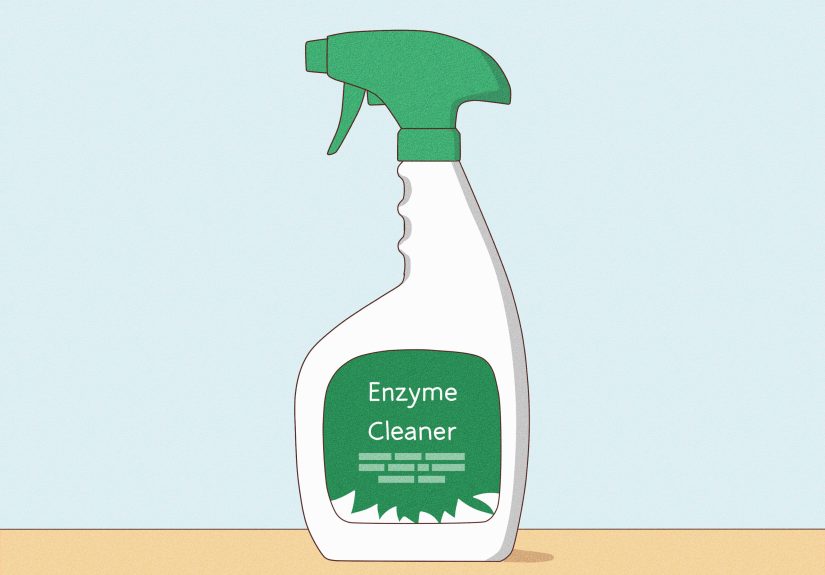
- Enzymatic cleaner (especially helpful for old stains or pet urine)
- Vacuum with upholstery attachment
- Fan (or open windows) for faster drying
Step-by-Step for New (Fresh) Urine Stains
Fresh stains are the easiest to fix because the urine hasn’t had time to settle into the fibers and crystallize. The goal is simple: remove moisture, neutralize odor, and dry thoroughly.
Step 1: Strip the bed and blot like you mean it
- Remove sheets, mattress pad, and any protector. Launder what you can.
- Blot the wet area with paper towels or a cloth. Press firmlydon’t rub.
- Keep blotting with fresh towels until the area feels only slightly damp.
Step 2: Mist with a vinegar solution (odor neutralizer)
Mix equal parts distilled white vinegar and cold water in a spray bottle. Lightly mist the affected areaenough to dampen the surface, not soak it. Let it sit for a few minutes, then blot again.
Vinegar smell is strong at first, but it fades as it dries. (Unlike urine, which has a talent for moving in and refusing to pay rent.)
Step 3: Baking soda blanket (the deodorizing MVP)
Sprinkle a generous layer of baking soda over the damp area (aim for a visible coating). Baking soda helps absorb moisture and odors.
- Let it sit for 8–12 hours (overnight is ideal).
- Use a fan or open windows to speed drying.
Step 4: Vacuum thoroughly
Once fully dry, vacuum up the baking soda using an upholstery attachment. If you still detect odor, repeat the vinegar + baking soda cycle one more time before moving on to stronger methods.
Step-by-Step for Old (Set-In) Urine Stains
Old stains are stubborn because urine components can bind to fibers and leave behind odor-causing residue. Expect a “two-pass” approach: enzymes to break down the mess, then oxidation (peroxide) or absorption (baking soda) to finish the job.
Option A: Enzymatic cleaner (best first move for old stains and pet urine)
Enzymatic cleaners are designed to break down organic stains. For urine, they help tackle what basic soap-and-water can’t. If you’re dealing with pet urine or a stain that laughs at baking soda, start here.
- Lightly mist the stained area with water first if it’s completely dry (just enough to rehydrate the surface).
- Apply enzymatic cleaner according to the label. Keep it contained to the stained zone.
- Let it dwell for the recommended time (this part mattersenzymes need time to work).
- Blot up moisture with a clean towel.
- Let the area dry fully, then reassess odor and staining.
Pro tip: Enzyme products can be less effective if other cleaner residue is present. If you’ve already tried multiple DIY mixtures, a light mist-and-blot with plain water (then dry) can help remove residue before using enzymes.
Option B: Baking soda paste (gentle, surprisingly effective)
If the stain is visible and the odor lingers, baking soda paste can help lift and absorb what’s stuck in the fibers.
- Make a thick paste: about 3 parts baking soda to 1 part water.
- Spread over the stain and gently work it in with a soft brush.
- Let it dry at least 4 hours (overnight or up to 24 hours is stronger).
- Vacuum thoroughly once fully dry.
Option C: Hydrogen peroxide mix (for discoloration and stubborn staining)
Hydrogen peroxide (3%) is a mild bleaching/oxidizing agent that can help fade set-in stains and freshen odor. It can also discolor some fabrics, especially colored or printed mattress coversso patch test first in a hidden spot.
Simple spray formula:
- 1 cup 3% hydrogen peroxide
- 3 tablespoons baking soda
- A few drops of mild dish soap
- Mix gently in a spray bottle (use shortly after mixing).
- Lightly mist the stainavoid saturating the mattress.
- Gently brush the surface to work it in.
- Blot with a clean, slightly damp cloth to remove residue, then blot dry.
- Let the mattress air dry completely. Use a fan to speed it up.
How to Remove the Urine Smell (Even When You Can’t See a Stain)
Sometimes the stain is invisible, but the odor is loud. Odor control is about neutralizing and removing residue, then drying fully.
Odor method #1: Vinegar mist + long dry
Lightly mist with straight distilled white vinegar (or a 1:1 vinegar-water mix if you’re cautious), then let it air dry fully with strong airflow.
Odor method #2: Baking soda “full mattress refresh”
If the smell is faint but persistent (or you’re already deep-cleaning), sprinkle baking soda over a wider areanot just the spotlet sit 1–12 hours, then vacuum. This can help absorb general odors and moisture.
Odor method #3: Time + airflow (the underrated finishing move)
Drying isn’t optional. Any remaining moisture can keep odors trapped (and invites the kind of funk no candle can defeat). Open windows, run a fan, and give it the time it needs.
Mattress Type Tips: Foam vs. Spring
Memory foam and all-foam mattresses
Foam can soak up liquid quickly and hold odor longer. Use minimal moisture, avoid over-spraying, and prioritize airflow. Plan for longer drying time.
Hybrid and innerspring mattresses
These may allow slightly better airflow, but the top layers can still trap urine. The same “don’t soak it” rule applies.
Troubleshooting: When the Stain Won’t Quit
If the stain comes back after drying
That’s usually residue rising as moisture evaporates. Repeat a gentle cycle (enzyme cleaner or peroxide mix), blot thoroughly, and dry longer.
If the odor is strongest when humidity rises
Odor can reappear when the room is damp. Re-deodorize with baking soda and ensure the mattress is completely dry inside and out.
If the stain is large or repeatedly soaked
Deep saturation can be difficult to fully remove. If multiple cleaning attempts fail and odor persists, professional cleaning or replacement may be the most realistic solution.
Safety Notes (Because Chemistry Is Not a Party Trick)
- Never use chlorine bleach on urine. Urine contains ammonia; mixing bleach and ammonia can create dangerous fumes.
- Don’t mix vinegar and hydrogen peroxide in the same container. Use one, let it dry, then use the other if neededseparately.
- Patch test peroxide on an inconspicuous area to avoid discoloration.
- Keep pets and kids away from damp cleaning areas until everything is fully dry.
Prevention: Stop Future Accidents from Becoming a Mattress Saga
- Use a waterproof mattress protector. It’s cheaper than replacing a mattress and way less emotionally exhausting.
- Layer smart: protector + fitted sheet, and for potty-training, consider an extra washable pad on top.
- Act fast: the sooner you treat urine stains on a mattress, the easier they are to remove.
- Regular freshening: occasional vacuuming and baking soda deodorizing can help keep the whole bed cleaner.
Real-World Experiences: What People Learn After the First “Mattress Pee Emergency” (Extra Insights)
Most households don’t Google “how to remove urine stains from a mattress” for fun. It’s usually a 2:13 a.m. situation: lights half on, sheets in a pile, and someone saying, “Is it… worse if we pretend it didn’t happen?” (Answer: yes. Always yes.)
Parents of potty-training kids often discover the biggest win is not a stronger cleanerit’s speed. The families who get the best results tend to do three things right away: strip the bedding, blot aggressively (pressing down, not rubbing), and get airflow going. A fan aimed at the mattress turns a “tomorrow problem” into a “we might sleep in our own bed tonight” situation. Many also learn that baking soda isn’t magic in five minutes. It shines when it has time to sit and dry. The people who sprinkle it and vacuum too early usually end up doing round two anyway.
Pet owners have a different battle: concentration and repeat offenses. Dog and cat accidents can smell stronger and linger longer, especially when the urine gets into foam layers. In these stories, enzymatic cleaners are the heroes more often than vinegar alone. People commonly report that vinegar reduces the “sharp” smell, but the “why does this still exist?” odor can hang around until enzymes break down what’s left behind. Another common lesson: don’t over-wet the spot with cleaner. It feels logical to flood it (fight liquid with more liquid!), but too much moisture can push the mess deeper and extend drying timesometimes by a full day.
College roommates and first-apartment sleepers tend to learn the hard way that “I’ll deal with it later” turns a fresh problem into a set-in one. Old stains often need repeat treatments, and sometimes a combination approach: enzymes first, then baking soda paste, and possibly a peroxide mix if discoloration remains. The smart move these folks wish they’d made earlier? A waterproof protector. It’s not glamorous, but neither is flipping a queen mattress at midnight trying to find the “dry side.”
Hosts (Airbnb/guest room situations) frequently discover that odor is the real reputation killer. A stain can be covered with a topper, but smell travels. Many hosts deodorize the entire mattress surface with baking sodanot just the spotthen vacuum using an upholstery attachment. They also prioritize ventilation: windows open, fan running, and time. The “quick spray and close the door” strategy almost always backfires.
Across all these experiences, the same theme shows up: you don’t need to panic-buy a dozen products. What works best is a calm, repeatable systemblot, treat with the right cleaner, absorb with baking soda, and dry like your comfort depends on it (because it does).
Conclusion
Removing urine stains from a mattresswhether fresh or oldcomes down to the right order of operations: blot first, treat without soaking, deodorize with baking soda, and dry thoroughly with airflow. Enzymatic cleaners are often the best first step for set-in stains (especially pet urine), while hydrogen peroxide mixtures can help fade stubborn discoloration when used carefully. If you add preventionlike a waterproof mattress protectoryou’ll spend less time cleaning and more time doing what beds were invented for: sleeping, not stress-cleaning at midnight.


