
Table of Contents >> Show >> Hide
- The Short Answer
- Why Acrylic Nails Can Come Off When You Remove Polish the Wrong Way
- What You Need Before You Start
- How to Remove Nail Polish from Acrylic Nails Without the Nails Coming Off
- What If the Polish Is Really Stubborn?
- How to Remove Gel Polish from Acrylic Nails
- Big Mistakes to Avoid
- When You Should Go to a Salon Instead
- How to Keep Acrylic Nails Looking Good After Polish Removal
- Final Thoughts
- Real-World Experiences: What People Learn the Hard Way
If you have acrylic nails and your polish looks like it survived a minor natural disaster, you may be tempted to grab the strongest remover in the house and go to war. That is exactly how many people end up with dull, weakened acrylics, or worse, an accidental full removal when they only meant to change the color. The good news is that removing nail polish from acrylic nails without the nails coming off is absolutely possible. The trick is knowing the difference between taking off polish and taking off the acrylic enhancement itself.
Here is the golden rule: if you want to keep your acrylic nails on, treat the polish like the target and the acrylic like protected property. In most cases, that means choosing a non-acetone nail polish remover, working gently, and resisting the urge to scrub like you are sanding a deck. Acrylics are durable, but they are not invincible. They can become cloudy, brittle, or loose when exposed to the wrong products or too much friction.
This guide breaks down how to remove nail polish from acrylic nails safely, what products to use, what mistakes to avoid, and what to do if you are dealing with stubborn color, glitter, or gel polish sitting on top of acrylics. In other words, this is your manicure rescue plan, minus the drama and minus the sad little acrylic casualty.
The Short Answer
If you want to remove regular nail polish from acrylic nails without the acrylics coming off, use a non-acetone polish remover, a soft cotton pad, light pressure, and patience. Do not soak the nails in acetone. Do not pick, peel, pry, scrape aggressively, or file the life out of them. If the color is especially stubborn, let the remover sit on the polish for a few extra seconds before wiping, then follow with cuticle oil and hand cream.
Why Acrylic Nails Can Come Off When You Remove Polish the Wrong Way
Acetone Is Great at Dissolving Things, Which Is Exactly the Problem
Acetone is the heavyweight champion of polish removal. It removes lacquer fast, cuts through glitter, and makes gel and acrylic removal possible. Unfortunately, that same strength is why it can be a problem when your goal is simply to change polish color on acrylic nails. Acrylic enhancements are not best friends with acetone. Extended exposure can soften the material, weaken the structure, dull the finish, and in some cases loosen the bond between the enhancement and your natural nail.
That is why nail pros and nail-care brands often recommend non-acetone remover for acrylic nails. These formulas are gentler and less likely to dissolve or compromise artificial nails. They may take a little longer to work, but that is still better than accidentally turning your manicure refresh into an unplanned acrylic farewell tour.
Friction Can Do Damage Too
Sometimes it is not the remover that causes trouble. It is the user going full scrubbing-machine mode. Aggressive rubbing, rough paper towels, sharp metal tools, and over-buffing can scratch the acrylic surface or lift the edges. Once lifting starts, moisture and debris can sneak in, and that is when a quick color change becomes a whole maintenance issue.
What You Need Before You Start
- Non-acetone nail polish remover
- Soft cotton pads or lint-free wipes
- Cotton swabs for cleanup around the edges
- An orangewood stick, only for gentle detail work
- Hand soap and lukewarm water
- Cuticle oil
- Hand cream
- A fine buffer, only if the very topcoat is extra slick and needs light dulling
That is it. No need for power tools, panic, or a chemistry set that looks like it belongs in a villain’s basement.
How to Remove Nail Polish from Acrylic Nails Without the Nails Coming Off
Step 1: Wash and Dry Your Hands
Start with clean, dry hands. Any lotion, oil, or mystery residue on the nail surface can make remover less effective. Give your hands a quick wash with mild soap and lukewarm water, then dry them thoroughly. This also gives you a chance to inspect the acrylics. If you already see lifting, cracks, or separation near the cuticle, skip the DIY session and book a salon appointment. Once acrylics are compromised, home polish removal can make them worse.
Step 2: Do a Tiny Test First
If you are using a new product, test it on one nail. Some removers are labeled “gentle” but still behave like they have a grudge. Wipe one nail, wait a minute, and see how the acrylic looks. If it stays glossy and intact, move on. If the surface gets tacky, cloudy, or weirdly soft, retire that remover immediately.
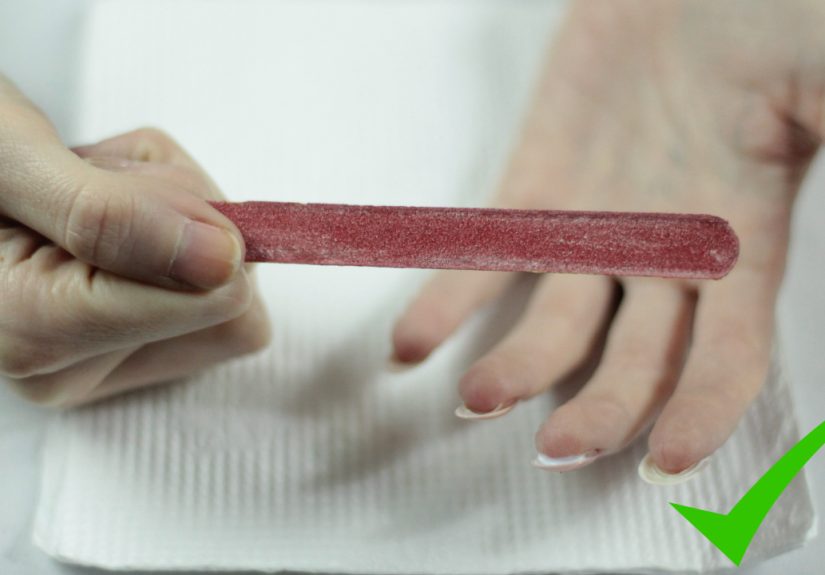
Step 3: Lightly Break the Top Layer if Needed
If your polish has a very shiny topcoat, especially a long-wear formula, you may need to lightly buff the surface once or twice with a very fine buffer. The keyword here is lightly. You are not trying to reshape the nail or strip the acrylic. You are just taking the glassy slickness off the top so the remover can do its job.
Step 4: Saturate the Pad, Then Press
Soak a cotton pad with non-acetone remover and press it onto the nail for several seconds. This part matters. Do not swipe immediately like you are cleaning a countertop. Let the remover sit and soften the polish first. That short pause reduces the amount of scrubbing you will need later.
Step 5: Wipe from Cuticle to Tip
Once the polish starts to soften, wipe from the cuticle area toward the free edge in one smooth direction. This helps prevent smearing dark pigments all over the surrounding skin and keeps the process neat. If the first pass leaves color behind, repeat the press-and-wipe method. Dark shades, reds, navy, black, and glitter often need extra rounds. That is normal. It does not mean the remover is failing or that your acrylics are plotting against you.
Step 6: Clean the Edges Gently
Use a cotton swab dipped in remover to clean around the sidewalls and near the cuticle line. If a tiny bit of color remains in a corner, you can use the flat end of an orangewood stick wrapped in cotton. Be gentle. This is precision cleanup, not excavation.
Step 7: Wash Away Residue
After all the polish is gone, wash your hands again with mild soap and water. This removes leftover remover, pigment, and lint. It also lets you check whether the acrylic surface still looks smooth and secure.
Step 8: Rehydrate Like You Mean It
Even non-acetone remover can be drying with repeated use. Finish with cuticle oil and a rich hand cream. Massage the oil into the cuticles, the skin around the nails, and under the free edge if possible. Your acrylics may not drink water, but your skin absolutely wants compensation for what just happened.
What If the Polish Is Really Stubborn?
For Glitter Polish
Glitter polish is the confetti of bad decisions. It looks festive, but it does not want to leave. For glitter on acrylic nails, hold a remover-soaked pad on each nail longer than usual, then wipe. You may need several rounds. Avoid the temptation to scrape. Glitter leaves when it is ready, not when you threaten it.
For Dark or Highly Pigmented Shades
Deep colors can stain the surface of acrylics slightly, especially if the topcoat is worn or the polish has been on for a long time. Use fresh cotton pads often instead of wiping the same dissolved pigment back across the nail. If you notice mild staining, a very gentle buff and a fresh clear topcoat can improve the look without damaging the enhancement.
For Long-Wear Polish
Some long-wear polishes act more stubborn than regular lacquer but are not true gels. In that case, a light buff to dull the topcoat can help, followed by multiple rounds of non-acetone remover. Patience wins here. Violence does not.
How to Remove Gel Polish from Acrylic Nails
This is where things get trickier. If you have gel polish on top of acrylic nails, regular non-acetone remover may not be enough. True gel polish is cured and usually needs acetone or professional filing techniques for removal. The problem, of course, is that acetone can also soften the acrylic underneath.
If you are dealing with gel on acrylics, the safest route is usually a salon visit. A trained nail tech can reduce the gel carefully without unnecessarily damaging the acrylic set. If you try to remove gel at home with aggressive filing or picking, you risk scratching the acrylic, thinning the enhancement, or causing lifting. In plain English: if it is gel, do not freestyle.
Big Mistakes to Avoid
- Using pure acetone for a simple polish change: Great for acrylic removal, not great for keeping acrylics intact.
- Soaking the nails too long: Extended exposure can weaken the acrylic or dry the surrounding skin.
- Peeling polish off: This can take top layers, dull the surface, and encourage lifting.
- Over-filing: Acrylics do not need to be sanded into another dimension just to remove color.
- Using metal tools aggressively: Easy way to gouge the surface or stress the edge.
- Skipping aftercare: Dry cuticles can make even a fresh set look tired.
- Ignoring lifting or cracks: Once the set is compromised, call a pro.
When You Should Go to a Salon Instead
DIY removal is fine for a straightforward polish change on a healthy acrylic set. It is not the best choice when the nails are lifting, cracked, painful, unusually thin, or covered with gel, dip, or heavy art that requires filing. You should also see a professional if the acrylics are old and overdue for a fill, because sometimes what looks like a polish problem is actually a structural one.
A salon is also the smarter move if you are the kind of person who says, “I’ll be careful,” while already reaching for a metal scraper. Self-awareness is a beauty skill too.
How to Keep Acrylic Nails Looking Good After Polish Removal
Once the old polish is off, give the acrylic surface a quick check under good lighting. If it looks smooth and secure, you can move on to your next color. Before repainting, wipe the nails clean, make sure no oil is left on the surface, and apply a quality base coat if your nail system and polish type call for one. If you notice tiny scratches, a gentle buff can smooth them out. If the nails look cloudy or rough, you may need a professional refresh instead of another layer of polish.
To keep acrylics looking their best between color changes, use cuticle oil daily, wear gloves for cleaning, avoid using nails as tools, and do not let chipped polish linger forever. Old polish plus constant tapping, typing, and opening soda cans is how even a nice set starts looking like it has seen things.
Final Thoughts
Removing nail polish from acrylic nails without the nails coming off is less about secret hacks and more about using the right product with the right technique. In most cases, that means choosing non-acetone remover, avoiding long soaks, skipping aggressive scraping, and moisturizing afterward. If you remember only one thing, make it this: acetone removes acrylics; non-acetone helps protect them during a simple polish change.
So yes, you can absolutely switch from moody burgundy to clean-girl pink without sacrificing the entire acrylic set. You just need patience, a gentle remover, and the emotional strength not to peel. Frankly, that last one is the hardest part.
Real-World Experiences: What People Learn the Hard Way
One of the most common experiences people have with acrylic nails is assuming that all polish removers do the same thing. At first, that sounds reasonable. The bottle says “nail polish remover,” the polish needs removing, math has been done. Then the remover goes on, the shine changes, the acrylic starts to feel oddly soft, and suddenly a simple color swap becomes a small personal crisis. Many people only discover the difference between acetone and non-acetone after they have already clouded a fresh set. It is a classic beauty lesson: the label matters, and the fine print matters even more.
Another very real experience is underestimating how stubborn certain polish formulas can be. Someone applies glitter for a weekend event, feels glamorous for approximately six hours, and then spends the next two days trying to evict it from their nails. Glitter polish on acrylics tends to test both patience and character. The biggest surprise for most people is that gentle removal still works better than brute force. Pressing remover-soaked cotton on the nail, waiting, and repeating feels slower, but it usually saves the acrylic surface from scratches and keeps the edges from lifting.
Dark polish creates its own category of drama. A lot of people notice that reds, blacks, and deep blues leave staining around the cuticle or seem to smear everywhere during removal. The experience can be frustrating because it makes perfectly decent acrylics look messy even when nothing is actually wrong with them. The fix is usually simple: more fresh cotton, less frantic rubbing, and a second cleanup pass around the edges. In other words, the polish is being difficult, not the acrylic.
There is also the very common “I thought I could remove gel the same way” moment. People with gel polish on top of acrylics often start with a regular remover, see no progress, and then escalate quickly into filing, picking, or soaking in stronger liquid. That is usually the point where regret enters the chat. Gel is a different beast, and many people only learn that after wasting time, roughing up the acrylic, or partially lifting the enhancement. It is not a failure to go to a salon for gel removal on acrylics. It is often the smartest move in the room.
On the positive side, many people who switch to a gentle routine say the difference is obvious after just a few polish changes. Their acrylics stay glossy longer, fills last better, and the surrounding skin no longer looks like it survived a desert crossing. Daily cuticle oil, careful wiping, and avoiding harsh remover can make a set look fresher between appointments. The experience most people describe is not dramatic. It is simply easier, cleaner, and less stressful. And honestly, in the world of beauty maintenance, “less stressful” is a luxury item.


