Table of Contents >> Show >> Hide
- What Efflorescence Is (and Why It Loves Your Pavers)
- Before You Start: Tools, Supplies, and a Quick Safety Pep Talk
- How to Remove Efflorescence from Pavers in 8 Steps
- Step 1: Confirm It’s Efflorescence (Not Something Else)
- Step 2: Decide If Waiting Makes Sense (Especially on New Pavers)
- Step 3: Dry Brush First (The “No Liquids, No Drama” Phase)
- Step 4: Rinse GentlyAvoid “Pressure Washer Overconfidence”
- Step 5: Choose the Right Cleaner (Skip the Random Kitchen Experiments)
- Step 6: Pre-Wet, Apply Cleaner, Lightly Scrub, and Don’t Let It Dry
- Step 7: Rinse Thoroughly (and Neutralize If You Used an Acid Cleaner)
- Step 8: Re-Sand Joints and Seal at the Right Time (Prevention Mode)
- Troubleshooting: If Efflorescence Keeps Coming Back
- Prevention Tips That Actually Help
- Real-World Experiences: The Stuff You Only Learn After Scrubbing a Patio
- Conclusion
You finally got your patio looking like a magazine spread… and then your pavers started wearing a chalky white “face mask.”
Good news: that powdery haze is usually efflorescence, and it’s more annoying than dangerous. Even better news:
you can remove it without turning your backyard into a chemistry lab (unless you want to wear goggles for funno judgment).
This guide walks you through 8 practical steps to remove efflorescence from concrete pavers, brick pavers, and many masonry surfaces.
We’ll start with the gentlest fixes and only graduate to stronger cleaners if the white haze refuses to move out.
What Efflorescence Is (and Why It Loves Your Pavers)
Efflorescence is a white, powdery deposit left behind when water travels through cement-based materials, dissolves soluble salts,
and carries them to the surface. When the water evaporates, the salts staylike a houseguest who “just needs one night” and never leaves.
On concrete pavers, it can be tied to normal curing chemistry and moisture movement, especially on newer installs or after long wet spells.
It’s typically cosmetic, but recurring efflorescence can also hint at ongoing moisture issues (poor drainage, sprinklers soaking the same area,
wicking from soil, etc.).
Before You Start: Tools, Supplies, and a Quick Safety Pep Talk
- Stiff nylon brush or push broom (avoid wire brushes that can scar surfaces)
- Leaf blower or shop vac (optional, but satisfying)
- Garden hose with spray nozzle
- Bucket, pump sprayer, and clean water
- pH-neutral or paver-specific efflorescence cleaner (recommended)
- Protective gear: gloves, eye protection, closed-toe shoes
- Plastic sheeting to protect plants + a plan to control runoff
If you use any acidic cleaner (even “mild” ones), keep pets and kids away, protect nearby landscaping, and don’t let runoff flow into storm drains.
Also: always test your method on a small, hidden area firstbecause “oops” is not a design style.
How to Remove Efflorescence from Pavers in 8 Steps
Step 1: Confirm It’s Efflorescence (Not Something Else)
Efflorescence is usually dry, powdery, and white to light gray. Rub it with your finger:
it often feels dusty and may brush off. If it looks greasy, dark, or fuzzy, you might be dealing with
mildew/algae, dirt, or sealer haze instead.
Quick check: mist a small area with water. If the white film temporarily disappears and then returns as it dries,
that’s a classic efflorescence behavior.
Step 2: Decide If Waiting Makes Sense (Especially on New Pavers)
On a new installation, some efflorescence will naturally fade with weathering. If the haze is light and you’re not in a rush
to seal or host a backyard wedding with drone footage, waiting a few weeks can be a legitimate strategy.
But if it’s heavy, patchy, or you’re preparing to seal the pavers, keep goingbecause sealing over salts can lock in blotchiness.
Step 3: Dry Brush First (The “No Liquids, No Drama” Phase)
Start dry. Sweep or scrub the surface with a stiff nylon brush or push broom.
Efflorescence is often loose enough that this alone makes a noticeable difference.
Pro move: vacuum or blow off the powder after brushing. If you don’t, you can accidentally re-spread it during rinsinglike wiping a counter
with a dirty sponge and calling it “cleaning.”
Step 4: Rinse GentlyAvoid “Pressure Washer Overconfidence”
Next, rinse with a garden hose. Use a spray nozzle, not a firehose setting that launches joint sand into orbit.
You’re trying to remove residue, not re-landscape the entire patio.
Let the area dry completely and reassess. If the haze is mostly gone, you may be done (and you didn’t even need chemistry).
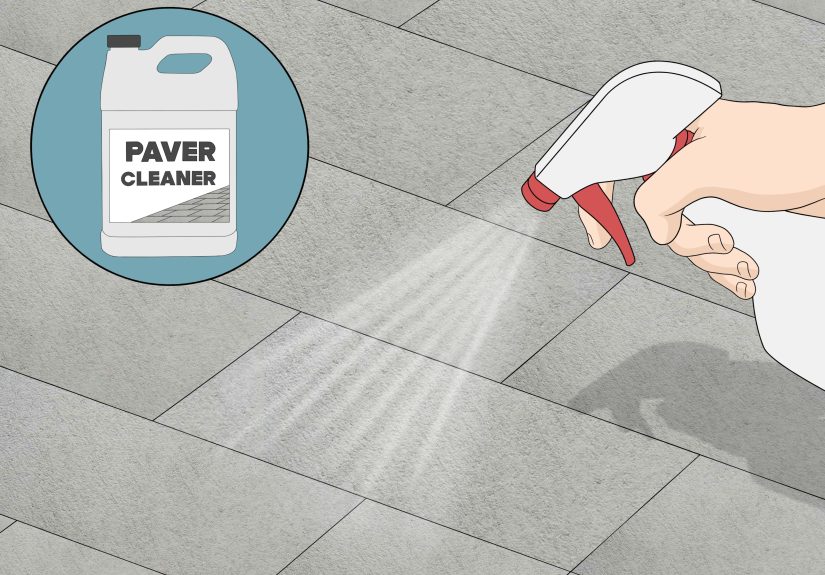
Step 5: Choose the Right Cleaner (Skip the Random Kitchen Experiments)
If brushing and rinsing aren’t enough, use a paver-specific efflorescence cleaner or a masonry cleaner designed for
concrete pavers/brick. These are formulated to dissolve mineral deposits while reducing the risk of discoloration or etching.
You’ll see internet advice recommending vinegar. Sometimes it works, sometimes it causes color changes or surface damage over time
especially on certain manufactured pavers. If you care about consistent color, a purpose-made cleaner is usually the safer bet.
Whatever you pick, read the label carefully. Many products require dilution, and more concentrate isn’t automatically “better.”
In the world of acids, “stronger” often means “more likely to etch.”
Step 6: Pre-Wet, Apply Cleaner, Lightly Scrub, and Don’t Let It Dry
Lightly dampen the pavers first (do not soak). Pre-wetting helps limit how deeply cleaners penetrate and encourages a more even reaction.
Apply the cleaner with a sprayer or watering can, then scrub with a nylon brush.
- Work in sections so the cleaner doesn’t dry on the surface.
- Use the recommended dwell time (often 1–5 minutes). Don’t “marinate” it for 30 minutes and hope for magic.
- Keep it even to avoid streakingespecially on colored pavers.
If you’re dealing with severe, stubborn buildup, you may need a second application. That’s normal. Efflorescence can reappear until the underlying
moisture/salt movement settles down.
Step 7: Rinse Thoroughly (and Neutralize If You Used an Acid Cleaner)
Rinse with lots of clean watermore than you think you need. Residue left behind can cause new staining or interfere with future sealing.
If your cleaner is acidic (many are), follow the label’s neutralization directions.
A common neutralization approach is a baking soda and water solution applied until fizzing stops, followed by additional rinsing.
(Again: confirm what your specific product requires.) Control runoff and protect plantsacidic wash water is not a garden smoothie.
Step 8: Re-Sand Joints and Seal at the Right Time (Prevention Mode)
After cleaning, you may need to add joint sand back into the joints if rinsing removed it.
Sweep sand into joints, compact lightly, and top up again as needed. This helps stabilize the pavers and reduces pathways for water movement.
If you plan to seal, timing matters. Many manufacturers recommend allowing new pavers time to “work through” potential efflorescence before sealing.
When you do seal, consider a breathable sealer appropriate for pavers so moisture isn’t trapped below the surface.
Troubleshooting: If Efflorescence Keeps Coming Back
Recurring efflorescence usually means moisture is still moving through the system. Cleaning removes the symptom; moisture control addresses the cause.
Here are the most common culprits:
- Poor drainage: low spots or clogged drains keep the base wet.
- Overactive sprinklers: repeated wetting/drying cycles pull salts to the surface.
- Wicking from soil: edges or poorly separated base layers draw moisture upward.
- Sealer issues: sealing too early can trap moisture or highlight haze.
If the same area always turns white, treat it like a clue. Fix the water source, regrade if necessary, and verify downspouts aren’t dumping onto the patio.
Your pavers aren’t being “dramatic”they’re reporting environmental conditions.
Prevention Tips That Actually Help
- Keep water moving: correct slope, clean drains, and redirect runoff.
- Use the right cleaners: paver-safe products help avoid etching and color shifts.
- Rinse well: cleaner residue can create its own weird stains.
- Wait to seal: let early efflorescence cycles calm down first.
- Choose breathable protection: if you seal, pick a product designed for pavers and local conditions.
Real-World Experiences: The Stuff You Only Learn After Scrubbing a Patio
The first time I met efflorescence “in the wild,” I didn’t know its name. I just knew my pavers looked like they’d been dusted with powdered sugar,
and nobody in my house remembered ordering the Patio Donut Upgrade. I did what many people do: I tried the easiest thing firstbrushing.
And honestly? It worked better than expected. About 60% of the haze came off with a stiff broom and a little persistence. That’s when I learned
the biggest lesson of all: efflorescence is often more fragile than it looks.
The second lesson came when I got impatient and tried “a stronger blast” of water. The haze faded, but my joint sand also disappeared.
The pavers didn’t move that day, but the joints looked like they’d been robbed. The patio started collecting little puddles afterward because the sand
that helped lock everything together was gone. Fixing that was its own mini-project: sweeping fresh sand into the joints, compacting, topping it off,
and repeating. So now, whenever someone says “I’ll just pressure wash it,” I hear the soundtrack to a cautionary documentary.
Another time, a friend had a brand-new driveway with dramatic white bloombig, patchy areas that looked like cloud formations.
Their first instinct was to seal it immediately to “lock in the color.” That would’ve been a mistake. Sealing can make efflorescence look worse
or trap moisture that keeps delivering salts to the surface. Instead, they waited a bit, then cleaned with a paver-specific efflorescence remover
in small test sections. The difference between the tested area and the untouched area was so obvious that neighbors started asking,
“Did you replace part of your driveway?” That’s the moment you realize cleaning products aren’t glamorous, but they can be weirdly satisfying.
The biggest practical surprise is how much weather and timing matter. Cleaning on a humid day can feel like trying to dry a wet dog with a napkin.
Warm, dry conditions make it easier because the surface dries predictably, and you can see what’s working. Also, efflorescence is rarely a one-and-done event
when it’s tied to ongoing moisture. I’ve seen patios that needed two cleanings spaced a few weeks apartespecially after rainy seasonsbefore the white haze
finally stopped reappearing. That’s not failure; that’s the process finishing.
And finally, there’s the “runoff reality.” Cleaners have to go somewhere. If you don’t plan for rinse water, it will choose its own adventure:
down the driveway, into a flower bed, or across the neighbor’s pristine concrete. Now I always pre-plan the rinse routeblocking off sensitive landscaping,
protecting nearby surfaces, and rinsing in a controlled direction. It’s not fancy, but it’s the difference between “I cleaned my pavers” and
“I accidentally created a new stain migration project.”
If you take nothing else from these experiences, take this: start gentle, test first, rinse thoroughly, and treat water as the real boss battle.
Efflorescence is manageable. It’s just persistent, like that one person who replies-all to everything. You can’t stop them from existing,
but you can absolutely keep them from ruining your day.
Conclusion
Removing efflorescence from pavers is mostly about using the right sequence: dry removal first, gentle rinsing next, then a paver-safe cleaner if needed
followed by thorough rinsing and (when applicable) neutralization. If it comes back, don’t just keep scrubbing harder; investigate moisture and drainage.
Once your pavers are clean and stable, reseal at the right time (and with the right product) to keep your patio looking sharp for the long haul.