
Table of Contents >> Show >> Hide
- Why Wine Corks Make Surprisingly Perfect Grapes
- Before You Start: Collect, Clean, and Prep Your Corks
- Tools and Supplies
- Project 1: Classic Hanging Grape Cluster (Corks as “Whole Grapes”)
- Project 2: Cork-Slice Grape Wall Plaque (Flatter, Cleaner, Very “Kitchen Art”)
- Project 3: Add Wine-Cork Grapes to a Wreath (Instant “Winery Door” Energy)
- Where to Display Your DIY Grape Decor
- Common Mistakes (and How to Fix Them Without Crying)
- Safety Notes (Especially If You’re Crafting With Kids or Teens)
- Conclusion: Turn “Leftover” into Legit Decor
- Extra: Real-World Maker Experiences and Tips (The Stuff You Learn After the First Attempt)
- 1) Cork collecting is a long gameuntil it suddenly isn’t
- 2) Cleaning matters more than people expect
- 3) The “grape look” comes from staggering, not perfection
- 4) Paint strategy changes everything
- 5) Glue control is a learned skill (and yes, glue strings happen)
- 6) Hanging hardware needs more respect than it gets
- 7) The “leaf problem” is real
- 8) The best part: every version looks intentional
You know that mysterious kitchen drawer? The one that contains three dead batteries, a takeout menu from 2019,
and approximately 47 wine corks “for a craft project someday”? Congratulationstoday is Someday.
DIY grape decor made from wine corks is one of those rare projects that checks every box: it’s inexpensive,
looks delightfully rustic (in a “Tuscan kitchen” way, not a “forgot to clean” way), and it’s forgiving.
If your grapes aren’t perfectly symmetrical, you can simply call them “handmade” and walk away confidently.
Why Wine Corks Make Surprisingly Perfect Grapes
Corks are lightweight, easy to glue, and naturally texturedaka, they already look like something that belongs
in farmhouse or wine-themed decor. Once you paint them, they read as “grapes” instantly, especially when you
arrange them into a clustered bunch and add a little stem and leaf situation.
Bonus: upcycling corks keeps them out of the trash and turns leftovers from celebrations into decor that actually
gets displayed. (Finally, the corks contribute something besides taking over your junk drawer.)
Before You Start: Collect, Clean, and Prep Your Corks
How to get enough corks (without doing anything you shouldn’t)
If you already have a stash, great. If not, you can still do this project without “collecting” corks in a way
that’s not age-appropriate. Ask family members to save corks from gatherings, check with friends’ parents,
or request corks from a local restaurant (some places are happy to give them away). You can also buy plain,
unused craft corks from a craft store or onlineno bottle required.
Natural cork vs. synthetic cork
Natural cork is typically lighter, slightly porous, and has a woody, speckled look. Synthetic corks can feel
foamier or plasticky and may not hold paint or glue the same way. For the cleanest crafting experience, try to
use mostly natural corks, especially if you plan to paint them or slice them.
Clean your corks (because “rustic” is not a scent)
- Quick clean: Rinse corks in warm water with a tiny bit of dish soap, then air-dry fully.
- Deodorize: Soak briefly in a bowl of water with a splash of white vinegar, then rinse and dry.
- Dry time matters: Give them at least overnight. Glue and paint both hate damp cork.
Optional: soften corks for easier cutting
If you want to slice corks (for flatter “grapes” or cleaner edges), steaming them for a short time can soften
them and reduce crumbling. Use carehot corks are still hot, and “I burned my finger on a grape” is a weird
story to tell.
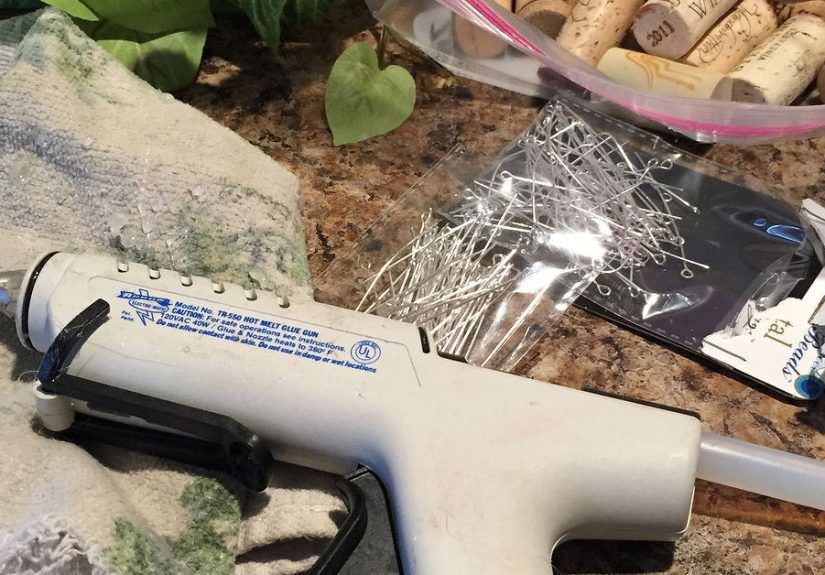
Tools and Supplies
This is a “use what you have” project. Here’s a practical list, with easy substitutions:
- Wine corks: 12–30 per grape cluster (depending on size)
- Hot glue gun + glue sticks (or strong craft glue, if you’re avoiding hot glue)
- Acrylic paint: purple, burgundy, green, or even a moody black-purple
- Paintbrush (or sponge brush for faster coverage)
- Wire: floral wire or craft wire for a stem/hanging loop
- Floral tape or twine to wrap the stem
- Leaves: faux grape leaves, felt leaves, or paper leaves
- Optional upgrades: matte Mod Podge/sealer, cinnamon stick or small dowel for the stem, glitter, ribbon
Project 1: Classic Hanging Grape Cluster (Corks as “Whole Grapes”)
This version looks like a rustic bunch of grapes you’d see hanging in a cozy kitchen, a wine nook,
or near a bar cart. The corks become the grapes, and the stem/leaves sell the illusion.
Step 1: Plan your cluster shape
On a table, arrange corks into a loose triangle: wider at the top, tapering down like a grape bunch.
A good starter layout is:
- Top row: 3 corks
- Next rows: 3, then 2, then 2, then 1–2 at the bottom
That gets you a compact ornament-sized bunch (around 9–12 corks). For a larger hanging cluster, double
the size and build it in layers.
Step 2: Glue the first layer
- Plug in your glue gun and let it fully heat.
- Glue corks side-by-side following your layout.
- Hold each cork for a few seconds so the glue sets (hot glue is dramaticit needs attention).
Step 3: Build dimension with a second layer
Real grape bunches aren’t flat, so add depth:
- Glue a few corks on top of gaps in the first layer (not perfectly stacked).
- Keep the top area a little flatter if you plan to add leaves and a hanging loop there.
- Step back and check the silhouetteif it reads “grapes,” you’re winning.
Step 4: Add a stem and hanging loop
You have two good options here:
- Wire stem: Twist floral wire into a thicker “vine,” then wrap with floral tape or twine.
- Cinnamon stick/dowel stem: Glue it to the top back of the cluster for a chunky, rustic look.
For hanging, form a loop from wire or ribbon and glue it securely behind the top row. If it’s going on a wall,
a simple loop is enough. If it’s going on a wreath or garland, leave extra wire to twist onto the base.
Step 5: Paint your “grapes”
Paint the corks while they’re assembled for the fastest finish. Use acrylic paint in one of these styles:
- Classic purple: deep purple with a tiny bit of black for richness
- Wine-red grapes: burgundy + a touch of brown
- Green grapes: olive green + a dab of yellow
- Ombre bunch: darker at the top, lighter toward the bottom
Let it dry completely. Add a second coat if cork texture shows through too much (unless that’s the vibe).
Step 6: Add leaves and finishing touches
Glue faux leaves (or felt/paper leaves) at the top near the stem. If you want a more “wine-country gift shop”
look, tie a small bow of twine or ribbon around the stem.
Optional: seal the whole piece with a matte sealer or Mod Podge so it holds up better to dusting and handling.
Project 2: Cork-Slice Grape Wall Plaque (Flatter, Cleaner, Very “Kitchen Art”)
If you want a grape design that’s more “farmhouse sign” than “hanging cluster,” cork slices work beautifully.
Think of it like mosaic grapessimple, cute, and easy to customize.
What you’ll need
- Corks (enough to slice into 20–40 “grapes”)
- A small wood plaque, canvas, or thick cardboard
- Serrated knife or small craft saw (with adult help if needed)
- Paint + brush
- Glue
- Marker/paint pen for vine lines
Steps
- Slice the corks into coin-shaped rounds (about 1/4″ thick). If they crumble, steam first and cut slowly.
- Paint the slices purple, burgundy, or green and let dry.
- Sketch a grape-bunch outline lightly on the plaque: a big teardrop/triangle shape.
- Glue slices inside the outline so they look like clustered grapes. Slight overlaps look more natural.
- Add vine details with a marker or paint pen, then glue on leaves at the top.
This version is easier to hang, easier to store, and less likely to bonk someone on the head if it falls.
(A low bar, but still a goal.)
Project 3: Add Wine-Cork Grapes to a Wreath (Instant “Winery Door” Energy)
If you already have a grapevine wreath or a wine-cork wreath, adding cork “grapes” is the quickest way to make
it look intentional and themed.
Easy method
- Make one or two small grape clusters using Project 1.
- Attach them to the wreath using wire (best) or heavy hot glue (fastest).
- Tuck leaves behind the cluster to hide attachment points.
- Add a bow or ribbon tail if you want it to look more finished from far away.
Tip: keep the very top of the wreath a little flatter so your bow or hanger sits nicely and the wreath hangs straight.
Where to Display Your DIY Grape Decor
- Kitchen: hang near a pantry door, open shelving, or a breakfast nook
- Dining area: use as part of a centerpiece or wine-themed tablescape
- Bar cart: drape a mini cluster on the handle or hang on a hook nearby
- Gift topper: a small cork-grape ornament makes a great add-on for housewarming gifts
- Seasonal twist: add metallic accents for holidays or muted tones for fall decor
Common Mistakes (and How to Fix Them Without Crying)
“My grape bunch looks like a triangle of marshmallows.”
Add a second layer of corks in the middle area and stagger placement. Depth makes it read as “cluster,” not “geometry homework.”
“The paint looks patchy and sad.”
Cork soaks up paint. Use two thin coats, or paint the corks before assembly for cleaner coverage.
A sponge brush also helps avoid streaks.
“Hot glue strings are everywheremy grapes have cobwebs.”
Let the glue cool slightly before pulling away, and keep a toothpick nearby to catch strings.
You can also remove cooled strings with a quick peel.
“It’s too heavy to hang.”
Use wire as the primary hanger (not just glue), and anchor it around the stem. If it’s a big cluster,
use two attachment points so the weight is distributed.
Safety Notes (Especially If You’re Crafting With Kids or Teens)
- Hot glue burns. Use a low-temp glue gun when possible and avoid touching fresh glue.
- Cutting corks: use a cutting board and keep fingers out of the blade path. If you’re younger, ask an adult for help.
- Ventilation: paint and seal in a well-ventilated area, and let everything dry fully before hanging.
Conclusion: Turn “Leftover” into Legit Decor
DIY grape decor using leftover wine corks is one of those projects that feels oddly satisfying: you clear clutter,
you make something cute, and you end up with decor that looks like it came from a boutique near a vineyard.
Whether you go for a chunky hanging cluster, a clean cork-slice wall plaque, or a wreath upgrade,
you’ll end up with something that’s charming, customizable, and surprisingly durable.
And if anyone asks where you got it, you can say, “Oh this? It’s upcycled.” Then pause dramatically,
like you’re the kind of person who upcycles things on purpose.
Extra: Real-World Maker Experiences and Tips (The Stuff You Learn After the First Attempt)
The first time most people try cork grape decor, it goes one of two ways: either it turns out shockingly cute,
or it turns into a lumpy cork blob that looks like it’s auditioning to be “abstract fruit.” Both outcomes are normal.
Here are the most common, real-world lessons crafters tend to pick upusually while holding a glue gun and questioning
their life choices.
1) Cork collecting is a long gameuntil it suddenly isn’t
People often underestimate how many corks a “simple” grape bunch needs. A small ornament might use 9–12 corks,
but a medium wall-hanging cluster can jump to 18–30 fast, especially if you build in layers for depth.
The trick many crafters use is outsourcing collection: tell a few adults in your life you’re saving corks for a project,
and the cork supply magically appears. Restaurants can also be surprisingly helpfulsome will hand over a bag of corks
if you ask politely and explain it’s for crafting.
2) Cleaning matters more than people expect
Corks can carry odors, stains, or little bits of foil. Even if you’re going for “rustic,” a quick wash makes the finished piece
feel cleaner and helps paint stick better. Makers often notice that skipping the dry time leads to two annoying problems:
glue doesn’t bond as well, and paint can look uneven. The boring step (drying) is secretly the hero step.
3) The “grape look” comes from staggering, not perfection
A lot of first attempts look too flat because the corks are lined up like bricks. What usually improves the look immediately
is staggering the second layer so it fills gaps rather than stacking directly on top of the cork below. Think “cluster,” not “cork wall.”
Many crafters also learn to keep the top slightly flatter so leaves and a bow sit nicelyand so the hanger doesn’t tilt forward.
4) Paint strategy changes everything
Makers split into two camps: paint before assembly or paint after. Painting before can look cleaner, especially if you want crisp color
with fewer missed spots. Painting after is faster and helps unify the bunch visually. A popular compromise is this:
do a quick base coat on individual corks, assemble, then do a final “touch-up coat” once it’s together.
If you want the grapes to look more realistic, people often dry-brush a slightly darker shade into the cracks
and a lighter shade on high pointstiny effort, big payoff.
5) Glue control is a learned skill (and yes, glue strings happen)
Almost everyone gets glue strings the first time. Experienced crafters keep a toothpick or wooden skewer nearby to catch glue strands,
or they wait a second longer before lifting the glue gun so the glue has time to thicken. Another common tip:
use less glue than you think you need. Cork is light, and too much glue can ooze out and create shiny blobs that show through paint.
6) Hanging hardware needs more respect than it gets
The most frustrating “experience” people report is making a gorgeous bunch… then realizing it has no solid way to hang.
For anything beyond a tiny ornament, wire reinforcement is your best friend. Many crafters wrap wire around the stem and anchor it
through the top layer of corks, then twist it into a loop. That way, the piece is supported structurally, not just relying on glue.
If you’re attaching to a wreath, leaving extra wire tails makes it much more secure than glue aloneespecially on a front door
that opens and closes (and vibrates) all day.
7) The “leaf problem” is real
Real leaves look amazing for about five minutes, and then they start to wilt or crumble. That’s why many makers switch to faux leaves,
felt, or paper leaves early on. Faux grape leaves instantly signal “grape decor,” and they also hide glue joints and wire.
In other words: leaves aren’t just decorationthey’re camouflage.
8) The best part: every version looks intentional
Here’s the oddly comforting truth: cork grape decor is almost impossible to “ruin.” Too rustic? It’s farmhouse.
Too shiny? It’s glam winery chic. Slightly crooked? It’s artisanal. The project rewards experimentation,
and most makers end up creating a second bunch quicklyeither because the first went well, or because the first one
taught them exactly what to tweak. That’s the real crafting win: you don’t just end up with decoryou end up with a repeatable skill.


