
Table of Contents >> Show >> Hide
- Quick Supplies Checklist (Use What You’ve Got)
- Before You Stencil: The 10-Minute Prep That Makes You Look Like a Pro
- Idea #1: Modern Farmhouse Frame with Grain-Sack Stripes + Stenciled Monogram
- Idea #2: Color-Blocked Geometric Frame with Stenciled Pattern “Pop”
- Idea #3: Raised Botanical Texture Frame with Painted Patina
- Stencil Troubleshooting: Fixes for the Most Common “Oops” Moments
- Display Ideas: Make Your DIY Frames Look Even More Expensive
- Real-World Notes From the Craft Table (Experience + Lessons Learned)
- Conclusion
Picture frames are basically the unsung bouncers of your home decor. They stand there quietly, making your photos look more important than they probably were (no judgmentmy best “candid” is 40% chin, 60% regret). The good news: you don’t need a fancy frame shop budget to make frames look custom. You need craft stencils, a little paint, and the willingness to say, “Yep, I meant to do that,” if your first try gets a little… expressive.
In this guide, you’ll learn three unique, stencil-forward DIY picture frame ideas that look like boutique finds but feel like a Saturday win. We’ll cover prep (so paint actually sticks), the stencil techniques that keep edges crisp (so your leaves don’t turn into blobs), and finishing steps that help your frames survive real life (dusting, fingerprints, that one friend who touches everything).
Quick Supplies Checklist (Use What You’ve Got)
- Frames: thrifted, dollar store, unfinished wood, or old ones from your closet “museum”
- Craft stencils: reusable plastic stencils or peel-and-stick stencils
- Paint: acrylic craft paint, chalk-style paint, or spray paint for base coats
- Stencil tools: stencil brush, foam pouncer, makeup sponge, or small dense roller
- Painter’s tape (and/or repositionable stencil adhesive, optional)
- Sandpaper: 120–220 grit for scuff sanding
- Cleaner: mild soap + water (or a degreaser if frames are grimy)
- Sealer: clear wax, water-based polycrylic, or a decoupage medium (depending on your look)
- Optional “extra credit” materials: metallic paint, gilding wax, texture paste/lightweight spackle, small palette knife
Before You Stencil: The 10-Minute Prep That Makes You Look Like a Pro
1) Clean like you mean it
If the frame has been living in a dusty attic, wipe it down first. Paint hates grease, dust, and mystery residue. A quick wash in warm soapy water (and a full dry) is often enough. If it’s especially grimy, step up to a degreasing cleaner.
2) Scuff sand for better adhesion
You’re not carving a sculptureyou’re just giving paint something to grip. Lightly scuff glossy finishes with 120–220 grit sandpaper, then wipe off dust with a tack cloth or damp rag. This one step prevents the heartbreak of paint peeling off like a sunburn.
3) Mask the glass (or remove it)
Remove the glass and backing if possible. If the glass is fixed, tape the edges carefully. This keeps your “clean lines” from turning into “why is there paint on my photo?”
4) The stenciling golden rule: less paint than you think
Stencil success is basically a controlled lack of enthusiasm. Offload paint onto a paper towel until your tool feels almost dry, then apply in light layers using a pouncing/stippling motion. You can always add another layer; you can’t un-bleed paint.
Idea #1: Modern Farmhouse Frame with Grain-Sack Stripes + Stenciled Monogram
Vibe: cozy farmhouse, clean and classic.
Best for: family photos, wedding snapshots, entryway galleries, or anything you want to look “curated.”
What makes it unique?
Instead of stenciling the whole frame (which can feel busy fast), you’ll create subtle “grain-sack” style stripes and then add a single bold monogram or simple icon. It looks expensive because it’s restrainedlike the frame is whispering, not shouting.
Materials
- Frame (wood looks best, but any material works with proper prep)
- Chalk-style paint or matte acrylic (white, cream, or soft greige)
- Painter’s tape
- Stencil: monogram letter, wreath, or simple symbol
- Contrasting paint color (charcoal, black, or muted navy)
- Sealer: clear wax or water-based polycrylic
Steps
- Base coat: Paint the entire frame in your light base color. Let it dry fully.
- Add grain-sack stripes: Use painter’s tape to mask two or three evenly spaced stripes along one side of the frame (or wrap them around all four sides if you want a full “textile” look). Paint the exposed stripe areas with a slightly darker shade (think: subtle). Remove tape while paint is still slightly tacky for cleaner edges.
- Place your stencil: Center a monogram or motif on the bottom or top rail (the horizontal part). Tape or lightly tack it in place.
- Stencil with a dry tool: Offload paint until your brush/pouncer is almost dry. Pounce lightly, building color in 2–4 thin passes. This prevents bleed and keeps your letter crisp.
- Optional “aged” detail: Lightly sand edges and raised details for a gently worn look. Don’t go full “abandoned barn,” unless that’s the assignment.
- Seal it: Use clear wax for a soft, velvety finish or a water-based topcoat for extra durability. Let it cure according to the product instructions before heavy handling.
Pro tip
If you’re worried about bleed on the monogram, do a first super-light pass using the base color over the stencil edges. It “seals” tiny gaps, and then your darker monogram color stays cleaner on top.
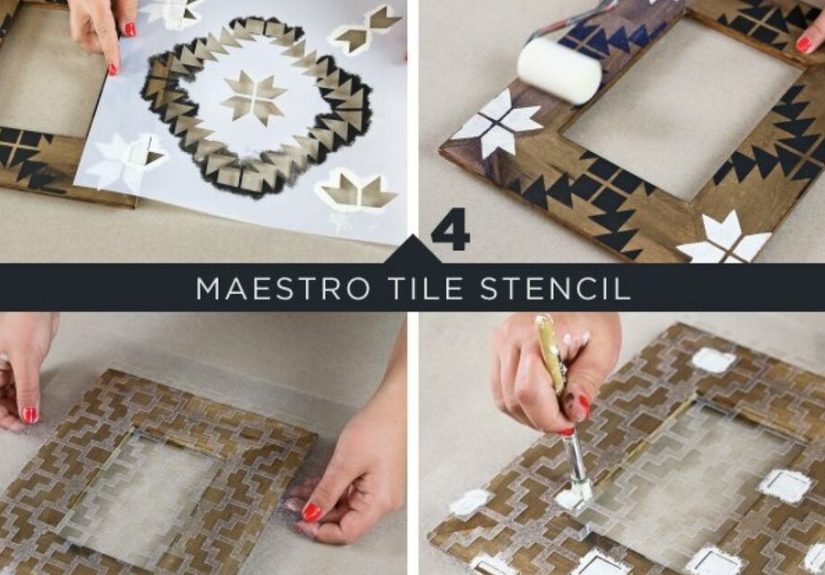
Idea #2: Color-Blocked Geometric Frame with Stenciled Pattern “Pop”
Vibe: modern, artsy, and a little “design store in Brooklyn.”
Best for: minimalist spaces, bright kids’ rooms, offices, or anyone who loves a good straight line.
What makes it unique?
This is a two-layer look: first you create bold color blocking, then you stencil a geometric pattern only in one sectionlike an accent wall, but for your frame. It feels intentional and graphic, and it’s a great way to use a stencil without covering every inch.
Materials
- Frame (thrifted frames are perfect here)
- Base paint (spray paint or brush-on; matte finishes look sleek)
- Painters tape (fresh tape = cleaner lines)
- Stencil: geometric (triangles, hex, art deco lines, dots)
- Accent paint color (contrast is your friend)
- Clear topcoat (optional but recommended for high-touch areas)
Steps
- Paint the base: Use spray paint for the smoothest finish (light coats, keep the can moving). Let it dry thoroughly.
- Plan your color blocks: Decide where the blocks godiagonal corners, half-and-half, or a chunky “L” shape. Use tape to mark off sections. Press tape edges down firmly.
- Add the second color: Brush or spray the second color in thin layers. Remove tape carefully before paint fully hardens to reduce chipping.
- Stencil the accent zone: Pick one block section as your “pattern panel.” Tape your stencil in place.
- Dry-apply paint: Use a dense sponge or small roller with minimal paint, pouncing rather than swiping. Build up slowly until the pattern is solid.
- Refine edges (optional): If you get a tiny bleed, don’t panic. A small artist brush and the base color can “erase” the mistake like it never happened.
- Seal: A thin water-based topcoat helps protect the crisp graphic finish from scratches.
Style variations
- Muted + metallic: Sage and cream with a gold stencil “pop.”
- Monochrome: Black base, charcoal blocks, stencil in soft white for subtle pattern.
- Playful: Coral + teal blocks with a white dot stencil for a retro vibe.
Idea #3: Raised Botanical Texture Frame with Painted Patina
Vibe: high-end artisan, touchable, and a little dramatic (in a good way).
Best for: mirrors, large frames, or centerpiece photosanything you want to feel special.
What makes it unique?
Instead of using paint alone, you’ll create raised stencil texture using paste/spackle through the stencil. It adds depth and shadow that looks far more expensive than it is. People will touch it. They can’t help themselves. Texture is irresistible.
Materials
- Frame with a wider face (1.5 inches or more is ideal)
- Stencil: botanicals, vines, florals, or ornate scrolls
- Texture paste, embossing paste, or lightweight spackle
- Palette knife or old gift card
- Paint colors: base + highlight (example: deep green + antique gold)
- Optional: dark wax or antiquing glaze for patina
- Sealer/topcoat
Steps
- Base coat: Paint the frame your base color and let it dry.
- Position the stencil: Tape it down firmly so it can’t shift. This matters even more with paste.
- Apply texture: Scoop a small amount of paste onto the palette knife and spread it across the stencil openings in one smooth pass. Keep the layer fairly thin (think: toast with butter, not a wedding cake with frosting).
- Lift carefully: Peel the stencil straight up while the paste is still wet. Set the stencil in warm water right away for easy cleanup.
- Dry completely: Let the raised design dry fully before paintingrushing this step can crack or smear the texture.
- Patina paint: Dry-brush a highlight color over the raised areas (metallics look incredible here). Then add a tiny bit of dark wax or glaze in the crevices to emphasize depth.
- Seal: Topcoat to protect the finish, especially if the piece will be handled often.
Where this idea shines
Try this technique on a mirror frame, a big 11×14, or even a shadow box. Raised botanical details make plain frames feel like statement pieces.
Stencil Troubleshooting: Fixes for the Most Common “Oops” Moments
Paint bleed under the stencil
- Use less paint. Then use even less than that.
- Pounce/stipple instead of brushing side-to-side.
- Hold the stencil tight, especially near edges and corners.
- Do multiple light layers, letting each one set briefly.
Stencil shifts mid-project
- Use painter’s tape as “hinges” on one side so you can lift and place it back down.
- Consider a repositionable stencil adhesive for stubborn surfaces (test first).
Chalky paint rubs off later
- Chalk-style finishes usually need wax or a topcoat for durability, especially on frequently handled items.
- Let sealers cure properly before putting the frame into daily rotation.
Display Ideas: Make Your DIY Frames Look Even More Expensive
- Gallery wall trick: Repeat one element (like a stencil motif) across frames, but vary paint colors.
- Pair textures: Mix one raised-texture frame with two simpler painted frames for a balanced look.
- Mat magic: A clean mat makes DIY frames look instantly polished.
- Odd-number grouping: Three frames together looks intentional and design-y without trying too hard.
Real-World Notes From the Craft Table (Experience + Lessons Learned)
I’ve made enough stenciled projects to know that the first one is always a little like cooking without a recipe: you’re confident until you’re suddenly not. My earliest stenciled frame attempt looked like a beautiful botanical print… if that botanical had been dragged through a rainstorm by an enthusiastic golden retriever. Here’s what I learned the practical wayso you don’t have to sacrifice your sanity (or your last clean rag).
Lesson #1: The “dry brush” thing isn’t a cute suggestionit’s the whole game. The biggest shift for me was realizing that stenciling is not painting in the normal sense. You’re not trying to “lay down” paint; you’re trying to tap color onto a surface without pushing wet paint under the stencil edge. When I finally started offloading paint until my sponge felt almost empty, the difference was immediate: crisp edges, clean lines, and no frantic touch-ups.
Lesson #2: Prep is boring, but repainting is worse. If you skip cleaning and scuff sanding on a glossy frame, it might look fine for a day… until you pop the backing in and your thumbnail scratches off a perfect little crescent of paint. (Ask me how I know.) Now I treat thrifted frames like they’ve been through a lotbecause they have. A quick wash, a light sand, and a dust wipe turn “random garage-sale frame” into a surface that actually cooperates.
Lesson #3: Choose your stencil based on the frame’s width. This sounds obvious, but I used a large floral stencil on a narrow frame once and ended up with petals that looked like they were cropped by accident. Wider frames can handle big patterns and raised paste. Narrow frames shine with smaller repeats (dots, mini geometrics) or a single centered monogram. If you only have a narrow frame, consider stenciling just the corners or one side as an accent.
Lesson #4: Sealers are not one-size-fits-all. A soft wax finish looks gorgeous on farmhouse frames, but it’s not always the best for frames that will be handled constantly (kids’ rooms, gallery walls you rearrange weekly, or anything near a busy entryway). In those cases, a water-based topcoat is my go-to because it holds up better to fingerprints and casual bumps. The key is letting it cure fullybecause “dry to the touch” and “ready for life” are two different things.
Lesson #5: The best DIY frames have a plan for imperfection. My favorite trick is building in a finish that makes tiny flaws disappear. Light distressing on edges, a subtle antiquing glaze, or a metallic highlight over raised texture can make the whole piece look intentionally artisan. It turns “minor stencil wobble” into “handcrafted charm.” And if someone asks where you bought it, you can smile calmly and say, “Oh, this old thing?” like you didn’t spend 45 minutes debating between antique gold and champagne gold.
At the end of the day, stenciled frames are one of the most satisfying DIY wins because they’re small, affordable, and wildly customizable. You can match your room, your mood, or your latest obsession with geometric patternsand you’ll never look at a plain frame the same way again.
Conclusion
With a little prep and the right stenciling technique, you can turn basic frames into decor that looks custom, intentional, and honestly kind of brag-worthy. Try the farmhouse stripe + monogram for timeless charm, the color-blocked geometric accent for modern punch, or the raised botanical texture for a statement piece that begs to be touched (politely).


