Table of Contents >> Show >> Hide
- Why Harvest Timing Matters
- When to Harvest Lavender
- How to Tell Lavender Is Ready
- What You Need Before You Start
- How to Harvest Lavender Step by Step
- How to Harvest Lavender for Different Uses
- How to Dry Lavender Properly
- Common Mistakes to Avoid
- How to Keep Lavender Plants Productive After Harvest
- Experience-Based Tips for Harvesting Lavender in Real Life
- Final Thoughts
Lavender is one of those rare garden plants that works overtime. It looks elegant, smells amazing, attracts pollinators, and somehow manages to make even a simple porch feel like a tiny boutique spa. But if you want that famous fragrance to last, timing matters. A lot. Harvest too early and you lose volume. Harvest too late and the stems may shed blossoms, fade in color, or smell less intense. In other words, lavender is forgiving as a plant, but a bit dramatic as a cut flower. Respectfully so.
If you have been wondering how to harvest lavender without turning your beautiful plant into a confused purple haircut, this guide will walk you through the whole process. You will learn when to cut it, how much to take, what tools to use, how to dry it, and how to harvest differently depending on whether you want bouquets, sachets, culinary lavender, or fragrant dried bundles. This article also includes practical experience-based tips at the end, because theory is nice, but real-life lavender harvesting has its own personality.
Why Harvest Timing Matters
The biggest secret to harvesting lavender is that you are not just cutting flowers. You are capturing fragrance, color, stem quality, and future plant health all at once. Lavender’s oils are strongest around the early bloom stage, which is why gardeners and growers often harvest when the first buds on the spike begin to open rather than waiting for a full fireworks display.
That timing gives you several advantages. The stems hold together better during drying, the blossoms keep more of their color, and the scent tends to stay stronger in storage. It also helps the plant stay tidy and can encourage another flush of blooms in some varieties and climates. Translation: one smart harvest can make you feel like a gardening genius.
When to Harvest Lavender
Watch the flower spikes, not the calendar
If you are searching for an exact month, the truth is that lavender does not care about your planner. Bloom time depends on your climate, the variety, and the weather that season. Instead of harvesting by date, harvest by flower stage. The best moment is usually when the buds are plump and only the first few flowers on each spike have started to open.
For dried lavender, this is the sweet spot. If you wait until most of the flowers are fully open, the stems may still be lovely for fresh arrangements, but they are more likely to lose petals during handling and drying. For strong scent and better long-term quality, early bloom wins.
Choose the right time of day
The best time to harvest lavender is in the morning after the dew has dried but before the hottest part of the day. At that point, the plant is dry enough to reduce mold risk, but the aromatic oils have not faded under afternoon heat. Think of it as harvesting after coffee but before the garden starts sweating.
Do not harvest a struggling plant too hard
If your lavender is newly planted, weak, or recovering from rough weather, go easy. A healthy, established plant can handle a decent cutting, but a young plant needs enough foliage left behind to keep growing well. Good harvesting should never look like revenge pruning.
How to Tell Lavender Is Ready
You do not need a complicated checklist, but you do need to pay attention. Your lavender is generally ready when:
- The flower spikes are long, full, and richly colored.
- Only a few florets near the bottom or middle of the spike have opened.
- The stems feel flexible but not floppy.
- The plant is dry from dew or rain.
- The fragrance is noticeable as soon as you brush the stems.
If the blooms are already wide open from top to bottom, you can still harvest them, especially for fresh bunches or immediate use. But for drying, sachets, or storing fragrant buds, earlier is better.
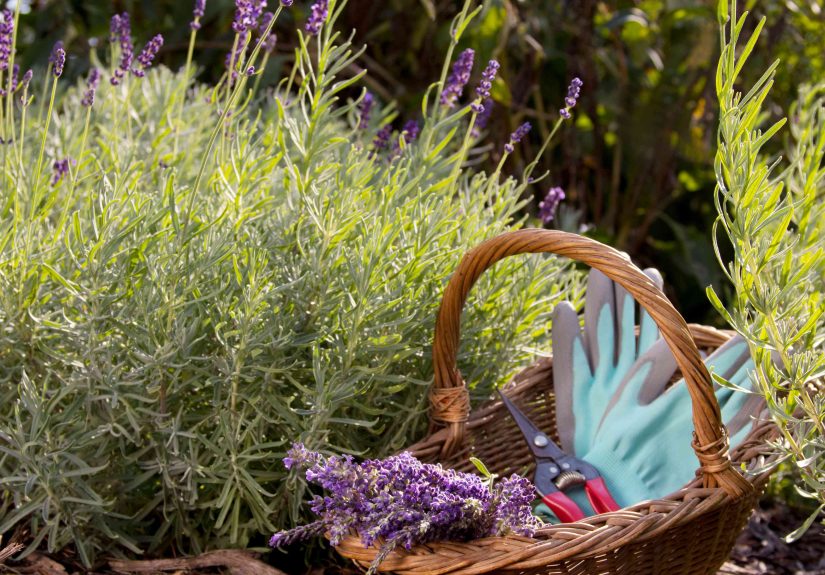
What You Need Before You Start
Lavender harvesting is refreshingly low-tech. You do not need fancy equipment, but you do need clean tools and a place to put your cut stems.
- Sharp hand pruners or garden snips
- A basket, bucket, or shallow container
- Twine, rubber bands, or string for bundling
- A dry, shaded, well-ventilated place for drying
- Optional gloves if your hands are sensitive or you are cutting a lot
Clean blades matter because they make smoother cuts and help reduce plant damage. Lavender may be charming, but it still appreciates basic hygiene.
How to Harvest Lavender Step by Step
Step 1: Inspect the plant
Look for healthy stems with buds just beginning to open. Avoid stems that are diseased, browned, or damaged by insects. If you are planning to dry lavender, pick your best spikes first. Drying does not magically improve ugly stems. It simply preserves them in high definition.
Step 2: Find the cutting point
Follow each flower stem down from the bloom spike until you reach the leafy part of the plant. Make your cut just above a set of leaves or side shoots. That helps the plant branch out and stay fuller.
Avoid cutting deep into old, woody growth unless you are doing a separate, deliberate pruning job and know the variety can handle it. For routine harvesting, stay in the green growth zone.
Step 3: Cut stems in handfuls
Gather a manageable bundle in one hand and snip with the other. Keeping stems aligned makes bundling easier later. It also keeps you from doing that awkward garden dance where you drop half your harvest and pretend nobody saw.
Step 4: Do not take too much at once
Leave enough green growth behind so the plant can recover and continue growing. On mature plants, you can usually take a generous harvest, but do not strip the whole plant bare. Lavender still needs foliage to photosynthesize, push new growth, and prepare for the next bloom cycle.
Step 5: Keep harvested stems dry and shaded
Place cut stems gently into a basket or container and move them out of direct sun. Heat and bright sunlight can reduce fragrance quality and speed wilting. Treat them like herbs, not like beachgoers.
How to Harvest Lavender for Different Uses
For drying and sachets
If your goal is dried lavender buds, potpourri, wreaths, or sachets, harvest early. Cut spikes when only the first few flowers have opened. This stage preserves scent well and helps reduce petal drop once the stems dry. Long, firm stems are best because they bundle neatly and hang easily.
For fresh bouquets
For a bouquet on the table, you can wait until a few more flowers have opened. The arrangement will look fuller and more colorful. Just know that fully open stems usually do not dry as neatly as earlier-cut stems. Use these fresh and enjoy them while they are looking fancy.
For culinary use
Harvest culinary lavender from plants that are grown cleanly and have not been treated with products not labeled for edible use. English lavender is typically the favorite for cooking because its flavor is sweeter and less camphor-heavy than some other types. Harvest buds early, use sparingly, and remember that lavender in food is like glitter at a craft table: a little can be delightful, too much can become the only thing anyone notices.
For encouraging another bloom
In some climates and with some varieties, a proper early-summer harvest followed by a light shearing can encourage another flush later in the season. This is not guaranteed everywhere, but it is one reason timely harvesting can be more than just maintenance. It can be a productive garden strategy.
How to Dry Lavender Properly
Drying lavender is simple, but the details matter. The goal is to remove moisture without cooking the fragrance out of the stems.
- Gather small bunches, usually around 10 to 15 stems, depending on thickness.
- Secure each bunch with twine or a rubber band near the base.
- Hang the bunches upside down in a warm, dry, dark, and well-ventilated space.
- Keep them out of direct sunlight to protect color and fragrance.
- Allow them to dry fully before storing. This may take about a week or more depending on humidity.
Small bundles dry more evenly than giant ones. A huge bouquet may look romantic, but it also traps moisture and invites mold. Lavender should dry crisp, not musty.
Once dry, you can leave the stems whole for décor or strip the buds by rolling the stems gently between your hands over a clean container. Store dried lavender in airtight containers in a cool, dark, dry place. Light, heat, and air are the sworn enemies of good fragrance.
Common Mistakes to Avoid
Waiting until full bloom for everything
Full bloom looks gorgeous in the garden, but it is not always the best stage for drying or long-term fragrance. If you want strong scent and better storage quality, harvest earlier.
Cutting into old wood
Lavender does not always bounce back well from severe cuts into woody stems. Harvest from green growth and save major shaping for the proper pruning season and method.
Bundling too thickly
Oversized bundles trap moisture. That can lead to mold, uneven drying, and disappointment. Make smaller bunches, even if it means taking five extra minutes. Future you will be grateful.
Drying in direct sun
Sunlight can fade the blooms and reduce aromatic quality. Dry in shade with good airflow instead.
Storing before fully dry
If stems are still soft or cool with moisture, wait longer. Storing partly damp lavender is an excellent way to turn a lovely harvest into a sad science project.
How to Keep Lavender Plants Productive After Harvest
Once harvesting is done, tidy the plant with light shaping if needed. Remove spent flower stalks and keep the plant mounded rather than wild and split. Do not push tender new growth too late in the season if your area gets frost. Lavender needs time to harden off before cold weather arrives.
Also pay attention to drainage. Lavender loves sun and dislikes wet feet. Gravelly or sandy soil, airflow around the plant, and careful watering habits all support stronger stems and better future harvests. A healthy plant gives you better flowers. Revolutionary, I know.
Experience-Based Tips for Harvesting Lavender in Real Life
The practical side of harvesting lavender is where many gardeners learn the most. On paper, the process sounds simple: cut the stems, tie them up, and dry them. In the garden, it becomes a full sensory event. The first thing people notice is that lavender tells you when it is ready. A stem that is at the right stage feels springy, fragrant, and somehow more intentional than one that is either too young or too far gone. When you brush your hand across the spikes and the scent jumps up immediately, that is usually your clue that the harvest window is open.
Another common experience is realizing how fast the flowers change in warm weather. One day the spikes look almost ready. Two sunny afternoons later, they are much more open than expected. That is why frequent checking matters during bloom season. Lavender teaches timing better than a wall calendar ever will. Gardeners who do best with it are usually the ones who walk by often, look closely, and harvest in rounds instead of trying to cut everything in one giant session.
There is also a noticeable difference between harvesting for beauty and harvesting for usefulness. If you cut lavender for a kitchen table bouquet, you might choose stems that are a little more open and showy. If you are harvesting for sachets, drying, or crafts, you quickly learn to prefer tighter spikes. They look less dramatic at first, but they usually dry better and hold their buds more reliably. It is one of those gardening lessons that feels backward until you see the results.
Many gardeners also discover that the drying space matters almost as much as the harvest itself. A bunch hung in a bright, hot room may dry quickly, but it can lose color and fragrance faster than one kept in a darker, airy place. Small bundles nearly always outperform giant bunches. The giant bunch looks glorious for about twelve minutes, then becomes a moisture trap. The smaller bundle looks modest but behaves like a professional.
Harvesting lavender can also change how you see the plant in the landscape. Before the first cut, the plant feels ornamental. After harvest, it becomes useful in a deeper way. You start seeing each stem as future tea blends, drawer sachets, dried arrangements, bath soaks, or handmade gifts. That shift is part of the charm. Lavender stops being just pretty and starts earning its rent.
Finally, experienced growers tend to become less nervous with time. The first harvest can feel intimidating because nobody wants to ruin a healthy plant. But once you learn where to cut and how much green growth to leave, the process becomes satisfying rather than stressful. In fact, a well-harvested lavender plant often looks better a week later than it did before you cut it. It regains shape, pushes fresh growth, and seems almost relieved that someone finally gave it a purposeful trim. That is the sweet spot every gardener hopes for: a harvest that helps both the plant and the person holding the basket.
Final Thoughts
If you want to know how to harvest lavender the right way, remember three essentials: cut when the first buds open, harvest after dew dries but before heat builds, and dry small bundles in a dark, airy place. Everything else is refinement. Once you get the timing right, the rest falls into place surprisingly fast.
Lavender rewards observation more than perfection. Watch the spikes, use clean cuts, avoid overharvesting, and match your harvest stage to your end use. Do that, and your lavender will not just survive the snip. It will come back looking better, smelling stronger, and making you feel wildly competent with a pair of garden shears.