
Table of Contents >> Show >> Hide
- What Is ESD and Why Should PC Builders Care?
- How to Ground Yourself When Building a PC
- Step-by-Step ESD-Safe PC Building Setup
- Best Anti-Static Tools for PC Building
- Common ESD Mistakes to Avoid
- Do You Really Need an Anti-Static Wrist Strap?
- ESD Tips for Specific PC Components
- My Practical Experience: What Actually Works During a PC Build
- Conclusion
Building a PC is one of those hobbies that makes you feel like a wizard with a screwdriver. You open a case, seat a CPU, click RAM into place, tame a nest of cables, and suddenly a pile of expensive rectangles becomes a gaming rig, editing machine, or productivity monster. But before you start handling your shiny motherboard like it is a slice of pizza, there is one invisible troublemaker worth respecting: electrostatic discharge, better known as ESD.
ESD is the tiny zap that happens when static electricity moves from one object to another. You may feel it when touching a doorknob after walking across carpet. PC components can feel it too, except they do not say “ouch.” They may simply fail, behave strangely, or develop a hidden weakness that shows up later when you are three hours into troubleshooting and blaming the BIOS, the RAM, the moon, and possibly your cat.
The good news is that learning how to ground yourself when building a PC is simple. You do not need a laboratory, a white coat, or a dramatic “Mission Impossible” theme song. You just need a clean workspace, sensible habits, and a few expert ESD tips that keep static electricity away from your motherboard, CPU, RAM, GPU, SSD, and power supply connections.
What Is ESD and Why Should PC Builders Care?
Electrostatic discharge happens when two objects with different electrical charges come into contact or close enough for charge to move between them. In everyday life, it is usually harmless and mildly annoying. In PC building, it can be risky because modern computer parts contain tiny circuits, delicate contacts, and semiconductor devices that are sensitive to sudden voltage spikes.
The tricky part is that damaging static discharge does not always come with a visible spark or a dramatic snap. A discharge can be too small for you to feel but still strong enough to harm sensitive electronics. That is why PC grounding is not just for nervous first-time builders. It is a professional habit used by repair technicians, system integrators, data center workers, and electronics manufacturers.
Does this mean one touch will definitely destroy your graphics card? No. PC components are more durable than internet horror stories suggest. But “probably fine” is not the same as “best practice,” especially when you are handling hundreds or thousands of dollars in hardware. Grounding yourself is cheap, easy, and far less painful than explaining to your wallet why it needs to buy a second motherboard.
How to Ground Yourself When Building a PC
The goal of grounding is to keep your body, your tools, your case, and your components at the same electrical potential so static charge does not jump into sensitive parts. Think of it like making everyone in the room agree to stop shouting. Once the charge difference is reduced, the risk of ESD damage drops sharply.
1. Use an Anti-Static Wrist Strap
The most reliable method for home builders is a wired anti-static wrist strap. It wraps around your wrist and connects by a cable to a grounding point. When worn correctly, it continuously drains static charge from your body instead of letting that charge build up while you work.
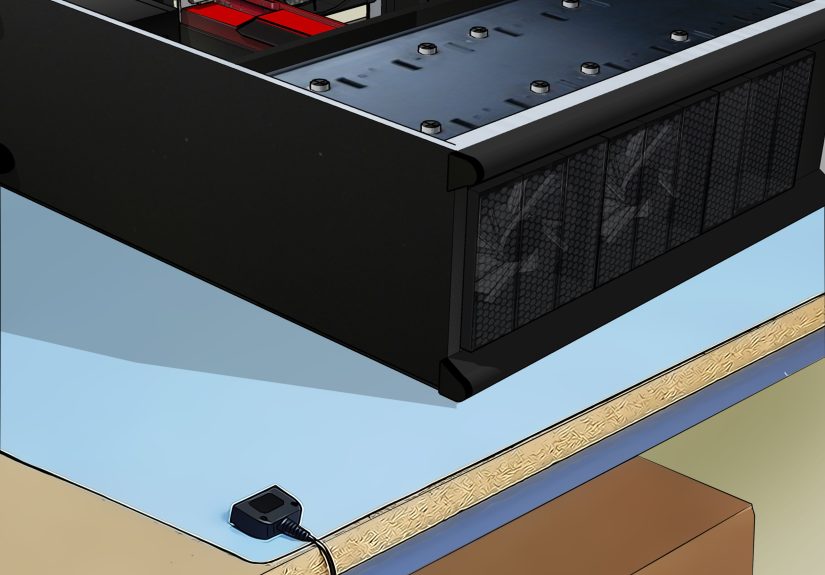
Wear the strap against bare skin, not over a hoodie sleeve. Clip the alligator clip to an unpainted metal part of the PC case, a grounded ESD mat, or another proper grounding point. If you are using the case as your bonding point, choose bare metal rather than painted panels, plastic trim, glass, or decorative surfaces. Paint is great for aesthetics. It is less great for electrical contact.
Many ESD wrist straps include a built-in resistor for safety and controlled discharge. Avoid wireless “anti-static” bracelets that claim magical protection without a ground cable. In professional ESD guidance, wired grounding is the dependable approach. Wireless straps may look convenient, but when you are installing a $900 GPU, “vibes-based grounding” is not the strategy.
2. Work on a Non-Carpeted Surface
Carpet is the static electricity theme park. Walking across carpet, especially in socks, can build charge on your body quickly. If possible, build your PC on hardwood, tile, concrete, laminate, or another non-carpeted floor. If your only option is carpet, place a large anti-static mat or sturdy table between you and the danger zone, and avoid shuffling around like you are warming up for a moonwalk competition.
Your work surface matters too. A wooden or laminated table is usually better than a metal surface or plastic folding table. Plastic can hold static charge, and metal can create short-circuit risks if loose components or screws touch the wrong places. Keep the workspace stable, dry, uncluttered, and well lit.
3. Touch Bare Metal Before Handling Components
If you do not have an anti-static wrist strap, touch an unpainted metal part of your PC case before handling components. Repeat this often, especially after walking around, touching fabric, handling packaging, or petting your dog. Yes, your dog is cute. No, your motherboard does not need a fur-covered static surprise.
This method is not as consistent as wearing a grounded wrist strap, but it is much better than doing nothing. Touching bare metal helps discharge built-up static from your body and reduces the chance of a sudden zap when you grab a RAM stick or graphics card.
4. Keep Components in Anti-Static Bags Until Needed
Motherboards, graphics cards, RAM, SSDs, and expansion cards usually arrive in anti-static packaging. Leave them there until the moment you are ready to install them. Do not open everything at once and spread parts across the table like a tech-themed buffet.
When you remove a component, place it on an anti-static mat, in its anti-static bag, or on the cardboard box it came in. Avoid setting circuit boards directly on carpet, plastic, blankets, towels, or random papers. Also, do not place parts on the outside of an anti-static bag unless the bag is specifically designed to be static-safe on both sides. Some bags are meant to protect what is inside, not serve as a universal landing pad.
5. Handle Parts by the Edges
One of the simplest ESD safety habits is also one of the most overlooked: hold components by their edges. Pick up a motherboard by its sides, a graphics card by the bracket and edges, RAM by the top corners, and a CPU by the edges rather than the contact pads or pins.
Avoid touching gold contacts, socket pins, exposed circuitry, solder points, or chip surfaces. This protects against static discharge, skin oils, dirt, and accidental bending. Your fingers are excellent tools for snacks and typing. They are less ideal for massaging the contacts on a DDR5 module.
Step-by-Step ESD-Safe PC Building Setup
Before you install your first component, create a safe build zone. A few minutes of preparation can save hours of troubleshooting later.
Step 1: Choose the Right Room
Pick a room with low clutter, good lighting, and a hard floor if possible. Avoid building on a bed, couch, rug, or blanket. Soft surfaces can generate static, swallow screws, block airflow during test boots, and make your case wobble like it is auditioning for a disaster movie.
Step 2: Control Humidity
Static electricity is more common in dry environments. Winter air, heavy air conditioning, and low indoor humidity can increase static buildup. You do not need to turn your room into a rainforest, but if the air is extremely dry, using a humidifier nearby can help reduce static. Aim for comfortable indoor humidity rather than a fog machine situation.
Step 3: Gather Tools Before Opening Parts
Have your screwdriver, thermal paste, zip ties, motherboard manual, screws, cable ties, and anti-static wrist strap ready before removing components from packaging. The less you move around during the build, the fewer chances you have to build static charge.
Step 4: Power Down and Disconnect Properly
If you are upgrading an existing PC, shut it down, switch off the power supply, unplug the power cable, and disconnect peripherals. Press the power button for a few seconds after unplugging to help discharge residual power. This is not only an ESD habit; it is basic safety.
For a brand-new build, keep the PSU unplugged while installing components. Many builders discuss plugging the PSU into a grounded outlet with the switch off, but for most home users, the safer general habit is to keep the system disconnected from wall power while working and use a proper wrist strap, ESD mat, or grounded metal point when available.
Step 5: Install Components Calmly and Deliberately
Do not rush. Align parts carefully. Check the motherboard manual before connecting front-panel cables, fan headers, M.2 slots, RAM channels, and power connectors. Static is only one risk; forced installation is another. If something requires heroic pressure, stop and check alignment. PC building is not a weightlifting event.
Best Anti-Static Tools for PC Building
You do not need a professional repair bench, but a few inexpensive tools can make ESD protection easier and more consistent.
Anti-Static Wrist Strap
This is the best low-cost ESD tool for most PC builders. Choose a wired strap with an adjustable band, a coiled cord, and an alligator clip or banana plug connector. Make sure the strap touches bare skin and stays connected while you handle static-sensitive components.
Anti-Static Mat
An anti-static mat gives your components a safer place to rest. Many mats include a grounding cable that connects to a proper ground point. This is especially useful if you build PCs often, repair laptops, swap GPUs, test open-air systems, or work with multiple drives and memory kits.
ESD-Safe Storage Bags
Keep spare parts, removed drives, old GPUs, and extra RAM in anti-static bags. This is especially important for storage devices with exposed circuit boards. If you sell, ship, or store components, ESD-safe packaging is part of responsible handling.
ESD-Safe Brushes and Cleaning Tools
If you clean dust from components, avoid household vacuums and random brushes that can generate static. Use compressed air carefully, hold fans still so they do not spin wildly, and use ESD-safe brushes when brushing circuit boards. A spinning fan may look fun, but turning it into a tiny wind turbine is not doing your motherboard any favors.
Common ESD Mistakes to Avoid
Even careful builders can make small mistakes that increase static risk. Here are the biggest ones to avoid.
Building on Carpet
Carpet plus socks plus dry air equals static electricity’s favorite sitcom. If you must build in a carpeted room, avoid walking around, wear an anti-static wrist strap, and work on a stable table.
Wearing Static-Prone Clothing
Wool sweaters, fleece jackets, and synthetic fabrics can build static. Wear cotton clothing if possible, and avoid dragging sleeves across components. Your hoodie may be comfortable, but your RAM does not want a hug.
Opening All Parts at Once
Only remove a component from its packaging when you are ready to install it. This keeps parts protected and reduces clutter. It also prevents the classic “where did that tiny M.2 screw go?” mystery, which has ended more friendships than it should.
Touching Contacts and Pins
CPU pins, motherboard socket contacts, RAM contacts, M.2 connector edges, and GPU PCIe fingers should be handled with care. Hold components by the edges and avoid unnecessary contact with circuitry.
Trusting Wireless Anti-Static Wristbands
Use a wired strap. If a product claims to protect against ESD without a real grounding path, be skeptical. Static charge needs somewhere safe to go. Marketing slogans are not a ground path.
Do You Really Need an Anti-Static Wrist Strap?
For a single home PC build in a low-static environment, many builders complete systems safely by touching bare metal often, avoiding carpet, and handling parts properly. Modern PC components usually include some ESD protection, and not every small static event will cause instant failure.
However, an anti-static wrist strap is inexpensive and provides continuous protection. If you are building in winter, working on carpet, upgrading expensive parts, handling bare motherboards, or simply want peace of mind, use one. It is the PC-building equivalent of wearing a seatbelt. You hope you will not need it, but you will never regret having it.
ESD Tips for Specific PC Components
Motherboard
The motherboard is the central nervous system of your PC. Keep it in its packaging until installation, hold it by the edges, and place it on its cardboard box or an ESD mat while installing the CPU, RAM, and M.2 SSD. Avoid touching socket pins, headers, or exposed circuitry.
CPU
Processors are tough in some ways and delicate in others. Hold the CPU by the edges. Do not touch the gold pads on modern AMD chips or the contact area on Intel CPUs. Never place a CPU loose on a table. Install it carefully according to the socket markings, then secure the retention mechanism without forcing it.
RAM
Memory modules are commonly handled during upgrades, making them frequent ESD-risk candidates. Hold RAM by the top corners, align the notch with the slot, and press evenly until the latches click. Do not touch the gold contacts along the bottom edge.
Graphics Card
A GPU is large, expensive, and surprisingly easy to bump into things. Hold it by the edges or metal bracket, avoid touching the PCIe connector, and do not set it on carpet or plastic. When installing, support its weight and line it up with the PCIe slot before pressing down firmly.
SSD and Hard Drive
M.2 SSDs should be handled by the sides, not the connector. Internal hard drives and SATA SSDs should be stored in ESD-safe packaging when not installed. Avoid touching exposed circuit boards on drives, especially if you are moving, shipping, or storing them.
My Practical Experience: What Actually Works During a PC Build
After helping with many PC builds and upgrades, the biggest ESD lesson is this: good habits beat panic. First-time builders often imagine static as a lightning bolt waiting to assassinate their graphics card. In reality, the safest builders are not necessarily the most nervous ones. They are the ones who prepare the workspace, slow down, and handle components consistently.
One of the best routines is to unpack only what you need for the next step. For example, start with the motherboard on its box. Install the CPU, RAM, and M.2 SSD before putting the board into the case. Wear the anti-static wrist strap or touch bare metal before each component. Keep plastic wrappers, foam, and random packaging away from the board. This simple workflow keeps the table clean and reduces unnecessary movement.
Another experience-based tip: do not underestimate lighting. Poor lighting causes people to lean awkwardly, brush sleeves across parts, drop screws, or force connectors at bad angles. A bright desk lamp can prevent more damage than fancy tools. If you can clearly see the CPU triangle, RAM notch, M.2 standoff, PCIe latch, and front-panel header labels, you are already building smarter.
Humidity also matters more than many beginners expect. In a dry room, you may notice static when touching metal objects before you even start building. That is a sign to take ESD precautions more seriously. Use a wrist strap, avoid fleece clothing, and reduce walking around. In a more humid environment, static may be less obvious, but you should still follow the same safe handling routine. The point is not fear; the point is consistency.
One common beginner mistake is using the bed as a workbench. It feels convenient because there is space, but it is a terrible PC-building surface. Blankets generate static, screws disappear into fabric, and the soft surface makes it harder to apply even pressure when installing parts. A plain table is better. Even a clean kitchen table can be a great temporary build station if you clear it properly and keep drinks far away. Coffee belongs in your body, not in your motherboard’s PCIe slot.
Another real-world tip is to keep one hand on the case when installing major components if you are not using a wrist strap. This helps maintain contact with bare metal and reminds you to move deliberately. However, do not stretch into uncomfortable positions just to keep contact. If the movement feels awkward, stop, touch the case again, and continue. Building a PC should feel careful, not like electronics yoga.
Finally, remember that ESD safety is part of a bigger careful-building mindset. The same person who grounds themselves properly is usually the person who reads the motherboard manual, checks standoff placement, routes cables patiently, and does not force a connector backward. That is why grounding is more than a single trick. It sets the tone for the entire build: calm, clean, and controlled.
Conclusion
Knowing how to ground yourself when building a PC is one of the easiest ways to protect your components and build with confidence. Use a wired anti-static wrist strap when possible, work on a non-carpeted surface, keep parts in anti-static bags until installation, touch bare metal regularly, and handle components by their edges. These ESD tips are simple, affordable, and effective.
You do not need to fear your PC parts, but you should respect them. Static electricity is invisible, unpredictable, and occasionally rude. With the right grounding habits, you can focus on the fun part: building a clean, powerful computer that boots on the first try. And if it does not boot on the first try, at least you can blame the front-panel connectors like everyone else.
Note: Always disconnect power before working inside a PC. If you are unsure about electrical grounding, damaged components, or power supply safety, consult a qualified technician before continuing.


