
Table of Contents >> Show >> Hide
- Why Frame a Rooster Placemat?
- Choose the Right Rooster Placemat for Framing
- Supplies You Will Need
- Step 1: Clean and Flatten the Placemat
- Step 2: Measure the Placemat and Select a Frame
- Step 3: Pick a Background That Makes the Rooster Pop
- Step 4: Decide How to Mount the Placemat
- Step 5: Test the Layout Before Securing Anything
- Step 6: Assemble the Frame
- Step 7: Add Hanging Hardware
- Step 8: Choose the Best Wall Location
- Step 9: Mark, Level, and Hang
- Design Ideas for Styling Your Framed Rooster Placemat
- Common Mistakes to Avoid
- How to Care for Your Framed Rooster Placemat
- Budget-Friendly Tips
- Personal Experience: What I Learned Framing a Rooster Placemat
- Conclusion
- SEO Tags
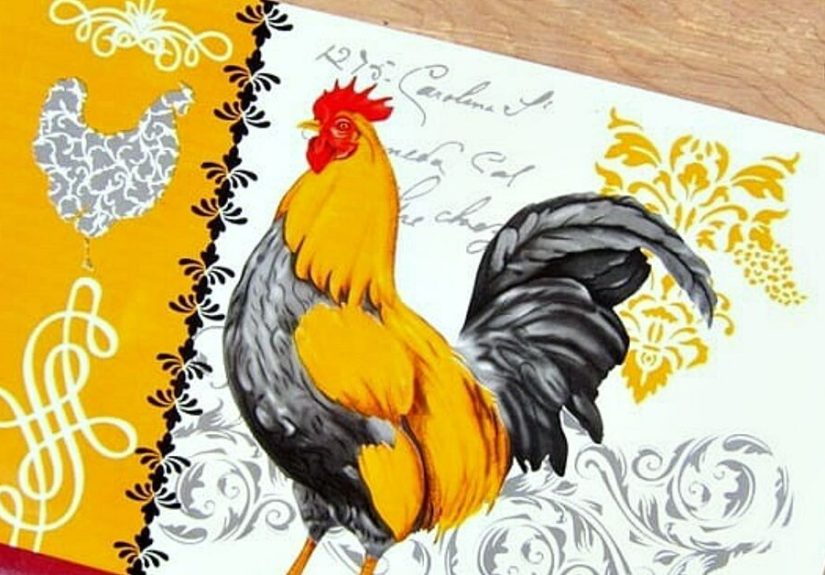
A rooster placemat may begin life as a humble table accessory, but give it a frame, a little backing, and a respectable spot on the wall, and suddenly it becomes farmhouse wall art with personality. It is the kind of DIY project that makes guests say, “Wait, was that always a placemat?” which is basically the crafting equivalent of winning an Oscar.
Whether your rooster placemat is woven, quilted, printed fabric, cork-backed, vinyl, bamboo, or a textured country-style table mat, framing it can turn an inexpensive find into a charming decorative piece. This project works beautifully in farmhouse kitchens, breakfast nooks, dining rooms, laundry rooms, pantry walls, cottage-style interiors, and even gallery walls that need a little barnyard confidence.
The best part? You do not need to be a professional framer. You only need the right frame depth, a clean mounting method, and hanging hardware that fits the weight of the finished piece. This guide walks you through how to frame a rooster placemat and hang it on the wall DIY-style, while keeping the placemat neat, secure, and easy on the eyes.
Why Frame a Rooster Placemat?
Rooster decor has long been a favorite in American kitchens because it feels warm, rustic, cheerful, and just a tiny bit bossy in the best way. A rooster placemat often has strong colors, folk-art details, woven texture, or printed charm, making it perfect for wall display. Framing gives it structure and turns it from “something under a plate” into “intentional kitchen artwork.”
This DIY idea is also budget-friendly. Instead of buying expensive framed farmhouse art, you can use a placemat you already own, thrifted, inherited, or picked up on sale. With the right frame and backing, the final result can look custom without making your wallet flap around like a startled chicken.
Choose the Right Rooster Placemat for Framing
Before grabbing your frame, take a close look at the placemat. The material determines how you should mount and display it.
Fabric or Quilted Placemat
A fabric rooster placemat is one of the best options for framing. Cotton, linen, quilted fabric, and embroidered textiles look lovely in a shadow box or deeper frame. These materials should not be crushed tightly against glass because fabric needs breathing room and can show wrinkles if pressed too firmly.
Woven or Braided Placemat
Woven placemats have natural texture and thickness. They often need a shadow box frame because a standard photo frame may not close properly. A woven rooster placemat can look especially charming when mounted over linen, burlap, or neutral mat board.
Vinyl or Laminated Placemat
Vinyl placemats are usually thinner and easier to frame in standard frames. However, they may look less natural if the surface is glossy. For the best result, use a simple frame and avoid heavy adhesive that could ripple or bubble the material.
Cork-Backed or Hard Placemat
A stiff placemat can sometimes be hung directly, but framing adds polish. Because these mats already have body, they may not need much backing. Just make sure the frame depth can handle the thickness.
Supplies You Will Need
Gathering supplies first saves you from the classic DIY situation where you are holding a half-mounted rooster in one hand and searching for scissors with the other.
- Rooster placemat
- Shadow box frame or deep picture frame
- Acid-free foam board, mat board, or mounting board
- Fabric backing, burlap, linen, or decorative paper if desired
- Archival mounting tape, fabric-safe pins, hand-sewing thread, or removable mounting strips
- Measuring tape or ruler
- Pencil
- Scissors or craft knife
- Level
- Picture hanging hardware, wall hook, nail, screw, or drywall anchor
- Clean microfiber cloth
If your placemat has sentimental value, choose acid-free and lignin-free materials when possible. These materials help reduce yellowing, staining, and fiber damage over time. For decorative placemats that are not heirlooms, you can keep the project simpler, but it is still smart to avoid harsh glue, cheap cardboard, or direct contact with raw wood.
Step 1: Clean and Flatten the Placemat
Start by cleaning the rooster placemat according to its material. For fabric, gently spot clean and let it dry completely. For vinyl, wipe it with a damp cloth and mild soap, then dry it well. For woven placemats, use a soft brush or vacuum with a low-suction attachment to remove crumbs, dust, and mysterious kitchen debris from 2019.
If the placemat is wrinkled, press it only if the care label allows it. Place a cotton cloth between the iron and the placemat, use low heat, and avoid ironing over plastic, vinyl, raised paint, or delicate embroidery. A flatter placemat sits better in the frame and creates a more professional finish.
Step 2: Measure the Placemat and Select a Frame
Measure the width, height, and thickness of the placemat. Standard placemats are often around 12 by 18 inches, but sizes vary. A rooster placemat with a decorative border may look best with visible space around it, so choose a frame larger than the placemat rather than one that squeezes the design edge to edge.
Standard Frame vs. Shadow Box
A standard frame works for thin vinyl, paper, or flat fabric placemats. A shadow box is better for quilted, woven, braided, embroidered, or thick placemats. Shadow boxes create depth, protect texture, and stop the piece from being smashed against the glazing.
Frame Style Ideas
For farmhouse decor, consider distressed white, weathered wood, black, walnut, oak, or barnwood-style frames. A black frame can make red rooster feathers pop. A white frame feels clean and cottage-like. A natural wood frame gives a cozy country kitchen look without trying too hard.
Step 3: Pick a Background That Makes the Rooster Pop
The backing matters more than many people think. A busy rooster placemat needs a background that supports the design instead of competing with it. Neutral linen, cream mat board, soft beige burlap, or muted gray fabric often works well. If your rooster has red, gold, black, or green details, let those colors shine by keeping the background simple.
For a rustic look, wrap acid-free foam board with washed cotton fabric or linen. Pull the fabric smooth around the board and secure it on the back with archival tape or small stitches. Avoid bulky folds, especially near the frame corners, because too much thickness may prevent the frame from closing.
Step 4: Decide How to Mount the Placemat
The best mounting method depends on whether you want the project to be reversible. If the placemat is valuable, handmade, vintage, or sentimental, avoid permanent glue. A reversible method lets you remove the placemat later without damage.
Option 1: Sew It to the Backing
For fabric placemats, sewing is often the safest and cleanest method. Use thread that matches the placemat or the background. Add a few small stitches along the top corners, bottom corners, and middle edges. Do not pull too tightly. The goal is to hold the placemat flat, not force it into military posture.
Option 2: Use Fabric-Safe Pins
Fine stainless pins can work for sturdy textiles. Insert pins at an angle through the placemat edge and into the backing board. Hide the pinheads in seams, woven texture, or dark printed areas when possible. This method is simple and usually removable.
Option 3: Use Archival Mounting Strips or Corners
For thinner placemats, archival mounting corners or strips can hold the piece without adhesive touching the front surface. This works especially well for flat printed mats. Make sure the corners are large enough to support the weight.
Option 4: Use Light Adhesive Only for Low-Value Decor
If the placemat is inexpensive and you do not mind making the mounting permanent, a small amount of craft adhesive or double-sided tape can work. Use it sparingly. Too much glue may soak through fabric, create lumps, or make the placemat look like it lost a wrestling match with a glue bottle.
Step 5: Test the Layout Before Securing Anything
Place the backing board flat on a clean surface. Center the rooster placemat on top. Step back and look at it from a distance. Is the rooster centered? Is the comb too close to the frame edge? Does the tail need more breathing room? Rooster artwork tends to have movement, so visual balance matters.
Use a ruler to measure the space around all sides. You do not need absolute perfection, but the placement should look intentional. Once it looks right, lightly mark the corners with pencil on the backing board. These marks help you keep the placemat straight while mounting.
Step 6: Assemble the Frame
Remove the frame backing and clean the glass or acrylic if your frame includes glazing. For textile placemats, consider leaving a little space between the placemat and the glazing. A shadow box naturally creates that space. If using a standard frame, a mat or spacer can help prevent direct pressure.
Place the mounted placemat into the frame carefully. Secure the backing according to the frame design. Turn the frame over and check for dust, loose threads, crooked placement, or trapped fuzz. A single speck of lint can become oddly dramatic once it is sealed behind glass, so inspect before closing the frame completely.
Step 7: Add Hanging Hardware
Many frames come with hanging hardware already installed. If yours does not, add sawtooth hangers, D-rings, or picture wire. For wider frames, D-rings with wire often provide better support and easier leveling. Make sure the hardware is rated for the weight of the finished frame.
If the frame is heavy, do not rely on a tiny nail and hope. Hope is not hardware. Use a stud when possible, or choose a drywall anchor that matches the weight of the frame. Lightweight frames may work with a picture hook, but heavier shadow boxes need stronger support.
Step 8: Choose the Best Wall Location
A framed rooster placemat looks great in a kitchen, dining area, breakfast nook, pantry, mudroom, or farmhouse-style hallway. Avoid placing it where steam, grease, or direct sunlight can cause fading or moisture damage. Above a coffee station is charming. Directly beside a splattering stovetop is less charming unless your rooster enjoys living dangerously.
As a general design rule, hang artwork so the center sits around eye level. In many homes, that means the center of the frame is roughly 57 to 60 inches from the floor. If you are hanging it above furniture, leave enough space between the furniture and the bottom of the frame so it feels connected but not cramped.
Step 9: Mark, Level, and Hang
Hold the frame against the wall and adjust until it looks right. Use a pencil to mark the hanging point. A level helps keep everything straight. If you are using picture wire, pull the wire upward as it will sit on the hook, then measure from the top of the frame to that point. Transfer that measurement to the wall so the frame lands exactly where you want it.
Install the hook, screw, nail, or anchor. Hang the frame and check it with the level again. Step back. Adjust. Step back again. Squint like a professional decorator. Once it looks straight, you are done.
Design Ideas for Styling Your Framed Rooster Placemat
Create a Mini Farmhouse Gallery Wall
Pair the framed rooster placemat with small cutting boards, vintage recipe cards, botanical prints, framed herb illustrations, or black-and-white kitchen photos. Keep the color palette consistent so the wall feels collected rather than chaotic.
Use a Pair or Trio
If you have multiple rooster placemats, frame two or three in matching frames. Hang them horizontally above a buffet, vertically in a narrow kitchen wall space, or as a symmetrical set around a window.
Add a Mat for a Custom Look
A mat can make a simple placemat feel more expensive. Choose a wide neutral mat for an airy look or a thin colored mat that picks up one shade from the rooster design. Red, black, cream, navy, and sage green often work well with rooster-themed decor.
Go Glass-Free for Texture
If the placemat is thick or highly textured, consider framing it without glass inside a shadow box. This lets the woven or quilted surface stand out. However, glass or acrylic helps protect against dust, so choose based on the room and how easy you want cleaning to be.
Common Mistakes to Avoid
Using a Frame That Is Too Shallow
A thick placemat forced into a shallow frame may warp, wrinkle, or prevent the backing from closing. When in doubt, choose a shadow box.
Applying Too Much Glue
Heavy adhesive can stain fabric, create hard spots, or make the placemat impossible to remove later. Use reversible mounting methods whenever possible.
Skipping the Level
Roosters may wake up the farm, but they cannot correct crooked wall art. Use a level before and after hanging.
Hanging in a Humid or Greasy Spot
Kitchens are perfect for rooster art, but not all kitchen spots are friendly. Keep framed textiles away from steam, sink splash zones, and heavy cooking grease.
Choosing a Background That Is Too Busy
If the placemat already has bold colors and patterns, a busy background can make the whole piece feel crowded. Let the rooster be the star. He clearly expects it.
How to Care for Your Framed Rooster Placemat
Dust the frame regularly with a dry microfiber cloth. If it has glass or acrylic, clean the surface with a suitable cleaner sprayed onto the cloth, not directly onto the frame. Spraying directly can allow moisture to seep inside the edges.
Check the hanging hardware every few months, especially if the frame is heavy. If the frame shifts or tilts often, add small rubber bumpers to the lower back corners. They help keep the frame steady and protect the wall from scuffs.
If the placemat is a vintage or heirloom textile, keep it out of direct sunlight and consider UV-protective glazing. Sunlight can fade fabric and weaken fibers over time. A little prevention keeps your rooster from slowly turning into a pale ghost chicken.
Budget-Friendly Tips
You do not need custom framing for every rooster placemat. Thrift stores, craft stores, discount home stores, and online marketplaces often have affordable frames and shadow boxes. Look for frames with solid corners, clean glass, and sturdy hanging hardware.
If the placemat is an odd size, buy a larger frame and use a mat or fabric-covered backing to fill the extra space. This trick often looks more expensive than trying to cram the placemat into a frame that barely fits.
For a cohesive kitchen wall, paint mismatched thrifted frames the same color. Black, antique white, warm wood stain, or soft sage can unify different frame styles. This is a great way to make a DIY project feel curated instead of random.
Personal Experience: What I Learned Framing a Rooster Placemat
The first time I framed a rooster placemat, I underestimated two things: the thickness of the placemat and the dramatic presence of the rooster. On the table, it looked cute. Inside a frame, it looked like it owned the kitchen and was considering charging rent. That is the funny thing about textile wall art: once you give it borders, space, and a proper background, the design suddenly feels much more important.
My biggest lesson was to choose the frame after measuring the placemat, not before. A standard frame looked like it would work until I tried to close the backing. The placemat was slightly padded, and the frame clips refused to cooperate. Instead of forcing it, I switched to a shadow box. That solved the problem immediately. The extra depth gave the fabric room, preserved the texture, and made the whole piece look more intentional.
I also learned that background color can completely change the final look. I first tried a patterned paper backing, thinking it would add country charm. It did add charm, but it also made the rooster disappear into visual noise. A plain linen-look fabric worked much better. The red comb, black feathers, and golden details stood out beautifully. Sometimes the best design choice is the quiet one.
Mounting was another experiment. I avoided glue because I wanted the option to remove the placemat later. Small stitches worked best. I used a few loose stitches along the edges, just enough to hold the placemat flat against the backing. The stitches were nearly invisible, and the placemat did not sag. That was much better than tape, which felt risky on fabric and less secure over time.
When it came time to hang the frame, I made the mistake of eyeballing the placement. It looked straight from two feet away, then wildly crooked from across the room. A level fixed the problem in seconds. Since then, I do not hang anything without one. A rooster may have rustic charm, but crooked rustic charm still looks like someone rushed.
The final piece worked especially well near a breakfast nook with a small wooden table and white curtains. It added warmth without feeling too themed. The framed placemat looked like folk art, not leftover table decor. Guests noticed it, and several assumed it came from a boutique home store. That is the magic of framing: it gives everyday objects permission to act fancy.
If I were doing the project again, I would spend more time testing frame colors before committing. A distressed white frame gave the piece a soft farmhouse look, while a black frame made it feel bolder and more graphic. Both worked, but the room decided the winner. For a bright kitchen, white felt fresh. For a moodier dining room, black would have been stunning.
The most satisfying part of this DIY is that it turns something ordinary into something personal. A rooster placemat can remind you of a country kitchen, a family breakfast, a flea market trip, or simply your love of cheerful farmhouse style. Framing it gives that small object a story. And honestly, any project that lets a placemat retire from crumb duty and become wall art deserves applause.
Conclusion
Learning how to frame a rooster placemat and hang it on the wall DIY-style is an easy way to create charming farmhouse wall decor without spending a fortune. The key is to match the frame to the placemat’s thickness, use a clean and secure mounting method, choose a simple background, and hang the finished piece with proper hardware.
Whether your rooster placemat is vintage, handmade, quilted, woven, or just too cute to hide under dinner plates, framing it can give your kitchen or dining room a warm, personal touch. With a little measuring, a little patience, and a level that prevents decorative tragedy, your rooster can officially move from the table to the wall.


