
Table of Contents >> Show >> Hide
- First: What Kind of “Crack” Are We Talking About?
- What You’ll Need (Pick Based on Crack Severity)
- Step-by-Step: How to Fix Cracked Leather Shoes
- Option A: Quick Restore (Best for Level 1–2)
- Option B: Deeper Repair (For Noticeable Cracks)
- Common Mistakes (So You Don’t Accidentally Make It Worse)
- When to See a Cobbler (Because DIY Has Limits)
- How to Prevent Leather Shoes From Cracking Again
- Quick Case Examples (Because Real Shoes Have Real Problems)
- of Real-World “DIY Repair” Experiences (What Usually Happens in Practice)
- Conclusion
Leather shoes are supposed to age like a fine… something. Wine, cheese, your favorite denim jacketpick your metaphor. But when leather starts cracking, it doesn’t feel “vintage.” It feels like your shoes are quietly auditioning to become a desert lizard. The good news: you can often reduce the look of cracks, restore flexibility, and slow further damage with the right DIY approach. The honest news: once leather is truly cracked, you can’t time-travel it back to factory-new. What you can do is clean, rehydrate, fill (when appropriate), recolor, and protectso your shoes look dramatically better and last longer.
This guide walks you step-by-step through fixing cracked leather shoes at homewhether you’re dealing with tiny surface “crazing” or deeper cracks in high-flex areas like the vamp (the part that bends when you walk). You’ll also learn how to prevent cracking from coming back like a sequel nobody asked for.
First: What Kind of “Crack” Are We Talking About?
Before you grab products and start scrubbing like you’re in a shoe-washing competition, figure out what you’re seeing. The repair strategy changes based on severity and leather type.
Level 1: Surface lines (dryness/crazing)
- Looks like fine lines or “spiderweb” texture in the finish
- Leather feels dry or stiff
- No deep separation when you gently flex the leather
Best fix: cleaning + conditioning + cream polish (sometimes that’s all you need).
Level 2: Visible cracks (shallow grooves)
- Cracks show as small grooves, often in the vamp crease
- Color may look lighter inside the crack
- Surface may feel rough or flaky
Best fix: cleaning + conditioning + targeted color restoration (cream polish or dye), and optional filler if cracks are noticeable.
Level 3: Deep cracks, splits, or tearing
- Cracks look like cuts or separated edges
- Leather may be thin, brittle, or breaking down
- Cracks spread quickly even after conditioning
Best move: talk to a cobbler. Deep structural cracking in uppers can be difficult to truly “repair,” and sometimes it’s a sign the leather is failing. DIY may still improve appearance, but expectations should be realistic.
What You’ll Need (Pick Based on Crack Severity)
You don’t need a hundred products. You need the right fewused gently and in the correct order.
Core basics (recommended for most repairs)
- Horsehair brush (or soft shoe brush) for daily grime and finishing buffs
- Soft cloths (microfiber or cotton)
- Leather cleaner or saddle soap (use lightly)
- Leather conditioner (neutral, meant for footwear)
- Cream polish (adds pigment + conditioning; great for minor cracking)
For deeper cracks (optional but useful)
- Flexible leather filler (repair compound designed to bend)
- Fine sandpaper (600–1000 grit) or ultra-fine sanding sponge
- Leather dye or leather paint (thin coats are your friend)
- Finisher/topcoat (flexible sealant)
- Edge dressing (if edges look rough)
Helpful extras (not mandatory, but your shoes will thank you)
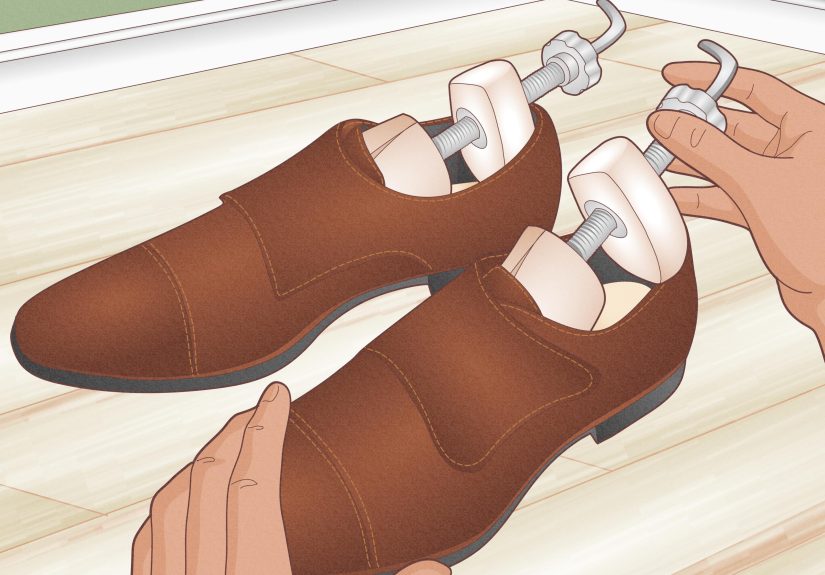
- Cedar shoe trees (helps keep shape and reduce harsh creasing)
- Newspaper/paper towels (for drying wet shoes safely)
- Waterproofing spray (use one compatible with your leather finish)
Pro tip: Conditioners (especially oils) can darken leather. If you love your current color, test on an inconspicuous area first (inside the heel collar or near the tongue).
Step-by-Step: How to Fix Cracked Leather Shoes
Step 1: Dry brush and inspect (2 minutes that matter)
Brush off dust and grit first. Dirt acts like sandpaper every time your shoe flexes, making cracks worse. While brushing, look closely at the cracked area: is it surface dryness or an actual groove? This quick check decides whether you’ll stop at conditioning or move into filler territory.
Step 2: Clean gently (because leather isn’t a frying pan)
Use a dedicated leather cleaner or a small amount of saddle soap on a damp cloth. Work in light circles. Your goal is to remove grime and old product buildupespecially around cracksso conditioner can absorb evenly.
- Use minimal water (leather hates being soaked).
- Wipe off residue with a clean damp cloth.
- Let shoes dry naturally at room tempaway from heaters, hair dryers, and direct sun.
If your shoes have winter salt stains, wipe them down promptly and let them dry fully before conditioning. (Salt is basically dehydration in crystal form.)
Step 3: Condition to rehydrate (the “drink water” phase for leather)
Apply a small amount of conditioner with a soft cloth. Massage it into the leather, paying extra attention to cracked zones and flex points. Let it absorb, then wipe off excess.
- Start smallyou can always add more.
- Give it time. Absorption can take a few hours (overnight is often ideal).
- If leather drinks the conditioner instantly, it was very dry. A second light application later may help.
For Level 1 surface lines, conditioning alone can make cracks far less noticeable by restoring flexibility and smoothing the finish.
Step 4: Decide your “finish line” (polish-only vs. filler repair)
At this point, many shoes are already improved. If cracks are faint, move straight to cream polish. If cracks are still visibly grooved or flaky, consider filler and color work.
Option A: Quick Restore (Best for Level 1–2)
Step 5A: Use cream polish to blend and nourish
Cream polish is the unsung hero for minor cracks because it adds pigment, softens appearance, and gives a healthy glow without building a thick wax shell. Choose a close match (or slightly lighter if you’re nervous).
- Apply a thin layer with a cloth or applicator brush.
- Let it set for a few minutes.
- Brush briskly with a horsehair brush to blend.
- Repeat a second thin coat if needed.
Optional: Add a small amount of wax polish for shine, but don’t rely on wax to “fix” cracking. Wax is a topper, not a cure.
Option B: Deeper Repair (For Noticeable Cracks)
If cracks are deeper, you’re basically doing tiny cosmetic carpentry: fill, level, recolor, and sealwhile keeping everything flexible enough to bend as you walk.
Step 5B: Smooth loose flakes (carefully)
If you see lifting finish or flaky edges, very lightly smooth the area with ultra-fine sandpaper (600–1000 grit). You’re not sanding a deck. You’re calming down rough texture so filler can sit evenly.
- Sand lightlystop as soon as it feels smoother.
- Wipe away dust with a clean, slightly damp cloth.
- Let dry fully.
Step 6B: Apply leather filler in thin layers (patience = a better-looking repair)
Use a flexible leather filler/repair compound made for items that bend (like shoes). Apply a very thin layer into the crack with a small spatula or an old gift card edge. Smooth it flush with the surface.
- Apply thin filler coat.
- Let it dry completely (follow product instructions).
- Lightly sand to level if needed.
- Repeat thin coats until the crack is visually minimized.
If you go thick, the filler can look obviousor worse, it can crack again because it can’t flex properly. Thin coats win. Every time.
Step 7B: Restore color (cream polish, dye, or paint)
If the crack interior looks lighter, recoloring helps a lot. For many dress shoes, cream polish is enough. For bigger repairs, a leather dye or thin leather paint can blend the repair.
- Apply color in thin coats and let dry between layers.
- Blend outward so there’s no harsh “repair circle.”
- Check color in natural light (bathroom lighting lies).
Step 8B: Seal and protect (lock in your work)
Once you’re happy with the look, apply a flexible finisher/topcoat designed for leather. This helps protect against moisture and abrasion. After it cures, you can finish with a light cream polish and a brush buff.
Common Mistakes (So You Don’t Accidentally Make It Worse)
1) Over-wetting leather
Too much water can stiffen leather as it dries and can worsen cracking. Damp cloth: yes. Soaking: no.
2) Using high heat to “speed dry”
Heat dries leather fastand not in a cute, efficient way. It pulls moisture out and increases brittleness. Air-dry at room temperature instead.
3) Over-conditioning
More conditioner isn’t always better. Heavy buildup can attract dirt, soften structure, and darken leather. Start small, let it absorb, then decide if it needs another light pass.
4) Thick filler layers
Thick filler looks like spackle on a moving hinge. Thin layers keep the repair smoother and more flexible.
5) Ignoring the inside of the shoe
If the lining is torn, the insole is cracked, or the shoe’s structure is collapsing, cosmetic fixes won’t feel good to wear. Sometimes the smartest “repair” is getting a cobbler to handle structural issuesor retiring the pair with honors.
When to See a Cobbler (Because DIY Has Limits)
DIY is great for improving appearance and slowing damage, but a professional is worth it when:
- The upper leather is splitting deeply or tearing
- The lining is worn through and rubbing your foot
- The sole is separating, the welt stitching is failing, or the heel is unstable
- The shoe no longer holds shape (collapsed counters, major deformation)
A cobbler can also help match color precisely and apply professional-grade finishesespecially useful on high-end shoes.
How to Prevent Leather Shoes From Cracking Again
Fixing cracks is one thing. Preventing them is the real flex.
Adopt a simple shoe care routine
- Brush after wears: quick brushing removes dust and keeps leather looking alive.
- Condition periodically: many people do well with conditioning every 3–6 months, depending on climate and wear.
- Use cream polish as maintenance: it refreshes color and adds light conditioning.
Rotate your shoes
Wearing the same pair daily doesn’t give leather time to rest and fully dry. Rotation reduces stress and helps shoes last longer.
Use shoe trees
Shoe trees help maintain shape, reduce aggressive creasing, and absorb moisture. Your shoes will crease anyway (that’s normal), but trees can help those creases stay civilized.
Dry shoes correctly
If shoes get wet, stuff them with paper (newspaper or paper towels), replace as it absorbs moisture, and let them air-dry. Keep them away from heaters and direct sunlight.
Protect from salt and grime
Wipe down winter salt quickly. Brush off dirt often. Leather fails faster when it’s constantly flexing with grit embedded in the grain.
Quick Case Examples (Because Real Shoes Have Real Problems)
Example 1: Dress shoes with light vamp cracking
Scenario: fine lines appear where the shoe bends, and the leather feels stiff. Best approach: brush, gentle clean, condition, then apply matching cream polish. Result: cracks soften visually, color evens out, leather flexes more comfortably.
Example 2: Work boots with visible grooves and dryness
Scenario: noticeable cracks and roughness from outdoor wear and infrequent conditioning. Best approach: clean carefully, condition (possibly two light rounds), then decide: cream polish for cosmetic blending or filler + recolor if grooves are obvious. Finish with protective treatment appropriate for that leather type.
Example 3: Deep cracks that look like splitting
Scenario: cracks are deep, edges separate, leather looks thin. Best approach: condition to slow worsening, but consult a cobbler. DIY filler may help cosmetically, but the leather itself may be structurally compromised.
of Real-World “DIY Repair” Experiences (What Usually Happens in Practice)
Most DIY leather shoe crack repairs don’t fail because people “didn’t try hard enough.” They fail because the repair steps get rushed, the products get overused, or expectations get set to “brand-new showroom” instead of “healthy, wearable, and noticeably improved.” The most common experience is this: someone cleans the shoes, conditions them once, and expects the cracks to disappear like they were drawn in pencil. When they don’t, the temptation is to dump on more conditioner. That can backfire. Leather can get overly soft, attract dirt, and sometimes darken in uneven patchesespecially around creases where product collects. The better experience tends to be slower: one light conditioning round, wait, evaluate, then a second light pass only if the leather still feels thirsty.
Another very typical moment: color panic. After conditioning, cracks may look more obvious because the leather darkens slightly, while the inside of the crack stays lighter. People often think they made things worsewhen really they just revealed the contrast. That’s where cream polish shines (literally). A thin coat of matching cream can blend the crack lines so your eye stops zooming in. Many DIYers find that polish does more for “how it looks” than conditioner alone, especially on dress shoes. The best results usually come from applying cream lightly, waiting a few minutes, then brushing briskly to merge the pigment into the grain.
For deeper cracks, the most common “aha” moment is learning that filler is not frosting. Thick filler layers often dry looking smooth, but once the shoe flexes, the repair can look obvious or even fracture again. The people who get the cleanest results almost always apply thin filler layers, let each layer dry completely, then gently level with ultra-fine sandpaper. It’s boring in the same way that flossing is boring: nobody wants to do it, but the results are dramatically better.
There’s also the “lighting betrayal” experience. A repair that looks perfect under warm indoor bulbs can look slightly off in daylight. DIYers who avoid frustration usually test color in natural light and blend outwardnever painting a crisp repair patch that ends abruptly. Finally, the happiest long-term experience is the one where repair becomes prevention: brushing after wears, rotating pairs, using shoe trees, and conditioning on a schedule. That’s when shoes stop cracking like a bad comedy set and start aging the way leather is supposed tosmooth, flexible, and full of character (the good kind).
Conclusion
If your leather shoes are cracked, don’t panicand definitely don’t punish them with heat or a conditioner flood. Start with the basics: brush, clean gently, and condition patiently. For minor cracking, cream polish often provides the biggest visual upgrade. For deeper cracks, a careful filler-and-color process can improve appearance and protect the leather, as long as you keep it thin, flexible, and realistic about what “repair” means.
The real win is prevention: keep leather clean, hydrated, and stored properly. Do that, and your shoes will look better, feel better, and last longerso the only cracking you hear is the sound of you stepping confidently into your day.


