Table of Contents >> Show >> Hide
- First: Make It Safe (and Keep the Ceiling From “Surprising” You)
- Step 1: Confirm It’s an Active Leak (Not an Old Stain)
- Step 2: Figure Out Where the Water Is Coming From (Water Is a Sneaky Traveler)
- Step 3: Stop the Leak at the Source
- Step 4: Dry Everything Fast (Because Mold Doesn’t Need an Invitation)
- Step 5: Repair the Ceiling (Patch It Like You Mean It)
- Step 6: Prevent the Next Leak (Future You Will Be Grateful)
- When to Call a Pro Immediately
- Costs, Insurance, and Documentation (Because Water Damage Is Expensive)
- Real-World Experiences and Lessons From Ceiling-Leak Veterans (Extra )
- Conclusion
- SEO Tags
A leaking ceiling is one of life’s least-fun surprises. It starts innocentone mysterious brown spotthen suddenly your living room is hosting a
very exclusive “indoor rain” experience. The good news: most ceiling leaks are fixable. The important news: you’ll fix it faster (and cheaper) if you
treat it like a two-part problemstop the water first, then repair the ceiling.
This guide walks you through safe, step-by-step ceiling leak repair, how to find the real source (because water loves to travel), how to dry things
properly to prevent mold, and how to patch and repaint so your ceiling stops looking like a latte art experiment.
First: Make It Safe (and Keep the Ceiling From “Surprising” You)
1) Protect people and pets
- Move furniture, rugs, electronics, and anything sentimental out from under the leak.
- Put down a tarp or plastic sheeting if you have it.
- Set a bucket under the drip and keep towels nearby.
2) Treat electricity like it’s allergic to water (because it is)
- If water is near a light fixture, ceiling fan, outlet, or wiring, turn off power to that area at the breaker.
- Don’t touch wet fixtures, switches, or dangling water bubbles with bare hands.
- If you’re unsure which breaker controls the area, shut off the main and call a licensed electrician or plumber.
3) Control the water
- If the leak seems plumbing-related, turn off the nearest fixture shutoff (toilet, sink, washing machine) or shut off the main water if needed.
- For an active “bulge” in drywall, you may need to drain it safely so the ceiling doesn’t collapse unexpectedly.
DIY trick (only if power is off and you feel safe): If water is pooling and the drywall is ballooning, carefully poke a small hole
in the lowest point of the bulge and let it drain into a bucket. This can prevent a bigger, messier tear later. Start smallgravity will do the rest.
Step 1: Confirm It’s an Active Leak (Not an Old Stain)
Not every ceiling stain is an active emergency. Some are “ancient history” from an old roof issue that was repaired years ago. Before you start ripping
things open, do a quick check:
- Touch test: Is it damp, soft, or cool to the touch (with power OFF if nearby)? That suggests it’s active.
- Tape test: Stick a piece of masking tape over the stain and check later. Moisture behind it usually shows.
- Outline test: Lightly pencil an outline around the stain. If it expands beyond the outline over the next day or two, it’s still leaking.
Step 2: Figure Out Where the Water Is Coming From (Water Is a Sneaky Traveler)
Here’s the big mistake people make: they fix the spot where the water shows up… instead of where it starts. Water can run along joists, pipes, ductwork,
and beams before it finally says “hello” on your ceiling.
Fast clues that narrow it down
- Only leaks when it rains or snow melts: likely a roof leak, flashing issue, vent boot, chimney area, or clogged gutter problem.
- Leaks when someone showers, flushes, or runs a dishwasher: likely plumbing supply/drain issues, wax ring, shower pan, or a failed seal.
- Leaks when the AC runs (especially in warm months): likely condensate drain blockage, overflow pan, or insulation/condensation problems.
- Brown rings with no current drip: could be an old leak or slow moisture issue that comes and goes.
Track it from above (the smartest way to stop the leak)
If you have access to an attic or the floor above, grab a flashlight and look “uphill” from the stain. You’re looking for:
- Wet insulation, darkened wood, or water trails on rafters/joists
- Moldy or musty-smelling areas
- Drips from a pipe joint, valve, or HVAC line
Pro tip: If the stain is on the first floor, check what’s directly above itbathrooms, laundry rooms, and kitchens are classic suspects.
But still remember: “directly above” is a clue, not a conviction. Water doesn’t always respect floor plans.
Step 3: Stop the Leak at the Source
Once you’ve identified the most likely culprit, focus on fixing the source before repairing drywall. Otherwise, you’ll do a beautiful patch job
just in time for the leak to return and ruin your confidence.
If it’s plumbing (most common for ceiling leaks under bathrooms/kitchens)
- Supply lines: Check toilet supply hoses, sink shutoff valves, and washing machine hoses for moisture or corrosion.
- Drain lines: Leaks may show up when water is draining (showers, tubs, sinks). Look for dripping at joints and traps.
- Toilet wax ring: A slow leak around the base can travel down and stain ceilings belowoften worse after flushes.
- Shower/tub seals: Failed caulk or grout can let water seep behind walls and down through framing.
Simple test: Run one fixture at a time (sink, shower, toilet) while someone watches the area below for dripping. This “one-at-a-time”
method turns mystery leaks into evidence.
If it’s the roof (leaks after storms, snow, or wind-driven rain)
- Look for damaged shingles, missing flashing, cracked vent boots, or chimney issues.
- Check gutters: Clogged gutters can push water under roofing edges and into soffits and ceilings.
- Follow stains uphill in the attic: the entry point is often higher than where you see the drip.
Safety note: Roof work can be dangerous. If you’re not trained and equipped, call a licensed rooferespecially for steep roofs, wet conditions,
or anything involving heights. The goal is a dry ceiling, not a dramatic story.
If it’s HVAC/condensation (a sneaky, seasonal ceiling leak)
- Condensate drain line clog: AC systems remove moisture; if the drain is clogged, water can back up and overflow.
- Overflow pan: A cracked or rusted pan can drip.
- Insulation issues: Poorly insulated ducts can sweat and drip onto ceilingsespecially in humid weather.
If you suspect HVAC, you can often spot it by timing: the “leak” appears when the AC runs and may stop when it’s off. An HVAC tech can clear drains,
fix pans, and address duct sweating safely.
Step 4: Dry Everything Fast (Because Mold Doesn’t Need an Invitation)
Stopping the leak is half the battle. The other half is drying the area thoroughly. Water trapped behind drywall and insulation can lead to
musty smells, mold growth, and future stainseven if the leak is “fixed.”
Drying checklist
- Ventilate: Open windows if weather allows, and run fans to move air.
- Dehumidify: A dehumidifier helps pull moisture out of the air and materials.
- Remove soaked insulation: Wet insulation can hold water like a sponge and keep framing damp.
- Open the cavity if needed: If drywall is soggy or sagging, cut it out so framing can dry properly.
Timing matters: If materials can’t be thoroughly dried within a couple of days, replacement is often safer than trying to “wait it out.”
Drywall and ceiling tiles are porousonce they stay wet long enough, mold can be difficult to fully remove.
Watch for hidden mold
- Musty odor
- Black/green specks, fuzzy growth, or discoloration
- Worsening allergies or irritation when you’re near the area
If you see significant mold, or if the affected area is large, consider professional remediationespecially if anyone in the home has asthma or
immune issues.
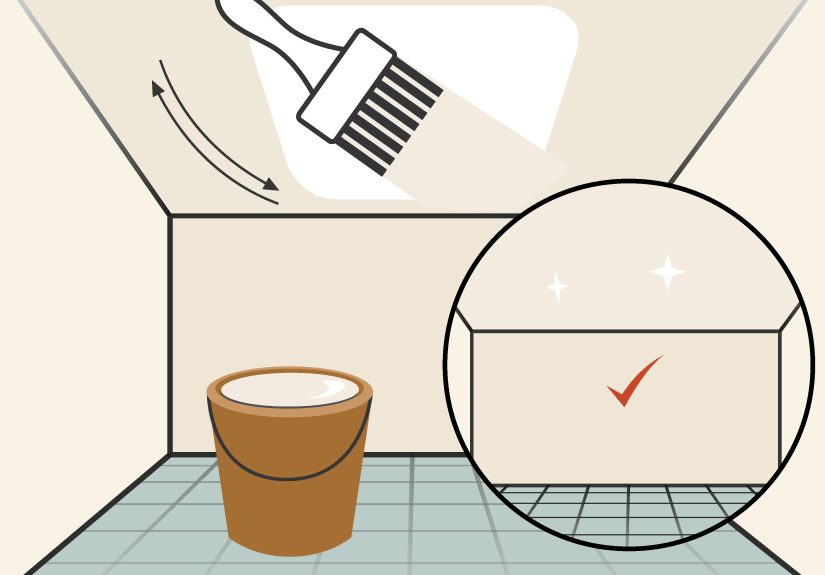
Step 5: Repair the Ceiling (Patch It Like You Mean It)
Once the leak source is fixed and the area is completely dry, you can repair the ceiling. The right approach depends on how bad the damage is.
Scenario A: Small stain, drywall feels solid
- Scrape loose paint gently with a putty knife.
- Lightly sand the edges of the stain/peeling paint.
- Seal the stain with a stain-blocking primer (this is what prevents the “ghost stain” from returning through fresh paint).
- Repaint the ceilingoften corner-to-corner for best blending.
Scenario B: Soft, bubbling, or sagging drywall
- Cut out damaged drywall into a neat square/rectangle (it’s easier to patch clean shapes than random craters).
- Check framing for dampness or rot. If wood is compromised, get a pro involved.
- Install a drywall patch using backing strips if needed, then screw the patch in place.
- Tape seams and apply joint compound in thin layers, feathering outward.
- Sand smooth between coats until the patch disappears to the touch.
- Prime and paint (primer firstalways).
Scenario C: Textured ceilings (aka “Why, 1997? Why?”)
Matching texture is the part that makes people consider moving. You have a few options:
- Texture spray: Works for many orange-peel or knockdown textures if you practice first on cardboard.
- Skim coat: Smooth the repaired area and repaint the entire ceiling for a consistent look.
- Pro finish: If the ceiling is heavily textured or very visible, a drywall finisher can save your sanity.
Important note: If your home is older and you suspect popcorn texture might contain asbestos, don’t scrape or sand it without proper testing
and professional guidance.
Step 6: Prevent the Next Leak (Future You Will Be Grateful)
- Inspect roofs and gutters seasonally and after major storms.
- Replace old appliance hoses (washing machine, dishwasher) before they fail.
- Watch caulk and grout around tubs, showers, and sinksre-seal when cracks appear.
- Service HVAC annually, and keep condensate lines clear.
- Consider leak detectors near water heaters, laundry areas, and under sinks.
When to Call a Pro Immediately
DIY is great, but there are times when calling a professional is the smartest (and safest) move:
- Water is near electrical fixtures or you see flickering lights
- The ceiling is bulging, sagging, or cracking over a large area
- You can’t locate the source after basic checks
- You suspect roof flashing issues or complex roof damage
- You see or smell significant mold
- The leak involves a multi-story/hidden pipe situation
Costs, Insurance, and Documentation (Because Water Damage Is Expensive)
Ceiling leak repair costs vary widely depending on the source and how much damage occurred. A minor plumbing fix and stain touch-up might be relatively small,
while roof repairs, drywall replacement, insulation removal, and water restoration can add up quickly.
Insurance basics (in plain English)
- Many homeowners policies tend to cover sudden, accidental water damage (like a burst pipe).
- They often don’t cover slow leaks caused by long-term maintenance issues or neglect.
- Mold coverage can be complicated and may depend on whether it resulted from a covered event.
How to document like a responsible adult (even if you don’t feel like one)
- Take photos/video of the leak, stains, and any damaged items.
- Write down dates (when you noticed it, storms, plumbing use, etc.).
- Save receipts for mitigation (fans, dehumidifier rental, emergency plumber).
- Fix/mitigate quicklyinsurers often expect you to reduce further damage once you discover it.
Real-World Experiences and Lessons From Ceiling-Leak Veterans (Extra )
If you ask a group of homeowners about ceiling leaks, you’ll get the same look people make when they remember an embarrassing middle-school haircut:
equal parts trauma and comedy. Here are some real-world “been there” lessons that can save you time, money, and a few new gray hairs.
Experience #1: The leak that showed up nowhere near the source
One of the most common surprises is distance. People see a drip in the living room and assume the problem is directly above it. Then they cut a neat hole,
only to find… nothing. No pipe. No wet wood. Just disappointment.
What happened? Water rode along a joist like it had a tiny surfboard. In attics and ceiling cavities, framing members create natural “runways” for water.
The practical lesson: if you open the ceiling and it’s dry right above the stain, don’t declare victory. Follow the traillook for staining on wood and
damp insulation farther uphill. Sometimes the entry point is several feet away.
Experience #2: The “it only leaks when we shower” mystery
Another classic: a ceiling stain under a bathroom that grows slowly over time. Homeowners often suspect a supply line, but the real culprit is frequently
a drain, a shower pan issue, or a toilet wax ring. These leaks may only happen during use, so the ceiling dries between eventsjust enough to confuse you,
not enough to prevent damage.
The lesson: test one fixture at a time while someone watches below. Flush the toilet. Run the sink. Run the shower. If the stain worsens after one specific
activity, you’ve just turned your leak from a guessing game into a diagnosis.
Experience #3: The air conditioner that cried wolf
In warmer climates (and during humid seasons), people often blame roofs when the ceiling “leaks,” especially if it happens near an exterior wall. But plenty
of leaks come from HVAC condensateespecially when the AC runs for long stretches. A partially clogged condensate line can overflow only under heavy load,
which is why the leak seems to appear randomly.
The lesson: pay attention to timing. If the leak lines up with AC use, check the condensate drain, overflow pan, and nearby ductwork for condensation.
Also, look for duct sweatinguninsulated or poorly insulated ducts can drip steadily and create stains that look exactly like roof problems.
Experience #4: The patch that looked perfect… until it was painted
Many DIYers do a beautiful drywall patch and then skip stain-blocking primer because the ceiling “looks fine now.” A week later, the brown ring reappears
through the paint like a ghost with excellent timing.
The lesson: water stains often contain tannins and residue that can bleed through standard paint. A stain-blocking primer is the boring hero that keeps your
ceiling from reliving its worst moment.
Experience #5: The “we fixed the leak” moment that wasn’t
Sometimes the water stops and everyone celebratesuntil the next storm, the next big laundry day, or the next time the upstairs tub is used. Intermittent leaks
are the hardest because they feel solved. The most successful homeowners do one extra thing: they outline the stain lightly with pencil, then monitor it for
a couple of weeks after the repair. If the stain expands, something’s still wrong.
The overall lesson from leak veterans is simple: don’t rush the cosmetic repair. The best ceiling repair is the one you only do onceafter the source is fixed,
the cavity is dry, and you’ve given the situation enough time to prove it’s truly over.
Conclusion
To fix a leaking ceiling the right way, think in phases: make it safe, stop the water at the source, dry everything thoroughly,
then repair and repaint. Most of the frustration comes from skipping a stepespecially the “find the source” and “dry it completely” parts.
Handle the urgent stuff first (power off, water contained), diagnose the cause using timing and location clues, and don’t be shy about calling a pro when the
leak involves roofs, hidden plumbing, or electrical risk. Once the leak is truly solved, a clean patch and stain-blocking primer will make your ceiling look
like nothing ever happenedwhich is exactly the kind of ending a ceiling leak deserves.