
Table of Contents >> Show >> Hide
- Table of Contents
- Diagnose the Problem (in 3 minutes)
- Tools & Supplies You’ll Actually Use
- Prep: Shut Off Water & Protect the Sink
- Fix a Drip From the Spout
- Fix Leaks Around the Handle
- Fix a Leak at the Base of the Faucet
- Fix Low Flow or Weird Spray
- Fix Pull-Down / Side Sprayer Problems
- Fix Leaks Under the Sink
- When to Stop DIY and Call a Plumber
- Real-World “Been There” Experiences
- 1) The “I Shut Off the Water… Why Is There Still Water?” Moment
- 2) The “Mystery Screw” That Was Hiding in Plain Sight
- 3) Parts Matching: The Trip to the Store You Didn’t Plan
- 4) The Aerator Surprise: “I Swear the Faucet Got Worse”
- 5) The “I Tightened It… and Now It Leaks More” Lesson
- 6) The Victory Lap: Testing Like You Mean It
- Conclusion
A kitchen faucet has exactly one job: deliver water on demand, without turning your sink cabinet into a surprise indoor pool.
When it starts dripping, wobbling, sputtering, or leaking like it’s trying to communicate in Morse code, you don’t necessarily need
a plumberor a new faucet. Most faucet problems come down to a few wear parts (O-rings, cartridges, seats, washers) and a little
patient detective work.
This guide walks you through common kitchen faucet issuesdrips from the spout, leaks around the handle, puddles at the base,
low flow, and sprayer problemsplus exactly how to fix each one. We’ll cover single-handle and double-handle faucets, and the
big internal “faucet families”: cartridge, ceramic-disk, ball-type, and compression.
Table of Contents
- Diagnose the Problem (in 3 minutes)
- Tools & Supplies You’ll Actually Use
- Prep: Shut Off Water & Protect the Sink
- Fix a Drip From the Spout
- Fix Leaks Around the Handle
- Fix a Leak at the Base of the Faucet
- Fix Low Flow or Weird Spray
- Fix Pull-Down / Side Sprayer Problems
- Fix Leaks Under the Sink
- When to Stop DIY and Call a Plumber
- Real-World “Been There” Experiences
- Conclusion + SEO Tags (JSON)
Diagnose the Problem (in 3 minutes)
Before you take anything apart, watch where the water shows up. Faucet leaks are basically a “crime scene” with clues:
- Drips from the spout when the faucet is OFF: Worn cartridge/ceramic disk, worn seats/springs (some designs), or a failing compression washer.
- Water around the handle or dripping down from the handle area: Worn O-ring, packing nut loose, stem seal failing, or a cracked handle adapter.
- Puddle around the base on the countertop: Spout O-rings worn, base gasket failing, or the faucet is loose and letting water sneak under the escutcheon/trim.
- Low flow or chaotic spray pattern: Clogged aerator, debris in the cartridge/valve, mineral buildup, or a clogged sprayer head screen.
- Leak under the sink: Supply line connection loose, hose quick-connect not seated, or the sprayer hose is damaged.
Tools & Supplies You’ll Actually Use
You don’t need a plumber’s truck. Most faucet repairs are an “under one hour, under one swear jar” situation if you have:
Basic Tools
- Adjustable wrench (or two)
- Phillips and flathead screwdrivers
- Allen/hex keys (common for set screws)
- Needle-nose pliers
- Utility knife (for trimming old caulk if needed)
- Soft cloth or towel (to protect finishes)
- Flashlight or headlamp (welcome to cabinet life)
Helpful (Not Mandatory) Extras
- Basin wrench (for under-sink mounting nuts)
- Strap wrench (for stubborn decorative caps without scratching)
- Faucet/cartridge puller (when cartridges refuse to move)
- White vinegar (mineral buildup cleanup)
- Plumber’s silicone grease (for O-ringsuse sparingly)
Common Replacement Parts
- Faucet cartridge (brand/model specific)
- O-ring kit (spout O-rings are frequent culprits)
- Seats and springs kit (common on some single-handle designs)
- Rubber washer and stem assembly parts (compression faucets)
- Aerator (or aerator screen)
Pro tip: If you can, identify the faucet brand and model before buying parts. Many manufacturers provide parts diagrams and valve replacement steps in their support resources.
Prep: Shut Off Water & Protect the Sink
- Clear out the cabinet so you can access the shutoff valves without playing Twister.
- Turn off the hot and cold shutoff valves under the sink (clockwise).
- Open the faucet to relieve pressure and confirm water stops flowing.
- Plug or cover the drain with a stopper or ragbecause tiny screws love disappearing.
- Lay a towel in the sink to protect the finish if you drop a tool.
Fix a Drip From the Spout
A spout drip when the faucet is off is the classic “I can hear it from the couch” problem. The fix depends on your faucet type.
If you’re not sure which type you have, don’t worrymost kitchen faucets today are cartridge or ceramic-disk inside.
Step 1: Remove the Handle (Most Faucet Types)
- Look for a small cap or “plug button” on the handle. Pop it off gently with a flathead screwdriver (protect the finish with a cloth).
- Remove the handle screw (Phillips or hex/Allen set screw).
- Lift the handle straight off. If it’s stuck, wiggle gentlydon’t pry like you’re opening a paint can.
Fix A: Cartridge or Ceramic-Disk Faucet (Most Single-Handle Faucets)
If your faucet has a removable cartridge/valve assembly under the handle, the most reliable fix for a persistent drip is replacing that cartridge.
Cleaning mineral buildup can help temporarily, but worn sealing surfaces typically mean “replace me.”
- Remove the retaining hardware (a bonnet nut, mounting nut, or retaining clip depending on your design).
- Pull out the cartridge/valve straight up. Note its orientation (take a photo).
- Inspect for debris or damage. If it’s gritty, rinse the valve body and wipe clean. If it’s worn, replace the cartridge.
- Install the new cartridge in the same orientation (alignment tabs matter).
- Reassemble the retaining nut/clip, reinstall handle, and turn water back on to test.
Specific example: Many popular faucets use brand-specific cartridges (like common Moen and Delta designs). That’s why the “take a photo and match the part” step saves a lot of return trips.
Fix B: Ball-Type Faucet (Common on Older Single-Handle Models)
Ball-type faucets have a ball assembly with rubber seats and springs. When these wear out, drips happen.
The good news: repair kits are common and inexpensive.
- After removing the handle, remove the cap and collar (often with a wrench).
- Lift out the cam, washer, and ball.
- Use a small screwdriver or pick to remove the rubber seats and springs.
- Install new seats and springs from the kit.
- Reinstall the ball, cam, washer, and cap/collar; then reinstall the handle and test.
Fix C: Compression Faucet (Often Two-Handle, “Old School”)
If you have two handles and the faucet drips when off, you may have a compression-style stem with a rubber washer.
These are straightforward: replace the washer and inspect the seat.
- Remove the handle and unscrew the stem assembly.
- Replace the rubber washer at the end of the stem (and the O-ring if present).
- Inspect the valve seat inside the faucet body. If it’s pitted, it may need to be replaced or resurfaced with a seat tool.
- Reassemble and test.
Fix Leaks Around the Handle
If water appears around the handle or runs down the faucet body when you turn it on, your seals may be worn.
This is usually an O-ring or a loose packing nut.
Option 1: Tighten the Packing Nut (Common in Some Designs)
- Shut off water and remove handle.
- Locate the packing nut (often a hex-shaped nut around the stem).
- Tighten it slightlythink “snug,” not “I lift weights.”
- Turn water back on and test. If it still leaks, move to the O-ring fix.
Option 2: Replace the Handle/Stem O-Ring
- Remove the handle.
- Pull the stem or cartridge as needed to access the O-ring.
- Match the old O-ring size exactly (take it to the store or use a kit).
- Apply a tiny amount of silicone plumber’s grease to the new O-ring and reinstall.
- Reassemble and test.
Don’t over-grease: Grease is like cologneone dab is charming; a whole bottle is a public nuisance.
Fix a Leak at the Base of the Faucet
A puddle around the faucet base often points to worn spout O-rings or a failing base gasket. The water may only show up when the faucet is on,
which makes it extra sneaky.
Fix A: Replace Spout O-Rings (Very Common)
- Shut off water and relieve pressure.
- Remove the handle if required to lift the spout (varies by model).
- Lift the spout straight up. You may need to remove a retaining collar or set screw first.
- Remove old O-rings and clean the spout base and faucet body (wipe away grit/mineral buildup).
- Install new O-rings (exact size), lightly grease, and reinstall the spout.
- Turn water back on and test for leaks.
Fix B: Tighten a Loose Faucet (If It Wobbles)
A loose faucet lets water creep under the base and can stress supply lines. If the faucet moves when you touch it, tighten the mounting hardware underneath.
- Under the sink, locate the mounting nut(s) or bracket holding the faucet to the counter/sink.
- Use a basin wrench or adjustable wrench to tighten snugly.
- If water has been getting under the base, consider lifting the faucet and replacing the base gasket or applying a thin bead of kitchen/bath silicone (only if your model requires it).
Fix Low Flow or Weird Spray
If your faucet suddenly feels like it’s sipping water through a coffee stirrer, start with the aerator. It’s the small screen at the tip of the spout,
and it’s a magnet for grit and mineral buildup.
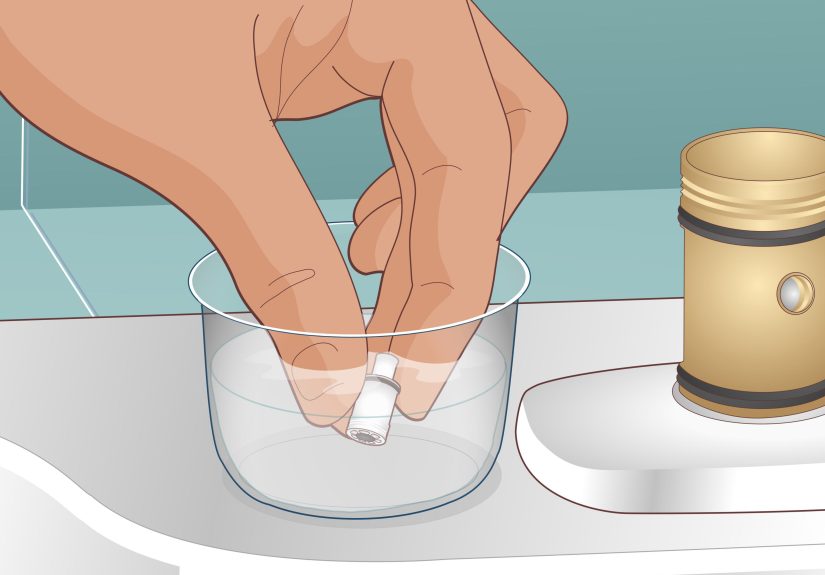
Fix A: Clean the Aerator
- Unscrew the aerator (by hand or with a cloth-wrapped pliers).
- Rinse the screen and parts; remove debris with an old toothbrush.
- For mineral buildup, soak the aerator in white vinegar for 20–60 minutes, then rinse.
- Reinstall and test flow.
Fix B: Flush Debris from the Faucet (After Repairs or Plumbing Work)
- With the aerator removed, turn on the faucet for about a minute.
- Let water run and flush any loose debris.
- Turn off, reinstall aerator, and test.
Fix C: If It’s Still Low Flow… Check the Cartridge or Supply Lines
Debris can lodge in the cartridge, especially after water shutoffs or plumbing work. If cleaning the aerator doesn’t help, inspect/replace the cartridge.
Also check that the shutoff valves under the sink are fully open.
Fix Pull-Down / Side Sprayer Problems
Pull-down faucets and side sprayers add convenienceand a few extra places for water to misbehave. Common issues: leaky spray head, weak spray, and leaks at quick-connect fittings.
Fix A: Clean the Sprayer Head Screen
- Unscrew the sprayer head (if your model allows) or remove the screen/filter at the head.
- Rinse and soak mineral deposits in vinegar if needed.
- Reassemble and test.
Fix B: Check the Hose Quick-Connect
- Under the sink, locate the hose connection point (often a quick-connect with a clip).
- Make sure the connector is fully seated and the clip is installed correctly.
- If leaking persists, inspect the small O-ring inside the connector and replace if worn.
Fix C: Sprayer Won’t Switch Modes or Won’t Return to Stream
Mode buttons can stick due to mineral buildup. Soaking the sprayer head (or its internal parts) in vinegar and rinsing thoroughly often restores function.
If the diverter inside the faucet is failing (water comes out of both spout and sprayer), you may need a diverter replacementmodel-specific.
Fix Leaks Under the Sink
If you see drips under the sink, act fast. Water damage is the kind of “home improvement” nobody puts on Pinterest.
Common Under-Sink Leak Points
- Supply line connections at the shutoff valves or faucet tailpieces
- Sprayer/pull-down hose connections (quick-connect fittings)
- Weight/guide contact points (hose rubbing can eventually wear through)
Fix Steps
- Dry everything with a towel so you can see fresh water clearly.
- Turn the faucet on and watch each connection point.
- If a fitting leaks, tighten slightly (a quarter turn at a time).
- If tightening doesn’t stop it, disassemble and inspect for a damaged washer, missing gasket, cracked fitting, or a mis-seated connector.
- Replace worn supply lines if the line itself is weeping or corroded.
When to Stop DIY and Call a Plumber
DIY is fantasticuntil it isn’t. Consider professional help if:
- The shutoff valves won’t shut off and you can’t safely isolate water.
- The faucet body is cracked or heavily corroded.
- A cartridge is seized and you’re applying “break it” levels of force.
- You discover damaged pipes, rotted cabinet flooring, or mold.
- The leak continues despite replacing the correct wear parts (might indicate valve body damage).
Real-World “Been There” Experiences
People rarely write about faucet repair until they’ve lived through the tiny drama of it. Here are real-world experiences that come up again and again
when homeowners tackle “How to fix a kitchen faucet” for the first timethink of this as the field guide for avoiding the most common DIY facepalms.
1) The “I Shut Off the Water… Why Is There Still Water?” Moment
Plenty of folks turn the shutoff valves, start disassembly, and then panic when water still dribbles out. That’s normal: there’s leftover water in the lines,
and a faucet can hold some in its body. The fix is simpleopen the faucet after shutting off the valves and let it drain. The actual red flag is
continuous flow that doesn’t slow down; that usually means a shutoff valve is failing or not fully closed. A helpful habit is to test shutoff valves
before you ever begin: turn them off, open the faucet, and confirm the water stops. It’s a boring test, and boredom is a gift in plumbing.
2) The “Mystery Screw” That Was Hiding in Plain Sight
Faucet handles love to disguise their fasteners. The screw might be under a decorative cap, behind a tiny plug button, or hidden in a set screw hole
at the back of the handle. People often start prying the handle off (and scratching finishes) when the real solution is a 30-second search for the
stealth screw. A flashlight and a gentle poke around the handle base usually reveals it. If you remember one thing, remember this:
if a handle won’t lift off with light effort, a fastener is still attached somewhere.
3) Parts Matching: The Trip to the Store You Didn’t Plan
A classic DIY story is buying a “universal” part and discovering your faucet did not receive the memo. Cartridges, especially, are often brand- and
model-specific. The easiest way to dodge multiple trips is to take a clear photo of the faucet and the part you remove, and bring the old cartridge/O-ring
with you to match. Many people also learn (pleasantly) that some manufacturers will provide replacement parts under warranty or at low cost if you have
the model information. In practice, identifying the faucet brandsometimes stamped on the base, sometimes found on documentationturns an
annoying scavenger hunt into a straightforward parts run.
4) The Aerator Surprise: “I Swear the Faucet Got Worse”
Aerators collect debris like lint traps collect lint. After plumbing work, a water shutoff, or even a city main repair, tiny particles can wash into your
faucet and clog the screen. People often assume the entire faucet is failing when the real culprit is a $5 aerator cleaning session. The “worse after repair”
complaint is common because disassembly and reassembly can shake loose sediment, which then rushes toward the smallest openingthe aerator.
A surprisingly effective routine is: remove the aerator, run the faucet for a minute to flush debris, then clean/reinstall. It’s a small step that can make you
feel like a magician.
5) The “I Tightened It… and Now It Leaks More” Lesson
Over-tightening is the villain that wears a helpful costume. Compression fittings and plastic quick-connects can deform, crack, or pinch a washer if you crank
down too hard. Experienced DIYers tend to tighten in small increments (quarter turns), retest, and stop as soon as the leak is gone. If a leak persists after
light tightening, it often means the washer is damaged, the O-ring is missing, or the connector isn’t seated correctlyproblems that force won’t solve.
The win here is patience: gentle adjustments plus a careful inspection beats brute strength every time.
6) The Victory Lap: Testing Like You Mean It
A satisfying moment is when the drip is gone and you want to declare success immediately. But seasoned DIY folks do a “victory lap test”:
run hot and cold, check around the handle, watch the base, inspect under the sink with a flashlight, and operate the sprayer if you have one.
Many leaks only show up under pressure or when you swing the spout. Spending two extra minutes testing can save you a long, damp surprise later.
Bottom line: faucet repair is less about heroic wrenching and more about calm troubleshooting. Take photos, go slowly, protect the finish,
and treat every tiny part like it’s trying to escape. Because sometimes it is.
Conclusion
Fixing a kitchen faucet usually comes down to three moves: identify where the leak starts, replace the correct wear part (cartridge, O-ring, washer, aerator),
and reassemble carefully without overtightening. Start with the simplest possibilitiescleaning the aerator and checking obvious loose connectionsthen move
to cartridge/O-ring replacement if the problem persists. With a few tools and the right part, most homeowners can eliminate drips, restore water pressure,
and stop wasting waterwithout replacing the whole faucet.


