
Table of Contents >> Show >> Hide
- First, What Counts as “Wide” on a Miter Saw?
- The Three Smart Options When the Board Is Wider Than Your Saw
- Set Yourself Up for Straight, Safe, Repeatable Cuts
- Accuracy Habits That Make Wide Boards Behave
- Common Problems (and the least annoying fixes)
- When You Should Not Try to Cut a Wide Board on a Miter Saw
- Experience Notes: The “Wide Board” Learning Curve
- Conclusion
Cutting a wide board with a miter saw sounds like a simple sentence until you meet the moment where the board is wider than your saw’s “one-and-done” cutting capacity.
Suddenly, your trusty chop saw is staring at that 1×10 like: “We need to talk.”
This guide walks you through the real-world options for handling wide stock with a miter sawwhat works, what’s risky, what’s smarter with a different tool, and how to get cleaner results without turning your project into modern art.
Safety note: Miter saws can seriously injure you if used incorrectly. If you’re new to tools (or under 18), don’t operate a miter saw without hands-on training and qualified adult supervision. Always follow your saw’s manual and local shop safety rules.
First, What Counts as “Wide” on a Miter Saw?
“Wide” doesn’t mean “wide in general.” It means “wider than your saw can crosscut in a single pass at the angle you need.”
Every miter saw has a maximum crosscut capacity, and it changes based on:
- Blade size (10-inch vs 12-inch, etc.)
- Sliding vs non-sliding design
- Miter angle (0° vs 45°) and bevel angle (flat vs bevel cut)
- How the board is positioned (flat on the table vs nested/standingonly when appropriate and allowed by the manufacturer)
How to tell your saw’s true capacity (without guessing)
The only reliable answer is your specific saw’s manual or spec sheet. Marketing blurbs are helpful, but your manual is the final boss.
If you’re cutting a wide board for trim or shelving, check capacity at 0° miter and also at the angle you actually need.
A saw that handles a board at 0° may fall short when you swing to 45°.
A quick reality check: many non-sliding miter saws top out around the “standard trim board” range, while sliding compound miter saws are designed specifically to increase crosscut capacity for wider stock.
If you regularly work with 1x10s, 1x12s, or wide shelving panels, that sliding feature stops being a luxury and starts being a sanity tool.
The Three Smart Options When the Board Is Wider Than Your Saw
If your board is wider than your saw can cut in one pass, you have three practical routes. Which one you choose depends on how wide the board is, how precise the cut must be, and how comfortable you are prioritizing safety over “I can totally make this work.”
Option 1: Use a sliding miter saw (or a saw with bigger capacity)
This is the cleanest option because it keeps you inside the tool’s intended design. A sliding compound miter saw lets the blade travel forward and backward, increasing how wide a board you can crosscut.
If your projects often involve wide boardsthink closet shelves, bench tops, or wide fasciathis is the “buy once, cry once, then stop crying forever” solution.
Even then, don’t assume bigger blade equals bigger capacity in every case. Some 10-inch sliders compete surprisingly well with 12-inch saws in crosscut capacity, while being lighter and easier to tune.
The right choice is the one that matches what you cut most often (and fits your space without forcing you to store it in a hallway like a confused robot dog).
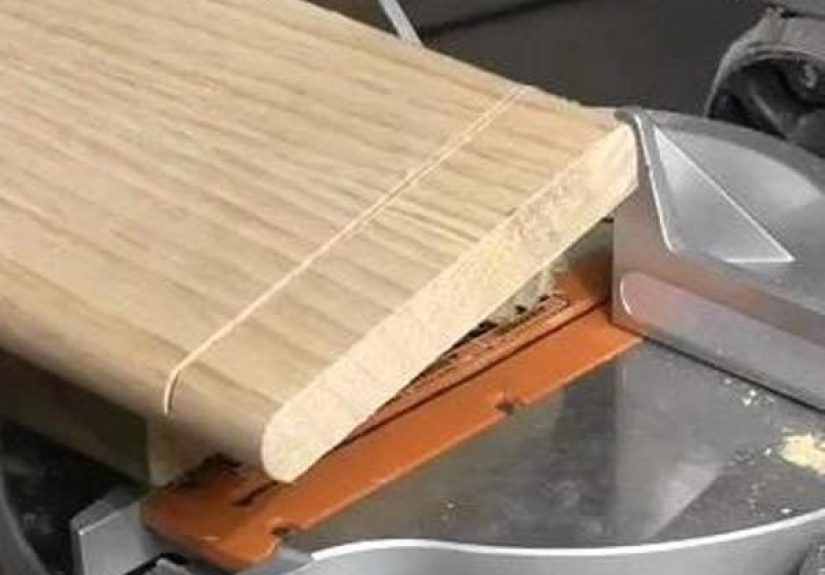
Option 2: The two-pass “flip cut” (only with experience and strict safety discipline)
You’ll often hear about a workaround where you cut as far as you can from one side, then rotate the board and complete the cut from the other side.
Conceptually, it’s simple: two partial cuts that meet in the middle.
Here’s the catch: the cut must align perfectly on both sides, and wide boards are more likely to rock, twist, or shift if your support and clamping aren’t excellent.
Misalignment can cause a step, a ridge, or an ugly “double-kerf smile” that shows up exactly where you wanted the joint to disappear.
Use this method only if you’re confident in your setup and supervision, and only if your saw manufacturer allows the workpiece orientation you’re using.
When in doubt, choose a different tool or have a lumber yard make the cut. Pride is expensive; fingers are priceless.
Option 3: Use a different tool that’s better for wide stock
Sometimes the most “pro” move is admitting a miter saw isn’t the best tool for the job.
For wide boards, these are often better choices:
- Circular saw + straightedge guide for wide shelving and panels
- Track saw for clean, repeatable wide cuts with excellent control
- Table saw + crosscut sled for furniture-grade accuracy (when the workpiece size is appropriate)
If the cut needs to be dead-straight across a board that’s well beyond miter saw capacity, a guided circular saw approach is often safer and more accurate than forcing a two-pass flip cut.
Set Yourself Up for Straight, Safe, Repeatable Cuts
Support matters more than people admit
Wide boards are often also long boards. If one side droops off the table, the board can lift, pivot, or bindruining accuracy and increasing risk.
Use stable outfeed/side support so the board stays level with the saw’s table.
The goal is boring: no tipping, no teetering, no “it was fine until it wasn’t.”
Clamp like you mean it
If a cut requires your hands to be uncomfortably close to the blade path, the correct answer is not “be braver.”
It’s clamp the workpiece using the saw’s clamp or an appropriate hold-down system.
Many safety guides explicitly warn against freehand operations and emphasize securing material against the fence and table.
Clamping is also an accuracy upgrade: it prevents the board from creeping during the cut, which is one of the sneakiest causes of slightly-off miters that ruin tight-fitting trim.
Use a sacrificial backer for cleaner edges
Wide boards love to tear out at the back edge of the cutespecially plywood, prefinished boards, and any wood with dramatic grain.
A sacrificial backer (a scrap board placed behind the workpiece) helps support fibers so the blade exits cleanly.
If your project is stain-grade, this one simple trick can save you from sanding for the rest of your natural life.
Stop blocks for batch cuts (without the “pinch point” drama)
If you’re cutting multiple pieces to the same lengthlike closet cleats or face-frame partsa stop block system improves consistency and speed.
But it has to be set up so offcuts don’t get trapped between the blade and a rigid stop, which can create binding or kickback risk.
Use a stop setup designed for miter saw stations, and follow proven shop practices for repeat cuts.
Accuracy Habits That Make Wide Boards Behave
Mark like you want to be right the first time
With wide boards, tiny angle errors turn into visible gaps fast.
Use clear marks, indicate the waste side, and measure from a consistent reference edge.
If you’re building something like a floating shelf, mark and cut test pieces firstbecause the “real board” always costs more than your scrap board.
Let the blade reach full speed, then keep the feed steady
For clean results, the blade should be at full speed before contacting the wood, and the cut should be smooth rather than forced.
Pushing too hard can increase tear-out, flex the board slightly, and make the saw feel like it’s fighting you (because it is).
A sharp blade and a steady, controlled cut beat “more pressure” every time.
Pick the right blade for the job
A framing blade can chew through studs quickly, but it’s not a love letter to your finish work.
For clean crosscuts in hardwoods and trim, a higher-tooth-count crosscut blade generally leaves a smoother edge.
If you’re cutting plywood or veneered panels, a blade designed to reduce splintering is worth it.
And if the blade is dull? Even a “perfect” setup will still cut like a butter knife.
Common Problems (and the least annoying fixes)
- Tear-out on the back edge: Add a sacrificial backer, verify blade sharpness, and slow the cut slightly.
- Cut isn’t square: Check saw calibration (fence, bevel, and detents). A slightly misaligned fence can haunt every wide cut.
- Joint gaps on miters: Make test cuts and sneak up on final angles. Wide trim magnifies small errors.
- Board rocks on the table: Wide boards warp more than we want to admit. Choose flatter stock or use safe, stable support techniques.
- Burn marks: Often a dull blade, too-slow feed, or sticky pitch buildup. Clean/replace the blade and keep the cut controlled.
When You Should Not Try to Cut a Wide Board on a Miter Saw
Some situations are a hard “no,” even if the internet says it’s possible:
- The board is too wide to be controlled safely, even with workarounds.
- The piece is too small to secure without putting hands near the blade path.
- The stock is heavy, twisted, or unstable and won’t sit firmly against the fence and table.
- You’re tempted to “freehand” it because clamps feel inconvenient.
In those cases, switch tools, change the cut plan, or have the material cut by a shop or lumber yard.
The best woodworking skill is knowing when to stop improvising.
Experience Notes: The “Wide Board” Learning Curve
The first time most people try to cut a wide board with a miter saw, it starts with optimism and ends with a new vocabulary word: capacity.
You line up a beautiful 1×10, you lower the head gently, and halfway through the cut the blade runs out of travel like it hit an invisible wall.
That’s the moment you realize a miter saw isn’t “a saw that cuts anything,” it’s “a saw that cuts a specific range of things really well.”
The next phase is bargaining. People start doing mental gymnastics:
“If I just scoot the board…”
“If I just angle it…”
“If I just hold it tighter…”
And this is where the project tries to teach the most important lesson in the shop: control beats creativity when blades are spinning.
Wide boards amplify every little issueslight warping, uneven support, a fence that’s 99% square instead of 100%, or a blade that’s “fine” until it meets hardwood.
A surprisingly common “aha” moment is how much support changes everything.
People think accuracy lives in the saw, but a lot of it lives in what the board is doing before the cut even begins.
If the board droops off the side, it can twist the cut line just enough to ruin a mitered joint.
If the board rocks, it can shift at the worst possible second.
Once you’ve seen a wide board move mid-cut (even slightly), you stop treating support stands like optional accessories and start treating them like part of the tool.
Then there’s the classic overconfidence trap: repeated cuts.
You make one good cut and feel unstoppableso you start batch cutting without a stop system, measuring quickly, eyeballing marks, and telling yourself you’ll “sand it to fit.”
But wide boards don’t sand their way into precision very gracefully, especially when you’re trying to make matching shelf parts or consistent trim lengths.
This is when a stop block system (set up safely and correctly) feels like a superpower: it turns “pretty close” into “actually identical,” which is the difference between a project that looks homemade and one that looks intentional.
Another real-world lesson: blade quality is not a woodworking conspiracy to sell you expensive circles.
A sharp, appropriate blade can make a wide-board cut feel controlled and clean, while a dull or wrong blade makes it feel like the saw is complaining in Morse code.
Burn marks, splintering, ragged edgespeople often blame technique first, but the blade is frequently the quiet culprit.
The funny part is that upgrading the blade can feel like upgrading your skill overnight, which is both satisfying and slightly insulting.
Finally, there’s the maturity stage: choosing the right tool for the cut.
A lot of DIYers start out thinking the miter saw is the “main saw.”
Eventually, they realize it’s the “fast, accurate crosscut specialist.”
For truly wide stock, a guided circular saw or track saw often delivers better results with less drama.
The win isn’t proving the miter saw can do itit’s finishing the cut safely, cleanly, and with a board that still looks like it belongs in your project.
That’s not defeat. That’s woodworking wisdom.
Conclusion
To cut a wide board with a miter saw, start by respecting the saw’s real crosscut capacity, then choose the safest option: a sliding saw when possible, an appropriate alternative tool when the board is truly wide, or a carefully controlled workaround only when you have the right setup and experience.
Wide boards punish sloppy support and reward careful planningso stabilize the stock, secure it properly, and prioritize clean, controlled cuts over “just make it work.”


