
Table of Contents >> Show >> Hide
- Meet Summer Squash (And Why It Gets Soggy So Easily)
- Before You Cook: 7 Rules for Not-Sad Squash
- How to Cook Summer Squash 9 Ways
- 1) Roast It (Sheet-Pan Golden Edges)
- 2) Broil It (Fast Char Without Firing Up the Grill)
- 3) Grill It (Smoky, Sweet, and Actually Not Mushy)
- 4) Sauté It (Hot Pan, Single Layer, Golden Pieces)
- 5) Steam It (Tender-Crisp, Minimal Effort, Maximum Side-Dish Energy)
- 6) Bake It (Cheesy Gratin, Casserole, or “Everybody Loves This”)
- 7) Stuff It and Bake (A Great Use for Big Squash)
- 8) Air-Fry It (Crisp-Tender in Under 10 Minutes)
- 9) Grate It Into Fritters or Patties (Crispy Outside, Soft Inside)
- Seasoning Ideas That Make Summer Squash Taste Like a Plan
- Storage and Leftover Moves
- Common Problems (And How to Fix Them)
- of Real-World Squash Experiences (The Lessons Everyone Learns Eventually)
- Conclusion
Summer squash is the friend who shows up to the party with a chill vibe, a neutral outfit, and absolutely no plan for what’s happening next.
Zucchini, yellow squash, pattypanthese veggies are mild, flexible, and ready to play whatever role you need: crispy side dish, cheesy casserole
co-star, or “help-I-grew-too-much” weeknight hero. The only catch? Summer squash is basically a tiny water balloon wearing a green jacket.
Treat it gently and it turns mushy. Treat it smart and it becomes golden, seared, charred, tender-crisp perfection.
This guide walks you through how to cook summer squash nine different waysroasted, grilled, sautéed, steamed, baked,
simmered, frittered, broiled, and air-friedplus seasoning ideas and real-world tricks to keep it from going soggy.
Whether you’re staring down a farmer’s market haul or a garden that won’t stop producing, this is your game plan.
Meet Summer Squash (And Why It Gets Soggy So Easily)
“Summer squash” is a category, not a single vegetable. It includes zucchini, yellow crookneck, straightneck, and adorable UFO-looking pattypan.
They’re harvested young with tender skins and soft seeds. They’re also very high in water, which is great for hydration and not-so-great
for crispness. When squash heats up, that moisture rushes out. If your pan is crowded or your heat is low, the squash steams in its own juices and
turns into a sad, slippery situation.
The fix is simple: use higher heat, give it space, and choose the right cut for the job. Sometimes you’ll salt it first to draw out
water. Sometimes you’ll skip salting so it doesn’t dry out (hello, grilling). And almost always, you’ll cook it just until tender-crispnot until it
forgets it was once a vegetable.
Before You Cook: 7 Rules for Not-Sad Squash
- Pick smaller squash when you can. Medium squash tend to be sweeter and less seedy; giant ones are better for shredding into fritters.
- Cut it thicker for high-heat cooking. Think 1/4- to 1/2-inch slices for sautéing and roasting so it keeps structure.
- Don’t crowd the pan. Crowding = steaming. Steaming = “Why is this wet?” Spread it out or cook in batches.
- High heat is your friend. Roasting at 450°F+ or searing in a hot skillet helps moisture evaporate quickly and boosts browning.
- Salt strategically. Salting can draw out water for sautéing/frying, but for grilling you often want to skip pre-salting.
- Dry is a seasoning. If you salt-drain, pat dry thoroughlywater on the surface blocks browning.
- Stop earlier than you think. Summer squash keeps cooking from residual heat. Pull it when it’s tender-crisp, not collapsing.
How to Cook Summer Squash 9 Ways
Each method below includes: best cut, how to avoid sogginess, and a few flavor ideas. Mix and match based on what you’re servingand how much time
you have before everyone starts “just snacking” and dinner mysteriously disappears.
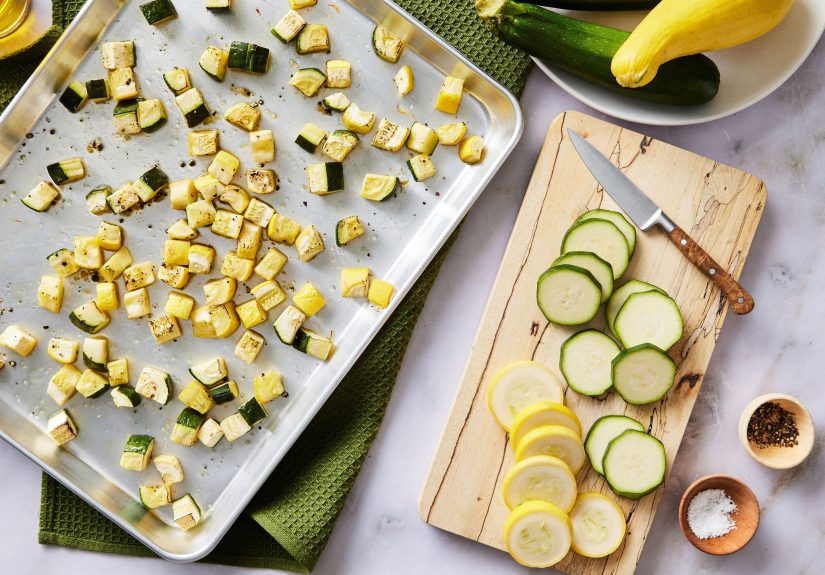
1) Roast It (Sheet-Pan Golden Edges)
Roasting is the easiest way to make summer squash taste like it’s trying its best. High heat evaporates moisture fast and encourages browning.
For classic roasted summer squash, slice zucchini or yellow squash into half-moons (about 1/2-inch thick) or cut into spears.
- Heat oven to 450°F to 475°F.
- Toss squash with olive oil, salt, pepper. Add garlic powder or smoked paprika if you like.
- Spread in a single layer on a sheet pan. Make sure pieces are not touching.
- Roast until browned at the edges and tender-crisp, usually 10–25 minutes depending on thickness.
Flavor moves: Parmesan + lemon zest at the end; chili flakes + honey; za’atar + yogurt drizzle; or pesto spooned over hot squash.
Pro tip: If you want extra browning, put the cut sides down (spears or planks) so more surface hits the hot pan.
2) Broil It (Fast Char Without Firing Up the Grill)
Broiling is roasting’s dramatic cousin: same oven, more intensity, quicker payoff. Broiled squash is great when you want a little char for salads,
grain bowls, or a yogurt-dill sauce moment.
- Set broiler to high. Place a rack 4–6 inches from the heat source.
- Cut squash into planks or thick rounds (thicker is safer under the broiler).
- Toss with oil, salt, pepper. Optional: cumin + coriander for a warm, toasty vibe.
- Broil, flipping once, until blistered and tender, about 8–12 minutes total.
Flavor moves: Finish with lemon juice and chopped herbs (basil, mint, dill). Or go full snack mode with a sprinkle of grated cheese
and a dip on the side.
3) Grill It (Smoky, Sweet, and Actually Not Mushy)
Grilling brings out sweetness and adds smoke. The trick is cutting for control: long planks are easier to flip than tiny coins, and they char nicely.
For grilling, skip pre-saltingyou want the squash to stay juicy enough to handle heat without drying out.
- Heat grill to medium-high and clean/oil the grates.
- Slice into 1/3- to 1/2-inch planks or lengthwise halves (depending on size).
- Brush with oil; season with salt and pepper right before grilling.
- Grill until browned and tender, turning once or twice, about 6–10 minutes total.
Flavor moves: Toss grilled squash with a mustardy vinaigrette; add shaved Parmesan and basil; or serve with herby yogurt sauce and
chili oil. Grilled squash also loves joining skewers with onions, tomatoes, and peppers.
4) Sauté It (Hot Pan, Single Layer, Golden Pieces)
Sautéed squash is the weeknight MVPif you respect two rules: high heat and no crowding. If you want extra insurance
against sogginess, you can salt the slices briefly, then pat dry.
- Slice into 1/4- to 1/2-inch rounds or half-moons.
- Optional anti-sog trick: Salt lightly in a colander for 15–30 minutes, then pat very dry.
- Heat a skillet over medium-high; add oil (or oil + butter).
- Add squash in a single layer. Let it sear undisturbed until golden, then flip.
- Cook just until tender, usually 6–10 minutes total.
Flavor moves: Garlic and cherry tomatoes; lemon + chive butter; soy sauce + sesame + scallions; or a pinch of sumac and fresh mint.
Texture tip: If it’s releasing a lot of water, your pan might be crowded or not hot enough. Spread out or bump the heat.
5) Steam It (Tender-Crisp, Minimal Effort, Maximum Side-Dish Energy)
Steaming doesn’t chase browningso it’s not the method for “crispy.” But it is excellent when you want clean flavor, fast cooking, and squash that
stays bright and tender. It’s also a great starting point for a quick mash, puree, or tossed-with-butter situation.
- Slice squash into rounds or half-moons.
- Steam over simmering water until tender-crisp, about 3–6 minutes (depending on thickness).
- Drain well and season immediately.
Flavor moves: Butter + black pepper; olive oil + lemon; miso butter; or a shower of herbs with a pinch of flaky salt.
Add toasted nuts for contrast (because texture deserves a seat at the table).
6) Bake It (Cheesy Gratin, Casserole, or “Everybody Loves This”)
Baking is where summer squash goes from “side dish” to “potluck legend.” Think gratins, casseroles, or layered bakes with tomatoes and onions.
Because squash releases water, use steps that help manage moisture: salt-drain slices, add breadcrumbs, or pair with ingredients that absorb liquid.
- Heat oven to 400°F.
- Slice squash (or grate it) and remove excess moisture if needed (salt-drain or squeeze).
- Combine with aromatics (onion/garlic), cheese, and a binder (egg, flour, or a little roux-style sauce), depending on the recipe style.
- Top with breadcrumbs and bake until bubbly and browned, often 25–40 minutes.
Flavor moves: Gruyère + thyme; Parmesan + basil; cheddar + green onion; or feta + dill.
Smart shortcut: Use leftover roasted squash in a bakeless water, more flavor.
7) Stuff It and Bake (A Great Use for Big Squash)
When squash gets bigger, it’s not a tragedyit’s a vessel. Halved zucchini or fat yellow squash can be hollowed slightly and filled with something
bold: sausage and rice, herby breadcrumbs, white beans and tomatoes, or a veggie-packed quinoa mix.
- Heat oven to 400°F.
- Halve squash lengthwise. Scoop out a little center if needed (save it for sautéing).
- Season the shells and pre-bake 8–12 minutes to get a head start.
- Fill, then bake until the filling is hot and squash is tender, about 12–20 minutes more.
Flavor moves: Marinara + mozzarella; taco-seasoned beans + corn; lemony couscous + feta; or spicy ground turkey + herbs.
Finish with fresh herbs so it tastes like summer instead of “Tuesday.”
8) Air-Fry It (Crisp-Tender in Under 10 Minutes)
The air fryer is basically a tiny convection oven with an attitude. It blasts hot air around your squash, encouraging browning without
the long preheat and without turning your kitchen into a sauna. The #1 rule here is: single layer.
- Cut into 1/2-inch slices, half-moons, or sticks.
- Toss with a little oil, salt, pepper. Add garlic powder, Italian seasoning, or paprika.
- Air-fry at 380°F to 400°F until tender-crisp, about 7–10 minutes, shaking or flipping halfway.
Flavor moves: Parmesan at the end; lemon and herbs; ranch seasoning (yes, it works); or a sprinkle of chili-lime seasoning.
Leftover hack: Reheat in the air fryer for a few minutes to bring back the texturemicrowaving is… not the vibe.
9) Grate It Into Fritters or Patties (Crispy Outside, Soft Inside)
This is the best method when your squash is watery, huge, or multiplying faster than your grocery budget. Fritters/patties work because you
remove water first, then bind the shreds with egg and a little flour, and fry until golden.
- Grate squash (and onion if you like). Salt lightly and let sit 15–30 minutes.
- Squeeze hard in a clean towel until noticeably drier. Don’t skip thiswater is the enemy of crisp.
- Mix with egg, a small amount of flour/cornmeal, cheese (optional), herbs, salt, pepper.
- Pan-fry in a thin layer of oil until golden, about 3 minutes per side.
Flavor moves: Add feta + dill; cheddar + scallions; or cumin + cilantro. Serve with sour cream, Greek yogurt, or a squeeze of lemon.
If you want them extra crisp, keep the batter light and let the pan do the work.
Seasoning Ideas That Make Summer Squash Taste Like a Plan
- Classic: olive oil + garlic + Parmesan + lemon
- Mediterranean: oregano + balsamic + tomatoes + basil
- Spicy-sweet: chili flakes + honey + lime
- Middle Eastern: za’atar + yogurt + mint
- Umami: soy sauce + sesame oil + scallions
- Smoky: smoked paprika + cumin + charred lemon
Storage and Leftover Moves
Cooked summer squash keeps in the fridge for a few days in an airtight container. Roasted and air-fried versions tend to reheat better than steamed.
For best texture, reheat in a hot skillet, oven, or air fryer (quick blast) instead of the microwave. Leftovers are great tossed into pasta, folded
into omelets, piled on toast with ricotta, or added to grain bowls with a punchy sauce.
Common Problems (And How to Fix Them)
- “It’s watery.” Use higher heat, cook in batches, and consider salting/patting dry for sautéing/frying.
- “No browning happened.” Your pan was crowded or not hot enough. Give pieces space and time to sear before stirring.
- “It’s mushy.” Pull it earlier. Tender-crisp beats tender-collapse.
- “It’s bland.” Finish with acid (lemon/vinegar), herbs, cheese, or a sauce. Squash loves a strong supporting cast.
of Real-World Squash Experiences (The Lessons Everyone Learns Eventually)
In many kitchens, summer squash follows a predictable storyline: someone buys it with the best intentions, chops it into polite little coins, and
then tosses it into a pan that’s already full of other things. Ten minutes later, the pan looks like it’s hosting a small lake. The squash is pale,
soft, and somehow both wet and dry at the same time. The cook stares at it and thinks, “Is this my fault?” The good news is: yes (kind of), but
alsothis is an extremely common rite of passage.
The first big “aha” moment people report is learning that squash behaves more like a moisture-rich fruit than a sturdy vegetable. That means the
usual instinctslow heat, lots of stirring, “let’s keep it from burning”can backfire. The second “aha” is realizing that browning needs space.
Once home cooks try cooking zucchini in a single layer, they suddenly get those golden edges that make the vegetable taste toasted instead of
watery. It feels like discovering a cheat code, except the cheat code is patience and a bigger skillet.
The third experience tends to be a personality shift about salting. Many cooks learn to salt and drain zucchini for sautéing or frying, and it’s a
game-changeruntil they do it before grilling and wonder why their planks feel oddly dry. That’s when the nuance clicks: salting is a tool, not a
rule. Use it when you want to pull out water (fritters, patties, some skillet dishes). Skip it when you want the vegetable to stay juicy enough to
take on char (grilling).
Then there’s the garden-glut phase. This is where summer squash becomes less of an ingredient and more of a lifestyle. People start leaving
zucchini on neighbors’ porches like it’s a reverse prank. This is also where the “big zucchini” strategy develops: smaller squash gets roasted,
grilled, and sautéed; larger squash gets shredded and squeezed for fritters, muffins, or casseroles where texture is managed on purpose. Once you
stop trying to treat an oversized squash like a delicate side dish, everything gets easier.
Finally, there’s the air-fryer discovery. For a lot of busy households, this method is the moment summer squash becomes a repeatable weeknight win:
chop, toss with oil and seasoning, single layer, quick blast, done. No babysitting. No swampy skillet. And because air-fried squash tastes best when
it’s served immediately, it encourages a habit that improves almost every method: cook it, season it, eat it while it’s hot, and don’t overthink it.
Summer squash doesn’t need a complicated planjust the right heat, the right space, and permission to be simple and delicious.
Conclusion
If you remember only one thing about how to cook summer squash, make it this: water management is the whole game.
High heat, enough space, smart cuts, and strategic salting turn zucchini and yellow squash into something you’ll actually look forward to eating.
Pick a method based on your moodroasted for deep flavor, grilled for smoke, sautéed for speed, air-fried for crisp-tender magic, fritters for
maximum comfortand let summer squash do what it does best: show up everywhere and still somehow be welcome.


