Table of Contents >> Show >> Hide
- Why a Metal Shelf Makes a Surprisingly Great Workbench Base
- Before You Touch a Screw: Choose the Right Shelf and Plan Your Bench
- Step-by-Step: Turn a Metal Shelf Into a Rock-Solid Workbench
- Step 1: Strip it down and inspect like a detective
- Step 2: De-rust, clean, and optionally paint
- Step 3: Set the work surface height and lock the frame square
- Step 4: Build a top that actually behaves like a bench
- Step 5: Choose your top style (three reliable options)
- Step 6: Attach wood to metal (without inventing new swear words)
- Step 7: Add edge banding and clamp-friendly overhang
- Step 8: Reinforce for heavy tools and real-world abuse
- Step 9: Level it (because “close enough” becomes “why is my drawer rolling?”)
- Step 10: Add the shop upgrades that make it feel custom
- Workbench Top Tips That Save You Later
- Safety Notes: Because ER Trips Are a Terrible Hobby
- Troubleshooting: Common Problems and Simple Fixes
- Realistic Time and Budget
- Common Build Experiences and Lessons Learned (Extra 500+ Words)
- Conclusion
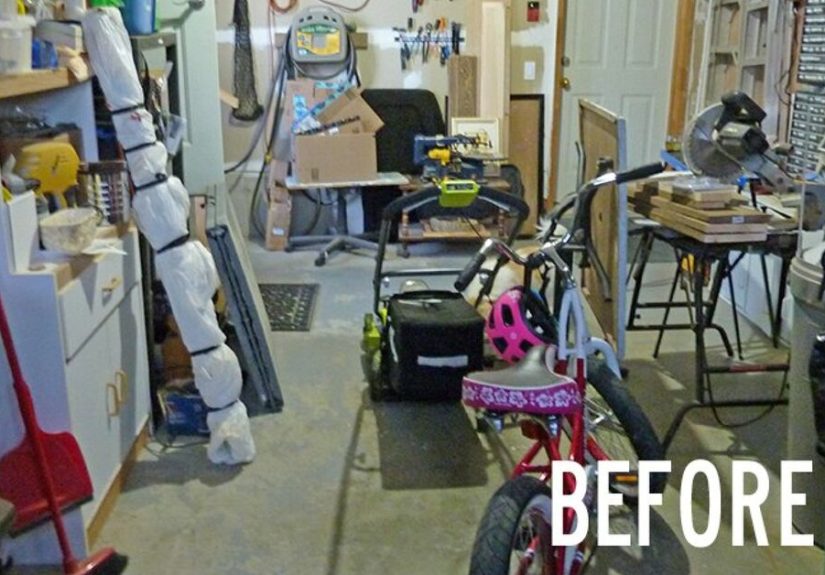
That old metal shelf in the garage has been quietly judging your “organization system” (a.k.a. piles). The good news? It’s already halfway to becoming a workbench: it’s sturdy, it’s got storage built in, and it’s not afraid of a little grime. With a solid top, a few reinforcements, and some smart hardware, you can turn an aging metal shelving unit into a legit workbench that’s ready for sawing, sanding, wrenching, tinkering, and all the projects you swear you’ll finish “this weekend.”
Why a Metal Shelf Makes a Surprisingly Great Workbench Base
A traditional DIY workbench usually starts with lumber, a plan, and the confidence of someone who has never measured twice. A metal shelf skips a lot of that drama. It already has a rigid frame, adjustable shelf heights, and storage space underneath (which is where unfinished projects go to nap).
- It’s fast: You’re upgrading a frame instead of building one from scratch.
- It’s budget-friendly: Most of the cost goes into the top and upgrades, not the structure.
- It’s adaptable: You can set the “bench height” by choosing which shelf level becomes the work surface.
- It’s storage-rich: The lower shelves become tool parking, bin storage, or a “temporary” place for that one bolt you just had.
Before You Touch a Screw: Choose the Right Shelf and Plan Your Bench
1) Pick a shelf that’s worth the effort
Not all metal shelves are created equal. The best candidates are heavy-duty steel racks (often sold for garages or warehouses), especially ones with thick uprights and shelves that lock into place. If your shelf is wobbly when empty, it will not become magically stable when you add tools. That’s not how physics works.
Look for: a solid frame, intact shelf supports, no cracked welds, and feet that sit flat. Rust is fine if it’s surface-level and you can clean it. Severe corrosion at joints or load points is a “nope.”
2) Know your load and your limits
Shelving units often advertise big weight capacitiesbut those ratings usually assume evenly distributed weight and correct assembly. A workbench introduces point loads: a vise torquing on one corner, a benchtop grinder vibrating, a big project clamped at the edge. Treat the manufacturer’s rating as a starting point, not a dare.
If you plan to mount heavy tools (vise, grinder, small press), you’ll want extra bracing and a thicker top (we’ll cover both).
3) Decide on height (so your back doesn’t file a complaint)
For general DIY, many people land around kitchen-counter height (roughly mid-30-inch range), but the “right” height depends on what you do most: assembly and detail work like a slightly higher bench; heavy hand-tool work often feels better a bit lower. A quick ergonomic trick: stand naturally, bend your elbows, and aim for a work surface a few inches below your elbow.
4) Measure your footprint and workflow
Decide where the bench will live and how you’ll move around it. If it’s going against a wall, plan for wall clearance, power access, and whether you want a pegboard back. If it’s in the middle of the space, consider adding castersbut make sure you can lock the bench down so it doesn’t skate away mid-cut like it’s trying to escape responsibility.
5) Tools and materials checklist
Common tools:
- Tape measure, pencil, square
- Drill/driver and bits (including metal-rated bits if pre-drilling)
- Wrenches/sockets (for bolts)
- Circular saw or jigsaw (for cutting plywood)
- Clamps (because holding things with your hand is not a “clamping method”)
- Safety gear: eye protection, hearing protection, gloves as appropriate
Common materials (mix and match):
- 3/4″ plywood (or doubled layers for a thicker top)
- Optional: MDF underlayer + hardboard sacrificial sheet
- 2x4s or 1x lumber for a perimeter frame/edge banding
- Self-drilling “wood-to-steel” screws or bolts with washers and lock nuts
- Construction adhesive (optional, not a substitute for fasteners)
- Leveling feet or locking casters (optional)
- Rust converter/primer + paint (optional refresh)
Step-by-Step: Turn a Metal Shelf Into a Rock-Solid Workbench
Step 1: Strip it down and inspect like a detective
Remove everything from the shelf (yes, even the “I might need this someday” pile). Check for bent uprights, loose connectors, cracked welds, missing bolts, and any shelf tabs that don’t fully seat. Tighten everything.
If the rack uses snap-in beams, make sure they’re fully engaged and oriented correctly. A half-seated beam is basically a surprise trap.
Step 2: De-rust, clean, and optionally paint
For light rust: wire brush + sanding + wipe down. For heavier surface rust: a rust converter can stabilize it, followed by primer and paint. Painting isn’t required for function, but it’s amazing how much more “new workbench energy” you feel when it looks fresh.
Step 3: Set the work surface height and lock the frame square
Choose which shelf level becomes your work surface. A common move is placing the work surface near the top while leaving at least one shelf below for storage. Use a level and check for wobble.
Pro stability move: If your shelf has diagonal braces, use them. If it doesn’t, add anti-racking help: a plywood back panel, corner brackets, or even a strap brace. Preventing side-to-side racking is what makes a bench feel “solid.”
Step 4: Build a top that actually behaves like a bench
The #1 upgrade is a stiff, flat top. A metal shelf surface alone is often too thin, too flexible, or too perforated to clamp work easily. You want something that:
- Spreads point loads
- Resists sagging
- Takes screws and clamps without drama
- Can be replaced or resurfaced later
Step 5: Choose your top style (three reliable options)
Option A: Simple and strong3/4″ plywood top
Cut 3/4″ plywood to match the shelf width and depth. If you want extra stiffness, add a 2×2 or 2×4 frame under the perimeter like a “torsion helper” (not a true torsion box, but the concept is the same: deeper structure resists bending).
Option B: Heavy-duty and dead flatdouble-layer top
Glue and screw two layers of 3/4″ material (plywood, MDF, or a mix) for a thicker top. This feels “serious” under a vise or grinder. If you go the MDF route, add a tougher sacrificial skin on top (see next option).
Option C: Replaceable sacrificial surfacehardboard/Masonite on top
Put your real structural top underneath (plywood or MDF), then add a thin hardboard sheet as a sacrificial layer. When it gets cut up, glued up, or generally looks like it survived a medieval battle, you replace it instead of rebuilding the bench.
Step 6: Attach wood to metal (without inventing new swear words)
There are three main methods. Choose based on your shelf design and the tools you have.
Method 1: Self-drilling wood-to-steel screws
These screws are designed to go through wood and bite into steel. They’re fast and clean, especially for thin-to-medium steel. Use washers if the metal holes are oversized. Keep screw heads slightly below flush (or countersink) so you’re not sanding your knuckles on them later.
Method 2: Bolts + washers + lock nuts
If your shelf has pre-drilled holes or slots, bolts are bombproof. Use washers on both sides to spread the load and lock nuts (or thread locker) to resist vibration. This is a great choice if you’ll mount heavy tools.
Method 3: Build a wood subframe that “drops in”
If the shelf design makes fastening awkward, build a snug-fitting wood frame that sits inside the metal perimeter, then screw your top to the wood frame. The metal shelf becomes the stand; the wood frame becomes your “real bench platform.”
Step 7: Add edge banding and clamp-friendly overhang
A thin plywood edge can get chewed up fast. Adding a hardwood or 1x perimeter band gives the bench a tougher bumper. Also consider a small overhang (even 1″) on the front and sides so clamps have something to grab.
Step 8: Reinforce for heavy tools and real-world abuse
If you’ll mount a vise, grinder, or anything that vibrates, reinforce before you install the tool. Here are reliable upgrades:
- Add cross members: Fasten 2x4s under the top, spanning left-to-right or front-to-back to stiffen the surface.
- Use steel angle: Bolt small steel angle brackets under corners to reduce flex at attachment points.
- Stop the wiggle: Add a plywood back panel or diagonal bracing to prevent racking.
- Anchor smart: If the bench sits against a wall and you do heavy work, consider anchoring the unit to studs for extra stability.
Step 9: Level it (because “close enough” becomes “why is my drawer rolling?”)
A bench that rocks is a bench that steals joy. If the shelf has adjustable feet, use them. If not, add leveling feet. If you need mobility, choose locking casters and add a way to “plant” the bench when working (casters that lift the bench down onto feet, or separate leveling feet near casters).
Step 10: Add the shop upgrades that make it feel custom
- Pegboard or slatwall back: Great for small tools and keeping the surface clear.
- Power strip: Mount it to the side so cords stay off the work area.
- Task light: Good lighting is the difference between “clean cut” and “modern art.”
- Magnetic strips/cups: Handy for screws, drill bits, and the mystery fastener you refuse to throw away.
Workbench Top Tips That Save You Later
Make it flat first, pretty second
A workbench top should be flat and sturdy. Perfectly flawless is optional. A common approach is to use a strong substrate (plywood or MDF), then protect it with a replaceable top skin (hardboard). This gives you a surface you can abuse without guilt.
Plan mounting zones for tools
If you’re adding a vise, mount it near a front corner so long boards can hang off the side. Add extra blocking underneath that zone. For grinders or small presses, position them where sparks and debris won’t land on flammablesor your future sandwich.
Don’t forget clearance for clamps
Many DIYers build a beautiful top… then discover the metal lip blocks clamp jaws. A small overhang or a clamping strip solves this.
Safety Notes: Because ER Trips Are a Terrible Hobby
Turning a shelf into a bench is pretty safe. Using the bench for power tools is where safety matters most. Wear eye protection when drilling, cutting, grinding, or even “just doing a quick trim.” Sparks from grinders can be a fire hazardkeep combustibles away, and keep the area clean. Disconnect tools before changing accessories or doing maintenance. And never clamp a handheld tool in a way that defeats its safety controls.
Troubleshooting: Common Problems and Simple Fixes
“My bench wobbles.”
- Level the feet or add leveling feet.
- Tighten every connection (especially snap-in beams).
- Add a back panel or diagonal brace to stop racking.
- If against a wall, anchor the frame to studs for extra stability.
“The top sags or feels bouncy.”
- Switch to thicker material (3/4″ plywood minimum is common).
- Add a second layer (laminated top).
- Add under-top cross braces or a perimeter frame.
“It’s loud and rattly when I use tools.”
- Add rubber washers between metal and wood in vibration zones.
- Use lock nuts or thread locker on bolts.
- Reinforce the shelf frame with braces to reduce resonance.
Realistic Time and Budget
If the shelf is already in decent shape, you can build a functional workbench in an afternoon. If you’re cleaning rust, painting, adding bracing, and building a thicker top, plan on a weekend (still faster than building a bench from scratch if you’re new).
Budget depends on what you already have. A basic plywood top and fasteners can be relatively inexpensive. A double-layer top, casters, lighting, and storage upgrades add costbut also add “I can actually work in here” comfort.
Common Build Experiences and Lessons Learned (Extra 500+ Words)
DIYers who convert metal shelves into workbenches tend to share the same “aha” momentsusually right after the first time they try to clamp something and realize the shelf lip is blocking the clamp like a tiny bouncer at a nightclub. One of the most common lessons is that clamp clearance matters more than people expect. A simple 1″ overhang on the front edge, or a dedicated clamping strip screwed beneath the top, can turn a frustrating bench into a truly useful one. It’s the kind of detail you don’t appreciate until you’re trying to hold a board steady with one hand and your dignity with the other.
Another frequent experience: the shelf frame may be strong, but it can still rack (twist side-to-side) under real work. Shelves are often designed to hold weight vertically, not resist lateral forces from planing, sanding, or wrenching. Many builders say the “bench transformation moment” happens when they add a back panel (plywood screwed to uprights) or a diagonal brace and suddenly everything feels planted. It’s not always about adding more massit’s about adding triangles. Geometry is the unsung hero of shop furniture.
People also learn quickly that “shelf rated for a lot” doesn’t automatically mean “bench feels solid.” Ratings usually assume evenly distributed loads. A vise creates torque at one corner, and a grinder adds vibration that loosens anything that isn’t locked down. A common fix is doubling up the top or adding blocking beneath tool-mount areas. Builders often report that a thicker top does two things: it stiffens the surface and it dampens noise. Thin tops can act like drumheads, especially when the metal frame resonates. A heavier top plus a few rubber washers in strategic places can make the whole bench sound calmer and feel more professionallike it went from “temporary setup” to “this might outlive me.”
Fastening wood to metal is another area where experience teaches quickly. Some DIYers start by pre-drilling everything, then realize self-drilling screws (the right ones) can be fasterwhile others learn that self-drilling screws have opinions about steel thickness and driver torque. The practical takeaway: go slow, use the right bit/driver setting, and don’t force it. If a screw starts to wobble or strip, switching to a bolt-and-washer setup can be a sanity saver. Several builders also mention that washers are underrated: they spread load, reduce “slot slop” in metal holes, and help keep a top from shifting over time.
There’s also a surprisingly emotional moment when someone adds a sacrificial hardboard layer. It feels wrong at firstlike putting a protective cover on a couch no one is allowed to sit on. But once glue drips, paint splatters, and saw cuts start appearing, the sacrificial layer becomes a badge of honor. Many DIYers say they worry less and work more when they know the top is replaceable. They’ll even screw it down lightly so they can flip it or swap it out when it’s too far gone. The bench becomes a tool, not a museum piece, which is exactly the point.
Finally, a lot of builders mention that the “best upgrade” wasn’t a fancy vise or a premium finishit was organization. Adding a lower shelf height that fits bins, labeling a couple of containers, and keeping frequently used tools within arm’s reach makes the bench feel bigger than it is. The shelf-to-bench conversion naturally encourages this, because you’re already working with a storage system. The consistent lesson: a workbench doesn’t have to be complicated; it just has to be stable, flat, and set up in a way that helps you actually finish projects instead of just collecting project supplies.
Conclusion
Converting an old metal shelf into a workbench is one of those rare DIY wins that’s fast, practical, and genuinely satisfying. Focus on the fundamentalsstable frame, stiff top, good fasteners, and anti-racking supportand you’ll end up with a bench that feels way more expensive than it was. Add a sacrificial surface, a little clamp clearance, and a few shop-friendly upgrades, and your garage will finally have a work zone that invites you to build… instead of just stepping over things.