
Table of Contents >> Show >> Hide
- Captions vs. Subtitles vs. “Text on the Screen”
- Option 1: Use Twitch-Compatible Closed Captions via OBS (Best Viewer Experience)
- Option 2: Add Captions Using a Twitch Extension (Fastest Path to “We Have Captions!”)
- Option 3: Add Open Captions as an Overlay in OBS (Works Everywhere, Can’t Be Turned Off)
- Option 4: Add Subtitles After the Stream (Best for Highlights & YouTube Exports)
- Make Captions Readable (Because “We Technically Have Captions” Is Not a Flex)
- Testing & Troubleshooting: The “Why Are My Captions Empty?” Survival Kit
- Quick Note for Viewers: How to Turn Twitch Captions On
- FAQ: The Questions Everyone Asks (Usually Mid-Stream)
- Real-World Experiences: What Streamers Learn After Turning on Captions (500+ Words)
- Conclusion
Streaming without captions in 2026 is like hosting a party and turning the music up so loud nobody can hear you.
Sure, the vibes are immaculate… but half your guests are reading lips like they’re auditioning for a spy movie.
Captions and subtitles make your stream easier to follow, more accessible, and surprisingly more watchable for everyoneespecially the “I’m at work, volume on 0%” crowd.
The good news: you don’t need a broadcast truck or a stenographer named Linda with superhuman typing powers.
You can add captions to your Twitch stream in a few different waysranging from “two clicks and done” to
“I enabled an API and now I understand why IT drinks coffee.”
Captions vs. Subtitles vs. “Text on the Screen”
Before we start flipping switches, let’s define terms the internet loves to mix together:
-
Closed Captions (CC): Viewer can turn them on/off, and they can often customize size, color, and placement.
This is the gold standard for accessibility. - Subtitles: Usually dialogue-focused (often for translation), sometimes not toggleable depending on how you add them.
-
Open Captions: Burned into the video (like a permanent tattoo). Everyone sees them, nobody can disable them.
Great for clips and multi-platform contentless ideal if they block your HUD.
On Twitch, most streamers aim for closed captions when possible, and use open captions
as a reliable fallback.
Option 1: Use Twitch-Compatible Closed Captions via OBS (Best Viewer Experience)
If you want captions that viewers can toggle like a civilized feature (instead of text permanently glued to your gameplay),
your best bet is sending caption data through OBS in a way Twitch’s player understands.
When it’s working, viewers typically get a CC button and can control caption appearance on their end.
Who this option is for
- You stream with OBS Studio (or a compatible OBS setup).
- You want captions that can be turned on/off by viewers.
- You care about accessibility and want captions to feel “native,” not hacked on.
How it works (high level)
You install an OBS captioning plugin (or integration) that converts your microphone audio into text in real time.
That text can be sent as closed-caption data (and some tools also let you generate open captions and even save transcripts).
In plain English: OBS hears you, turns it into words, and Twitch can display those words as CC.
Step-by-step setup in OBS (typical workflow)
-
Pick your caption engine.
Many streamers use an OBS plugin that integrates with a speech-to-text provider.
Some solutions rely on cloud speech recognition (often requiring an API key and billing setup). -
Install the plugin and restart OBS.
If you’re on Windows, this is usually a standard plugin install. After restart, look for a captions dock/menu entry. -
Select what audio gets captioned.
Most people start with just the microphone (because captioning game audio and Discord chaos is… ambitious).
If you want captions for multiple speakers, you’ll need to route audio intentionally (more on that below). -
Choose language and basic filters.
Set your spoken language, andif availableadd word replacement for gamer vocabulary (“GG” should not become “Jiji,” thanks). -
Test locally before going live.
Speak normally, whisper, then do your “hype moment” voice. If captions only work when you shout like a sports announcer,
adjust mic gain, noise suppression, and compression. -
Go live and verify viewer controls.
Ask a friend to watch on desktop and mobile. Confirm there’s a CC option when captions are available.
Pro tips for better accuracy (your mic matters more than your graphics card)
- Use noise suppression and a noise gate carefullytoo aggressive and the captioner misses syllables.
- Keep mic distance consistent. Captions hate the “lean in / lean out” podcast dance.
- Slow down by 5%. You don’t have to talk like a robotjust slightly less like an auctioneer.
Captioning multiple speakers (co-streams, Discord, couch co-op)
If you’re capturing only your mic, captions will ignore your teammates, game dialogue, and that one friend who only communicates in dolphin noises.
To caption more than one source, you typically need to:
- Route all desired voices into a single audio track (virtual mixer/virtual audio cable), or
- Use a caption tool that can caption an entire OBS audio track, not just one input.
Be careful: captioning “everything” can reduce accuracy because the captioner has to guess which voice to follow.
If your stream’s vibe is “four people talking over each other during a boss fight,” captions will do their best…
and occasionally invent a new language.
Option 2: Add Captions Using a Twitch Extension (Fastest Path to “We Have Captions!”)
Twitch extensions are the simplest way to add captions without deep OBS tinkering.
A popular approach is enabling a closed captioning extension as a video overlay (or sometimes a panel),
then running a captioning service that listens to your mic and pushes the text to Twitch.
Who this option is for
- You want a quick setup and don’t mind using an extension.
- You prefer “works today” over “I built a perfect pipeline.”
- You’re okay with captions being delivered via an overlay/panel experience.
Typical setup steps
-
Open Twitch Creator Dashboard → Extensions.
Search for a closed captioning extension (for example, services commonly used by streamers for CC overlays). -
Install the extension and set it as a Video Overlay.
You’ll usually assign it to an overlay slot (Overlay 1, 2, etc.). -
Start the caption feed.
Many caption extensions require you to press a “Start Captions” button in a companion page/app that has microphone permission.
Keep that page open while streaming. -
Test on mobile and desktop.
Extensions can behave differently depending on device/app. Verify your viewers can actually see and use them.
Pros and cons (honest edition)
- Pros: easy, fast, minimal OBS surgery, great for newer streamers.
- Cons: overlays can clash with your layout, may require an extra “start captions” step each stream, and reliability varies.
Option 3: Add Open Captions as an Overlay in OBS (Works Everywhere, Can’t Be Turned Off)
Open captions are the “duct tape that actually looks nice.” They’re visible to everyone on every platform because
they’re part of the video output. The tradeoff: viewers can’t disable them, and you must design them so they don’t block important content.
Two common ways to generate open captions
- Browser-based caption tools that generate a caption overlay you add as a Browser Source in OBS.
- Professional caption services that provide an output you can embed, overlay, or route into your production.
Step-by-step: Browser Source captions in OBS
- Start your caption tool (grant mic permission, choose language, adjust style).
- Get the overlay output (often a special URL or overlay page).
-
In OBS: Add Source → Browser.
Paste the overlay URL, set width/height to match your canvas (e.g., 1920×1080), and apply a custom CSS style if available. - Crop and position the captions so they’re readable but don’t cover your lower-third or in-game subtitles.
- Add a background box (semi-transparent) or outline for contrast. Readability beats aesthetics every time.
- Test at different volumes and in fast speech moments.
Example placement rules that won’t make viewers hate you
- If your game already has subtitles at the bottom, put stream captions higher (mid-lower third) to avoid overlap.
- If you have a facecam bottom-left, avoid placing captions directly under it (people read faces and words; don’t force a choice).
- For mobile viewers, keep captions inside a safe zonetiny text at the very bottom can become “ant captions.”
Open captions are also amazing for turning your VOD into short-form clips. If you’ve ever posted a clip and thought,
“Why is nobody reacting?”it’s because half the internet is watching silently.
Subtitles fix that.
Option 4: Add Subtitles After the Stream (Best for Highlights & YouTube Exports)
Live captions help in the moment. But if you care about evergreen contenthighlights, tutorials, “how I clutched a 1v5” documentaries
post-production subtitles can be cleaner and more accurate.
When post-production makes sense
- Your live captions are decent, but you want near-perfect subtitles for uploads.
- You want multiple languages for audience growth.
- You want to clean up names, slang, and game terminology.
Typical workflow
- Record locally while you stream (OBS recording is your best friend).
- Upload your highlight to a captioning platform or service.
- Download the subtitle file (common formats include SRT or VTT).
- Import into your editor (Premiere, DaVinci Resolve, etc.) and fix timing/wording.
- Publish with subtitles (burned-in for social clips, closed captions for platforms that support it).
If you’re monetizing content or using it for brand deals, higher accuracy can be worth paying for.
Also: nothing makes a sponsor happier than their product name being spelled correctly in subtitles.
Make Captions Readable (Because “We Technically Have Captions” Is Not a Flex)
Captions only help if people can read them. Here’s what consistently works:
Design checklist
- High contrast: light text on dark background (or vice versa), with a subtle shadow/outline.
- Big enough: if it looks “fine” on your 27-inch monitor, it may be microscopic on a phone.
- Don’t cover key UI: HUD, chat overlay, alerts, and in-game subtitles need breathing room.
- Limit line length: captions should be scannable, not a novel.
- Keep latency low: a short delay is normal; a 10-second delay is a comedic spoiler.
Content checklist
- Introduce names: “That’s Juno (my mod)” helps the captioner and the audience.
- Spell out jargon once: “MMR (matchmaking rating)” makes future captions better.
- Say important info clearly: giveaways, rules, commandsrepeat them slowly once for caption reliability.
Testing & Troubleshooting: The “Why Are My Captions Empty?” Survival Kit
If captions aren’t showing up, it’s usually one of these:
- Wrong audio source selected: you’re captioning “Desktop Audio” while your mic is on a different input.
- Mic permissions not granted: browser tools and extension companion pages need permission every so often.
- Muted source: some caption tools intentionally stop captioning when the mic is muted (a safety feature, not a bug).
- Noise gate too strong: your words never “open the gate,” so captions never trigger.
- Language mismatch: speaking English while captions are set to Spanish will produce… interpretive art.
Practical test: record a 60-second sample, watch it on your phone, and ask one friend who’s not afraid to be honest.
If they say “it’s readable,” you’re good. If they say “it’s tiny and covered by your alerts,” adjust placement and scale.
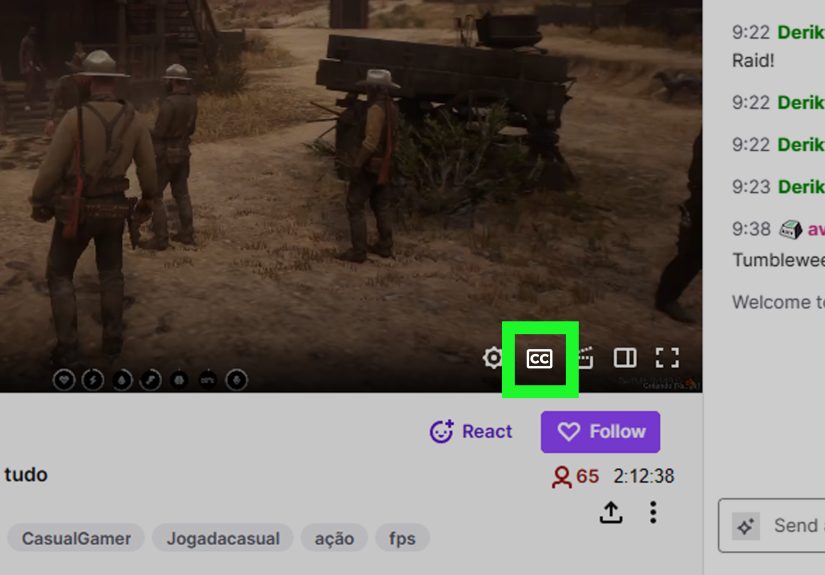
Quick Note for Viewers: How to Turn Twitch Captions On
Captions won’t always be available on every stream. When they are available, viewers commonly see a CC control on the player.
On many setups, viewers can also open player settings (often a gear icon) to adjust caption displayfont, color, size, and positioning
depending on the device and player experience.
FAQ: The Questions Everyone Asks (Usually Mid-Stream)
Does Twitch automatically generate captions for me?
In most creator workflows, you provide captions using software or an extension. If you don’t send captions, viewers generally won’t see a CC option.
Are captions “worth it” if I’m small?
Yes. Captions improve retention for mobile viewers, help non-native English speakers, and make your content more welcoming.
Also, it’s a competitive advantagelots of streamers still don’t bother.
What accuracy should I expect from automatic captions?
Automatic speech-to-text can be very good in calm, clear speechand noticeably worse in noisy rooms, with heavy slang, or during excited yelling.
If you need near-perfect accuracy (events, education, sponsored streams), consider professional captioning.
Can I do captions in multiple languages?
Some tools offer live translation, but results depend on the provider and your setup. A safer approach is:
live captions in your primary language, then translated subtitles for highlights and uploads.
Real-World Experiences: What Streamers Learn After Turning on Captions (500+ Words)
The first time most streamers enable captions, the reaction is usually: “Whoa, this is cool… why does it think ‘headshot’ is ‘hedgehog’?”
That moment is almost a rite of passage. Real-time captions aren’t magic; they’re a tool that gets better when you treat your audio like the
main ingredient instead of a garnish.
One common experience: captions change how you speakin a good way. Streamers often notice they become slightly more deliberate,
especially when sharing important info like rules, schedules, or commands. You don’t have to lose your personality; you just learn to land the punchline
so the captioner can keep up. The bonus is that your communication improves for everyone, not just viewers using captions.
Another big lesson is layout discipline. Captions force you to confront how crowded your screen really is.
Alerts in the bottom center, chat overlay on the right, sponsor banner across the bottom, facecam in the cornerand then captions show up like,
“Hello, I would also like some space.” The streamers who end up loving captions are the ones who simplify:
fewer moving parts, clearer hierarchy, and captions placed where the eye naturally goes. Many creators discover that this cleaner design
makes their stream feel more professional overall.
Streamers also learn quickly that the mic is the boss. A $20 mic can work fine, but only if it’s positioned well and processed thoughtfully.
People who add captions often end up tweaking noise suppression, compression, and gainnot because they’re chasing audiophile perfection,
but because captions expose every inconsistency. If your voice volume swings wildly, captions swing with it.
Once dialed in, many creators report fewer “What did you say?” messages in chat and more natural conversation.
There’s also the community effect. Captions tend to attract (and retain) viewers who might otherwise bounce:
people watching quietly on mobile, viewers with hearing loss, non-native speakers, and anyone who benefits from text reinforcement.
Streamers sometimes notice a subtle shift in chat tonemore questions about what was said, more engagement with explanations,
and better participation during intense gameplay where audio can get chaotic. It’s not that captions magically “grow your channel,”
but they reduce friction. Less friction means more people stick around long enough to actually enjoy you.
Finally, captions create a surprising byproduct: better clips. Even if you only run open captions for highlights,
text-on-screen boosts comprehension in short-form content. Streamers who start captioning often become more intentional about clip-worthy moments:
they restate the setup, they punch the key line, and they let the caption land. That habit translates directly into better TikTok/Shorts/Reels performance.
In other words: captions don’t just help accessibilitythey can improve your content craft.
The practical takeaway from all these experiences is simple: start with a basic setup, test it on mobile, adjust for readability,
and iterate. Captions aren’t a one-time “feature.” They’re a living part of your productionlike lighting, audio, and scene layout.
And once you get them right, you’ll wonder how you ever streamed without them.
Conclusion
Adding captions and subtitles to Twitch is one of the highest-impact upgrades you can make:
it improves accessibility, boosts watchability for silent viewers, and makes your content easier to follow.
Start with the option that matches your comfort levelOBS closed captions for the best viewer control, extensions for quick setup,
or open captions for universal visibilityand then refine for readability and timing.
Your future viewers (and your future clip performance) will thank you.


