
Table of Contents >> Show >> Hide
- Why Make Homemade Vanilla Coffee Creamer?
- The 2-Ingredient Trick (And Why It Works)
- Ingredients You’ll Need
- Homemade 2-Ingredient Vanilla Coffee Creamer Recipe
- How to Make It Taste Like “Vanilla,” Not Just “Sweet”
- Texture Tips (Because Creamer Has Feelings)
- How Long Does Homemade Coffee Creamer Last?
- How to Use Vanilla Coffee Creamer (Beyond Hot Coffee)
- Cost and Convenience: A Real-World Comparison
- Variations (Still Mostly 2 Ingredients)
- FAQ: Quick Answers for Busy Mornings
- Conclusion: Your Coffee, Upgraded (Without the Ingredient Drama)
- Extra: Real-Life Experiences With 2-Ingredient Vanilla Coffee Creamer (500-ish Words)
Coffee is already doing a lot for yougetting you out of bed, helping you survive meetings, and preventing you from
responding to emails with “pls no.” The least we can do is give it a creamy, vanilla-sweet upgrade that doesn’t
require a chemistry degree (or a pantry full of mystery thickeners).
This homemade 2-ingredient vanilla coffee creamer is the “I want it tasty, fast, and not weird”
solution. It’s rich, smooth, and customizable, and it takes about as long as it takes your coffee to finish brewing.
Plus: you can make it dairy or dairy-free, extra thick or lighter, and “dessert in a mug” sweetor toned down for
weekday realism.
Why Make Homemade Vanilla Coffee Creamer?
Store-bought creamers are convenient, surebut they can also be a greatest-hits compilation of ingredients you didn’t
know could legally be poured into coffee. Making your own is basically choosing peace.
You control the flavor (and the sweetness)
Want a gentle vanilla hint? Done. Want “vanilla cupcake that fell into my mug”? Also doable. This recipe starts sweet
because one ingredient is sweetened condensed milkso you can dilute to taste instead of being stuck with a bottle
that thinks everything should taste like birthday cake.
You can fit it into real life
No simmering. No blender. No “let cool for 3 hours while you ponder your life choices.” You shake two ingredients in a
jar, refrigerate, and you’re ready for tomorrow’s coffee.
It’s easy to swap for dietary needs
Whether you’re going dairy-free, lactose-free, or just experimenting with oat milk because it’s having a cultural moment,
this DIY coffee creamer adapts without drama.
The 2-Ingredient Trick (And Why It Works)
The secret isn’t complicatedit’s strategic. You’re combining:
- Sweetened condensed milk for body, sweetness, and that silky “coffee shop” mouthfeel.
- Vanilla-flavored milk (dairy or plant-based) to thin it to pourable perfection and deliver the vanilla taste.
Sweetened condensed milk is concentrated milk plus sugar, so it brings thickness and sweetness without needing extra
sugar or stabilizers. Meanwhile, using vanilla milk means you keep the ingredient list at two while still
getting that classic vanilla creamer flavor. It’s like a loopholebut for breakfast.
Ingredients You’ll Need
Ingredient 1: Sweetened condensed milk
One standard can is the usual starting point. It’s thick, sweet, and built to blend smoothly. If you prefer less sweetness,
you’ll adjust with more vanilla milk (more on that soon).
Ingredient 2: Vanilla milk (your choice)
Pick based on your vibe:
- Vanilla whole milk: classic and lighter than cream-based options.
- Vanilla half-and-half: richer, more “coffeehouse creamer” texture.
- Vanilla oat milk: creamy, trendy, and usually great in coffee.
- Vanilla almond milk: lighter, slightly nutty, and still delicious.
- Vanilla soy milk: higher protein, creamy, and sturdy in hot drinks.
If your vanilla milk is very sweet, you may want to start with a little more milk and taste as you go. If it’s lightly
sweetened or “barista blend,” you’ll probably love the balance right away.
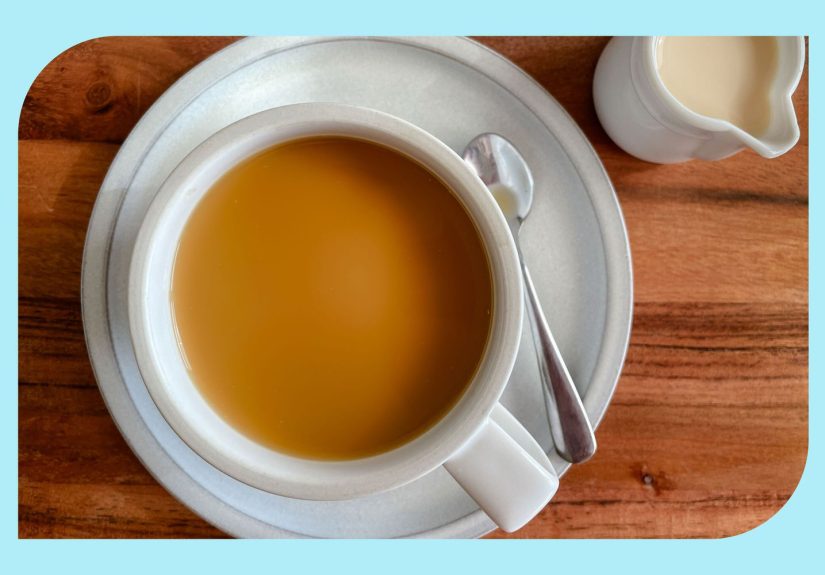
Homemade 2-Ingredient Vanilla Coffee Creamer Recipe
This makes about 3 cups of creamer, depending on your milk choice and exact ratio. That’s enough for a week
of generous poursor three days if you “measure with your heart.”
What you’ll need
- 1 (14 oz) can sweetened condensed milk
- 1 1/2 to 2 cups vanilla milk (dairy or plant-based)
- A jar or bottle with a tight lid (a mason jar is perfect)
- A whisk or spoon (optionalshaking works)
Step-by-step
- Add condensed milk to your jar. If it clings to the can like it’s paying rent, scrape it in with a spoon.
- Pour in 1 1/2 cups vanilla milk. Seal the lid and shake hard for 15–20 seconds.
- Check the texture. Want it thinner and more “pour-and-go”? Add up to 1/2 cup more vanilla milk and shake again.
-
Taste-test in coffee. Start with 1 tablespoon in a mug of coffee, stir, then adjust. If you like it sweeter,
add more creamer; if it’s too sweet, add more coffee (a tragic solution) or thin the jar with extra vanilla milk (a smart solution). - Refrigerate. Store cold and shake before each use.
How to Make It Taste Like “Vanilla,” Not Just “Sweet”
If your first sip tastes like sweet milk but the vanilla is shy, it usually means your vanilla milk is lightly flavored.
You have three options:
- Choose a stronger vanilla milk next time (some brands are bold, others whisper).
- Use vanilla half-and-half for a richer base that carries flavor better.
-
Optional add-in (rule-bending): add a tiny splash of pure vanilla extract or vanilla bean paste.
That technically makes it 3 ingredients, but your coffee won’t call the police.
Texture Tips (Because Creamer Has Feelings)
If it separates
Totally normal. Homemade creamer doesn’t always have emulsifiers like commercial products. Just shake the jar before
pouring. Plant-based milks can separate a bit morestill fine.
If it’s too thick
Add more vanilla milk, a little at a time, and shake. You’re aiming for “drizzles easily,” not “requires a spatula.”
If it’s too sweet
Thin with extra vanilla milk (or use an unsweetened vanilla milk next time). Another pro move: use a smaller amount in
your cup and let the coffee flavor lead.
How Long Does Homemade Coffee Creamer Last?
A realistic rule: use it within about 7–10 days for best flavor and freshness, and always follow the
“use-by” date of the milk you chose. If you made it with ultra-pasteurized dairy or a shelf-stable plant milk, you may
get a little longerbut don’t treat this like a science experiment you plan to drink.
Food-safety basics (quick and practical)
- Keep it refrigerated and aim for a fridge temperature at or below 40°F.
- Don’t leave it out at room temp longer than 2 hours.
- Smell and look before using: sour smell, curdling, or weird fizz = toss it.
- Label the jar with the date you made it. Future-you will be grateful.
How to Use Vanilla Coffee Creamer (Beyond Hot Coffee)
This isn’t just a one-trick pony. Try it in:
- Iced coffee: stir it into cold brew for instant vanilla sweetness.
- Tea: especially black tea or chai (start smallit’s sweet).
- Overnight oats: replace part of your milk with a spoonful of creamer for vanilla dessert energy.
- Smoothies: a tablespoon can round out bitter greens or strong cocoa.
- DIY “coffee shop” drinks: add it to espresso, then top with ice and a splash of extra vanilla milk.
Cost and Convenience: A Real-World Comparison
Prices vary wildly by brand and location, but the math is simple: sweetened condensed milk plus a carton of vanilla milk
usually costs about the same as (or less than) a premium flavored creamerespecially if you already buy vanilla milk.
The bigger win is that you’re making a creamer that matches your taste instead of gambling on a new bottle that might
taste like “vaguely vanilla candle.”
Variations (Still Mostly 2 Ingredients)
Dairy-free 2-ingredient vanilla creamer
Use a plant-based vanilla milk (oat, almond, soy) plus sweetened condensed milk. If you avoid dairy entirely, look for a
plant-based sweetened condensed alternative and combine it with vanilla oat/almond milk. The texture can be slightly thinner,
but it’s still creamy and coffee-friendly.
Extra-rich “weekend” creamer
Use vanilla half-and-half as your second ingredient for a thicker, richer pour. It feels indulgent without turning your coffee
into a milkshake (unless you want thatno judgment).
Lower-sweetness approach
Keep the recipe the same, but use more vanilla milk to dilute sweetness. Also, start with less creamer per cup.
Your taste buds adapt quicklyafter a few days, you may prefer the lighter sweetness.
FAQ: Quick Answers for Busy Mornings
Can I freeze homemade coffee creamer?
You can freeze portions (like in an ice cube tray), but the texture may separate when thawedespecially with dairy.
It’s usually best made fresh in small batches so it stays smooth.
Why does my creamer look a little separated?
Homemade creamer doesn’t rely on stabilizers. A quick shake fixes it. If it separates dramatically, your milk choice may be
the culpritsome plant milks are more prone to splitting in hot coffee.
How much creamer should I add per cup?
Start with 1 tablespoon, then adjust. If you like very sweet coffee, you may use 2 tablespoons or more. If you’re
trying to cut sugar, keep it to a smaller splash and let the vanilla do the work.
Can I make it “French vanilla”?
“French vanilla” is usually a custard-like vanilla vibe. The easiest path is choosing a vanilla milk that leans warm and
creamy, then (optional) adding a tiny pinch of salt or a drop of vanilla extract for depth. Not requiredjust fun.
Conclusion: Your Coffee, Upgraded (Without the Ingredient Drama)
If you want a vanilla creamer recipe that’s easy, fast, and actually tastes like something you’d choose on purpose,
this is it. Two ingredients. One jar. A week of happier mornings. And the satisfaction of knowing your creamer didn’t come from
a labunless your kitchen is a lab, in which case: respect.
Keep it cold, shake before pouring, and tweak the ratio until it matches your perfect cup. Once you find your sweet spot,
you’ll never look at store-bought creamer the same way againmostly because you’ll be too busy sipping smugly.
Extra: Real-Life Experiences With 2-Ingredient Vanilla Coffee Creamer (500-ish Words)
When people first try a homemade creamerespecially one built on sweetened condensed milkthe most common experience is a
moment of surprise that can be summarized as: “Whoa. That’s sweet.” And honestly? Fair. Sweetened condensed milk is doing a
lot of heavy lifting here, which is why the best experience comes from treating this recipe like a starting point, not a
law of nature. The jar is your playground.
A classic first-week pattern goes like this: you make the creamer, you pour it into hot coffee, and suddenly your mug tastes
like vanilla dessert. Some people love that immediately. Others realize they want the vanilla flavor without quite as much sugar.
The good news is that the “fix” feels empowering, not annoying: add a little more vanilla milk to the jar, shake, and try again.
You get to dial in your personal sweet spot the same way you adjust coffee strengthby taste, not by suffering.
Another surprisingly relatable experience is how much shaking the jar becomes part of the ritual. It’s oddly
satisfying. It’s also practical: homemade creamer can separate a bit, especially if you’re using oat milk or almond milk.
People often discover they like a jar with a tight lid specifically because it turns the morning routine into “shake, pour, sip,
conquer the day.” (Okay, maybe “conquer the day” is ambitiousbut we can at least conquer the inbox.)
Iced coffee fans tend to have the happiest “aha” moment. In hot coffee, sweetness reads louder. In cold brew or iced coffee,
this creamer tastes smoother and more balancedalmost like a shortcut to a café-style drink. Many people end up using less
creamer in iced coffee than in hot coffee, because the cold version keeps the sweetness in check and lets the vanilla shine.
If you’re trying to recreate that coffee shop vibe at home, this is where it really delivers.
There’s also the experience of accidental creativity. You make the creamer for coffee, then you realize it’s pretty great in
tea. Then you notice it makes overnight oats taste like vanilla pudding. Then you’re drizzling a teaspoon into a smoothie and
feeling like a genius. Homemade creamer tends to “escape” coffee and become a general-purpose sweet, creamy flavor boosterbecause
it’s basically a dessert-friendly milk concentrate with vanilla built in.
Finally, there’s the quiet experience of convenience. Once you’ve made this a couple times, it becomes one of those low-effort
habits that improves your day disproportionately. You stop running out for flavored creamer. You stop collecting half-used bottles
of “Seasonal Pumpkin Something” in the fridge door. You just keep a jar of your go-to vanilla creamer and make mornings easier.
And if that’s not self-care, at least it’s self-care-adjacent.


