Table of Contents >> Show >> Hide
- Why Milk Paint Is the Secret Weapon for an Entryway Table
- Before You Paint: Pick Your Makeover “Personality”
- Tools & Supplies Checklist
- Step-by-Step: Entryway Table Makeover With Sweet Pickins Milk Paint
- Step 1: Do the “entryway reality check”
- Step 2: Clean like you mean it
- Step 3: Lightly sand for “tooth”
- Step 4: Mix the milk paint (the fun science part)
- Step 5: Decide on bonding (aka: will it chip?)
- Step 6: Paint coat #1 (don’t panic)
- Step 7: Sand lightly between coats (optional, but satisfying)
- Step 8: Paint coat #2 (and maybe #3)
- Step 9: Distress strategically (if you want that aged charm)
- Step 10: Seal it for real life
- Color & Design Ideas That Look Great in an Entryway
- Entryway Styling: Make the Table Look “Done,” Not “Decorated Once”
- Troubleshooting: When Milk Paint Gets… Opinionated
- Time & Cost: A Realistic Makeover Plan
- Field Notes: of Real-Life Experience With a Sweet Pickins Milk Paint Entryway Table Makeover
- Conclusion: A First Impression You’ll Actually Enjoy Coming Home To
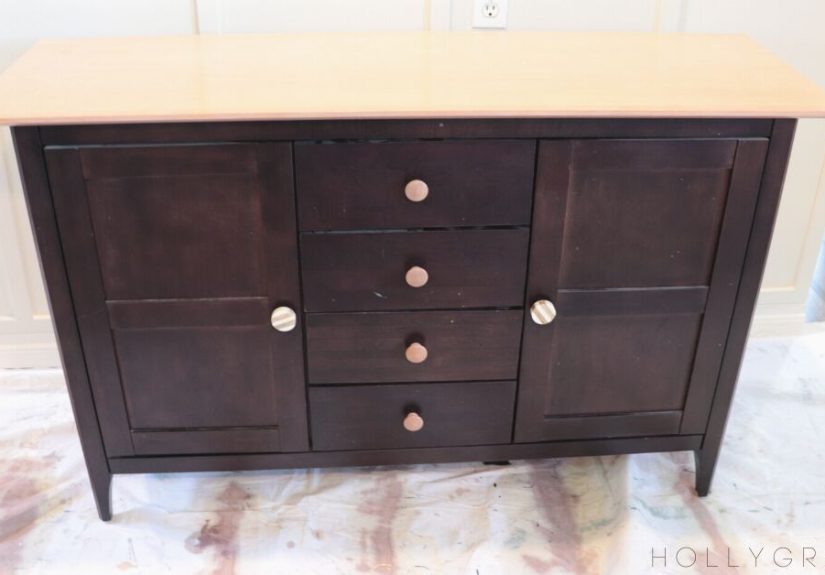
Your entryway is basically your home’s handshake. It sets the tone, catches the chaos (keys! mail! sunglasses you swear you just had!), and politely pretends it’s not judging the state of your life at 6:42 PM on a Tuesday. If your entryway table currently looks like it lost a fight with time, fingerprints, and a rogue cup ring… good news: a makeover with Sweet Pickins Milk Paint can turn that sad little surface into a “wow, this house has it together” moment. (Even if the laundry situation suggests otherwise.)
This guide walks you through a practical, good-looking, not-overly-fussy furniture refresh using a true powdered milk paint. You’ll get steps, troubleshooting, color ideas, styling tips, and a realistic plan for achieving either a smooth modern farmhouse finish or that vintage “I found this in a charming antique shop” patinawithout needing an antique shop budget.
Why Milk Paint Is the Secret Weapon for an Entryway Table
An entryway table is a high-traffic piece. People drop bags, slide packages onto it, set down drinks “just for a second,” and occasionally lean on it like it’s a structural support beam. So the finish has to be tough and forgiving.
Milk paint is famous for its velvety matte look and its ability to create everything from a clean, solid coat to a beautifully aged, timeworn finish. It can be incredibly durable on porous surfaces (hello, bare wood), while also offering a “chippy” vintage vibe on slicker finishessometimes intentionally, sometimes because furniture likes to humble us.
What makes Sweet Pickins Milk Paint different?
Sweet Pickins Milk Paint is a true milk paint that comes in powder form and gets mixed with water. That powdered format matters: it’s part of why milk paint looks so organic, and it’s why you can control the consistency and character (smooth wash vs. rich coverage). Sweet Pickins is also known for boutique-style packaging and curated color choices that lean modern, cozy, and farmhouse-friendly.
Translation: it’s perfect for a piece that needs to look intentional the minute someone walks in your front door.
Before You Paint: Pick Your Makeover “Personality”
Milk paint is like a mood ring for furniture. The same color can read sleek and contemporary or rustic and romantic depending on prep, bonding, and topcoat choices. Decide your “personality” before you start:
Option A: Smooth & Solid (more modern)
- Best for: busy families, rental homes, or anyone who doesn’t want surprise chipping.
- How: clean + scuff sand + use a bonding additive (when needed) + seal well.
- Look: velvety matte, consistent color, minimal texture.
Option B: Vintage & Chippy (more character)
- Best for: farmhouse, cottage, French country, or “I collect old things on purpose.”
- How: minimal bonding additive (or none) on slick surfaces + strategic sanding/distressing.
- Look: layered, timeworn, dimensional, a little rebelliousin a good way.
Tools & Supplies Checklist
Here’s what you’ll want on hand so you don’t end up holding a dripping brush while yelling “Where’s the rag?!” into the void:
Must-haves
- Sweet Pickins Milk Paint (powder)
- Clean mixing jar/container with lid (mason jar works great)
- Water + measuring cups/spoons
- Whisk, frother, or small mixer (lumps happenplan accordingly)
- Quality brush (synthetic or natural bristle) + small brush for corners
- Sandpaper (120–220 grit) or sanding sponge
- Cleaner/degreaser and lint-free cloths
- Tack cloth or vacuum for dust
Nice-to-haves
- Bonding additive (often called “Extra-Bond” or “bonding agent”) for slick surfaces
- Topcoat: water-based, oil-based, hemp oil, wax, or a brand-specific clear coat
- Painter’s tape (if you’re doing a two-tone design)
- Wood filler (for dings) + putty knife
- New hardware (knobs/pulls) if your table has drawers
Step-by-Step: Entryway Table Makeover With Sweet Pickins Milk Paint
Step 1: Do the “entryway reality check”
Look at the table like a detective. Is it raw wood? Previously painted? Sealed with a glossy factory finish? Milk paint behaves differently depending on what’s underneath. If you’re not sure, assume it’s sealedbecause manufacturers love a shiny topcoat.
Step 2: Clean like you mean it
Entryway furniture collects invisible grime: hand oils, dust, residue from who-knows-what, and that mysterious sticky spot that might be honey or might be a portal to another dimension. Clean thoroughly and let it dry.
Step 3: Lightly sand for “tooth”
If the surface is slick or glossy, scuff sanding is your best friend. You’re not trying to erase the table’s identityjust giving the paint something to grab. Focus on the top, edges, and high-touch areas.
Step 4: Mix the milk paint (the fun science part)
Mix your Sweet Pickins Milk Paint powder with water until it’s smooth and pourable. A common starting point for true milk paint is a roughly equal powder-to-water ratio, then adjust: thinner for a wash, thicker for fuller coverage.
- Want fewer brush marks? Mix well, strain if needed, and avoid overbrushing once it starts to set.
- Want texture? Don’t fight it. Milk paint can have a naturally organic, slightly varied look.
- Pro move: Let the mixture sit a few minutes after mixing, then stir again before painting.
Step 5: Decide on bonding (aka: will it chip?)
If your table is raw/porous wood, milk paint tends to bond extremely well. If it’s sealed, laminate-like, or very glossy, you’ll get more chipping unless you use a bonding additive.
For a smooth finish: add bonding agent to at least your first coat. For a chippy finish: skip it, or use less bonding agent and embrace the vintage vibe.
Step 6: Paint coat #1 (don’t panic)
The first coat can look patchy. This is normal. Milk paint likes to test your emotional resilience. Use long, even strokes. Keep a wet edge. Don’t go back and “fix” areas that are dryingmilk paint will show you who’s boss.
Step 7: Sand lightly between coats (optional, but satisfying)
Once coat #1 is dry, lightly sand to knock down texture or grain raise. Wipe away dust. This step is the difference between “cute DIY” and “wait, did you buy that?”
Step 8: Paint coat #2 (and maybe #3)
Most entryway tables look great with two coats; higher contrast colors or dramatic transformations sometimes need a third. If you’re going for a layered look, you can also paint a base color, then lightly apply a second color and distress to reveal the first.
Step 9: Distress strategically (if you want that aged charm)
If you’re going chippy/vintage, sand edges, corners, and areas that would naturally wear: around drawer pulls, the front lip of the top, and table legs. Keep it believable. Random distressing is like randomly adding laugh tracks to a movieit confuses everyone.
Step 10: Seal it for real life
Entryway tables see action, so sealing is not optional if you want durability. Your choice of topcoat changes both the look and the maintenance:
- Wax: soft, velvety, classic; needs occasional refreshing; can deepen color.
- Water-based clear coat: durable, low odor; can add slight sheen depending on product.
- Oil-based polyurethane: very tough; can warm/amber certain colors over time.
- Hemp oil / oil finishes: natural look, easy to apply; may need reapplication depending on wear.
If you’re using a water-based topcoat, apply thin, even layers and avoid overworking it. Two thin coats usually beat one thick coat (thick coats love to dry cloudy or show brush drag).
Color & Design Ideas That Look Great in an Entryway
An entryway is a transition space, which means the best paint colors either (1) gently connect to nearby rooms or (2) deliberately contrast for a “moment.” Here are makeover ideas that work especially well on an entryway table:
1) Warm Modern Farmhouse
- Paint: creamy white or soft greige base
- Top: stained wood look (or a deeper neutral paint)
- Style: woven baskets underneath, black metal accents, simple greenery
2) Coastal Calm
- Paint: dusty blue/sea-glass tone
- Finish: smooth with a satin topcoat
- Style: light-toned runner, rattan tray, white ceramic vase
3) Vintage Cottage Pop
- Paint: muted sage or soft buttery tone
- Finish: chippy edges + wax for a mellow glow
- Style: floral art above, brass accents, lidded catchall box for keys
4) Moody & Dramatic (but still welcoming)
- Paint: deep charcoal, inky blue, or forest green
- Finish: smooth, sealed, slightly higher sheen
- Style: oversized mirror, sculptural lamp, minimal clutter (moody rooms hate clutter)
Entryway Styling: Make the Table Look “Done,” Not “Decorated Once”
After the paint dries, styling is the final glow-up. The goal is a landing zone that’s functional and photogenic because if you’re going to do a full makeover, it deserves at least one proud picture.
The classic styling formula
- Anchor: a mirror or art centered above the table
- Light: a lamp (or pair of lamps if the table is wide)
- Contain: a tray or bowl for keys + small daily items
- Lift: something tall (vase with branches, topiary, tall candlesticks)
- Hide: baskets underneath for shoes, dog leash, or the mail you’re “sorting later”
Practical add-ons that don’t ruin the vibe
- Catchall dish for keys (your future self says thank you)
- Small lidded box for earbuds/coins (clutter’s sneaky cousin)
- Wall hooks nearby for bags or jackets
- Runner rug to define the space and protect floors
Troubleshooting: When Milk Paint Gets… Opinionated
“It’s chipping and I didn’t want it to.”
That usually means the surface was slick and the paint didn’t bond. You can stabilize it by sealing sooner, or repaint with a bonding additive. For major flaking, sand back loose areas, clean, then recoat with bonding agent added to the paint.
“It looks streaky.”
Milk paint can naturally read a little varied, especially on the first coat. Add a second coat, sand lightly between coats, and keep your brushwork consistent. If you want ultra-even color, a roller or sprayer tends to even it out more than brushing.
“The topcoat changed the color!”
Many sealers deepen color slightly. Wax and oils can warm tones; some polys can add ambering. If you’re nervous, test your topcoat on the back edge or underside first. It’s like tasting sauce before dumping it on pastabasic wisdom.
Time & Cost: A Realistic Makeover Plan
A typical entryway table makeover can be done over a weekend:
- Day 1: clean, sand, mix paint, coat #1, coat #2
- Day 2: light sanding, optional coat #3, distressing, topcoat
Cost varies based on what you already have, but milk paint projects are often budget-friendly because coverage is efficient, and you’re transforming something you already own (or scored secondhand).
Field Notes: of Real-Life Experience With a Sweet Pickins Milk Paint Entryway Table Makeover
The first time I painted an entryway table with powdered milk paint, I treated the mixing step like it was optional. Spoiler: milk paint treats your assumptions like a chew toy. I dumped powder into water, gave it three heroic stirs, and immediately started painting. Within minutes, my brush was dragging tiny pigment “islands” across the surface like a sad little boat in a gritty sea. The finish wasn’t terrible, but it looked… artisanal in the way a lopsided pancake is artisanal. Lesson one: mix thoroughly, then mix again like you’re trying to impress a chemistry teacher.
Then came the existential question: bonding agent or no bonding agent? I was aiming for “charming vintage,” which is a polite way of saying “I’m okay if it chips a little as long as it chips artistically.” The table had a factory finishsmooth, sealed, and smug. I scuff-sanded it, but I skipped bonding agent on the first coat because I wanted character. And I got it. By coat two, a few edges started flaking in the most believable spotscorners, drawer lip, the front edge where bags always scrape. It was the kind of wear that makes guests say, “Oh my gosh, where did you find this?” and makes you say, “Oh, you know… around.”
The most surprising part was how fast the entryway looked better. It wasn’t just the colorit was the texture, the matte softness, and the way milk paint can make even cheap furniture look like it has a backstory. I swapped the hardware for something simple and warm (not too shiny, not too modern), and suddenly the table went from “college apartment leftovers” to “grown-up home with intentions.” That’s the magic: paint doesn’t just change the piece, it changes the story you tell about the space.
Topcoating was where I nearly fumbled the victory. I used a clear coat too heavily on one section, and it flashed a little cloudy. Not enough to ruin the project, but enough that my eye zoomed to it every time I walked bylike a tiny personal accountability beacon. I sanded lightly once it cured, then reapplied in thinner coats. That fixed it and taught me the most boring truth in DIY: patience is the cheapest supply you can use, and also the one we always forget to buy.
Once the paint and sealer were done, styling sealed the deal. I added a tray for keys, a small lamp for warmth, and baskets underneath for shoes and “emergency mail.” The entryway became a system, not just a pretty spot. And every time someone walked in and immediately used the tray like it was obvious, I felt absurdly proudlike I’d invented the concept of surfaces. If you’re debating whether an entryway table makeover is worth it, here’s my verdict: yes. It’s a small project with outsized impact, and Sweet Pickins Milk Paint makes it feel less like “painting furniture” and more like giving your home a better first sentence.
Conclusion: A First Impression You’ll Actually Enjoy Coming Home To
An Entryway Table Makeover With Sweet Pickins Milk Paint is one of those rare DIY wins that hits style, function, and satisfaction all at once. With solid prep, thoughtful bonding choices, and a durable topcoat, you can create a finish that survives daily life while still looking intentional. Go smooth and modern, or embrace a little vintage chippingeither way, you’ll end up with a table that feels like a welcome instead of a warning.
Take your time on the cleaning and sealing, keep the styling practical, and remember: the entryway doesn’t need to be perfect. It just needs to make you feel like your home is on your side.