
Table of Contents >> Show >> Hide
- Quick Navigation
- Why Macrame Works So Well for Budget DIY
- Supplies You Need (and What You Can Skip)
- The Knot Cheat Sheet (Beginner-Friendly)
- Easy Macrame DIY Projects That Look Expensive
- 1) Mini Macrame Keychain or Bag Charm
- 2) Macrame Coasters (Set of 2–4)
- 3) “No-Fuss” Plant Hanger (Beginner Classic)
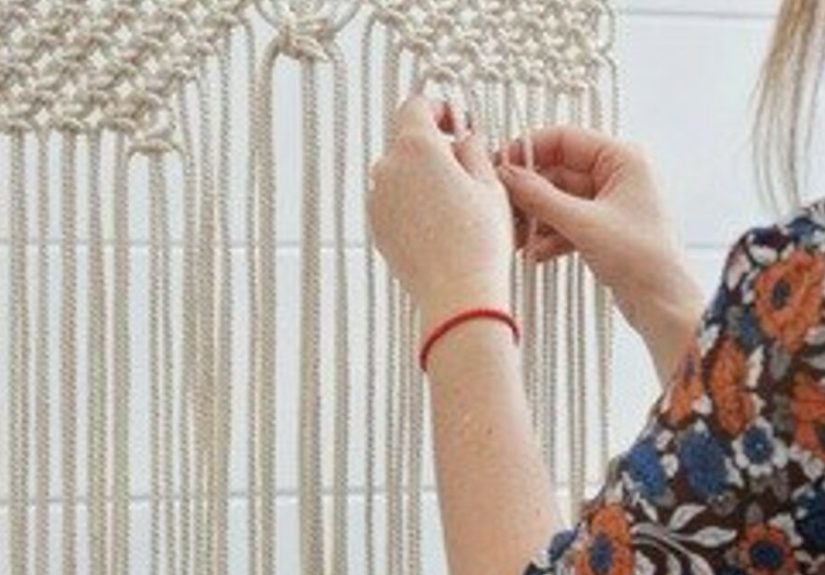
- 4) Simple Wall Hanging with Fringe
- 5) Hanging Shelf (Macrame + Wood = Instant “Designer”)
- 6) Curtain Tiebacks (Small Project, Big “Before/After”)
- 7) Bottle or Jar Carrier (Macrame That’s Actually Useful)
- 8) Macrame Light-Cord Cover (Hide the Ugly, Keep the Vibe)
- 9) Macrame Wall Organizer (Pretty Storage That Doesn’t Scream “Storage”)
- 10) Seasonal Macrame Ornaments (Fast, Festive, and Easy to Gift)
- How to Make Macrame Look “Store-Bought” (Without Trying Too Hard)
- How to Keep Macrame Affordable Long-Term
- Troubleshooting: Fix the Weird Stuff
- Common Experiences (and What Crafters Learn Fast)
- The “I swear this looked easy in the photo” moment
- Measuring feels dramatic, but it saves your project
- You’ll develop strong feelings about cord
- The tension struggle is real (until it isn’t)
- Counting cords becomes your new personality trait
- You’ll learn the joy of “small wins” projects
- The moment it finally looks good is addictive
- What experienced crafters would tell you in one sentence
- Conclusion
Macrame is the rare DIY hobby that hits the sweet spot: it’s easy to start, cheap to keep going, and it somehow makes your home look like you “definitely have your life together” (even if your junk drawer says otherwise). With a few basic knots and a roll of cord, you can make décor that looks boutique-y, giftable, and totally customizedwithout needing a garage full of power tools or a craft budget that requires a co-signer.
In this guide, you’ll get a practical, beginner-friendly roadmap: the supplies that actually matter, the knots you’ll use on repeat, and a lineup of macrame DIY projects that are simple, affordable, and genuinely good-looking. We’ll also cover budget hacks, “how to make it look expensive” tricks, and a longer real-world experiences section at the end (because the learning curve is real, and so is the satisfaction).
Quick Navigation
- Why Macrame Works So Well for Budget DIY
- Supplies You Need (and What You Can Skip)
- The Knot Cheat Sheet (Beginner-Friendly)
- Easy Macrame DIY Projects That Look Expensive
- How to Make Macrame Look “Store-Bought”
- How to Keep Macrame Affordable Long-Term
- Troubleshooting: Fix the Weird Stuff
- Common Experiences (and What Crafters Learn Fast)
- Conclusion + SEO Tags (JSON)
Why Macrame Works So Well for Budget DIY
1) The startup cost is low (and the tools are boringin a good way)
Unlike hobbies that require specialized machines or ten different adhesives that all smell like “industrial accident,” macrame is mostly cord + scissors + patience. Even if you upgrade later (hello, fancy brass hoops and hand-dyed rope), you can begin with a modest kit and still make projects you’ll actually use.
2) It’s beginner-friendly because repetition does the teaching
Macrame is basically the “practice makes pretty” craft. You’ll tie the same few knots again and again, and your hands learn faster than your brain. The first square knot might look like a confused pretzel. By the tenth, you’re suddenly a person who says things like, “I’ll just do one more row,” and then it’s midnight.
3) It upgrades a room without repainting anything
Texture is the secret sauce of good interiors. Macrame adds softness, warmth, and that layered look designers lovewithout you moving furniture, patching drywall, or negotiating with a landlord. Plant hangers, wall hangings, shelves, organizers, and even cord covers can make a space feel styled with minimal effort.
Supplies You Need (and What You Can Skip)
Macrame cord: what to buy for easy, affordable projects
For most beginner macrame DIY projects, cotton cord is the easiest to work with and looks polished. The two most common “starter sizes” are 3mm (more detailed, lighter) and 5mm (chunkier, faster, bold texture). If you want quick results that look dramatic, 5mm is your friend. If you’re making smaller items like keychains, coasters, and ornaments, 3mm is easier to scale down.
- Twisted cord: classic look, holds shape well, fringe can be brushed out with a comb.
- Braided cord: sturdy and smooth, but doesn’t fringe as easily.
- Single-strand cord: dreamy fringe potential, but it can unravel if you bully it.
Hardware and add-ons that make projects easier
- Wooden rings or metal rings (great for plant hangers and small hangings)
- Wood dowel, driftwood, or a smooth branch (for wall hangings)
- Wood beads (optional, but they instantly read “boutique craft fair”)
- S-hooks or a sturdy hook (to hang your work while you knot)
Tools: the “you probably already have these” list
- Sharp scissors (cord laughs at dull scissors)
- Measuring tape
- Masking tape (helps mark knot rows and reduce fraying)
- A comb or pet brush (for fringeyes, really)
- Optional: a clipboard, clothing rack, or door hook to hold projects while you work
Skip for now: expensive specialty jigs, giant kits with 47 mystery accessories, and any “beginner bundle” that includes cord so stiff it feels like it was previously a ship rope.
The Knot Cheat Sheet (Beginner-Friendly)
You can make a shocking number of projects with just a handful of knots. Learn these, and you’re basically set for 80% of beginner patterns.
1) Lark’s Head Knot (the “attach everything” knot)
This is how you attach cord to a dowel, ring, or hoop. It’s usually the very first step for wall hangings and many plant hangers.
2) Square Knot (the “macrame bread and butter”)
Square knots create that classic macrame texture. They’re used in plant hangers, wall patterns, straps, and pretty much anything that looks like a neat grid of knots.
3) Half Hitch + Double Half Hitch (the “line maker” knots)
Half hitches help you form lines and shapesespecially diagonals and curves in wall hangings. Double half hitches are often used when you want cleaner, stronger lines.
4) Spiral Knot (the “why is it twisting like that?” knot)
Spiral knots happen when you tie the same half of a square knot repeatedly. The cord twists into a rope-like spiral that looks complicated but is secretly just repetition.
5) Gathering/Wrapping Knot (the “clean finish” knot)
This knot bundles cords together neatlyperfect for finishing plant hangers, creating tassels, or making your project look intentionally complete instead of “I ran out of confidence.”
Pro tip: Tension matters more than speed. Even tension makes your work look professional. If your knots are uneven, slow down and check that you’re pulling each side with similar force.
Easy Macrame DIY Projects That Look Expensive
Below are beginner-friendly macrame projects designed to be easy, affordable, and good-looking. Each includes budget notes, materials, and a simple build plan you can adapt.
1) Mini Macrame Keychain or Bag Charm
Why it’s great: Fast, low-cord, perfect for learning square knots and fringe.
Budget: Very low (scrap cord works).
Time: 20–40 minutes.
What you need: 3mm cord, keyring or clip, scissors, optional bead.
- Cut 2–4 cords (each about 3–4 feet long, depending on the style).
- Attach to keyring with Lark’s Head knots.
- Tie a small panel of square knots (or alternating square knots for texture).
- Add a bead (optional), then finish with a gathering knot and trim the fringe.
- Comb the fringe for that fluffy, intentional look.
2) Macrame Coasters (Set of 2–4)
Why it’s great: Useful, giftable, and you can crank them out assembly-line style.
Budget: Low to moderate (depends on cord thickness).
Time: 45–90 minutes for a set.
What you need: 3mm cord (or thinner), scissors, measuring tape.
Build idea: Create a center knot cluster (square knots or a simple woven look), then form a round or hex shape with double half hitches. Finish with a neat fringe border and trim evenly.
3) “No-Fuss” Plant Hanger (Beginner Classic)
Why it’s great: The MVP of macrameinstantly makes a room feel styled.
Budget: Low (ring + cord).
Time: About 60–120 minutes.
What you need: 3mm or 5mm cotton cord, ring, scissors, tape measure.
- Cut several long cords (longer than you thinkplant hangers love cord).
- Fold cords in half and attach to the ring with Lark’s Head knots.
- Create the “strap” with square knots or spiral knots.
- Split cords into groups and tie square knots to form the net that holds the pot.
- Finish the bottom with a gathering knot and trim fringe.
Looks-expensive upgrade: Add two wooden beads above the net and keep your knot rows evenly spaced.
4) Simple Wall Hanging with Fringe
Why it’s great: Big impact, easy pattern, and you can customize the size to any wall.
Budget: Low to moderate (more cord).
Time: 1–3 hours.
What you need: Dowel or driftwood, 3mm or 5mm cord, scissors, comb.
- Attach cords across the dowel with Lark’s Head knots.
- Create a simple V-pattern using diagonal double half hitch knots.
- Add a band of square knots for texture (optional).
- Trim fringe into a clean triangle or soft arc and comb it out.
5) Hanging Shelf (Macrame + Wood = Instant “Designer”)
Why it’s great: It looks high-end and is surprisingly doable.
Budget: Moderate (shelf board + cord).
Time: 2–4 hours.
What you need: Smooth wood board, cord, drill (or pre-drilled shelf), ring or loop, scissors.
Build idea: Thread cords through shelf holes, knot under the shelf to hold it level, then create straps with square knots or spirals. Keep measurements consistent so your shelf doesn’t tilt like it has an opinion.
6) Curtain Tiebacks (Small Project, Big “Before/After”)
Why it’s great: Minimal cord, very functional, makes a room feel finished.
Budget: Very low.
Time: 30–60 minutes per tieback.
What you need: 3mm cord, optional wooden ring or bead.
Build idea: Braid three cords or tie a strap of square knots, then add a loop-and-knot closure. Keep them symmetrical so they look like a matching set, not distant cousins.
7) Bottle or Jar Carrier (Macrame That’s Actually Useful)
Why it’s great: Looks cute, protects glass, and makes gifting feel fancy.
Budget: Low.
Time: 45–90 minutes.
What you need: Twine or cord, scissors, a jar/bottle to size it.
Build idea: Start with a wrapped circle near the neck, knot a net pattern down the sides, and finish with a gathered bottom. Keep it snug, but not so tight you need to negotiate with the glass to get it out.
8) Macrame Light-Cord Cover (Hide the Ugly, Keep the Vibe)
Why it’s great: Small upgrade that changes the “feel” of a room.
Budget: Low to moderate.
Time: 1–2 hours.
What you need: Cord, tape, patience.
Build idea: Create a repeated knot pattern around the cord cover area. Choose a neat, consistent texture (like spirals or a tight square-knot wrap) so it looks intentional rather than “rope happened.”
9) Macrame Wall Organizer (Pretty Storage That Doesn’t Scream “Storage”)
Why it’s great: Decorative and practicalperfect for entryways or desks.
Budget: Low to moderate.
Time: 1–3 hours.
What you need: Dowel, cord, optional wall knobs or hooks.
Build idea: Make a web of cords (using simple knots and loops) to hang mail, sunglasses, or small baskets. Stick to a limited pattern so it feels clean and modern.
10) Seasonal Macrame Ornaments (Fast, Festive, and Easy to Gift)
Why it’s great: Tiny projects are perfect for practicing knotsplus they make great gifts.
Budget: Very low.
Time: 15–30 minutes each.
What you need: 3mm cord, scissors, optional ribbon or beads.
Build idea: Create mini tassels, small knot diamonds, or simple shapes. Keep them consistent and tie a neat hanging loop so they look polished.
How to Make Macrame Look “Store-Bought” (Without Trying Too Hard)
Use fewer patterns, not more
Beginner mistake: trying every knot you learned in one project. Pick one “main texture” (square knots, spirals, or hitches) and let it be the star. Simple patterns look modern and intentional.
Measure like you mean it
If your knot rows are uneven, the project can look sloppy even if your knots are technically correct. Use masking tape markers or a measuring tape to keep rows aligned. Your future self will thank you.
Finish edges cleanly
Trim fringe with sharp scissors and comb it out. For wall hangings, step back and trim a little at a time. For coasters or ornaments, trim on a flat surface so the fringe line is even.
Add one “upgrade” detail
Pick one: beads, dip-dye, a brass hoop, a chunky 5mm cord, or a wood dowel with a nice finish. One detail looks designer. Five details look like a craft store exploded.
How to Keep Macrame Affordable Long-Term
Buy cord strategically
- Start with neutral cotton (natural, cream, soft gray). It works with almost any décor and doesn’t feel “trendy-only.”
- Get a larger roll if you plan to make more than one project. Cord is cheaper per foot when you buy more.
- Repurpose materials when it makes sensesome DIYers use clothesline or sturdy twine for certain projects (especially utility items).
Use sales, coupons, and “leftovers” like a pro
Macrame is extremely friendly to scraps. Keep a small bin for leftover cord and use it for keychains, ornaments, tassels, and small wraps. If you shop craft stores, watch for sales and coupons on cord, rings, and beads. (Macrame is a hobby where waiting one week can literally cut your costs in half.)
Choose projects that match your cord
Thicker cord looks best when the pattern is simple. Thinner cord is better for intricate designs. Matching your project style to the cord you already have is the easiest “budget upgrade” there is.
Troubleshooting: Fix the Weird Stuff
Problem: My knots look uneven
Fix: Slow down, keep consistent tension, and periodically “dress” knots (gently adjusting them into place). Also, make sure your cords are laid flat and not twisting.
Problem: My project is lopsided
Fix: Check that your cords are the same length at the start and that your anchor point is centered. For plant hangers, count strands and make sure your groups are evenly divided.
Problem: The fringe looks messy
Fix: Comb it, then trim it. If it’s still unruly, lightly mist with water and comb again, then let it dry before final trimming.
Problem: My cord is fraying too much
Fix: Wrap cord ends with a bit of tape while you work, then remove it at the end. For some cords, a small dab of fabric glue on the tip can help prevent unraveling (test first).
Common Experiences (and What Crafters Learn Fast)
(This section is intentionally longer and experience-focused to help you feel normal while learning.)
The “I swear this looked easy in the photo” moment
Most beginners start macrame with bold confidence and a brand-new roll of cord… and then immediately experience the universal first hurdle: your hands don’t yet know what your eyes are trying to do. You’ll tie something, look at it, and think, “This is… a knot, technically.” That’s normal. Macrame has a tactile learning curve; it’s less like memorizing and more like training your hands to recognize how cord behaves when pulled, twisted, and tightened.
Measuring feels dramatic, but it saves your project
At some point you will ask yourself, “Do I really need to measure every row?” and the honest answer is: you don’t have to… but your results will absolutely snitch on you if you don’t. Many crafters report that the biggest upgrade in their work happens the moment they start marking rows with tape or a ruler. Suddenly the plant hanger looks symmetrical. The wall hanging looks intentional. And you stop trimming fringe like you’re giving a haircut during turbulence.
You’ll develop strong feelings about cord
Macrame cord has personality. Some cotton cord is soft and dreamy; some feels like it was raised by wolves. Most people end up discovering preferences fast:
twisted cord holds shape and looks classic; single-strand makes gorgeous fringe but can unravel if you handle it roughly; braided cord is strong and smooth but won’t fluff up the same way. A common “aha” moment is realizing that if your knots look messy, it’s not always your techniquesometimes the cord is just not the vibe for that particular pattern.
The tension struggle is real (until it isn’t)
Early on, many makers tighten knots too much because they’re trying to “make it secure.” The result can look stiff or uneven, and it can even make it harder to adjust knots into place. With practice, you learn the difference between “snug” and “strangling.” The best macrame has consistent tensionfirm enough to hold shape, relaxed enough to sit neatly. A lot of crafters find it helps to pause every few rows, gently straighten cords, and make tiny adjustments before moving on.
Counting cords becomes your new personality trait
If you’ve never counted strands like your life depends on it, welcome. Plant hangers and nets often require dividing cords into equal groups, then recombining strands in a pattern. Almost everyone has a moment where they accidentally grab the wrong cord, tie a perfectly decent knot, and then realize they’ve created a brand-new modern art concept. The good news? Macrame is forgiving. You can usually undo a knot (slowly), fix the grouping, and continue. The best habit is to pause before each new row and do a quick “strand check” like you’re a pilot doing a pre-flight inspection.
You’ll learn the joy of “small wins” projects
Macrame rewards quick projects. Many people find they improve faster when they mix one larger project (like a wall hanging) with several tiny ones (like keychains or ornaments). The small projects teach your hands the knots without requiring two hours of focus. They also build momentumbecause finishing something feels amazing, and motivation is a craft supply you can’t buy at the store.
The moment it finally looks good is addictive
Here’s the part people don’t always tell you: macrame often looks awkward halfway through. Cords are dangling, knots look unfinished, and the whole thing can resemble a slightly confused octopus. Then you reach the finishing stepstighten, align, comb, trimand it transforms. The fringe becomes clean. The rows look even. The project suddenly looks like something you’d actually hang in your home. That “before and after” shift is one of the most satisfying experiences in DIY, and it’s why so many beginners end up saying, “Okay… one more project.”
What experienced crafters would tell you in one sentence
If you’re learning macrame: buy decent cord, measure your rows, and don’t judge the project until the fringe is combed and trimmed. Also: take a photo of your first attempt. In a month, you’ll want proof of your glow-up.
Conclusion
Macrame is a DIY win because it’s approachable, affordable, and ridiculously flexible. You can start with one roll of cord and make everything from keychains to wall hangings, from plant hangers to shelveswithout needing advanced skills. Focus on a small set of beginner knots, choose projects with a high “impact-to-effort” ratio, and use simple finishing tricks to make your work look polished.
Most importantly: give yourself permission to be a beginner. Your first knots don’t have to be perfectthey just have to exist. And once they exist, you’re officially someone who can make beautiful things out of string, which is honestly a pretty great superpower.


