
Table of Contents >> Show >> Hide
- Why a Tiered Tray Works (Even in Small Spaces)
- Plan First: Choose Your DIY Tiered Tray Style
- Tools and Materials Checklist
- Build Option 1: Classic Wooden DIY Tiered Tray (Two Tiers)
- Finishing Your DIY Tiered Tray: Paint, Stain, and Topcoat (Without the Sticky Regret)
- Build Option 2: No-Saw DIY Tiered Tray Using Thrifted Plates
- Optional Upgrade: Turn It Into a Spinning Tiered Tray
- How to Style a Tiered Tray So It Looks Curated (Not Crowded)
- Common DIY Tiered Tray Problems (And Easy Fixes)
- Care Tips: Keep Your Tiered Tray Looking New
- Real-World DIYer Experiences: 10 Lessons You’ll Actually Use (Extra 500+ Words)
- 1) Centering is everything (and “eyeballing it” is a villain)
- 2) The bottom tier wants to be heavier than the top
- 3) Sanding feels “optional” until you paintthen it’s suddenly mandatory
- 4) Softwoods blotchand it’s not personal
- 5) “Dry” is a liar (sometimes)
- 6) Thin coats look better than thick coats
- 7) Washers are the unsung heroes of the plate version
- 8) The tray looks better when you style it like a “tiny room,” not a storage shelf
- 9) Seasonal decor works best when the tray stays neutral
- 10) Your second tray will be faster, cleaner, and smugger
- Conclusion
Tiered trays are the tiny apartment buildings of home decor: two (or three) levels, surprisingly roomy, and somehow always full of cute stuff you swear you “totally needed.” They’re part serving piece, part organizer, part stage for your seasonal decor to do jazz hands. The best part? You don’t have to buy one. You can build a DIY tiered tray that fits your space, your style, and your budgetwithout needing a garage that looks like a lumber aisle.
In this guide, you’ll get two practical build options (a classic wood two-tier tray and a no-saw thrifted-plate version), finishing tips that actually prevent sticky disasters, and styling ideas that don’t scream “I panic-bought mini pumpkins at 9 p.m.” (No judgment. We’ve all been there.)
Why a Tiered Tray Works (Even in Small Spaces)
A tiered tray is basically vertical storage in a cute outfit. Instead of spreading items across your counter, table, coffee bar, or entryway, you stack them upfreeing space while keeping the vibe intentional. That’s why tiered trays show up everywhere from kitchens to holiday hosting setups: they make clutter look curated, which is honestly a superpower.
Common places to use a DIY tiered tray
- Coffee bar: sweeteners, mugs, stirrers, syrups, napkins
- Kitchen counter: salt cellar, olive oil, garlic, small plant
- Entryway: keys, hand sanitizer, mail, sunglasses
- Bathroom vanity: skincare, cotton rounds, perfume minis
- Seasonal decor “zone”: swap tiny items without redecorating the whole house
Plan First: Choose Your DIY Tiered Tray Style
Before you pick up a drill, decide what you want your tray to do. A serving tray needs stability and a wipeable finish. A decor tray can be lighter-duty and more “pretty than practical.” Your goal will change the materials and the topcoat you choose.
Size guidelines that fit most countertops
- Classic two-tier round: bottom 14–16 inches, top 10–12 inches
- Height: about 14–18 inches total so it feels tall but not top-heavy
- Spacing between tiers: 6–8 inches is comfortable for mugs, jars, and decor
If you’ve seen a lot of trays with a bigger bottom tier and a smaller top tier, that’s not just traditionit’s physics. A wider base makes the whole tiered tray stand more stable, especially when you load it with heavier pieces.
Pick a “look” so decisions get easier
- Farmhouse tiered tray decor: painted neutral base + warm wood accents + mini signs
- Modern minimal: simple silhouette, matte finish, fewer objects, more negative space
- Vintage/romantic: distressed paint, brass-toned hardware, floral pieces
- Seasonal swapper: neutral tray + themed minis you rotate monthly
Tools and Materials Checklist
You can absolutely build a DIY tiered tray with basic tools. This list covers the most common approach: two wooden rounds, a center support, and hardware that keeps everything aligned.
Materials (wood version)
- Two wooden rounds (pre-cut rounds make life easier) or boards to cut circles
- Center support: a wood dowel, a threaded rod, or a “dowel screw” style connector
- Washers + nuts (if using threaded rod) or appropriate fasteners for your connector
- Optional trim for a raised rim (edge trim, lattice strips, or thin molding)
- Feet/legs for the bottom (small furniture legs, bun feet, or even wood blocks)
- Wood glue
- Sandpaper (120 and 220 grit are a great starting combo)
- Finish: stain, paint, and a protective topcoat
Tools (nice-to-have vs must-have)
- Must-have: drill + drill bits, measuring tape, pencil, screwdriver
- Very helpful: sander (orbital or sanding block), clamps
- Optional: jigsaw/router (if cutting your own rounds), brad nailer (if adding trim)
Build Option 1: Classic Wooden DIY Tiered Tray (Two Tiers)
This is the “workhorse” build: sturdy, customizable, and easy to refresh later with a new paint color or stain. If you want a real tiered tray stand that can handle mugs and small jars, start here.
Step 1: Choose and prep your tiers
You can cut circles from a board, but many DIYers use pre-cut wooden rounds because they’re quick and consistent. Either way, decide which piece is the bottom tier and which is the top. A common combo is 15 inches for the bottom and 12 inches for the top.
Step 2: Add a raised rim (optional, but very “tiered tray”)
If you want that classic tray edge, attach thin trim around the perimeter of each round. This creates a lip so items feel “contained.” Keep it lowabout 1/4 to 3/4 inchso it looks refined rather than like a tiny wooden fence.
Step 3: Mark centers and drill clean holes
- Measure across each circle and mark the center (do this carefullycenter alignment is the difference between “artisan” and “leaning tower”).
- Drill a straight hole through the center of both tiers sized for your connector (dowel screw, threaded rod, or bolt).
- If you’re using a top handle or finial, drill the top tier accordingly.
Step 4: Install the center support
You have a few reliable options:
- Threaded rod + washers/nuts: extremely sturdy, adjustable height, easy to tighten
- Dowel screw (wood-to-wood connector): cleaner look, fewer exposed metal parts
- Wood dowel with glue + screws: simple, but less adjustable if something goes off-center
When tightening hardware, aim for “snug and secure,” not “I’m trying to crush this wood into a diamond.” Over-tightening can dent wood fibers or crack ceramic if you’re doing the plate version later.
Step 5: Add feet/legs to the bottom tier
Feet make your tray easier to pick up and prevent it from scraping your surfaces. Attach three or four small legs evenly spaced under the bottom tier. Three legs can be more forgiving on slightly uneven surfaces, while four gives a more traditional look.
Step 6: Sand like you mean it (but not like you’re mad at it)
Sanding is where a DIY tiered tray goes from “craft night” to “wait, you MADE that?” A simple progression works well:
- Start with 120 grit to smooth roughness and shape edges.
- Finish with 220 grit for a touchable, paint/stain-ready surface.
- Sand with the grain, clean dust between grits, and don’t skip too far in grit jumps.
Finishing Your DIY Tiered Tray: Paint, Stain, and Topcoat (Without the Sticky Regret)
Your finish does two jobs: it makes the tray look good, and it helps the tray survive real life (spills, fingerprints, and that one friend who sets a sweating iced coffee down like it’s a sport).
If you stain your tiered tray
- Prep matters: stain needs open pores, so sand properly first.
- Softwoods blotch: if you’re using pine, consider a pre-stain conditioner so color looks more even.
- Wipe timing controls color: longer dwell time usually means deeper color, but follow your stain directions.
If you paint your tiered tray
Paint is perfect for farmhouse tiered tray decor because it gives you that clean, bright base. For a “lived-in” look, do a light distress (gentle sanding on edges after paint dries) or dry-brush a second color. Just remember: “distressed” should look intentional, not like you dropped it and decided to call it a design choice.
Topcoat: the difference between “cute” and “actually usable”
If your tray will hold drinks, snacks, or anything remotely sticky, seal it. Water-based polyurethanes are popular for DIY decor because they dry relatively quickly and stay clear. Oil-based finishes can deepen wood tone but generally take longer to fully cure.
Dry time vs cure time (important!): “Dry” means it’s not tacky. “Cured” means it’s hardened enough for normal use. A finish can feel dry and still be easy to dent for days or weeks, depending on product and conditions.
Food contact note (the sensible version)
If you’re using your tiered tray as a serving piece, choose a finish appropriate for occasional food contact and let it fully cure before using. Many finishes are considered food-safe once cured, but they’re not meant to be cut on like a chopping board. When in doubt, keep direct food on plates, parchment, or liners and treat the tray as the “carrier,” not the cutting surface.
Want patterns? Try decoupage (carefully)
Decoupage is a great way to add prints, sheet music, napkin patterns, or seasonal paper to the tray surface. Apply your medium smoothly, press from center outward to reduce bubbles, and seal with at least a couple protective coats. Just keep the surface wipeable if you plan to use it near food or drinks.
Build Option 2: No-Saw DIY Tiered Tray Using Thrifted Plates
If you love the look of a tiered dessert stand (tea-party energy, but make it casual), the plate version is a fun shortcut. You’ll use plates or shallow bowls and a hardware kit made for tiered stands. This is ideal if you want something for cupcakes, fruit, cookies, or decorwithout woodworking.
What you’ll need
- Two or three plates (thrift store finds work great)
- A tiered stand hardware kit (rod, connectors, handle)
- Washers (often included; soft washers help protect plates)
- Optional: a ceramic drill bit if you want to drill plates yourself (many people use pre-drilled plates or kits designed for assembly)
Assembly tips that prevent heartbreak
- Use washers: they distribute pressure so plates are less likely to crack.
- Hand-tighten first: tighten gradually and evenly.
- Don’t over-tighten: “secure” beats “cracked porcelain and regret.”
Optional Upgrade: Turn It Into a Spinning Tiered Tray
If you want the tray to rotate (hello, coffee syrups and sugar packets), add a Lazy Susan mechanism under the bottom tier. This works especially well for a coffee bar or dining table. Choose a bearing size appropriate for your tray base and attach it with short screws that won’t poke through the top surface.
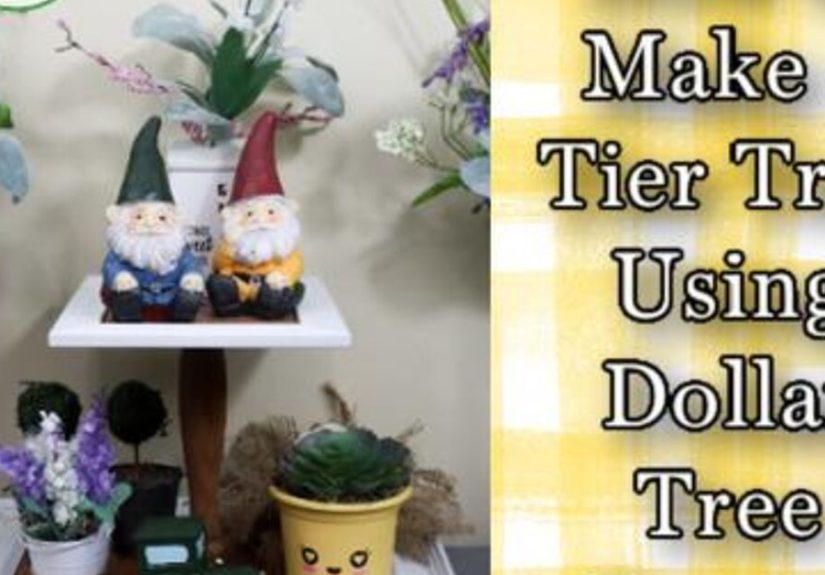
How to Style a Tiered Tray So It Looks Curated (Not Crowded)
Styling is where DIY tiered trays really shine. The goal is balance: different heights, a consistent color story, and enough breathing room so the tray doesn’t look like a tiny flea market.
The simple styling formula
- Start with an anchor piece: something larger that sets the theme (a mug, a small canister, a mini vase).
- Add greenery: real or fauxthis softens hard edges and adds movement.
- Play with height: stack coasters, books, or small risers to vary levels.
- Fill with minis: small signs, tiny bowls, ornaments, mini pumpkins, little figurines.
- Edit ruthlessly: leave a little empty space so it feels intentional.
Three quick styling examples
1) Everyday coffee bar: bottom tier = mugs + sugar bowl + napkins; top tier = syrups + stir sticks + tiny plant.
2) Spring theme: bottom tier = small pitcher + faux tulips; top tier = pastel eggs + mini bunny + “hello spring” sign.
3) Fall farmhouse: bottom tier = mini pumpkin cluster + cinnamon sticks; top tier = candle + “gather” sign + dried wheat.
Common DIY Tiered Tray Problems (And Easy Fixes)
Problem: The tray wobbles
- Check if legs/feet are even. Sand one foot slightly or add felt pads.
- Make sure the center support is truly centered and tightened evenly.
- Use three feet instead of four if your surfaces are often uneven.
Problem: The finish feels sticky
- Let it cure longerdry isn’t the same as cured.
- Use thinner coats next time (thick coats trap solvents and stay tacky).
- Sand lightly between coats with fine grit and remove dust before recoating.
Problem: The stain is blotchy
- Use pre-stain conditioner on softwoods like pine.
- Sand evenly; uneven sanding can create uneven absorption.
- Consider gel stain for more control if you’re new to staining.
Care Tips: Keep Your Tiered Tray Looking New
- Wipe with a damp cloth; don’t soak it.
- Use liners or small dishes for messy items (honey, syrup, jam).
- Avoid extreme heat directly on the finish (use coasters under hot mugs).
- If you waxed the tray, buff occasionally to refresh sheen.
Real-World DIYer Experiences: 10 Lessons You’ll Actually Use (Extra 500+ Words)
DIY tiered tray projects look simple on papertwo circles, a center post, done. In the real world, makers tend to learn the same lessons in the same order, usually while holding sandpaper in one hand and questioning their life choices in the other. Here are the most common “wish I knew that earlier” experiences that show up across woodworking guides, tool plans, and tiered-stand tutorials.
1) Centering is everything (and “eyeballing it” is a villain)
A tiered tray can be beautifully built and still look wrong if the holes aren’t centered. DIYers often discover that being off by even a small amount creates a visible lean once both tiers are stacked. The fix is simple: measure, mark, and drill carefullythen double-check before making the hole permanent.
2) The bottom tier wants to be heavier than the top
People load the top with mugs and wonder why the whole tray feels tippy. A common experience is realizing the tray behaves like a tiny tower: weight low equals stability. Heavier items (mugs, jars, canisters) belong on the bottom tier; lighter items (mini signs, greenery, small ornaments) belong up top.
3) Sanding feels “optional” until you paintthen it’s suddenly mandatory
First-time builders often skip sanding steps because the wood “looks fine.” Then paint highlights every rough edge like a spotlight on a bad haircut. Many wood prep guides stress a step-by-step grit progression and cleaning dust between grits because that’s what creates a finish that looks professional and feels smooth to the touch.
4) Softwoods blotchand it’s not personal
Pine and other softwoods can absorb stain unevenly, which surprises a lot of people on their first tray. The typical “aha” moment is learning that conditioner (or choosing a more controlled stain type) can make the color look more consistent. This isn’t a skill issue; it’s how certain woods behave.
5) “Dry” is a liar (sometimes)
DIYers frequently describe the heartbreak of placing decor on a tray that felt dryonly to find ring marks or dents the next day. Finishing FAQs explain why: a topcoat can be dry to the touch but still curing to full hardness. The practical lesson is to give the tray time before heavy use, especially if you plan to set mugs or glassware on it.
6) Thin coats look better than thick coats
Another repeat experience: trying to “finish faster” with thicker coats usually backfires. Thick coats can run, stay tacky longer, and feel rubbery. Makers who switch to thin, even coats (with light sanding between) typically get smoother results and fewer finishing headaches.
7) Washers are the unsung heroes of the plate version
For thrifted-plate tiered stands, people often learn the hard way that pressure needs to be distributed. Soft washers and gradual tightening help protect plates. The best advice from tutorials is wonderfully unglamorous: tighten with care, and don’t treat ceramic like it’s steel.
8) The tray looks better when you style it like a “tiny room,” not a storage shelf
Styling guides often encourage an anchor piece, greenery, varied height, and a few small accents. DIYers report that once they stop trying to fit everything they own on the tray, it suddenly looks more expensive. Editing is not defeatit’s design.
9) Seasonal decor works best when the tray stays neutral
A common strategy is building or painting the tray in a neutral palette (white, black, warm wood, soft gray). Then the seasonal personality comes from the minis: ornaments, small signs, ribbon, greenery, tiny pumpkins, pastel eggs. This keeps the DIY tiered tray from becoming a one-season-only piece.
10) Your second tray will be faster, cleaner, and smugger
Many DIYers describe the same progression: first tray = learning curve; second tray = confidence; third tray = you’re making them as gifts and casually dropping “oh, I built it” into conversation like it’s no big deal. The real win is that once you understand centering, sanding, and finishing, tiered trays become a repeatable project you can customize endlessly.
Conclusion
A DIY tiered tray is one of those projects that gives you maximum payoff for reasonable effort: it’s functional, customizable, and easy to restyle all year. Whether you build a classic wooden tiered tray stand with a sturdy center support or assemble a thrifted-plate dessert stand with simple hardware, the keys are the sameplan your size, drill carefully, sand smoothly, and finish patiently. Then style it with anchors, greenery, and a little restraint so it looks curated instead of chaotic.


