
Table of Contents >> Show >> Hide
- Before You Start: The 15-Minute Prep That Saves 5 Hours of Pain
- Choose Your Strategy: The “Don’t Fight the Whole Slab at Once” Rule
- Step-by-Step: How To Break Up a Concrete Slab
- Step 1: Clear and contain the workspace
- Step 2: Create control lines (score/cut into sections)
- Step 3: Start 6 inches from the edge, then work inward
- Step 4: Break it uptool-specific tips
- Step 5: Pry up sections as you go
- Step 6: Deal with rebar or wire mesh
- Step 7: Load and haul (the unglamorous finale)
- Removing Buried Concrete and Footings
- How To Get Rid of Concrete Without Making It Everyone’s Problem
- Common Mistakes That Make Concrete Removal Miserable
- Real-World Experiences: of “Learn From My Mistakes” Energy
- Conclusion
- SEO Tags
Concrete is the ultimate “I’m not moving” materialuntil you show up with a plan, the right tools, and just enough stubbornness. Whether you’re removing a cracked sidewalk panel, tearing out a patio, or rescuing your yard from a mystery slab left by the previous owner (thanks, mystery slab), this guide walks you through how to break up and remove concrete safely and efficientlywithout turning your weekend into a full-body regret.
Before You Start: The 15-Minute Prep That Saves 5 Hours of Pain
1) Figure out what you’re dealing with
Not all concrete is created equal. A thin walkway might be 3–4 inches thick. Driveways can be thicker. Footings and pads can be deep, reinforced, and emotionally attached to the earth. Do a quick reality check:
- Thickness: If you can see an exposed edge, measure it. If not, drill a small test hole in an inconspicuous spot.
- Reinforcement: Look for rebar, wire mesh, or thick “grid” patterns. Reinforced concrete takes longer and needs cutting tools.
- Location: Is this slab near a foundation, retaining wall, or utility line? If yes, you’ll want extra caution (or a pro).
2) Call 811 before you dig (seriously)
If your project involves digging below graderemoving footings, buried chunks, or concrete that sits near where utilities might runcontact 811 so underground public utilities can be marked. It’s free, it’s fast, and it beats discovering a line with a steel bar.
3) Dust is not “just dust”
Breaking, drilling, and cutting concrete can create respirable crystalline silica dust. That’s the tiny, airborne stuff you don’t want in your lungs. Reduce dust with wet methods (light water spray at the point of impact/cut), local exhaust/dust collection when available, and cleanup methods that don’t kick dust back into the air.
4) PPE you actually need
- Eye protection: Safety glasses (and ideally a face shield if you’re chipping).
- Hearing protection: Demolition tools are loud. Your future self would like quieter ears.
- Gloves: Heavy-duty, not the “I garden sometimes” kind.
- Boots: Closed-toe minimum; steel/composite toe is better.
- Respiratory protection: Use a properly fitted respirator suited for dusty work if you can’t reliably control dust with water/collection.
5) Tool checklist (pick based on slab thickness)
The best tool is the one that matches the job. Here’s the practical lineup:
- Under ~3 inches thick: Sledgehammer, digging bar, pry bar, cold chisel.
- 3–6 inches thick: Electric demolition hammer (a.k.a. breaker), rotary hammer with chisel bit.
- Large areas / thick slabs: Jackhammer, concrete saw (wet cutting preferred), heavy pry bar, wheelbarrow, and a plan for debris.
- If reinforced: Angle grinder with cutoff wheel, reciprocating saw with metal blade, or rebar cutter (as needed).
Choose Your Strategy: The “Don’t Fight the Whole Slab at Once” Rule
Concrete removal gets dramatically easier when you stop trying to break “a slab” and start breaking “manageable pieces.” Your goal is not dust and drama. Your goal is chunks you can lift without inventing new words.
When a sledgehammer is enough
For thin slabs (often under about 3 inches) and small areas, manual tools can be efficient. The trick is technique: start at an edge or corner, strike confidently, and let cracks spread. If there’s no exposed edge, you can create one by removing adjacent soil or cutting a starter line.
When you should rent a demolition hammer
Once slabs get thicker or larger, a demolition hammer saves time and your shoulders. It’s a sweet spot tool: powerful enough for most patios and walkways, easier to control than a full jackhammer, and typically available at big-box tool rental counters.
When a jackhammer (and cutting) is the smarter play
If the area is big, the slab is thick, or you’re dealing with reinforcement, a jackhammer plus a plan to section the slab (often by saw-cutting) is usually the fastest route. Think: driveway panels, thick pads, and anything that laughs at your sledgehammer.
Step-by-Step: How To Break Up a Concrete Slab
Step 1: Clear and contain the workspace
- Remove furniture, planters, and anything you don’t want pelted by tiny concrete shrapnel.
- Block off the areaespecially from kids, pets, and curious neighbors who love saying, “Looks easy!”
- If dust is a concern, lightly wet the work area and keep a hose/sprayer nearby.
Step 2: Create control lines (score/cut into sections)
If you want easier lifting and cleaner removal, break the slab into planned sections. For larger slabs, saw-cutting (preferably wet cutting) helps you “pre-decide” where the concrete will fail. Aim for pieces you can actually moveoften in the 1–2 square foot range for DIY work.
No saw? You can still create weak points by drilling a line of holes (close together) or using a chisel line to encourage cracking along a path.
Step 3: Start 6 inches from the edge, then work inward
A classic approach is to start near the edge (not right on it) and work your way in. Edges are where slabs tend to give up first, and once you get lift under a section, everything gets easier. If the slab is surrounded by soil, dig out a small trench along one side to expose an edge.
Step 4: Break it uptool-specific tips
Sledgehammer method (thin slabs)
- Use smart swings: Let the tool do the work. A controlled, full swing beats frantic tapping.
- Work cracks: Once a crack forms, hit along it to spread it and release chunks.
- Don’t make boulders: Stop when pieces are liftable. Smaller chunks beat heroic chunks.
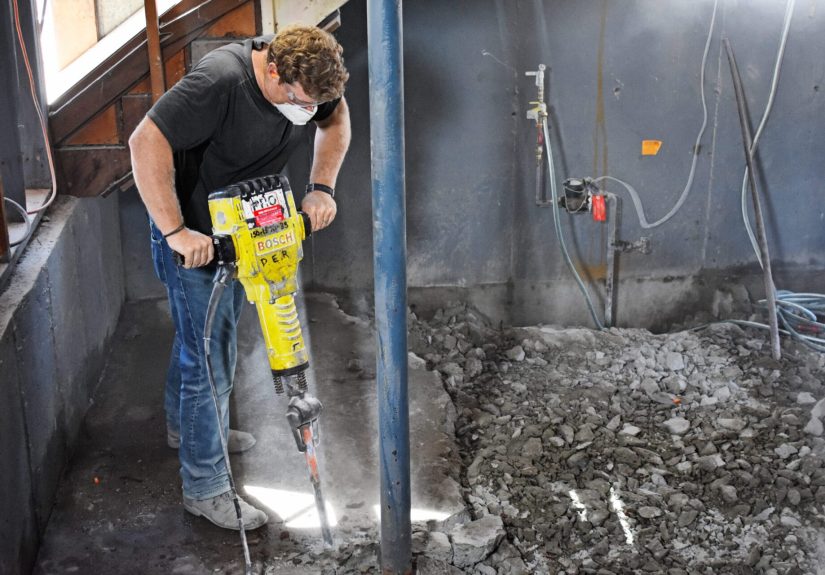
Demolition hammer / jackhammer method (thicker slabs)
- Pick the right bit: A pointed bit helps start fractures; a chisel bit helps peel and separate sections.
- Let the weight work: Don’t wrestle the toolguide it.
- Control dust: Use a water-spray attachment or wet the point of impact when practical, and clean slurry before it dries.
Step 5: Pry up sections as you go
Breaking is only half the job; lifting is the other half. Use a long pry bar (or digging bar) to lever sections up. A small chunk of wood or a brick can act as a fulcrum. Once you get an edge lifted, you can slide the bar farther under and pop it up in stages instead of deadlifting it.
Step 6: Deal with rebar or wire mesh
If you hit reinforcement, the concrete may break but refuse to separate. That’s normal. Cut rebar/wire as needed using an angle grinder with a cutoff wheel or a reciprocating saw with a metal-cutting blade. Work slowly, keep sparks away from anything flammable, and keep your cut points stable so the tool doesn’t bind.
Step 7: Load and haul (the unglamorous finale)
Move debris with a wheelbarrow, dolly, buckets, or a garden cart rated for heavy loads. Concrete is shockingly heavy. If your wheelbarrow looks like it’s praying, you’ve loaded too much.
Removing Buried Concrete and Footings
Footings and buried chunks are where concrete goes to become a legend. The approach is similar, but you need digging space and patience.
1) Expose the concrete
Dig around the concrete to expose the sides. You’re creating working room for bars and for cracks to travel. For post footings, dig a ring around the plug so you can break it outward.
2) Break from the outside in
Once exposed, use a digging bar to create fractures, then break off pieces. If it’s deep or reinforced, a demolition hammer is usually worth renting.
3) Lift in stages
Don’t try to yank the whole footing out at once. Break it into smaller chunks, pry up sections, and keep widening the void. Gravity is your assistant if you give it room to help.
How To Get Rid of Concrete Without Making It Everyone’s Problem
Disposal is where many DIY plans go to die. Before you start breaking, decide where the concrete is going. Your future self will thank you.
Option A: Recycle it (often the best choice)
Many areas have facilities that accept “clean concrete” (no trash mixed in). Recycled concrete is commonly used as aggregate/base material. Call ahead and ask what counts as “clean” in your area.
Option B: Rent a C&D-approved dumpster
For larger projects, a dumpster service that accepts construction and demolition (C&D) debris can be the simplest solution. Confirm weight limits. Concrete gets heavy fast, and overweight fees are a nasty surprise.
Option C: Haul it yourself (good for small jobs)
If you only have a small amount, you may be able to haul it to a local transfer station or recycling yard. Protect your vehicle (tarps are your friend), and don’t exceed payload limits. “It fit in the trunk” is not the same as “it’s safe for the suspension.”
Option D: Reuse it on-site
In some situations, broken concrete can be reused as fill (where allowed), drainage support, or as base for certain landscaping applications. Always check local rules and make sure you’re not creating drainage issues.
Common Mistakes That Make Concrete Removal Miserable
- Breaking giant pieces: Big chunks feel productive until you try to lift them.
- Starting in the middle with no plan: Edges and control cuts make everything easier.
- Ignoring dust control: Wet methods and proper cleanup reduce airborne dust dramatically.
- Overloading the wheelbarrow: Two lighter trips beat one trip that ends in a spill (or a strained back).
- Forgetting reinforcement: Rebar turns “break” into “break and cut.” Have a plan for metal.
- No disposal plan: A driveway full of rubble is not a storage system.
Real-World Experiences: of “Learn From My Mistakes” Energy
The first time you break up concrete, you learn an important truth: concrete is not impressed by your optimism. You can walk into the project feeling like a weekend warrior and leave feeling like you fought a sidewalk and the sidewalk won on points.
One of the biggest “aha” moments is how much an exposed edge matters. If you start in the middle of a slab because it feels dramatic, you’ll spend way more time convincing the concrete to crack. But once you dig out one side and create a proper edge, the slab suddenly remembers it has weaknesses like the rest of us. The pry bar becomes your MVP: not glamorous, not loud, but shockingly effective. Every time you lever up a section, you’re not just moving concreteyou’re creating the next edge for the next break. That’s momentum you can feel.
Renting a demolition hammer is another rite of passage. You think you’re just “borrowing a tool,” but what you’re really renting is time and spine preservation. The tool does the hammering; you do the guiding. The mistake people make is trying to muscle it like a shopping cart with a bad wheel. Don’t. Let the weight work, keep a steady stance, and move in short, controlled steps. Also: hearing protection isn’t optional unless you enjoy the sound of ringing silence later.
Then there’s the rebar surprise. You finally get a chunk to crack free, and it lifts up like a hinged doorbecause steel is holding it together like it’s auditioning for a superhero movie. That’s when you learn to keep a metal-cutting plan on standby. An angle grinder makes quick work of rebar, but sparks are real, and so is tool kickback if the piece shifts. Stabilize what you’re cutting. If you can’t stabilize it, break more concrete around it until you can.
The most underappreciated part is cleanup and disposal. Concrete is heavy in a way that feels personal. The first wheelbarrow load always seems fine, and the second load is where the handles start negotiating their retirement. Smaller loads keep the job moving and reduce the chance you’ll spill a pile of rubble precisely where you don’t want itlike onto the only patch of grass you were trying to save. If you’re hauling to a recycler or transfer station, you’ll also discover that “a little pile” can become “wow, that’s a lot of weight” once it’s all broken up.
Finally, the best experience-based tip: pace yourself. Concrete removal rewards steady progress. Work in sections, take short breaks, hydrate, and treat the job like a marathon you’re completing with power tools. The goal isn’t to prove you can do it in one frantic burst; the goal is to finish cleanly, safely, and without waking up the next day feeling like you got into a disagreement with a parking lot.
Conclusion
Breaking up and removing concrete is absolutely doable for many DIYersif you match the tool to the slab, control dust, work from edges, and break pieces into sizes you can safely handle. The winning formula is simple: plan first, section the slab, break strategically, pry often, and don’t let disposal be an afterthought. Do that, and you’ll turn “immovable” into “gone” with a lot less chaos (and far fewer dramatic sighs).


