
Table of Contents >> Show >> Hide
- Before You Start: The 3 Money-Saving Decisions
- Fast Faux Headboards (Minimal Tools, Maximum Payoff)
- Cozy Upholstered Headboards (Soft, Stylish, Actually Comfortable)
- 9) Classic Upholstered Plywood Headboard
- 10) Slipcovered Headboard (No Staple Drama)
- 11) Button-Tufted “Hotel” Headboard
- 12) Channel-Tufted (Vertical Stripes)
- 13) Scalloped Upholstered Headboard
- 14) Wavy Painted Plywood Headboard
- 15) Wall-to-Wall Upholstered Panel
- 16) Upholstered Wall Panels (3-Panel Set)
- Wood & Paneling Headboards (Weekend Builds That Feel Custom)
- Light, Storage & Small-Space Wins (Function That Looks Good)
- Upcycled & Salvaged Headboards (Character on a Budget)
- Finishing Touches That Make It Look Expensive
- of Real-Life DIY Headboard “Experience” (What You’ll Actually Run Into)
- Conclusion
If your bedroom feels a little “meh,” you don’t need a new mattress, a new dresser, and a new personality.
You need a new focal point. Enter: the humble headboardaka the easiest way to make your bed look
intentional instead of “I moved in yesterday and my laundry is the décor.”
The best part? A DIY headboard can be a paint-and-tape afternoon, a thrift-store rescue mission, or a
one-weekend woodworking flex. Below are 32 DIY headboard ideas (from super-simple faux headboards to
“look what I built!” statement pieces) designed to refresh your space without torching your budget.
Before You Start: The 3 Money-Saving Decisions
- Mounting: Wall-mounted looks custom; bed-frame-mounted is easier to move; “faux” options skip drilling.
- Scale: Wider headboards can make a room look more polishedjust don’t block outlets or switches.
- Finish: Paint hides sins. Stain highlights them. Choose your adventure.
Fast Faux Headboards (Minimal Tools, Maximum Payoff)
1) Painted Arch Headboard
Tape a soft arch (or rectangle) behind the bed and paint it like a mural. It costs little, takes one afternoon,
and instantly “frames” the bed like it belongs on purpose.
2) Peel-and-Stick Wallpaper Panel
Apply removable wallpaper to a foam board or thin plywood panel, then hang it like art. It’s renter-friendly
and gives you pattern without committing to a full accent wall.
3) “Headboard” With Paint + Trim Tape
Paint a simple block and outline it with peel-and-stick trim tape to mimic panel molding. The result reads
expensive… from a distance… which is where most people admire bedrooms anyway.
4) Hanging Quilt or Throw
Drape a quilt, rug, or oversized textile from a curtain rod to create a cozy backdrop. Bonus: you can swap it
seasonally, like a pumpkin spice latte for your walls.
5) Oversized Art as a Headboard Substitute
Hang one large piece (or a tight grid of frames) centered behind the bed. Keep the bottom edge just above
your pillows so it visually “anchors” the sleep zone.
6) Floating Shelf Ledge Headboard
Install a long picture ledge behind the bed and style it with books, small prints, and a plant (a fake one is fine;
it won’t judge your schedule).
7) Stick-On Upholstered Tiles
Use adhesive wall panels (or DIY fabric-wrapped squares) to create a soft grid behind the bed. It’s easy,
modern, and surprisingly forgiving if your measurements are… optimistic.
8) Pool Noodle Cushion Hack
For a padded look on a tiny budget, use foam noodles (or foam pipe insulation) under fabric on a lightweight
backing panel. It’s goofy in theory and weirdly chic in practice.
Cozy Upholstered Headboards (Soft, Stylish, Actually Comfortable)
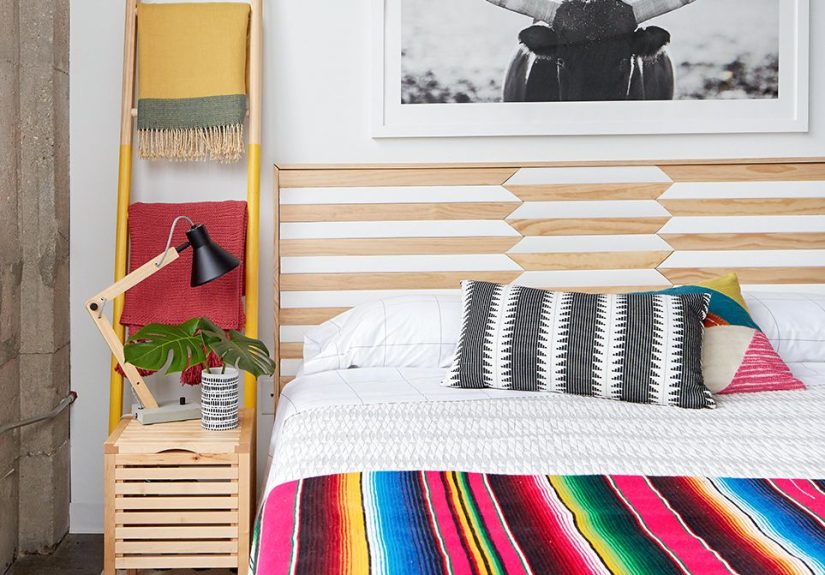
9) Classic Upholstered Plywood Headboard
The staple: plywood cut to shape, foam + batting, then fabric stapled on the back. Choose a performance fabric
if you snack in bed (no shamejust planning).
10) Slipcovered Headboard (No Staple Drama)
If you already own a headboard, make a tailored slipcover. It’s the “new outfit” solution: same person,
better look, less money.
11) Button-Tufted “Hotel” Headboard
Add tufting by drilling evenly spaced holes and pulling covered buttons tight with upholstery twine. It’s a little
fussy, but the final vibe is upscale and nap-approved.
12) Channel-Tufted (Vertical Stripes)
Create plush channels using foam strips and fabric wrapped over them. It reads modern, hides staple lines well,
and makes your bed look like it knows what it’s doing.
13) Scalloped Upholstered Headboard
Trace a scallop shape on plywood, cut it out, and upholster. The outline adds instant personalitylike your bed
got a haircut and now gets compliments.
14) Wavy Painted Plywood Headboard
Cut a simple wavy silhouette from plywood and paint it a bold color. It’s playful, graphic, and looks custom even
if your cutting line had… feelings.
15) Wall-to-Wall Upholstered Panel
Build one long, padded panel the width of the wall behind your bed. It makes a small bedroom feel intentional
and gives you that built-in, boutique-hotel effect.
16) Upholstered Wall Panels (3-Panel Set)
Make three tall fabric panels and mount them evenly behind the bed. It’s easier than one giant piece, and the
seams look like “designer detailing,” not “I ran out of plywood.”
Wood & Paneling Headboards (Weekend Builds That Feel Custom)
17) Board-and-Batten Feature Headboard
Use vertical battens over a flat backing to create that crisp panel look. Paint it the same color as the wall for
subtle textureor go contrast for drama.
18) Shiplap-Inspired Plank Headboard
Add horizontal planks behind the bed for farmhouse warmth. This one’s forgiving: slightly uneven boards can
read “rustic” instead of “oops.”
19) Tongue-and-Groove Plank Look
Use tongue-and-groove boards (or the lookalikes) to create a tidy, tight-lined backdrop. Painted white is classic;
stained wood leans cabin-cozy.
20) Chevron Plank Headboard
Cut boards with angled ends and arrange them in a chevron pattern on a backing panel. It’s geometric, modern,
and makes your bed look like it has an architect friend.
21) Reclaimed Wood “Stacked” Headboard
Layer reclaimed boards on plywood for a textured, rustic statement. Sand thoroughly, seal it well, and enjoy the
vibe of “mountain lodge,” even in a city apartment.
22) Rough-Sawn Rustic Headboard
Use rough-sawn boards for bold texture and contrast. A dark finish can feel moody-modern; a lighter wash reads
airy and relaxed.
23) DIY Spindle Headboard
Spindles add vintage charm and lots of vertical rhythm. Paint it one color for classic cottage style, or go high-gloss
black for a “grandma, but make it fashion” look.
24) Woven Wood Headboard
Create a woven effect with thin wood strips over a frame. It’s a little more detailed than basic planking, but the
texture payoff is hugelike basket-weave, but architectural.
Light, Storage & Small-Space Wins (Function That Looks Good)
25) LED-Lit Wooden Headboard
Add LED strip lighting behind a wood headboard for soft glow and built-in ambience. It’s the easiest way to upgrade
“basic bedroom” into “I might be in a boutique hotel.”
26) Storage Headboard With Cubby Openings
Build shallow compartments for books, chargers, and the water glass you pretend you won’t knock over.
Paint it to match the wall so it feels built-in, not bulky.
27) Headboard “Wings” That Frame Nightstands
Extend the headboard wider than the bed to visually connect nightstands. This creates a cohesive, designer look
and makes mismatched bedside tables feel like a deliberate choice.
28) Shelf + Sconce Rail Combo
Mount a slim shelf and add plug-in sconces above. You’ll free up nightstand space and your bed will look instantly
styledeven if your closet disagrees.
Upcycled & Salvaged Headboards (Character on a Budget)
29) Repurposed Interior Door Headboard
Old doors make incredible headboards: instant panels, instant height, instant charm. Clean it, sand it, paint it,
and mount it securely for an architectural statement.
30) Vintage Shutters Headboard
Pair two or three shutters side-by-side for farmhouse texture. The slats add depth, and a fresh coat of paint turns
“yard sale find” into “curated vintage.”
31) Fireplace Mantel as a Headboard Ledge
A salvaged mantel creates a chunky ledge behind the bedperfect for artwork, books, and a tiny clock you’ll ignore.
It’s rustic, unexpected, and surprisingly practical.
32) Folding Screen Headboard
A thrifted folding screen can stand behind the bed as a zero-build headboard. It adds pattern, height, and instant
“I travel the world” energyregardless of your weekend plans.
Finishing Touches That Make It Look Expensive
- Match your metal: If you add hardware, try to repeat the finish elsewhere (lamp, drawer pulls, or frames).
- Go taller: A little extra height reads “custom” and makes ceilings feel higher.
- Repeat a color: Pull one headboard color into pillows or art so it feels intentional, not random.
of Real-Life DIY Headboard “Experience” (What You’ll Actually Run Into)
DIY headboards are one of those projects that look ridiculously easy in a 20-second clipthen you start measuring and realize
your room has opinions. The first “experience” most people have is discovering that walls are rarely perfectly straight and floors
are rarely perfectly level. That doesn’t mean you failed; it means your house was built by humans, not lasers. A simple fix is to
level the top line visually (what your eye notices) and hide small gaps behind pillows (what your eye forgives).
The second experience: the hardware store trip you didn’t plan. You’ll go in for “just a few screws,” and walk out with sandpaper,
wood filler, a new drill bit, and a plant you swear is “for the bedroom vibe.” If you want to keep costs low, decide your finish early.
Paint is cheaper and more forgiving than stain, especially if your wood pieces don’t match perfectly. Stain can look amazing, but it
highlights every scratch, patch, and “creative” cut line. If you’re mixing reclaimed boards, paint is your best friend.
Upholstered headboards come with their own comedy: fabric looks smooth until you staple it, and then suddenly it develops wrinkles
like it’s auditioning for a raisin commercial. The trick is to pull fabric tight from the center outward, alternating sides, and using
extra batting so you don’t see harsh edges. And yes, you’ll probably remove and re-staple a few times. That’s normal. Consider it
“quality control,” not “I can’t staple.”
Mounting is where DIY confidence meets physics. Anything heavy should be anchored properlyideally into studs or using a secure cleat
system. If you rent (or hate drilling), faux headboards can still look legit: paint, textiles, screens, and panels can create the same
visual impact without turning your wall into Swiss cheese. For small bedrooms, the best experience is how quickly a headboard makes
the space feel intentional. It’s weirdly satisfying: you change one thing behind the bed, and suddenly the whole room feels “finished,”
like you’ve been quietly good at interior design all along.
Finally, expect the project to reveal your personal style. Some people start with “simple wood headboard” and end up adding LED glow,
a shelf, and a dramatic color becausesurprisethey’re a maximalist. Others begin with a bold plan and end up painting everything white
because calm is the real luxury. Either way, the best DIY headboard experience is the payoff: you did it yourself, it cost less than a
store-bought upgrade, and every time you walk into the room, your bed looks like it got a promotion.
Conclusion
A low-cost bedroom refresh doesn’t require a full makeover. Pick one DIY headboard idea that matches your time, tools, and tolerance for
sawdust. Whether you paint, upholster, plank, or upcycle, you’ll end up with a bedroom that feels more “designed” and less “default settings.”


