
Table of Contents >> Show >> Hide
- Quick Planning Checklist (So Your Headboard Looks Custom, Not Chaotic)
- 32 DIY Headboard Ideas (Budget-Friendly, Style-Forward, and Totally Doable)
- No-Build & Low-Tool Headboards (Perfect for Beginners and Renters)
- Upcycled & Thrifted Headboards (Big Style, Tiny Price Tag)
- Wood Headboards That Look Custom (Without Custom Pricing)
- Upholstered & Soft Headboards (Cozy, Comfortable, Surprisingly Affordable)
- Natural Texture Headboards (Warm, Trendy, and Often Cheap to DIY)
- Finishing Details That Make a Cheap Headboard Look Expensive
- Real-Life DIY Headboard Lessons (About of “Wish I’d Known That” Wisdom)
- Conclusion
If your bedroom feels a little “meh,” you don’t need a new mattress, a new bed frame, and a new personality. (Although the
last one is optional.) A headboard is one of the quickest ways to make a bed look finishedlike it belongs in a catalog
instead of “whatever was on sale with free shipping.” The best part: a DIY headboard can be done on a tight budget using
paint, fabric, thrift finds, leftovers from your garage, or that mysterious stack of boards you swear you’ll “use someday.”
This guide rounds up 32 budget-friendly DIY headboard ideas that range from zero-tools wall tricks to beginner carpentry and
upholstered upgrades. You’ll also get practical tips on sizing, mounting, and finishing so your headboard looks intentional
(not “I tried my best at 11:30 p.m. and now we live with it”).
Quick Planning Checklist (So Your Headboard Looks Custom, Not Chaotic)
Before you start cutting wood or stapling fabric like you’re auditioning for a DIY reality show, take five minutes to plan.
A little prep saves money, prevents wobbles, and keeps you from making a headboard that blocks outlets or bonks your pillows.
1) Choose your style of headboard
- Wall illusion: paint, wallpaper, decals, art, or textiles (fastest and often cheapest).
- Wall-mounted: sturdy and flexible, but you’ll need safe anchoring.
- Bed-frame mounted: attaches to the frame; good for renters who prefer minimal wall holes.
- Freestanding: sits behind the bed or attaches to legs; helpful if you can’t drill into walls.
2) Size it like a pro
- Width: match the mattress width, or go 2–6 inches wider for a “designer” look.
- Height: 40–60 inches off the floor is common, but taller can look luxe (especially with low beds).
- Clearances: check outlets, vents, windows, and whether you want space for nightstands and lamps.
3) Pick a budget strategy
- Use what you already have: leftover paint, scrap plywood, old curtains, thrifted doors, or pallets.
- Shop smart: furring strips, pine boards, and plywood are often more affordable than hardwood.
- Upgrade with finish: stain + a clear coat can make inexpensive wood look high-end.
32 DIY Headboard Ideas (Budget-Friendly, Style-Forward, and Totally Doable)
Pick one ideaor combine two for a custom look (painted arch behind a simple wood headboard, anyone?). Each idea includes a
quick “why it works” plus an easy execution plan.
No-Build & Low-Tool Headboards (Perfect for Beginners and Renters)
-
Painted arch “headboard”
Why it works: paint is inexpensive and visually powerful. An arch instantly adds softness and designer vibes.
How to do it: tape an arch outline (or trace a large round object for curves), paint two coats, peel tape, and
admire your work like a proud museum curator. -
Painted rectangle with “trim” lines
Why it works: looks like paneling without the lumber bill. How to do it: paint a rectangle slightly
wider than the bed; add thin painted lines inside to mimic molding. -
Washi tape geometric headboard
Why it works: ultra-low cost, removable, and oddly addictive. How to do it: build a pattern (chevrons,
diamonds, skyline) directly on the wallno commitment issues required. -
Peel-and-stick wallpaper panel
Why it works: big impact, small effort. How to do it: apply removable wallpaper in a headboard-shaped
section; frame it with thin trim or painted border for polish. -
Removable wall decal “faux headboard”
Why it works: easiest path to pattern and detail. How to do it: choose a decal motif (lace-like,
botanical, geometric), smooth it on, and pair with crisp bedding so it reads intentional. -
DIY mural moment (paint or wallpaper collage)
Why it works: your wall becomes the headboard. How to do it: paint a simple mural (flowers, stripes,
abstract shapes) or create a collage with removable paper and tape. -
Oversized framed art as a headboard substitute
Why it works: a big frame reads like furniture. How to do it: hang one large thrifted print or DIY a
simple canvas with painted color blocks. -
Gallery wall “headboard cluster”
Why it works: visual weight without construction. How to do it: arrange frames in a wide, low cluster
the width of the beduse matching frames to calm the chaos. -
Quilt or blanket on a curtain rod
Why it works: cozy, textured, and easy to swap seasonally. How to do it: clip a quilt to rings or drape
it over a rod; keep it taut so it looks like upholstery. -
Fabric panel headboard (no sewing)
Why it works: soft look, low cost. How to do it: stretch fabric over a lightweight board or foam panel,
staple/secure on the back, then mount or lean it behind the bed. -
Macramé or woven wall hanging
Why it works: adds texture and height without bulk. How to do it: hang a large woven piece centered
over the bed; go wider than you think for balance. -
String-light outline headboard
Why it works: a little glow = instant ambiance. How to do it: outline a headboard shape with warm
string lights or LED strips. Bonus points for hiding cords neatly.
Upcycled & Thrifted Headboards (Big Style, Tiny Price Tag)
-
Old door headboard
Why it works: doors already have panels and characteraka built-in “designer detail.” How to do it:
clean, sand lightly, paint or stain, and mount securely (or attach legs for freestanding use). -
Shutter headboard
Why it works: cottage charm on a bargain budget. How to do it: connect two or three shutters side by
side, paint them one color, and mount or secure behind the bed. -
Window-frame headboard
Why it works: architectural salvage = instant focal point. How to do it: use old window frames as a
grid; back them with fabric or wallpaper for extra punch. -
Folding screen or room divider headboard
Why it works: tall, dramatic, and renter-friendly. How to do it: place a screen behind the bed and
secure it so it can’t tip; upholstered screens feel especially luxe. -
Vintage rug headboard
Why it works: pattern + texture + warmth. How to do it: attach a rug to a board (or a sturdy backing
like cardboard/foam board for lightweight setups), then mount or lean. -
Thrifted bookshelf “storage headboard”
Why it works: functional and budget-smarthello extra storage. How to do it: position a low bookshelf
behind the bed; anchor it for safety and style it with baskets and books. -
Picture frame headboard arrangement
Why it works: ornate frames look expensive even when they’re thrift-store finds. How to do it: mount a
row of frames above the bed; add fabric, wallpaper, or painted inserts inside for cohesion. -
Repurposed headboard from a tabletop or desk hutch
Why it works: solid wood pieces are often cheap secondhand. How to do it: remove legs/hardware, patch
holes, refinish, and mount.
Wood Headboards That Look Custom (Without Custom Pricing)
-
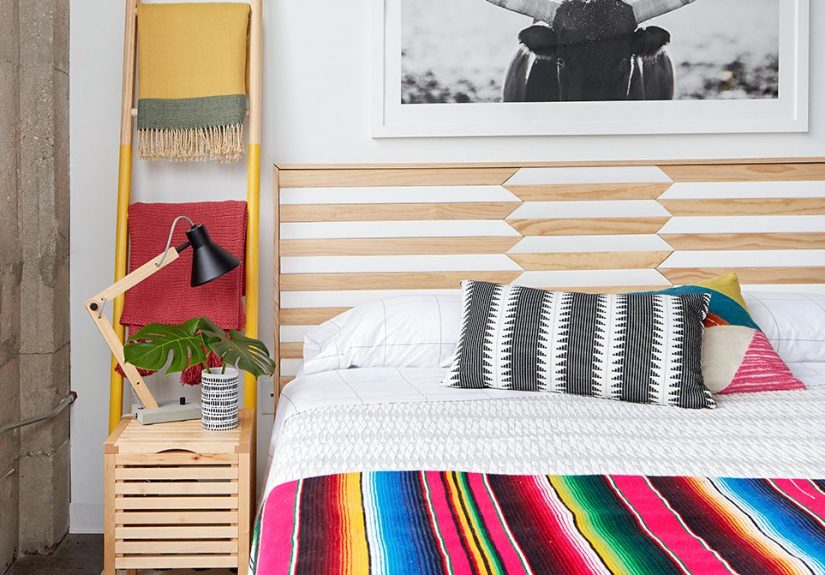
Simple plank headboard (beginner-friendly)
Why it works: clean lines fit almost any style. How to do it: attach inexpensive pine boards or furring
strips to a backing board; stain, paint, or whitewash. -
Board-and-batten wall headboard
Why it works: architectural detail makes the room feel upgraded. How to do it: add vertical battens
over a flat panel; paint it one color for a built-in look. -
Shiplap or faux-shiplap headboard
Why it works: farmhouse-meets-modern; surprisingly easy. How to do it: use shiplap boards or create the
look with evenly spaced planks and shadow gaps. -
Chevron or herringbone scrap-wood headboard
Why it works: pattern makes cheap wood look high-end. How to do it: cut equal pieces and arrange in a
V pattern; stain in one tone or alternate tones for contrast. -
Pieced wood mosaic headboard
Why it works: ideal for using leftoversevery piece becomes “design.” How to do it: assemble a patchwork
of scrap boards on plywood; sand edges and seal. -
Reclaimed pallet wood headboard
Why it works: rustic texture for low cost. How to do it: select safe, clean boards; sand thoroughly,
then attach horizontally to a backing. -
Fence picket headboard
Why it works: pickets are inexpensive and give cottage character. How to do it: line them up vertically,
cap with a top rail, and paint for a charming finish. -
Cedar shingle headboard
Why it works: tons of texture for minimal money. How to do it: staple or nail shingles onto a backing
board; leave natural or stain for warmth. -
Wood “woven” headboard
Why it works: looks like artisan weaving, but it’s wood strips. How to do it: cut plywood strips and
weave them through a simple frame; sand edges for a smooth finish. -
Arched plywood cutout headboard
Why it works: curved shapes feel trendy and soft. How to do it: draw an arch on plywood, cut carefully,
sand, then paint a bold color or neutral. -
Pegboard headboard with hooks and mini shelves
Why it works: adjustable storage and a modern look. How to do it: mount pegboard securely; add hooks,
tiny ledges, and a “nightstand zone” that fits your routine. -
Backlit floating wood headboard
Why it works: hotel vibes on a DIY budget. How to do it: create a shallow wood box or panel and add LED
strip lighting behind it for a soft glow.
Upholstered & Soft Headboards (Cozy, Comfortable, Surprisingly Affordable)
-
Basic upholstered plywood headboard
Why it works: it’s the “classic” for a reasonsimple and polished. How to do it: wrap plywood with foam
and batting, then staple fabric on the back; mount or attach to frame. -
Tufted headboard (buttons or faux-tuft)
Why it works: tufting reads expensive. How to do it: plan button placement, pull tufts through foam and
plywood, then secure tightly on the back. -
Channel-tufted look (easy DIY version)
Why it works: modern and “designer.” How to do it: create padded vertical channels with foam strips and
fabric pulled tight; keep spacing consistent for clean lines. -
Modular upholstered panels
Why it works: you can build it in sections, replace one panel later, and scale it wide. How to do it:
cover multiple small boards with foam and fabric; mount in a grid. -
“Curtain-to-headboard” upholstery hack
Why it works: curtains offer lots of fabric for less money. How to do it: use a curtain panel as your
upholstery fabric; staple on the back like you would with yardage. -
Velvet wrap headboard (IKEA-inspired)
Why it works: velvet looks luxe even when it’s budget. How to do it: wrap foam and fabric around a
simple form; keep corners smooth and tension even. -
Slipcovered headboard (removable fabric cover)
Why it works: washable, changeable, future-proof. How to do it: sew a simple envelope-style cover or
use hook-and-loop strips for a no-fuss removable layer. -
Stuffed bolster “pillow headboard”
Why it works: comfy and minimal. How to do it: create a long bolster (or several) and mount a simple ledge
or rod to hold it in place behind pillows.
Natural Texture Headboards (Warm, Trendy, and Often Cheap to DIY)
-
Cane or rattan webbing headboard
Why it works: airy texture that feels boutique. How to do it: stretch cane webbing inside a simple wood
frame; seal it to protect against snags. -
Bamboo reed woven headboard
Why it works: natural + graphic; looks way harder than it is. How to do it: weave reeds in a crisscross
pattern across a frame; trim edges neatly. -
Rope-wrapped headboard frame
Why it works: coastal texture on the cheap. How to do it: wrap thick rope tightly around a simple frame
or panel; secure ends with staples or strong adhesive. -
Seagrass mat headboard
Why it works: organic texture that reads calm and collected. How to do it: mount a seagrass rug/mat to a
board; frame it with thin wood strips for a finished edge.
Tip for mixing ideas: If you love the look of a tall upholstered headboard but hate the cost, do a simple
upholstered panel and paint a wide arch behind it. You’ll get height, softness, and color without building a whole
wall-to-wall structure.
Finishing Details That Make a Cheap Headboard Look Expensive
Sanding and sealing (the “don’t skip this” steps)
If you’re working with woodespecially reclaimed piecessand thoroughly so it doesn’t snag fabric, sheets, or skin. Then
seal it. A clear protective finish helps prevent splinters, reduces dusting, and makes the whole thing look intentionally
made rather than “rescued from the curb at dusk.”
Paint and stain tricks
- Color-wash: dilute paint slightly to let wood grain show through for a soft, layered look.
- Two-tone: use one tone for the frame and another for planks to create depth.
- Matte black accents: a simple dark top rail or trim can make budget wood feel modern.
Upholstery shortcuts that still look polished
- Use batting: batting smooths foam edges so the surface doesn’t look bumpy.
- Staple with strategy: start center-top, then center-bottom, then sides; work outward evenly.
- Keep corners neat: fold like wrapping a giftclean lines beat bulky lumps every time.
Mounting basics (safety + stability)
Heavy headboards should be anchored properly. If you’re unsure, go with a freestanding design or attach the headboard to the
bed frame. For wall-mounted headboards, use appropriate hardware for the wall type and weight, and make sure everything is
level before final tightening.
Real-Life DIY Headboard Lessons (About of “Wish I’d Known That” Wisdom)
DIY headboards are one of those projects that look deceptively simpleuntil you’re holding a staple gun, balancing a panel,
and wondering if anyone will notice that your “perfect arch” is slightly more “melted rainbow.” The good news: most of the
things people worry about don’t matter as much as they think, and the few things that do matter are easy to fix if you know
what to watch for.
First, the biggest surprise is how much scale changes the room. DIYers often start too small because they
picture a headboard as a little accent piece. But in real bedroomsespecially with larger bedssmall headboards can look like
a postage stamp on a billboard. Going wider (even just 2–6 inches beyond the mattress) is the simplest way to make the bed
feel intentional. The same goes for height: a taller headboard makes ceilings feel higher and turns the bed into a focal
point. If you’re nervous, try a temporary version first: tape off a headboard outline on the wall and live with it for a day.
Second, there’s a universal truth about “budget” materials: they look expensive when the edges are clean. With wood projects,
the glow-up comes from sanding and finishing. With fabric projects, the glow-up comes from tension and alignment. DIYers who
get a “professional” look usually aren’t using fancy materialsthey’re just pulling fabric evenly, keeping seams straight, and
taking the extra five minutes to smooth corners. If you’re using patterned fabric, center the pattern so it looks balanced.
Your brain notices off-center patterns the way it notices crooked picture frames: instantly and forever.
Third, don’t underestimate the power of lighting. People often build a headboard and then feel like
something’s still missing. Adding warm, soft light behind or above the headboard can make the entire setup look styled.
Backlighting also hides minor imperfections (a gift from the universe). Even a simple plug-in sconce or LED strip can make a
budget headboard feel like a hotel upgrade.
Fourth, DIYers frequently learn that comfort matters. A hard wood headboard looks fantasticuntil you sit up
to read and bonk into it. If you love the look of wood but want comfort, consider a hybrid approach: a slim upholstered panel
mounted to the headboard area, or even a row of large pillows on a narrow shelf. That way you get the design without the
“wooden forehead stamp.”
Finally: perfection is not required. Most DIY headboards are viewed with pillows in front, blankets rumpled, and someone
searching for a phone charger in the dark. If the project is level, stable, and fits the room’s style, you’ve won. And if
it’s not perfect? Congratulationsyou now have a bedroom feature that proves a human lives here, not a furniture showroom.


