Table of Contents >> Show >> Hide
- Before You Build: Plan the Cabinet Like a Player, Not Just a Carpenter
- Way 1: Build a Full-Size Arcade Cabinet from Scratch
- Way 2: Build a Bartop Arcade Cabinet
- Way 3: Use a Cabinet Kit, Flat-Pack, or Conversion Build
- Essential Arcade Cabinet Components
- Safety and Practical Tips
- Which Method Should You Choose?
- Experience Notes: What Building an Arcade Cabinet Teaches You
- Conclusion
Building an arcade cabinet is one of those projects that sounds wildly ambitious until you break it down. At first, it feels like you need a woodshop, an electrical engineering degree, and possibly a tiny wizard who understands joystick wiring. In reality, you need a clear plan, a sensible parts list, basic tools, patience, and the ability to forgive yourself when your first pencil line looks like it was drawn during an earthquake.
The good news? There is more than one way to build an arcade cabinet. You can go full-size and create a classic stand-up machine that looks ready to swallow quarters. You can build a compact bartop arcade cabinet that fits on a desk, counter, or game-room shelf. Or you can take the easier road with a kit, flat-pack cabinet, or restored old shell. None of these options is “cheating.” The arcade gods do not care whether you cut every panel yourself or bought pre-cut MDF. They care only that the buttons click, the screen glows, and someone yells, “One more round!” at least three times.
This guide covers three practical ways to build an arcade cabinet, including materials, electronics, controls, software, design tips, safety notes, and real-world lessons that can save your project from becoming a very expensive laundry rack.
Before You Build: Plan the Cabinet Like a Player, Not Just a Carpenter
Before you buy wood, buttons, paint, or a Raspberry Pi, decide how the arcade cabinet will actually be used. A machine for one player and classic vertical games does not need the same layout as a two-player fighting-game cabinet. A cabinet for kids should be stable, durable, and simple to turn on. A cabinet for adults who grew up feeding quarters into machines may need a nostalgic shape, bold marquee, and controls that feel satisfyingly clicky.
Choose Your Arcade Style
Most home arcade builds fall into three categories: full-size upright cabinets, bartop cabinets, and kit or conversion builds. A full-size arcade cabinet gives you the classic arcade look and the most room for a larger monitor, speakers, storage, and two-player controls. A bartop cabinet is smaller, easier to move, and usually cheaper. A kit or conversion build reduces the woodworking pressure and lets you focus on assembly, electronics, artwork, and gameplay.
Pick Your Gaming System
Many DIY arcade cabinets use a Raspberry Pi with RetroPie, Batocera, Recalbox, or a similar retro-gaming setup. Others use a mini PC, old desktop, laptop motherboard, or commercial multi-game board. Raspberry Pi builds are popular because they are compact and power-efficient, while mini PCs can offer stronger performance for more demanding games and front-end software.
One important note: emulators are not the same thing as free games. Use legal game files, homebrew games, officially released collections, or games you have the right to use. A beautiful cabinet filled with questionable downloads is like building a sports car and fueling it with courtroom drama.
Way 1: Build a Full-Size Arcade Cabinet from Scratch
A full-size arcade cabinet is the dream build. It has presence. It looks like furniture with a joystick addiction. This method gives you the most control over size, shape, materials, artwork, and layout, but it also requires the most planning and patience.
Best For
This option is best for people who want a centerpiece for a game room, basement, garage, studio, or entertainment space. It is also ideal if you want two-player controls, a larger monitor, a lighted marquee, real speakers, and enough internal room to work comfortably.
Materials You Will Typically Need
Most scratch-built cabinets use MDF or plywood. MDF is smooth, easy to paint, and popular for arcade projects, but it is heavy and creates fine dust when cut. Plywood is lighter and stronger, though the surface may need more sanding and filling before paint or vinyl artwork. Many builders use 3/4-inch sheet material for the main sides and structure, with thinner material for back panels, speaker panels, or access doors.
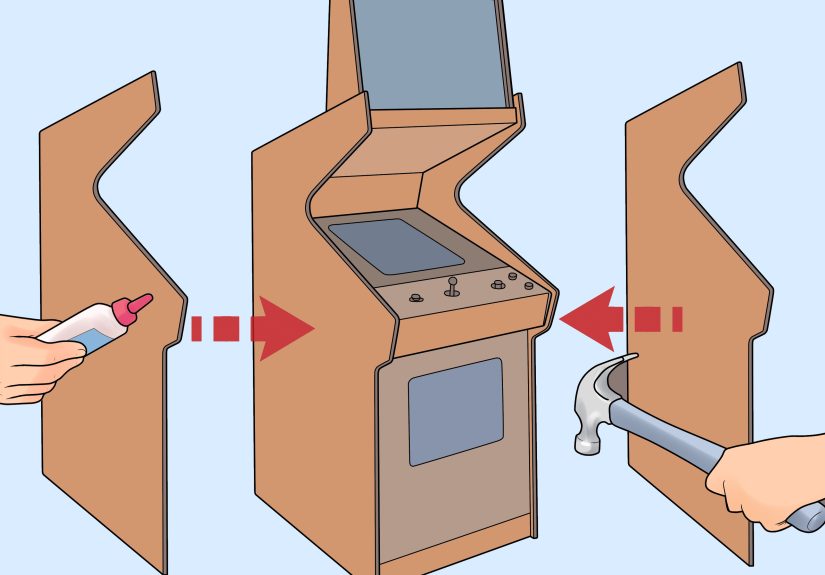
You will also need wood screws, wood glue, clamps, braces or battens, primer, paint or vinyl wrap, T-molding if you want that classic arcade edge, a monitor, speakers, buttons, joysticks, a control encoder, wiring, a power strip or safe internal power solution, and a computer or Raspberry Pi.
Basic Build Process
Start with plans. Do not “eyeball” a full-size cabinet unless your eyeballs are certified architects. Print or draw side-panel templates and mark the monitor height, control-panel angle, marquee area, speaker area, and access door. Cut both side panels together if possible so they match. Then build the internal frame with support strips, cross braces, and shelves for the monitor and electronics.
Install the monitor securely, leaving enough ventilation and access for future repairs. Build the control panel separately so you can drill button holes cleanly, test spacing, and remove it later if a button fails. A common layout includes one joystick and six action buttons per player, plus start and coin buttons. Fighting-game fans may prefer eight buttons per player, while classic arcade fans may prefer fewer buttons and more breathing room.
Pros of a Full-Size Cabinet
The biggest advantage is authenticity. A full-size cabinet feels like an arcade machine, not just a computer in a box. You can use a larger display, better speakers, larger artwork, a lighted marquee, and real arcade spacing. It also gives you enough interior space to hide wiring neatly and service parts later.
Cons of a Full-Size Cabinet
The downsides are size, weight, cost, and commitment. Once built, it is not something you casually move from room to room unless you enjoy negotiating with doorways. It also requires more cutting, sanding, painting, and measuring. If you live in an apartment, your neighbors may not appreciate the late-night soundtrack of “one more quick cut.”
Way 2: Build a Bartop Arcade Cabinet
A bartop arcade cabinet is the practical cousin of the full-size machine. It still gives you real arcade controls and a dedicated screen, but it sits on a table, desk, counter, or cabinet. This is one of the best ways to build an arcade cabinet if you want the fun without surrendering half your living room.
Best For
A bartop build is best for beginners, renters, smaller homes, dorm rooms, bedrooms, workshops, and anyone who wants a project that feels manageable. It is also a strong choice for a one-player machine, although two-player bartop cabinets are common too.
Materials and Parts
A bartop cabinet usually needs less wood, a smaller monitor, fewer structural braces, and a more compact control layout. Many builders use an old 17-inch, 19-inch, 22-inch, or 24-inch LCD monitor. A Raspberry Pi or mini PC can sit inside the cabinet, and a USB encoder can connect the joysticks and buttons to the system.
For the cabinet body, MDF is popular because it paints well and gives a clean arcade look. Plywood can also work, especially if you want a lighter cabinet. Acrylic or plexiglass can protect the screen and control-panel artwork. Vinyl decals can turn a simple black box into something that looks like it escaped from 1987 in the best possible way.
Basic Build Process
Design the side panels first. Bartop cabinets often have a sloped screen, angled control panel, and small marquee. Once the side profile is set, cut two identical side pieces. Add horizontal panels between them: bottom, back, top, speaker panel, monitor support, and control panel. Keep the back accessible because you will eventually need to adjust cables, update software, or rescue a screw that somehow vanished into the machine’s soul.
Drill the control panel carefully using a template. Button spacing matters. If the controls are too close, two players will bump elbows like polite penguins. If they are too far apart, the cabinet becomes wider than necessary. Test the layout on cardboard first. It costs nothing and can prevent the dreaded “why is Player Two’s jump button in another zip code?” problem.
Pros of a Bartop Cabinet
The bartop cabinet is smaller, cheaper, lighter, and faster to build. It is easier to paint, easier to wire, and easier to store. It also gives you the satisfaction of a real arcade machine without requiring a moving crew.
Cons of a Bartop Cabinet
The main limitation is space. You have less room for a large monitor, big speakers, two-player comfort, and internal cable management. A bartop also needs a stable table or stand. Put it on a wobbly folding table and every heated match will feel like gaming during an earthquake.
Way 3: Use a Cabinet Kit, Flat-Pack, or Conversion Build
The third way to build an arcade cabinet is to avoid reinventing the wooden wheel. Cabinet kits, flat-pack arcade shells, and conversion projects are excellent choices if you care more about playing games than becoming emotionally bonded with a circular saw.
Best For
This route is best for beginners, busy builders, families, classrooms, makerspaces, and anyone who wants cleaner results with fewer tools. It is also great if you want predictable dimensions and pre-cut panels.
Types of Kit and Conversion Builds
A flat-pack kit usually arrives as pre-cut panels that you assemble with screws, brackets, cam locks, or glue. Some kits include control-panel holes, marquee panels, monitor mounts, and T-molding slots. Other kits include only the cabinet shell, leaving you to choose the buttons, joystick, screen, and computer.
A conversion build uses an existing cabinet, furniture piece, or older arcade shell. Some people convert entertainment centers, small cabinets, IKEA-style furniture, cocktail tables, or damaged arcade cabinets. This can save time, but it may require creative problem-solving. Furniture was not always designed to hold joysticks, monitors, speakers, and the emotional weight of losing at Pac-style maze games.
Basic Build Process
With a kit, dry-fit everything before final assembly. Make sure panels face the correct direction, especially if one side has a finished surface. Install the monitor mount, control panel, speakers, and computer only after the cabinet is structurally solid. Add artwork, T-molding, and acrylic protection near the end to avoid scratches during assembly.
For conversions, measure everything twice. Check monitor depth, control-panel angle, ventilation, access doors, and cable routing. Older furniture may need reinforcement. If the cabinet wobbles before you add electronics, it will not magically become stable afterward.
Pros of Kits and Conversions
Kits save time and reduce cutting mistakes. They are especially useful if you do not own saws or have a good workspace. Conversion builds can be budget-friendly and environmentally smart because you are reusing existing furniture or hardware.
Cons of Kits and Conversions
Kits can cost more upfront than raw lumber. Some kits also limit your design choices. Conversion builds may involve awkward dimensions, hidden damage, or strange compromises. That vintage cabinet you found online might be charming, but it may also smell like a basement that lost a fight with humidity.
Essential Arcade Cabinet Components
1. Display
Modern LCD monitors are the easiest choice. They are thin, affordable, and simple to connect with HDMI, DisplayPort, or adapters. A 4:3 monitor looks more authentic for many older games, while a widescreen monitor offers flexibility for modern front ends and console-style games. Make sure the screen angle is comfortable when standing or sitting.
2. Controls
Arcade buttons and joysticks come in different styles. Japanese-style controls often feel lighter and more responsive, while American-style controls can feel heavier and clickier. There is no universal winner. The best control is the one that makes you grin while mashing buttons with completely unnecessary confidence.
3. Encoder Board
A USB encoder converts button and joystick inputs into signals your computer or Raspberry Pi can understand. Many beginner kits include zero-delay USB encoders with labeled wiring. Keep your wiring organized with labels, zip ties, and a layout diagram. Future-you will be grateful.
4. Computer or Single-Board Computer
A Raspberry Pi is compact and popular for retro builds. A mini PC offers more power and may run demanding emulators, Windows-based front ends, or modern indie arcade games more smoothly. Choose the system based on the games you legally plan to run, not just the cheapest hardware you can find.
5. Sound
Small powered speakers are usually enough for a home arcade cabinet. Mount them behind a speaker panel or under the marquee. Avoid blasting the volume unless everyone in the house has agreed to live inside an arcade soundtrack.
6. Artwork and Finish
Paint, vinyl wrap, side art, marquee graphics, and control-panel overlays give the cabinet personality. Primer is important, especially on MDF edges, which drink paint like they have been wandering through a desert. Sand between coats for a smoother finish.
Safety and Practical Tips
Wear eye protection, hearing protection, and a dust mask when cutting or sanding. Follow the instructions for your tools and ask an experienced adult or professional for help if you are unsure. Keep wiring tidy, avoid overloading outlets, and use properly rated power components. Ventilation matters too; electronics need airflow, even if the cabinet looks like a sealed nostalgia refrigerator.
Also plan for maintenance. Make the back panel removable. Leave space to reach the power switch, USB ports, and SD card or storage drive. A cabinet that cannot be opened easily will eventually become a puzzle box with buttons.
Which Method Should You Choose?
Choose a full-size cabinet if you want the most authentic arcade experience and have room for it. Choose a bartop cabinet if you want a smaller, cheaper, beginner-friendly project. Choose a kit or conversion if you want faster results, cleaner parts, or less woodworking stress.
There is no wrong choice as long as the cabinet fits your space, budget, skills, and gaming goals. The best arcade cabinet is not always the biggest or most expensive. It is the one people actually play.
Experience Notes: What Building an Arcade Cabinet Teaches You
The first thing you learn while building an arcade cabinet is that measuring is not a suggestion. It is the quiet boss of the entire project. A difference of 1/8 inch may not sound dramatic, but when two cabinet panels refuse to line up, that tiny measurement suddenly develops a villain origin story. The best habit is to mark clearly, cut slowly, and dry-fit parts before glue or paint enters the conversation.
The second lesson is that control-panel layout deserves more attention than beginners expect. Buttons may look fine on a computer template, but hands tell the truth. Before drilling into finished wood, mock up the controls on cardboard. Stand at the cabinet height. Pretend to play. Move your wrists. Imagine two players standing shoulder to shoulder. This simple test can prevent cramped spacing, awkward angles, and accidental elbow combat.
Another experience that surprises many builders is how much finishing matters. The cabinet can be structurally perfect, but rough paint, dusty edges, or crooked vinyl will make it look unfinished. MDF edges need sealing. Paint needs patience. Vinyl needs a clean surface and a calm mood. Do not apply side art while tired, hungry, or emotionally wounded by a bubble under the decal.
Wiring also teaches humility. At first, every button wire seems obvious. Then you close the control panel, boot the system, and discover that Player One’s punch button is somehow mapped to pause. Label each wire as you go. Take photos before closing panels. Keep a small wiring diagram inside the cabinet. It sounds overly careful until something stops working six months later and you do not have to become a detective with a flashlight.
Software setup is another area where patience wins. Configure one controller first, then test every button in the menu and in a game. Adjust screen resolution, audio output, and safe shutdown behavior before inviting friends over. Nothing ruins a grand reveal faster than saying, “Hold on, I think the joystick is being recognized as a keyboard from another dimension.”
The final lesson is emotional: arcade cabinets are never truly finished. You may add a lighted marquee later. Then better speakers. Then new artwork. Then a trackball. Then a spinner. Then you start explaining to people that, technically, this is still the same project. That is part of the charm. A DIY arcade cabinet is not just a gaming machine; it is a hobby disguised as furniture.
Conclusion
Learning how to build an arcade cabinet is really about choosing the right path. A full-size cabinet delivers the classic arcade feel. A bartop cabinet offers a smaller and more beginner-friendly build. A kit or conversion project saves time and reduces woodworking headaches. Whichever method you choose, focus on comfort, safety, clean wiring, legal game sources, and a finish you will be proud to show off.
Build carefully, test often, and remember: the first game you play on a cabinet you built yourself will feel better than any high score. Even if you lose immediately. Especially if you lose immediately.