Table of Contents >> Show >> Hide
- How to Cover Pipes on a Wall Without Creating a Future Plumbing Mystery
- Step 1: Identify What Type of Pipe You Are Covering
- Step 2: Decide Whether to Hide, Blend, or Feature the Pipes
- Step 3: Paint the Pipes to Match the Wall
- Step 4: Use Pipe Insulation for a Cleaner and More Functional Look
- Step 5: Build a Simple Wooden Pipe Chase
- Step 6: Install a Removable Access Panel
- Step 7: Hide Pipes Behind Cabinets, Shelving, or Built-Ins
- Step 8: Use Decorative Wall Panels or Beadboard
- Step 9: Cover Pipes with Curtains or Fabric Panels
- Step 10: Wrap Pipes with Rope, Reed, or Decorative Sleeves
- Step 11: Leave Strategic Access and Finish Like a Pro
- Best Materials for Covering Pipes on a Wall
- Common Mistakes to Avoid
- of Real-World Experience: What Actually Works When Covering Wall Pipes
- Conclusion
Note: This article is original, written for web publishing, and based on widely accepted home improvement, plumbing, energy-efficiency, and indoor-moisture guidance. Before enclosing, drilling near, or modifying plumbing, always check local building rules and call a licensed professional for gas lines, major plumbing changes, suspected leaks, or anything that makes your inner homeowner whisper, “This feels expensive.”
How to Cover Pipes on a Wall Without Creating a Future Plumbing Mystery
Exposed wall pipes have a special talent: they can turn an otherwise polished room into something that looks like the backstage area of a laundromat. Whether they run through a basement, bathroom, laundry room, kitchen, mudroom, or awkward corner that real estate listings politely call “character,” visible pipes often interrupt the look of a space.
The good news is that covering pipes on a wall does not always require tearing into drywall or rerouting plumbing. In many cases, you can hide, disguise, frame, paint, box in, or decorate around them using practical DIY methods. The better news: a smart pipe-covering project can improve the room without blocking access to shutoff valves, cleanouts, or areas that may need inspection later.
The trick is not simply to make the pipe disappear. The trick is to make it disappear responsibly. A beautiful cover that traps moisture, blocks a shutoff valve, or forces a plumber to destroy your new wall panel later is not a design solution; it is a decorative hostage situation.
Below are 11 simple ways to cover pipes on a wall, from renter-friendly fixes to permanent built-ins. Each step includes practical advice, design notes, and safety reminders so your finished wall looks intentional instead of like a pipe wearing a disguise from the dollar store.
Step 1: Identify What Type of Pipe You Are Covering
Before you grab wood, paint, fabric, or a heroic amount of adhesive, figure out what kind of pipe you are dealing with. Water supply lines, drainpipes, radiator or steam pipes, HVAC lines, sprinkler pipes, and gas lines all have different needs. Some can be decoratively covered. Some can be boxed in. Some should not be touched without professional help.
If the pipe is a water line, look for nearby shutoff valves and signs of condensation. If it is a drainpipe, make sure any cleanout access remains reachable. If it is a hot pipe, such as a radiator or steam line, do not wrap it in random materials that may overheat, smell, melt, or become a fire risk. If it is a gas line, do not enclose or alter it casually. Call a licensed professional before making decisions.
A quick inspection also helps you avoid covering a problem. Look for rust, stains, dripping, mineral buildup, moldy odors, soft drywall, peeling paint, or damp flooring nearby. Covering a leaking pipe is like putting a tuxedo on a raccoon: it may look better for a minute, but the underlying situation is still chaotic.
Step 2: Decide Whether to Hide, Blend, or Feature the Pipes
There are three basic design strategies for exposed pipes: hide them completely, make them blend into the wall, or turn them into a deliberate feature.
Hiding works best in finished rooms where exposed plumbing feels out of place. This usually means building a pipe chase, installing a removable cover, adding cabinetry, or using decorative panels. Blending works when the pipe is not too bulky; painting it the same color as the wall can make it visually retreat. Featuring works in industrial, farmhouse, loft, or utility-style spaces where exposed metal can look intentional.
For example, a vertical pipe in a basement family room may look best boxed into a slim column and painted like the wall. A short pipe under a wall-mounted sink might look cleaner with a decorative shroud. A copper pipe in a vintage laundry room could be polished or painted matte black to look like part of the design. The right choice depends on the pipe’s location, the room’s style, and how often the pipe needs access.
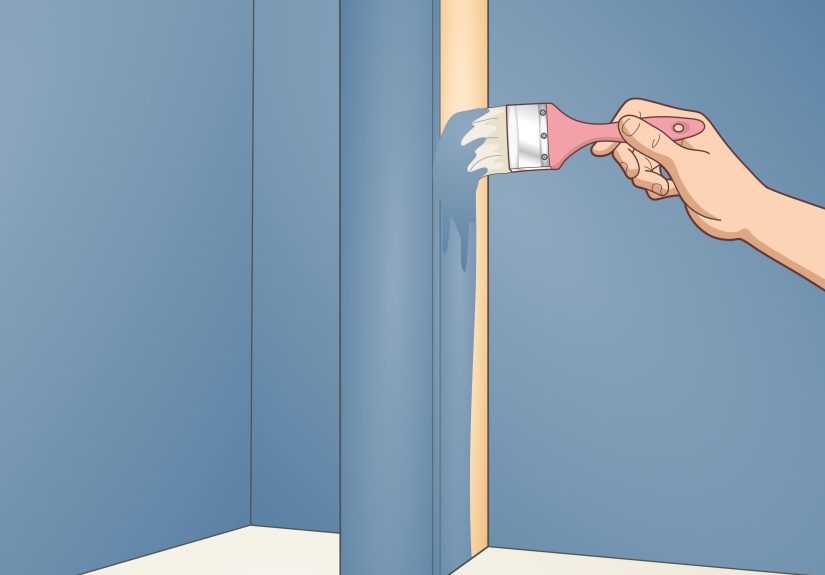
Step 3: Paint the Pipes to Match the Wall
Painting is the simplest way to cover pipes visually without covering them physically. It is inexpensive, quick, and ideal when you need full access to the pipe. This method works especially well for slim pipes, pipes running along corners, or pipes already in decent condition.
Start by cleaning the pipe thoroughly. Dust, grease, and old residue can keep paint from bonding. Lightly sand glossy metal or plastic surfaces if appropriate, then apply a primer designed for the pipe material. Use a paint that suits the surface and the temperature conditions. For hot pipes, choose a heat-tolerant coating recommended for that use.
To make pipes disappear, paint them the exact wall color. To make them look intentional, choose a contrast color that coordinates with fixtures, hardware, or trim. Matte black can make pipes feel modern and architectural. White can look clean in bathrooms and laundry rooms. A bold color can work in a creative studio, kids’ space, or industrial-style basement.
Step 4: Use Pipe Insulation for a Cleaner and More Functional Look
Pipe insulation is not just practical; it can also make exposed pipes look neater. Foam sleeves, rubber insulation, and fiberglass wraps can help reduce heat loss from hot water lines, reduce condensation on cold lines, and soften pipe noise. In colder areas, insulation may also help lower the risk of freezing for pipes exposed to chilly air.
Foam sleeves are often the easiest option for accessible water pipes. Measure the pipe diameter, choose sleeves that fit snugly, cut them to length, and slide them over the pipe with the seam positioned neatly. Secure the seams with compatible tape or built-in adhesive strips. For awkward elbows, cut angled pieces so the insulation follows the pipe shape instead of looking like a pool noodle lost a fight.
Insulation is especially useful in basements, garages, crawlspaces, and utility rooms. However, it is not a magic invisibility cloak. If the pipe is in a main living area, you may still want to paint the insulation, cover it with a decorative chase, or place it behind a removable panel for a more finished look.
Step 5: Build a Simple Wooden Pipe Chase
A pipe chase is one of the most reliable ways to cover pipes on a wall. It is basically a narrow box built around the pipe and attached to the wall. Once painted, trimmed, or paneled, it can look like a column, beam, pilaster, or intentional architectural detail.
To build one, measure the depth and width needed to clear the pipe while leaving a little breathing room. Use furring strips or small framing lumber to create a rectangular frame around the pipe. Attach the frame to the wall, then cover it with plywood, MDF, drywall, beadboard, or another finish material. Caulk the seams, sand the surface, and paint it to match the wall or trim.
The most important rule is access. If there is a valve, union, cleanout, meter, or fitting inside the chase, include a removable panel or access door. Do not permanently bury anything that a plumber may need later. Your future self will not admire your craftsmanship while holding a flashlight and listening to water drip somewhere behind a sealed box.
Step 6: Install a Removable Access Panel
Access panels are practical, affordable, and designed for exactly this type of situation. They let you cover an opening or utility area while still allowing future access to shutoff valves, drain cleanouts, wiring, or plumbing connections.
Plastic access panels are common in bathrooms, laundry rooms, basements, and utility spaces. Many can be painted to match the wall. Metal panels are available for heavier-duty areas, and some are fire-rated for specific applications. Spring-fit panels are especially handy because they can pop in and out without complicated hardware.
Use an access panel when pipes are behind drywall, inside a chase, or near a plumbing fixture. Choose a panel large enough for actual human hands, not just decorative optimism. If the valve requires a wrench or needs room to turn, size the opening accordingly. A tiny panel may look cute, but cute does not help much when the washing machine hose decides to audition for a fountain show.
Step 7: Hide Pipes Behind Cabinets, Shelving, or Built-Ins
Furniture-style solutions can cover pipes while adding storage. In kitchens, bathrooms, mudrooms, and laundry rooms, a shallow cabinet or custom shelving unit can disguise pipes without making the wall feel boxed in.
A tall utility cabinet can hide vertical pipes in a laundry area. A floating shelf can distract from a horizontal line. A bookcase with a notched back can fit around pipework in a basement office. In a bathroom, a vanity or sink skirt can conceal supply lines and drainpipes under the sink.
The key is to avoid trapping moisture and to keep access available. Use removable backs, hinged sections, or open sides where needed. If the pipe is in a damp-prone area, choose moisture-resistant materials and avoid stuffing the space so tightly that air cannot circulate. A cover should make the room more useful, not create a cozy little cave for mildew.
Step 8: Use Decorative Wall Panels or Beadboard
Decorative panels can hide pipes while upgrading the wall. Beadboard, shiplap-style planks, slatted wood, wainscoting, and textured panels can all create a finished surface in front of exposed pipework.
This method works best when the pipes run along a lower section of wall or in a predictable line. You can frame out the wall slightly, install panels over the framing, and leave removable sections where valves or cleanouts are located. In a basement, a paneled lower wall can look much more intentional than one random boxed pipe.
For bathrooms and laundry rooms, choose materials that handle humidity well. PVC beadboard, sealed plywood, moisture-resistant MDF, or properly painted wood may be better choices than raw fiberboard. Caulk edges neatly, but do not seal the system so tightly that leaks become invisible until damage spreads.
Step 9: Cover Pipes with Curtains or Fabric Panels
For renters or anyone who wants a no-saw solution, curtains can be surprisingly effective. A tension rod, ceiling-mounted track, or small curtain wire can hide pipes while keeping them easy to access.
This method is ideal for laundry areas, utility corners, basement walls, or under-sink spaces. Choose washable fabric, especially in rooms where dust, humidity, or detergent splashes are likely. Keep fabric away from hot pipes unless the material and pipe conditions are safe for that use.
A curtain is not the most built-in-looking option, but it can be charming when styled well. Use linen for a soft cottage feel, canvas for utility style, or a patterned fabric to make the corner feel decorative. The goal is to make the cover look like a design choice rather than a bedsheet hiding a plumbing secret.
Step 10: Wrap Pipes with Rope, Reed, or Decorative Sleeves
Decorative wrapping can soften the look of exposed pipes, especially in boho, coastal, rustic, or industrial rooms. Manila rope, jute, reed, cane webbing, or purpose-made pipe sleeves can turn an awkward pipe into a textured design feature.
This approach works best on dry, stable pipes that do not need frequent inspection. Start at one end and wrap tightly, keeping the lines even. Secure the material with appropriate adhesive, ties, or hidden fasteners, depending on the pipe and wrap. Avoid wrapping over active leaks, heavy corrosion, or areas that need service.
Be careful with hot pipes. Some decorative materials may not be suitable for heat, and certain wraps can trap heat or moisture. When in doubt, use a product made for pipe insulation or ask a professional. “It looked good on Pinterest” is not a recognized fire-safety standard.
Step 11: Leave Strategic Access and Finish Like a Pro
No matter which covering method you choose, the final step is to inspect the finished project for serviceability. Can you reach shutoff valves? Can a plumber access cleanouts? Can you see signs of future leaks? Can air circulate where needed? Can the cover be removed without demolishing half the room?
Once the practical questions are answered, focus on finish details. Fill nail holes. Sand rough edges. Caulk gaps where trim meets the wall. Paint the cover in the same sheen as nearby trim or wall surfaces. Add baseboard around a chase so it looks built in. Align panel seams with existing architectural lines whenever possible.
The difference between “DIY cover” and “custom feature” often comes down to details. A straight line, a clean paint job, and a removable access point can make a simple pipe box look like it was always meant to be there.
Best Materials for Covering Pipes on a Wall
For Budget-Friendly Projects
Paint, foam pipe insulation, fabric curtains, and basic plastic access panels are usually the most affordable options. They work well when you need a quick improvement without major carpentry.
For a Built-In Look
Wood framing, drywall, MDF, plywood, beadboard, trim boards, and cabinet panels create a more permanent finish. These materials are best when you own the home or have permission to make changes.
For Damp Areas
Use moisture-resistant materials in bathrooms, basements, and laundry rooms. Painted PVC trim, sealed wood, plastic panels, and removable access doors often perform better than untreated wood or paper-faced materials in humid spaces.
Common Mistakes to Avoid
The biggest mistake is permanently sealing pipes behind a wall or box without access. Plumbing systems need maintenance. Valves need to be turned. Cleanouts need to be opened. Leaks need to be found before they become ceiling stains with dramatic lighting.
Another mistake is covering pipes before checking for moisture. If there is condensation, rust, mold, or staining, solve that problem first. Paint and panels should never be used as camouflage for water damage.
A third mistake is using the wrong materials near heat. Radiator and steam pipes can become hot enough to damage certain coverings or create safety concerns. Always choose materials suited to the pipe’s temperature.
Finally, avoid making covers too bulky. A pipe chase should be large enough to protect and access the pipe, but not so large that it eats the room. Measure carefully and design the cover to follow existing lines, corners, cabinetry, or trim.
of Real-World Experience: What Actually Works When Covering Wall Pipes
In real homes, pipe-covering projects usually begin with one sentence: “I am tired of looking at that.” The pipe may be in a basement workout room, behind a laundry sink, next to a water heater, under a wall-mounted vanity, or running vertically through a corner where no piece of furniture can fully hide it. At first, the temptation is to cover it as quickly as possible. But the best results come from slowing down for one hour before you start.
The first experience-based lesson is that paint solves more problems than people expect. If the pipe is slim and in good condition, painting it to match the wall can reduce visual clutter dramatically. In a white laundry room, white-painted pipes almost vanish. In an industrial basement, matte black pipes can look deliberate and stylish. Paint is also easy to touch up, and it does not block access. For renters, this may still require permission, but it is often less invasive than building anything.
The second lesson is that a pipe chase should be planned like trim, not like a storage crate. A bulky box around a pipe can look worse than the exposed pipe itself. The best chases are slim, straight, and connected visually to the room. For a vertical pipe, make the chase look like a narrow column. For a horizontal pipe near the floor, align the cover with baseboard height or create a low ledge. When possible, repeat the same trim profile used elsewhere in the room. That little detail makes the cover feel intentional.
The third lesson is that access panels are not optional when valves are involved. Many homeowners want a perfectly smooth wall, but plumbing does not care about your minimalist dreams. A painted access panel may be slightly visible, but it is far better than cutting through fresh drywall during an emergency. In laundry rooms, bathrooms, and basements, a visible but neat access panel is a sign of smart planning.
The fourth lesson is that moisture changes everything. A pipe in a dry hallway is one thing. A pipe in a basement, bathroom, or exterior wall area is another. Before covering anything, check the pipe during different conditions: after a shower, during laundry, after rain, or on a cold morning. Condensation can appear only at certain times. If you trap that moisture behind wood or drywall, you may create a hidden problem. Insulation, air sealing, dehumidification, or plumbing repair may be needed before the cover goes on.
The fifth lesson is that decorative solutions work best when they match the room’s personality. Rope wrapping can look great in a casual bathroom or coastal laundry nook, but strange in a formal dining room. A curtain can look charming in a utility area, but flimsy in a finished living room. Beadboard can make a basement wall feel finished, while a cabinet can turn an awkward pipe corner into useful storage. The best pipe cover is not just the one that hides the pipe; it is the one that belongs in the room.
Finally, expect small adjustments. Walls are rarely perfectly straight. Pipes may not run plumb. Old houses especially enjoy surprising you with angles that seem inspired by abstract art. Dry-fit panels before fastening them. Label removable pieces on the back. Take photos before covering pipes so you remember where everything is. That one habit can save time later when you, a plumber, or a future homeowner needs to understand what is behind the wall.
Conclusion
Covering pipes on a wall can be simple, stylish, and practical when you choose the right method. Painting is the easiest visual fix. Insulation adds function. Curtains and wraps offer renter-friendly creativity. Cabinets, panels, and pipe chases create a polished built-in look. The golden rule is simple: never sacrifice access, safety, or moisture control just to make a pipe disappear.
Done well, a pipe cover does more than hide plumbing. It improves the room, protects the system, and makes the space feel finished. And if your once-ugly pipe becomes a neat column, a tidy panel, or a clever storage feature, congratulations: you have officially turned a household eyesore into a design decision. The pipe may still be there, but now it has manners.