
Table of Contents >> Show >> Hide
- What You’ll Need
- Before You Start: Is It Dirty, or Is It Truly Yellowed?
- Simple Ways to Clean Yellowed Fluorescent Light Covers: 12 Steps
- Step 1: Turn off the power and let everything cool down
- Step 2: Set up your workspace like a person who enjoys not falling
- Step 3: Remove the cover gently and pay attention to how it fits
- Step 4: Dust first before introducing water
- Step 5: Mix a gentle cleaning solution
- Step 6: Soak the cover for 5 to 10 minutes
- Step 7: Wash with a soft sponge or microfiber cloth
- Step 8: Use a soft toothbrush for grooves, edges, and stubborn film
- Step 9: Rinse thoroughly
- Step 10: Dry it carefully and completely
- Step 11: Decide whether the yellowing is fixable or permanent
- Step 12: Reinstall the cover and prevent future yellowing
- Common Mistakes to Avoid
- When Replacement Makes More Sense Than Cleaning
- Real-World Experiences With Cleaning Yellowed Fluorescent Light Covers
- Final Thoughts
Fluorescent light covers have a special talent: they collect dust, trap mystery bugs, and slowly turn that sad shade of “old vanilla” nobody asked for. One day they look fine. The next day they make your kitchen, office, or garage feel like it’s lit through a bowl of lukewarm soup. The good news is that many yellowed fluorescent light covers can be cleaned enough to look noticeably better. The less-fun news is that some covers are not really dirty at all; they are simply old, heat-stressed, and permanently discolored.
That distinction matters. If the yellowing is caused by grease, smoke film, dust, and years of grime, a careful wash can dramatically improve the cover. If the plastic itself has aged and changed color, cleaning may help a little, but it will not perform miracles. No cleaner can bully time back into the bottle. Still, with the right method, you can safely remove built-up residue, improve brightness, and decide whether your cover deserves a second life or a respectful retirement.
This guide walks through 12 simple steps to clean yellowed fluorescent light covers without scratching, cracking, or making the problem worse. It also explains what cleaning methods are safest for common cover materials, when to stop scrubbing and replace the panel, and how to keep covers clearer longer. In other words: less guesswork, more light.
What You’ll Need
- A sturdy step ladder
- Microfiber cloths
- A soft sponge
- A soft-bristled toothbrush
- Mild dish soap
- Lukewarm water
- A large sink, tub, or utility basin
- Dry towels
- Rubber gloves if you want them
- A cardboard box or towel-lined counter for setting the cover down safely
Avoid the usual “I’ll just use whatever is under the sink” approach. Harsh chemicals, abrasive pads, and strong solvents can damage acrylic and similar plastics, leaving them cloudy, scratched, or brittle. That means this is not the moment for steel wool, rough scrubbers, or random chemistry experiments with glass cleaner.
Before You Start: Is It Dirty, or Is It Truly Yellowed?
Some fluorescent light covers look yellow because they are coated in kitchen grease, nicotine residue, airborne dust, or a thin film of grime baked on by heat. Others are yellow because the plastic itself has aged. Older acrylic, polycarbonate, and similar diffuser materials can discolor over time, especially when exposed to heat, ultraviolet light, and repeated cleaning with the wrong products.
A quick test helps. If the cover feels sticky, dusty, greasy, or dull, cleaning will probably help a lot. If it feels clean but still looks amber, brownish, or unevenly yellow after washing, the plastic may be permanently discolored. That does not mean you wasted your time. A clean cover still looks better, lets more light through, and makes it easier to decide whether replacement is worth it.
Simple Ways to Clean Yellowed Fluorescent Light Covers: 12 Steps
Step 1: Turn off the power and let everything cool down
Start with the obvious but important move: turn off the light switch. For extra safety, turn off power at the breaker if you can. Then wait a few minutes so the bulbs and fixture cool completely. Warm bulbs plus slippery hands plus a ladder is a terrible trio. Cleaning around live electrical components is even worse.
If the fixture uses older fluorescent tubes, handle them carefully. They are fragile, and if one breaks, that becomes a cleanup job with different rules. This is a cleaning project, not a mercury-themed side quest.
Step 2: Set up your workspace like a person who enjoys not falling
Place a stable ladder on level ground. Put a towel, blanket, or large piece of cardboard underneath the fixture in case the cover slips. Many plastic diffuser covers are lightweight but awkward, and older ones can be brittle. If you can, ask someone to spot you while you remove the cover. That second person is not there for decoration. They can steady the ladder and save the panel if it starts to slide.
This is especially useful for long wraparound covers or large ceiling panels in kitchens, garages, and basements. Those big covers have a way of turning into floppy plastic kites at the worst possible moment.
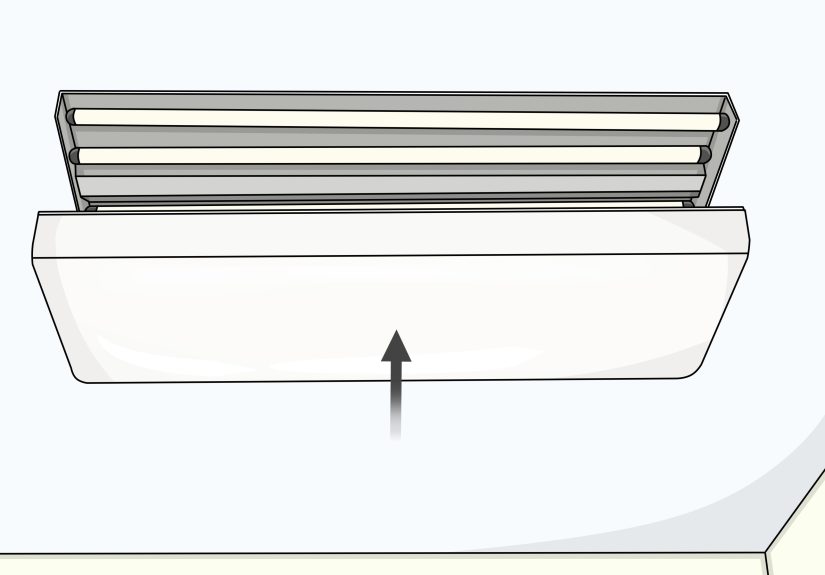
Step 3: Remove the cover gently and pay attention to how it fits
Take the cover off slowly. Some fluorescent light covers slide into grooves. Others use clips, tabs, side brackets, or screws. Do not force anything. If it is stuck, check for hidden fasteners or clips before tugging harder. Prying aggressively can crack old plastic faster than you can say, “Well, I guess I’m ordering a replacement now.”
As you remove it, notice which side faced down and how it sits in the fixture. A quick phone photo helps during reassembly, especially if the cover fits into tracks or has a particular orientation.
Step 4: Dust first before introducing water
Once the cover is down, dry-dust it with a microfiber cloth. This step matters more than people think. If you skip straight to scrubbing, grit and dust can drag across the surface and leave tiny scratches. Those scratches make plastic look even cloudier over time.
Wipe both sides. Don’t forget the corners, the textured pattern, and the upper side that faces the bulbs. That hidden side is usually where the grossest debris lives. Dust, dead insects, and the occasional mystery speck love to throw secret parties up there.
Step 5: Mix a gentle cleaning solution
Fill a sink, tub, or basin with lukewarm water and add a small amount of mild dish soap. You do not need a bubble mountain. A few drops to a teaspoon or two is plenty, depending on the amount of water. The goal is a gentle soap solution, not a cauldron.
Stick with mild soap because many light covers are made from plastics that do best with gentle cleaners. Strong solvents, ammonia-based products, alcohol-heavy cleaners, and abrasive compounds can cloud or weaken some plastics. If you are not sure what the cover is made of, mild dish soap and lukewarm water is the safest bet.
Step 6: Soak the cover for 5 to 10 minutes
Place the cover in the solution and let it soak for several minutes. This loosens grime so you do not have to scrub like you are sanding a deck. If the cover is too large to submerge all at once, clean one half first, then rotate it and do the other half.
Soaking works especially well on covers that have collected greasy kitchen film, bathroom residue, or old dust that has fused itself to the surface through the power of time and stubbornness. If the cover has a metal trim or hardware attached, keep prolonged soaking to a minimum and dry those areas well later.
Step 7: Wash with a soft sponge or microfiber cloth
After soaking, wipe the cover with a soft sponge or microfiber cloth using light pressure. Work in broad passes rather than frantic circles. Focus on both the flat areas and any textured prism pattern that diffuses the light. This is where years of residue like to hide.
Be gentle. Plastic light covers scratch more easily than glass. If you scrub too hard, you may remove the dirt but leave behind a hazy surface that still looks old. Let the soap do most of the work. Your job is to assist, not audition for a cleaning-product commercial.
Step 8: Use a soft toothbrush for grooves, edges, and stubborn film
For corners, seams, textured areas, and greasy buildup that refuses to leave quietly, use a soft-bristled toothbrush dipped in the soapy water. Gently brush along the pattern lines, edges, and vents. This helps remove grime trapped in the tiny ridges of prismatic covers.
If the cover still looks yellow in certain areas, pause and inspect it closely. Surface grime usually lifts in uneven streaks or patches. Permanent discoloration tends to look embedded in the plastic itself. That difference will save you from overscrubbing a cover that has already given you all it can give.
Step 9: Rinse thoroughly
Rinse the cover with clean lukewarm water until all soap residue is gone. Leftover soap can dry into a cloudy film and make the cover look worse, which is a deeply annoying ending after all that effort. Run your fingers lightly over the surface; if it still feels slippery, keep rinsing.
Do not blast it with very hot water. Extreme heat can warp thinner plastic covers, especially older ones. Lukewarm water is your friend here: effective, gentle, and far less dramatic.
Step 10: Dry it carefully and completely
Use a clean microfiber cloth or soft towel to blot and wipe the cover dry. Then let it air-dry fully before reinstalling it. Moisture trapped in or around the fixture can lead to streaking, dust attraction, and, in some situations, electrical trouble you absolutely do not need.
Dry both sides, paying special attention to edges, corners, and any lip that rests in the fixture frame. If you put it back while damp, dust will stick faster and your “freshly cleaned” cover may immediately begin its return to mediocrity.
Step 11: Decide whether the yellowing is fixable or permanent
Once the cover is clean and dry, hold it up in natural light. If it looks brighter, clearer, and less dingy, great. Mission accomplished. If it still has a deep yellow, brown, or tea-stained cast, the plastic has probably aged. In that case, additional washing is unlikely to restore the original color.
Also check for brittleness, cracks, crazing, or cloudy patches. If the cover feels fragile, looks unevenly discolored, or has damage around clips and corners, replacement may be the smarter move. A cleaned but brittle cover is still a brittle cover. It is not a comeback story; it is a countdown.
Step 12: Reinstall the cover and prevent future yellowing
Once the cover is fully dry, reinstall it the same way it came off. Secure clips, tabs, or screws without overtightening. Then step back and admire what cleaner light actually does for a room. It is one of those small maintenance jobs that makes a surprisingly big visual difference.
To keep covers clearer longer, dust them regularly, clean them every few months, use the correct bulb type and wattage for the fixture, and avoid harsh cleaners. If the fixture is near a stove, shower, or smoking area, clean it more often. Heat, residue, and neglected dust are basically the dream team of ugly light covers.
Common Mistakes to Avoid
The fastest way to ruin a fluorescent light cover is to treat it like glass. Many people reach for window cleaner, abrasive scrub pads, or strong degreasers because they want results fast. That can leave acrylic and similar plastics cloudy, scratched, or chemically damaged.
Another mistake is mixing cleaners. Never combine bleach with ammonia or other random household products. That can create dangerous fumes. Even if you are only cleaning the cover and not disinfecting a hospital wing, chemical safety still matters.
Finally, do not ignore a cracked or crumbling cover. If the panel is brittle enough to flex oddly or shed tiny fragments, replacement is safer than heroic cleaning. Sometimes the smartest cleaning tip is knowing when to stop cleaning.
When Replacement Makes More Sense Than Cleaning
If your fluorescent light cover is still deeply yellow after a careful wash, replacement may give you a better result than any DIY fix. This is especially true for older diffuser panels exposed to years of heat and light. A new cover can make the room look brighter instantly because more light passes through clean, clear material.
Replacement is also the better option if the cover is cracked, warped, heavily stained, or no longer sits securely in the fixture. In kitchens, garages, offices, and laundry rooms, a fresh diffuser often improves both appearance and light quality more than people expect. It is not the most glamorous home upgrade in history, but it is effective.
Real-World Experiences With Cleaning Yellowed Fluorescent Light Covers
In real homes, the results usually come down to one simple question: was the cover dirty, or was it old? People often assume a yellowed fluorescent light cover needs some magical whitening trick, but experience says the biggest improvement usually comes from ordinary, careful cleaning. In kitchens, the worst offenders are grease and fine cooking residue. A cover can look permanently stained when it is actually wearing a thin, sticky layer of oil and dust. Once that film is soaked and washed away, the panel often looks several years younger. Not brand-new, maybe, but no longer embarrassing.
Bathroom fixtures tell a different story. There, the buildup is often lighter but more stubborn because it mixes dust with moisture and heat. Covers may look dull instead of greasy, and the grime likes to settle into textured diffuser patterns. A soft toothbrush makes a huge difference in those grooves. Many people skip that step and then wonder why the panel still looks tired. The answer is usually trapped residue hiding in the texture like it pays rent there.
Garage and basement covers are their own adventure. These covers often collect dead bugs, cobwebs, and a dramatic amount of dust on the top side nobody sees until removal day. Cleaning those covers can produce the most satisfying before-and-after results because the change is so visible. The room goes from murky to crisp with one basic wash. But garages also reveal the truth about old plastic. If a panel has been baking for years and turns brittle in your hands, no amount of soap is going to restore flexibility or true clarity.
Another common experience is the “I thought it was filthy, but it was actually aged” moment. After a careful wash, some covers come out clean, dry, and still yellow. That is not failure. It is useful information. It tells you the discoloration is in the material, not on it. At that point, you can stop wasting effort and decide whether replacement is worth the cost. Many people are relieved by that, honestly. Scrubbing for an hour only to discover the plastic itself has aged is frustrating, but it is better than endlessly trying harsher cleaners that may damage the cover.
The most successful long-term results usually come from simple habits: dusting the cover before grime bakes on, using mild soap instead of aggressive cleaners, and cleaning often enough that the job stays boring. Boring is good. Boring means no brittle plastic, no mystery stains, no chemical mishaps, and no cover snapping in half while you balance on a ladder questioning your life choices.
Final Thoughts
Cleaning yellowed fluorescent light covers is one of those jobs that seems minor until you see the difference. A cleaner cover can brighten the room, improve the look of the fixture, and make the whole space feel less neglected. The safest approach is also the simplest: turn off the power, remove the cover gently, dust first, wash with mild soap and lukewarm water, dry thoroughly, and be realistic about what cleaning can fix.
If the yellowing is mostly grime, you can get a big visual improvement. If the plastic has aged, cleaning still helps, but replacement may be the true upgrade. Either way, you win. At minimum, the cover will be cleaner. At best, your room stops looking like it is illuminated by a tired stick of butter.


